
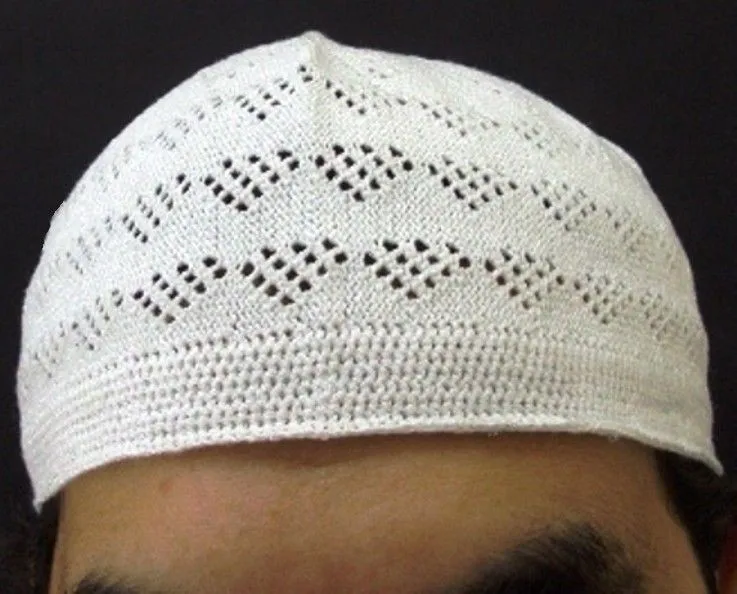
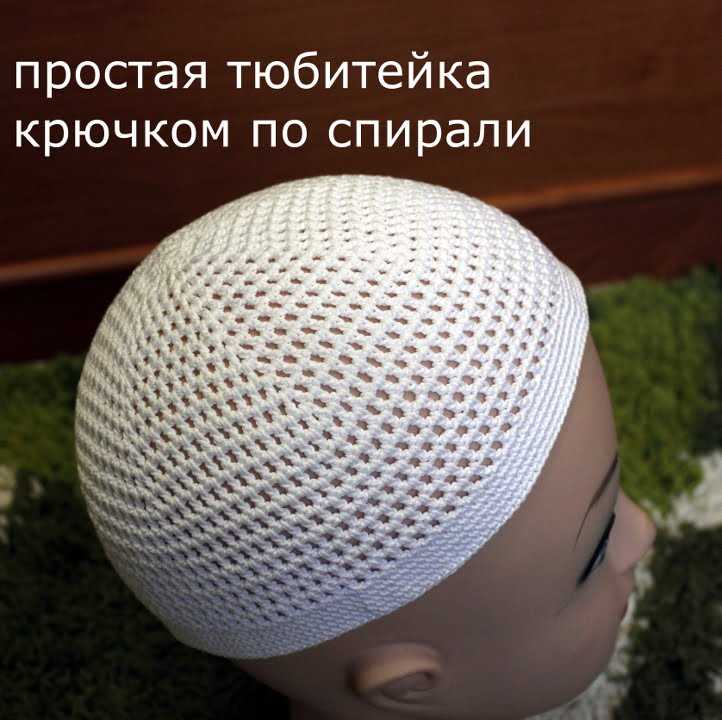
A kufi hat is a type of brimless, round cap traditionally worn by men in West Africa and some Arab countries. It is often made from colorful knitted fabric, and is a popular accessory for both formal and casual occasions. If you’re looking to add a unique touch to your wardrobe, why not try knitting your own kufi hat? In this article, we’ll provide you with a simple and easy-to-follow knitted kufi hat pattern that you can use to create your own stylish headgear.
Materials Needed:
– Worsted weight yarn (choose a color of your preference)
– Circular knitting needles (size 8)
– Double-pointed knitting needles (size 8)
– Stitch markers
Instructions:
1. Start by casting on 88 stitches using the circular knitting needles.
2. Join the stitches in a circle, being careful not to twist them.
3. Knit in a 2×2 ribbing pattern for 2 inches.
4. Switch to stockinette stitch and continue knitting until the hat measures 5 inches from the cast on edge.
5. Begin decreasing for the crown. Switch to the double-pointed knitting needles when necessary.
6. *K6, K2tog* – repeat this pattern until the end of the round.
7. Knit one round.
8. *K5, K2tog* – repeat this pattern until the end of the round.
9. Knit one round.
10. Continue decreasing in this manner, knitting one less stitch before the decrease in each round, until you have 8 stitches remaining.
11. Cut the yarn, leaving a tail. Thread the tail through a yarn needle and slip the remaining stitches onto it. Pull tightly to close the top of the hat.
12. Weave in any loose ends, and your knitted kufi hat is ready to be worn!
Now that you have a pattern for your very own knitted kufi hat, you can experiment with different colors and yarns to create a personalized accessory that suits your style. Whether you wear it as a fashion statement or for cultural reasons, your handmade kufi hat is sure to turn heads and make you stand out from the crowd.
Overview of Knitted Kufi Hat Pattern
The knitted kufi hat pattern is a popular choice for those who want to create a unique and stylish hat. This pattern is inspired by traditional kufi hats, which are worn in many Middle Eastern and African cultures. By following this pattern, you can create a hat that is not only fashionable but also rich in cultural significance.
To start knitting the kufi hat, you will need basic knitting skills and knowledge of common stitches such as knit, purl, and decrease. The pattern usually requires medium-weight yarn and appropriate-sized knitting needles. If you prefer, you can also use different colors and patterns to customize your hat and make it truly one-of-a-kind.
Steps to knit the kufi hat:
- Cast on the required number of stitches to create the desired hat size.
- Work in a rib stitch pattern for the brim of the hat.
- Switch to a stockinette stitch for the main body of the hat.
- Continue knitting until the hat reaches the desired length.
- Shape the crown of the hat by decreasing stitches evenly across each row.
- When only a few stitches remain, cut the yarn, leaving a long tail, and thread it through the remaining stitches to secure them.
- Weave in any loose ends and block the hat if necessary.
Once you have completed the knitting process, you will have a beautiful kufi hat that can be worn with pride. Whether you make it for yourself or as a gift, this knitted hat will add a touch of cultural charm to any outfit. And the best part? You can easily create multiple hats in different colors and sizes to suit your style and preferences.
Materials needed for knitted kufi hat
Knitting a kufi hat requires a few specific materials to ensure a successful and comfortable finished product. By gathering the following items, you can begin your project with confidence:
- Yarn: Choose a soft, lightweight yarn in a color of your choice. The yarn should be suitable for the desired hat size and texture.
- Knitting needles: Select a pair of knitting needles that are compatible with the chosen yarn. The size of the needles will depend on the desired gauge and thickness of the hat.
- Tape measure: A tape measure is essential for measuring the circumference of the head and determining the proper size for the kufi hat.
- Darning needle: A darning needle is needed for weaving in loose ends and finishing touches on the hat.
- Stitch markers: Stitch markers can be useful for keeping track of different sections or specific stitches in the pattern.
- Scissors: A pair of scissors is necessary for cutting the yarn and trimming any excess fabric.
Having these materials readily available before starting the knitting process will make it easier to follow the kufi hat pattern and create a hat that fits well and looks stylish.
Step-by-step instructions for knitting a kufi hat
Knitting a kufi hat is a great way to create a unique and stylish accessory for yourself or as a gift. With the right pattern and some basic knitting skills, you can easily create your own kufi hat. Follow these step-by-step instructions to get started.
Materials you will need:
- Knitting needles (size may vary depending on your preferred knitting tension)
- Yarn (choose a color and thickness that suits your preference)
- Tape measure
- Scissors
Step 1: Casting on
Using your chosen yarn and knitting needles, make a slip knot and place it on one of the needles. Slide the knot snugly onto the needle, leaving a tail of about 6 inches. Hold the needle with the slip knot in your right hand and the empty needle in your left hand. Insert the left needle through the slip knot from front to back, and wrap the yarn around the left needle counterclockwise. Use the right needle to pull the loop of yarn through the slip knot from back to front, creating a new stitch. Repeat this process until you have cast on the desired number of stitches for the circumference of your kufi hat.
Step 2: Knitting the ribbed brim
Once you have cast on the desired number of stitches, you will start knitting the ribbed brim of the kufi hat. The ribbed brim is usually worked in a knit 2, purl 2 pattern to create a stretchy and snug fit. Continue knitting in the knit 2, purl 2 pattern until the brim reaches your desired length.
Step 3: Knitting the body
After completing the ribbed brim, you will continue knitting the body of the kufi hat in a basic stockinette stitch. This means you will knit all the stitches in each row. Continue knitting in the stockinette stitch until the hat measures the desired length from the brim to the top of the crown.
Step 4: Decreasing the crown
To shape the crown of the kufi hat, you will need to decrease the number of stitches gradually. This can be done by knitting two stitches together at regular intervals. The specific decrease pattern will depend on the design of the kufi hat you are knitting. Follow the pattern instructions to decrease the stitches until only a few remain.
Step 5: Finishing off
Once you have decreased the stitches, you will need to finish off the kufi hat. Cut the yarn, leaving a long tail. Thread the tail through a yarn needle, and slide the needle through the remaining stitches on the knitting needle. Remove the knitting needle, and pull the yarn tight to close the top of the kufi hat. Secure the yarn by weaving it through the stitches on the inside of the hat. Trim any excess yarn and weave in any remaining loose ends.
Cast on stitches
In knitting, the process of casting on stitches is the first step in starting any project. It is the foundation of the entire piece and determines the size and shape of the finished product. There are several different methods for casting on stitches, each with its own unique look and purpose.
One common method for casting on stitches is the long-tail cast on. To perform this method, you will need to measure a tail that is approximately three times the width of your finished piece. Holding the yarn in your right hand, make a slipknot and place it on your needle. Then, with your right hand, bring the yarn over your left thumb and hold it in place with your palm facing down. Insert the needle under the yarn on your thumb and bring it through the loop, creating a new stitch on your needle. Repeat this process until you have cast on the desired number of stitches.
Another method for casting on stitches is the cable cast on. This method is often used when you need a particularly sturdy and elastic edge. To perform this method, hold the needle in your right hand and make a slipknot, placing it on the needle. Then, insert the right needle into the front of the slipknot from left to right, as if to knit. Bring the yarn over the right needle from back to front, creating a loop. Slip this loop onto the left needle, and tighten it slightly. Repeat this process until you have cast on the desired number of stitches.
The choice of casting on method will depend on the specific requirements of your knitting project. The long-tail cast on is versatile and commonly used for a variety of projects, while the cable cast on provides a more sturdy edge. Understanding and experimenting with different casting on methods will allow you to create beautifully finished knitted pieces.
Knit the brim
When knitting a kufi hat, it’s important to create a brim that fits securely around the head. The brim not only adds a stylish touch to the hat, but also helps to keep it in place. Here are some steps to knit the brim:
1. Choose your yarn and needles
Before starting to knit the brim, select the yarn and needles that you want to use. The choice of yarn will determine the thickness and texture of the brim, while the size of the needles will determine the gauge and stretchiness. A smaller needle size will create a tighter brim, while a larger needle size will result in a looser and more stretchy brim.
2. Cast on stitches
To begin knitting the brim, cast on the desired number of stitches. The number of stitches will depend on the size of the hat and the desired width of the brim. For a standard adult-sized kufi hat, a cast on of around 80-100 stitches is usually sufficient.
3. Work in ribbing stitch
To create a stretchy and comfortable brim, it’s recommended to work the brim in a ribbing stitch pattern. The most common ribbing stitch patterns are 1×1 ribbing, where you alternate between knitting and purling every stitch, or 2×2 ribbing, where you alternate between knitting two stitches and purling two stitches. Depending on your preference and the look you want to achieve, choose the ribbing stitch pattern that you like.
4. Knit the desired length
Continue working the ribbing stitch pattern for the desired length of the brim. Typically, a brim length of 2-3 inches is sufficient to provide a comfortable and snug fit. However, you can adjust the length according to your personal preference.
5. Bind off
Once you have reached the desired length, bind off the stitches to finish the brim. Make sure to bind off loosely to maintain the stretchiness of the brim. You can use a larger needle size for the bind off row to achieve a looser bind off.
By following these steps, you can knit a brim that adds both style and functionality to your kufi hat.
Increase stitches for the body
To create the body of the knitted kufi hat, you will need to increase the number of stitches. This will give the hat the desired shape and size.
Start by knitting a few rounds in the established pattern. Once you have a solid base, it’s time to start increasing. To do this, you will need to add extra stitches at regular intervals throughout the round. This will gradually increase the circumference of the hat.
Here is a step-by-step guide on how to increase stitches for the body:
- Identify the stitch where you want to begin the increase. This can be any stitch, but it is typically best to choose a stitch near the center of a round.
- Knit into the stitch as normal, but before you drop the stitch off the left-hand needle, make a new stitch. There are various ways to make a new stitch, such as yarn over or knitting into the same stitch twice.
- Continue knitting in the established pattern until you reach the next stitch where you want to increase.
- Repeat step 2 to make a new stitch in the next designated stitch.
- Continue this pattern of knitting and increasing until you have reached the desired number of stitches for the body of the hat.
By increasing stitches in this way, you can create a hat that gradually widens as it reaches the top. This will result in a comfortable and snug fit, perfect for keeping warm in colder weather.
Continue knitting the body
After completing the ribbing, it’s time to move on to knitting the body of the kufi hat. Start by continuing to work in the round, using the stitch pattern of your choice. This could be a simple stockinette stitch, a textured stitch pattern, or even a colorwork design.
Continue knitting in the round until the hat reaches the desired length. This could mean knitting a certain number of inches or following a specific pattern instruction. Remember to check your gauge to ensure that the hat will fit properly.
As you knit, take the time to periodically try on the hat to check the fit. This will help you adjust the length and make any necessary modifications while you are still knitting.
If you are following a pattern, make sure to carefully read and follow the instructions for any shaping or stitch pattern changes. This will ensure that your hat turns out as intended.
Once you have reached the desired length, it’s time to move on to the next step, whether that’s adding a brim, shaping the crown, or finishing the edges. Stay tuned for the next section of the pattern to continue knitting your kufi hat!
Shape the Crown
Once you have completed the ribbing and established the stitch pattern, it is time to shape the crown of your knitted kufi hat. This is where you will start decreasing stitches to create the rounded top of the hat.
Decrease Rounds:
In this section, you will be working decrease rounds to shape the crown of the hat. Follow these instructions carefully:
- Round 1: Knit 1, knit 2 together across the round. (You can use a stitch marker to keep track of the beginning of the round if needed.)
- Round 2: Knit all stitches.
- Round 3: Knit 1, knit 2 together across the round.
- Continue alternating between Rounds 2 and 3 until you have decreased enough stitches and have a manageable number left on your needles.
As you continue working the decrease rounds, you will notice that the crown of the hat begins to take shape. The decreases will create a rounded top, which is characteristic of kufi hats.
Once you have finished shaping the crown, you can bind off the remaining stitches. Make sure to weave in any loose ends and block the hat to give it a polished and finished look. Your knitted kufi hat is now complete and ready to be worn with style!
Tips and Tricks for Knitting a Perfect Kufi Hat
Knitting a kufi hat can be a fun and rewarding project, but it can also be challenging. Here are some tips and tricks to help you create a perfect kufi hat.
Choose the Right Yarn
When knitting a kufi hat, it’s important to choose the right type of yarn. Opt for a yarn that is lightweight and breathable, as kufi hats are typically worn in warmer weather. Cotton or bamboo yarns are good options to consider.
Use the Right Needles
The type of needles you use can also make a difference in the outcome of your kufi hat. Circular or double-pointed needles are often used for knitting hats, as they allow you to easily knit in the round. Make sure to use needles that are the appropriate size for the yarn you are using.
Get the Gauge Right
Gauge is important in knitting, as it affects the size and fit of the finished hat. Before you start knitting, make a gauge swatch to ensure you are achieving the correct number of stitches per inch. Adjust your needle size if necessary to obtain the correct gauge.
Try Different Stitch Patterns
While a simple stockinette stitch can create a classic kufi hat, don’t be afraid to try different stitch patterns to add interest and texture to your hat. Consider using ribbing, cables, or lace patterns to make your kufi hat unique.
Pay Attention to Measurements
When knitting a kufi hat, it’s important to pay attention to measurements to ensure a proper fit. Measure the circumference of the head and consider adding a few inches of negative ease to create a snug fit. Keep in mind that kufi hats are typically designed to be stretchy.
Finishing Touches
Once you have finished knitting your kufi hat, don’t forget the finishing touches. Weave in any loose ends of yarn and block your hat to give it a professional look. You can also consider adding a pom-pom, tassels, or other embellishments to further personalize your kufi hat.
With these tips and tricks in mind, you’ll be well on your way to knitting a perfect kufi hat. Enjoy the process and have fun creating a hat that is both stylish and comfortable to wear!
Common mistakes to avoid when knitting a kufi hat
Knitting a kufi hat can be a fun and rewarding project, but it’s important to avoid some common mistakes that can easily occur. By being aware of these pitfalls, you can ensure that your hat turns out just the way you want it to.
1. Using the Wrong Yarn
One of the most common mistakes when knitting a kufi hat is using the wrong type of yarn. Make sure to choose a yarn that is suitable for the project, preferably one that has good stretch and recovery. Using a yarn that is too thick or thin can result in a hat that doesn’t fit properly.
2. Not Checking Gauge
Gauge is an important factor in any knitting project, and a kufi hat is no exception. It’s crucial to check your gauge before starting to ensure that the hat will have the correct size and fit. Not checking gauge can result in a hat that is too small or too large, and you may need to start over.
3. Forgetting to Use Stitch Markers
When knitting in the round to create a kufi hat, it can be easy to lose track of your stitches. Using stitch markers can help you keep track of your rounds and prevent mistakes such as accidentally decreasing or increasing stitches. Don’t forget to place stitch markers at the beginning and end of each round, as well as any stitch pattern repeats.
4. Skipping Blocking
Blocking is an important step in finishing your kufi hat. It helps to even out the stitches and shape the hat to the desired size. Skipping this step can result in a hat that lacks structure and doesn’t hold its shape well. Take the time to properly block your hat to achieve a professional and polished look.
5. Ignoring Pattern Instructions
Finally, it’s essential to carefully follow the pattern instructions when knitting a kufi hat. Ignoring or misinterpreting the instructions can lead to mistakes, uneven stitch patterns, or an ill-fitting hat. Take the time to read the pattern thoroughly and make sure you understand each step before proceeding.
Avoiding these common mistakes when knitting a kufi hat will help you create a beautiful and well-fitting accessory. With the right yarn, correct gauge, stitch markers, blocking, and attention to pattern instructions, your kufi hat will turn out just as you envisioned.
How to Customize Your Kufi Hat with Different Stitch Patterns

The kufi hat is a versatile accessory that can be customized to suit your personal style. One way to add your own touch to the hat is by incorporating different stitch patterns. By using different stitches, you can create unique textures and designs that make your kufi hat stand out.
One popular stitch pattern to try is the cable stitch. This technique involves crossing stitches over each other to create a twisted effect. Adding cable stitches to your kufi hat can give it a classic and sophisticated look. You can create simple or complex cable patterns depending on your skill level and preference.
If you prefer a more delicate and feminine touch, you can experiment with lace stitch patterns. Lace stitches create intricate and airy designs that give your kufi hat a feminine and elegant look. Whether it’s a simple lace pattern or a complex lace motif, incorporating lace stitches into your kufi hat adds a touch of sophistication.
For a more casual and textured look, you can try using popcorn or bobble stitches. These stitches create small, raised bumps on the surface of the fabric, adding depth and visual interest to your kufi hat. Popcorn or bobble stitches can be combined with other stitch patterns or used on their own to create a unique texture.
When customizing your kufi hat with different stitch patterns, it’s important to consider the yarn weight and needle size. Different stitch patterns may require different yarn and needle combinations to achieve the desired effect. Additionally, practicing the stitch pattern on a small swatch before knitting the whole hat can help you refine your technique and ensure that the pattern looks as intended.
In conclusion, adding different stitch patterns to your kufi hat allows you to personalize it and create a unique accessory. Whether you prefer classic cables, delicate lace, or textured bobbles, there are endless possibilities to experiment with. Have fun exploring different stitch patterns and make your kufi hat truly one-of-a-kind!
Inspiration and ideas for styling your knitted kufi hat
Now that you have learned how to knit your own kufi hat, it’s time to think about how to style and wear it. Whether you prefer a casual or a more formal look, the knitted kufi hat can be a versatile accessory that adds both warmth and style to your outfit.
Here are some ideas and inspiration to help you style your knitted kufi hat:
1. Casual and cozy
For a casual and cozy look, pair your knitted kufi hat with a chunky sweater, jeans, and boots. This is a perfect outfit for a chilly day, whether you’re running errands or meeting friends for a coffee.
2. Chic and stylish
To achieve a more sophisticated look, wear your knitted kufi hat with a tailored coat, a sleek pair of pants, and stylish ankle boots. This combination is perfect for a day at the office or a night out on the town.
3. Playful and vibrant
Add a pop of color to your outfit by choosing a knitted kufi hat in a bright and vibrant shade. Pair it with a color-coordinated scarf and gloves to create a playful and eye-catching look.
4. Boho and free-spirited
If you have a bohemian style, embrace it by wearing your knitted kufi hat with flowy maxi dresses, fringed jackets, and ankle boots. This combination will give you a laid-back and free-spirited look.
5. Sports-inspired and casual
For a sports-inspired look, pair your knitted kufi hat with a hoodie, sweatpants, and sneakers. This is a comfortable and trendy outfit that is perfect for a day of running errands or a casual hangout with friends.
Remember, the key to styling your knitted kufi hat is to have fun and experiment with different looks. Don’t be afraid to mix and match different styles and accessories to create your own unique and personalized look.
With your newfound knitting skills and these styling ideas, you’re ready to rock your knitted kufi hat in style!