
If you’re looking for a fun and fashionable knitting project, look no further than easy knitted vest patterns. Vests are a versatile and stylish addition to any wardrobe, and the best part is, they’re relatively simple to make! Whether you’re an experienced knitter or just starting out, there’s a pattern out there that’s perfect for you.
One of the great things about knitting a vest is that it allows you to experiment with different stitches and colors. From classic cables to modern lace, there’s a pattern for everyone. Plus, since it doesn’t require sleeves, it’s a relatively quick project to complete. You’ll be able to show off your new vest in no time!
In this article, we’ve compiled a list of easy knitted vest patterns that are available for free. These patterns range in difficulty and style, so there’s something for every knitter. Whether you prefer a fitted and tailored look or a loose and oversized design, there’s a pattern here that will suit your taste.
So why wait? Grab your knitting needles and some colorful yarn, and start stitching your way to a fabulous new vest! With these easy knitted vest patterns, you’ll be able to create a one-of-a-kind piece that you can proudly wear and show off to all your friends.
Easy Knitted Vest Patterns Free
If you’re looking for a fun and simple knitting project, look no further than these easy knitted vest patterns. Whether you’re a beginner or an experienced knitter, these patterns are perfect for all skill levels. Best of all, they’re available for free, so you can start knitting right away.
1. Basic Knitted Vest Pattern: This pattern is great for beginners who want to try their hand at knitting a vest. It uses basic stitches and simple techniques to create a stylish and comfortable vest. You can customize it with different colors and yarns to make it your own.
2. Ribbed Knitted Vest Pattern: This pattern features a ribbed design that adds texture and interest to your vest. It’s a bit more advanced than the basic pattern, but still relatively easy to knit. The ribbed pattern creates a snug and stretchy fit, making it perfect for layering.
3. Lace Knitted Vest Pattern: If you’re looking for a feminine and delicate vest, this lace pattern is for you. It features an intricate lace design that adds elegance and charm to your vest. The pattern may require some experience with lace knitting, but the end result is definitely worth it.
These easy knitted vest patterns free are a great way to practice your knitting skills and create stylish and unique vests. Whether you’re knitting for yourself or as a gift for someone else, these patterns are sure to impress. So grab your needles and yarn, and start knitting your new favorite vest today!
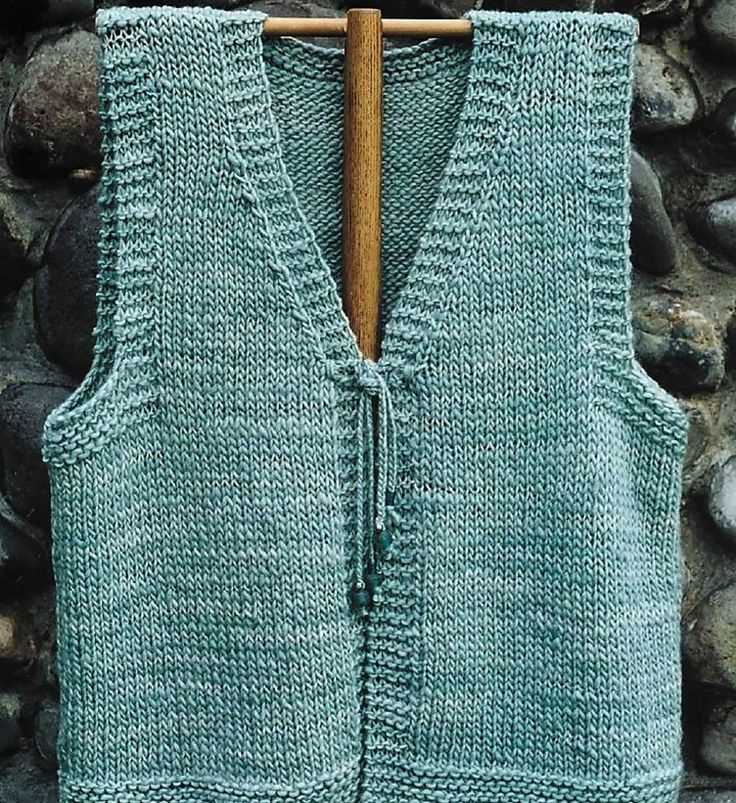
Classic V-Neck Vest Pattern
Looking for a classic and versatile vest pattern? Look no further than this easy-to-knit v-neck vest pattern. Perfect for both men and women, this timeless design is a wardrobe staple that can be dressed up or down for any occasion.
Materials:
- Yarn: Worsted weight yarn in your color of choice
- Knitting Needles: US size 7 (4.5 mm) circular needles and double-pointed needles
- Stitch markers
- Tapestry needle for weaving in ends
Size:
This pattern is available in multiple sizes, ranging from small to extra large. Simply follow the instructions for your desired size.
| Size | Bust/Chest Measurement |
|---|---|
| Small | 30-32 inches |
| Medium | 34-36 inches |
| Large | 38-40 inches |
| Extra Large | 42-44 inches |
Instructions:
- Using the circular needles, cast on the required number of stitches for your size.
- Work in a rib stitch (k1, p1) for the desired length of the ribbed section.
- Switch to stockinette stitch and continue knitting until the piece measures the desired length from the bottom edge to the armhole.
- Divide the stitches for the front and back of the vest, and work each section separately.
- Shape the V-neck by gradually decreasing stitches on each side of the front section.
- Continue knitting each section until the desired length from the armhole to the shoulder.
- Join the shoulders using the three-needle bind off method.
- Pick up stitches around the armholes and neck to create the ribbed bands.
- Finish off by weaving in any loose ends and blocking the vest to size.
With this classic v-neck vest pattern, you’ll have a versatile and stylish garment that you can wear year-round. Whether you’re knitting for yourself or someone else, this pattern is sure to become a favorite in your knitting repertoire.
Cable Knit Vest Pattern

If you are looking for a stylish and cozy addition to your wardrobe, a cable knit vest is a perfect choice. Cable knitting adds texture and interest to any garment, and a vest is a versatile piece that can be worn year-round. With this cable knit vest pattern, you can create a beautiful and unique vest that will become a staple in your wardrobe.
This free cable knit vest pattern is suitable for intermediate knitters who are comfortable with cable stitches and basic shaping techniques. The pattern provides instructions for multiple sizes, so you can easily customize the fit to suit your body shape. The cable design used in this pattern creates a classic and timeless look, making it suitable for both casual and formal occasions.
To create this cable knit vest, you will need a set of knitting needles in the recommended size, as well as your choice of yarn. The pattern specifies the amount of yarn needed for each size, so you can ensure you have enough to complete your project. Additionally, you will need a cable needle or a double-pointed knitting needle to create the cable stitches.
The pattern is written in a clear and easy-to-follow format, with step-by-step instructions for each section of the vest. The cable stitches are explained in detail, so even if you haven’t worked with cables before, you will be able to follow along. The pattern also includes a schematic and a stitch chart, which can be helpful for visual learners.
Once you have finished knitting the cable knit vest, you can personalize it by adding buttons or other embellishments. You can also experiment with different colors and yarn types to create a unique and customized look. With this cable knit vest pattern, you can create a stylish and cozy garment that will keep you warm and fashionable all year long.
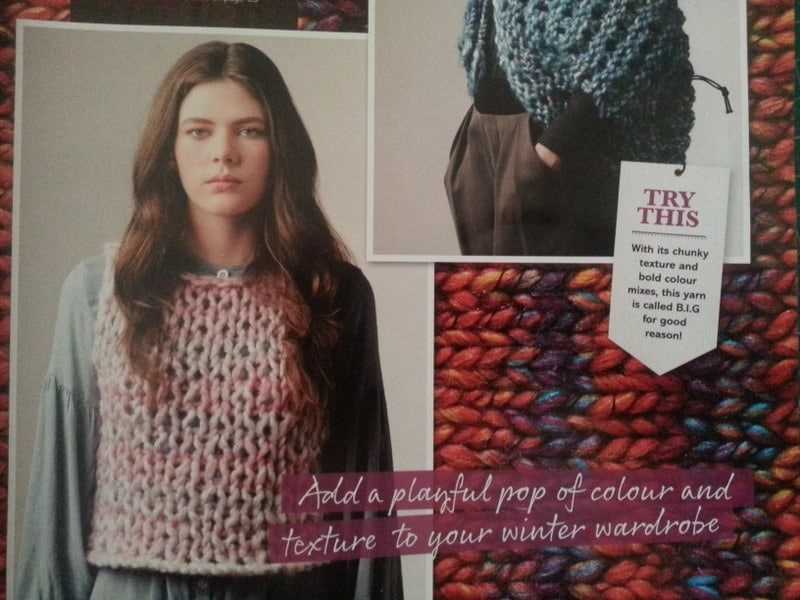
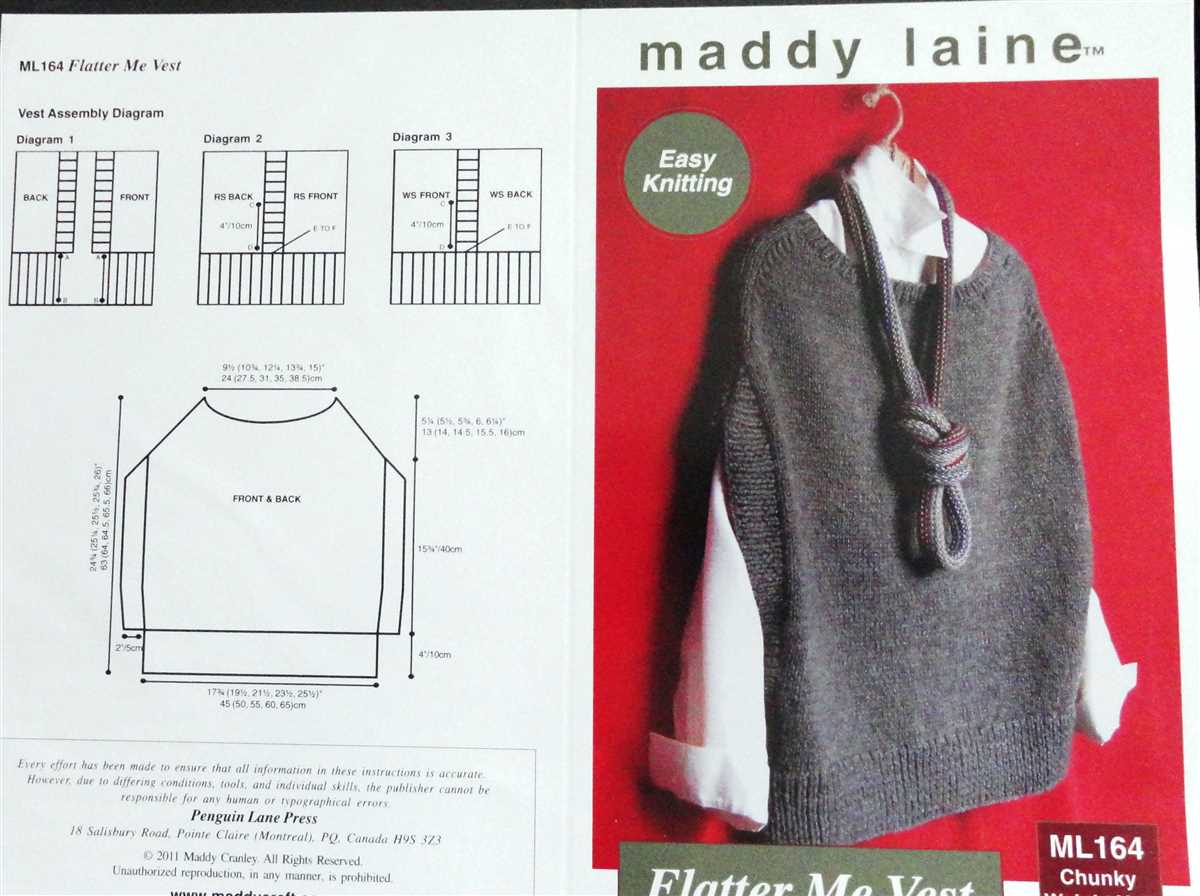
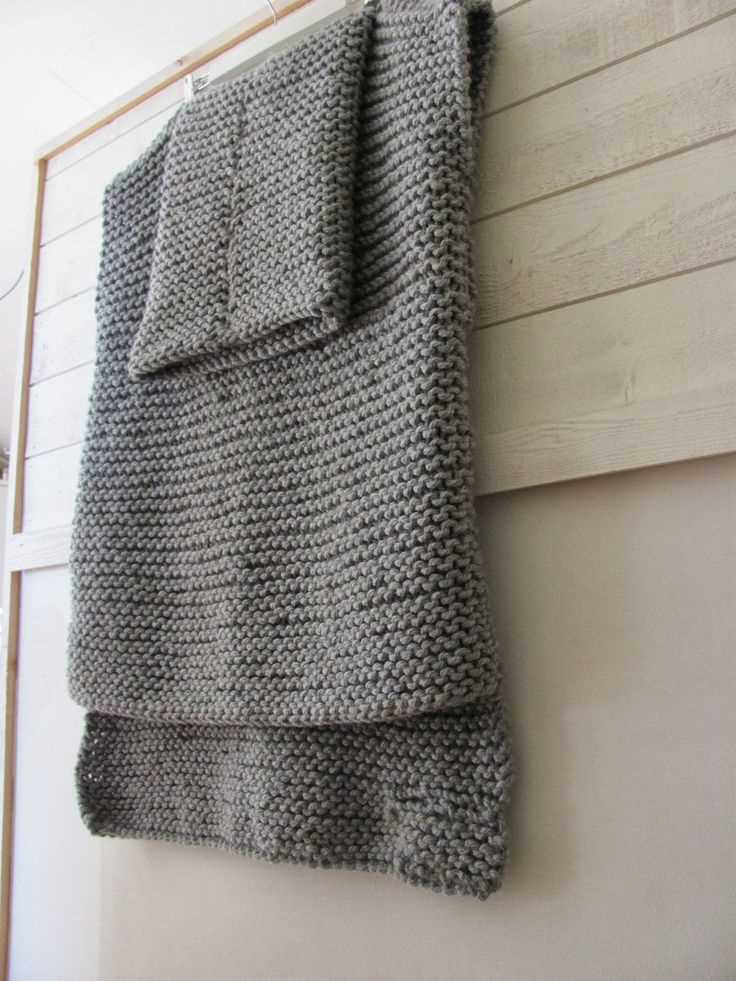
Chunky Ribbed Vest Pattern
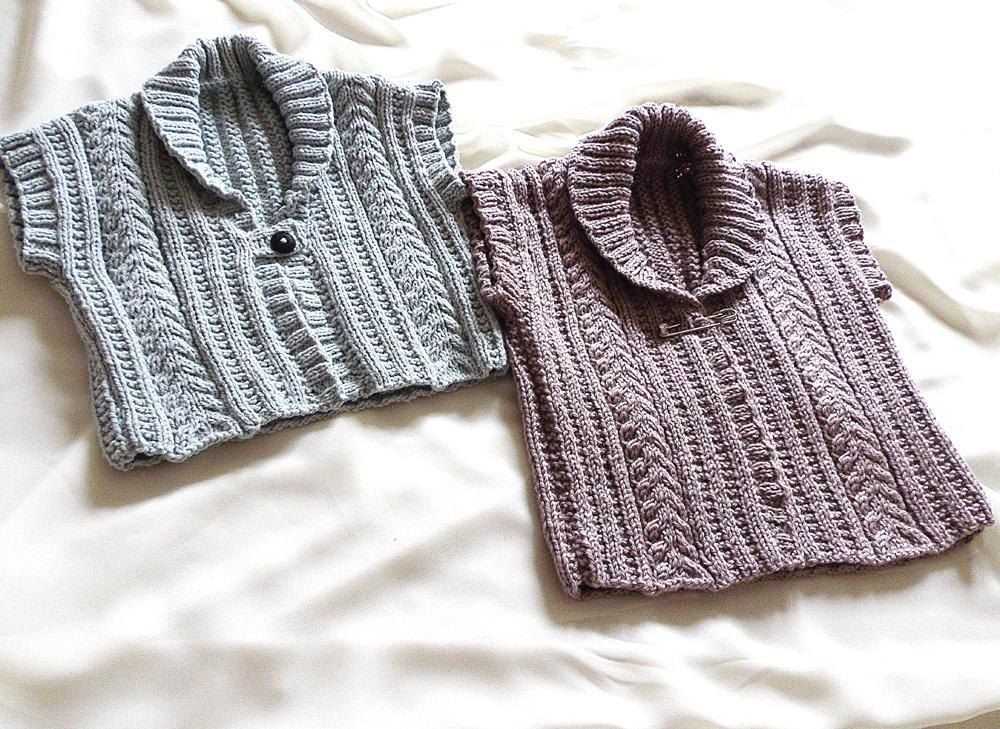
This Chunky Ribbed Vest pattern is perfect for knitters looking for an easy and quick project. The chunky yarn and simple ribbing stitch create a cozy and stylish vest that you can wear all winter long.
To begin, you will need the following materials:
- Chunky yarn (approximately 300-400 grams)
- Knitting needles size 10mm
- Tape measure
- Scissors
Start by casting on 60 stitches using the long-tail cast-on method. This will be the back of the vest. Next, knit in a 2×2 ribbing pattern for the first 4 rows. This means knitting 2 stitches, then purling 2 stitches, and repeating this pattern until the end of the row. Continue this ribbing pattern for the entire row, knitting 2 stitches and purling 2 stitches, until the back of the vest measures approximately 16 inches in length.
Once the back of the vest is complete, you will work on the front panels. For each front panel, cast on 30 stitches using the long-tail cast-on method. Knit in the same 2×2 ribbing pattern as before for the first 4 rows. Continue this pattern for each front panel until they measure approximately 12 inches in length.
After completing the front panels, it is time to seam everything together. Lay the back of the vest flat and place the front panels on each side, aligning the edges. Use a tapestry needle and the same yarn to sew the panels to the back, using a mattress stitch or whip stitch. Once the sides are seamed, you can sew the shoulder seams together as well.
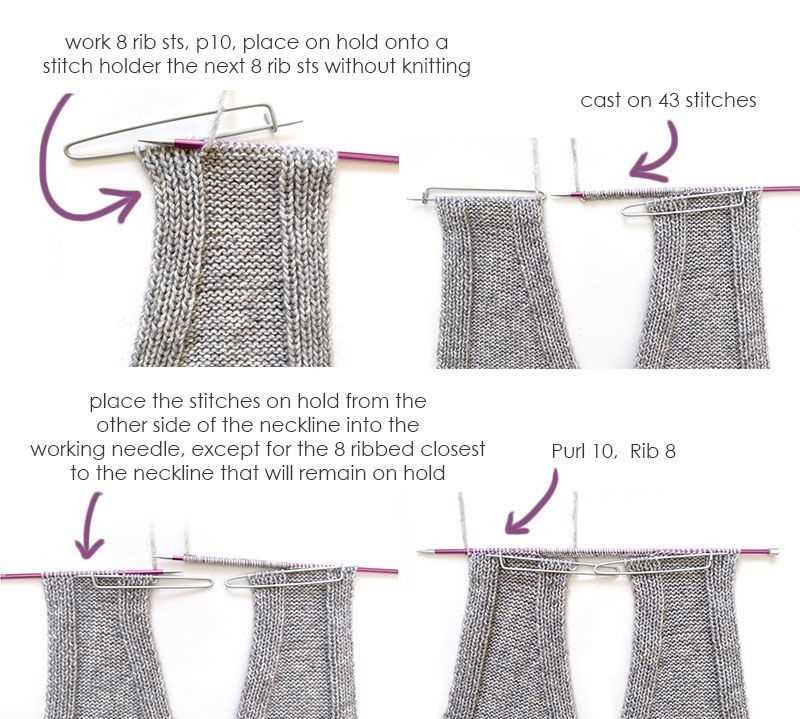
Finally, finish off the vest by adding a ribbed collar. Pick up stitches along the neckline using your circular knitting needles and knit in the same 2×2 ribbing pattern for approximately 2-3 inches. Bind off the stitches and weave in any loose ends.
Now your Chunky Ribbed Vest is ready to wear! This versatile piece can be dressed up or down and is sure to keep you warm and stylish throughout the colder months.
Fair Isle Vest Pattern
A Fair Isle vest is a classic and stylish addition to any wardrobe. The Fair Isle technique involves knitting with multiple colors in a single row to create intricate patterns and designs. This vest pattern is perfect for knitters of all skill levels, as it combines simple stockinette stitch with the more advanced Fair Isle technique.
To create this Fair Isle vest, you will need a set of double-pointed knitting needles and two contrasting colors of yarn. Begin by casting on stitches for the back of the vest, and then work in stockinette stitch until you reach the armholes. At this point, you will begin the Fair Isle section, following the provided chart to create the desired pattern. After completing the Fair Isle section, you will continue in stockinette stitch until the desired length is reached. Finally, the front and back of the vest are sewn together, and ribbing is added to the neckline and armholes.
Materials:
- Double-pointed knitting needles
- 2 contrasting colors of yarn
- Tapestry needle
Instructions:
- Cast on stitches for the back of the vest.
- Work in stockinette stitch until armholes.
- Begin Fair Isle section, following chart for desired pattern.
- Continue in stockinette stitch until desired length.
- Sew front and back of vest together.
- Add ribbing to neckline and armholes.
This Fair Isle vest pattern is a great project for knitters looking to expand their skills and create a beautiful and unique garment. Whether you choose to make it for yourself or as a gift, this vest is sure to be a stylish and cozy addition to any wardrobe.
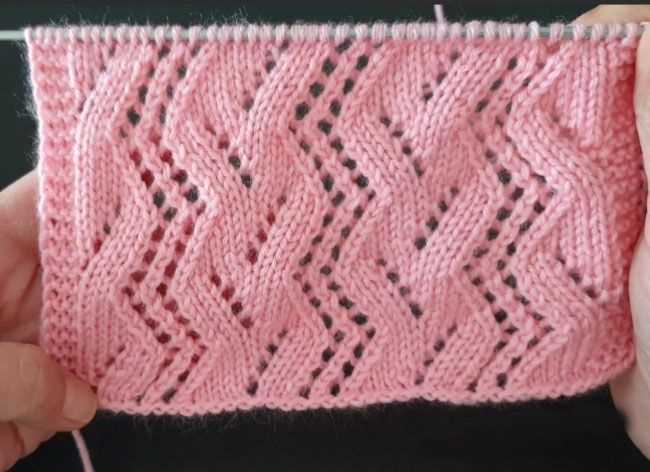
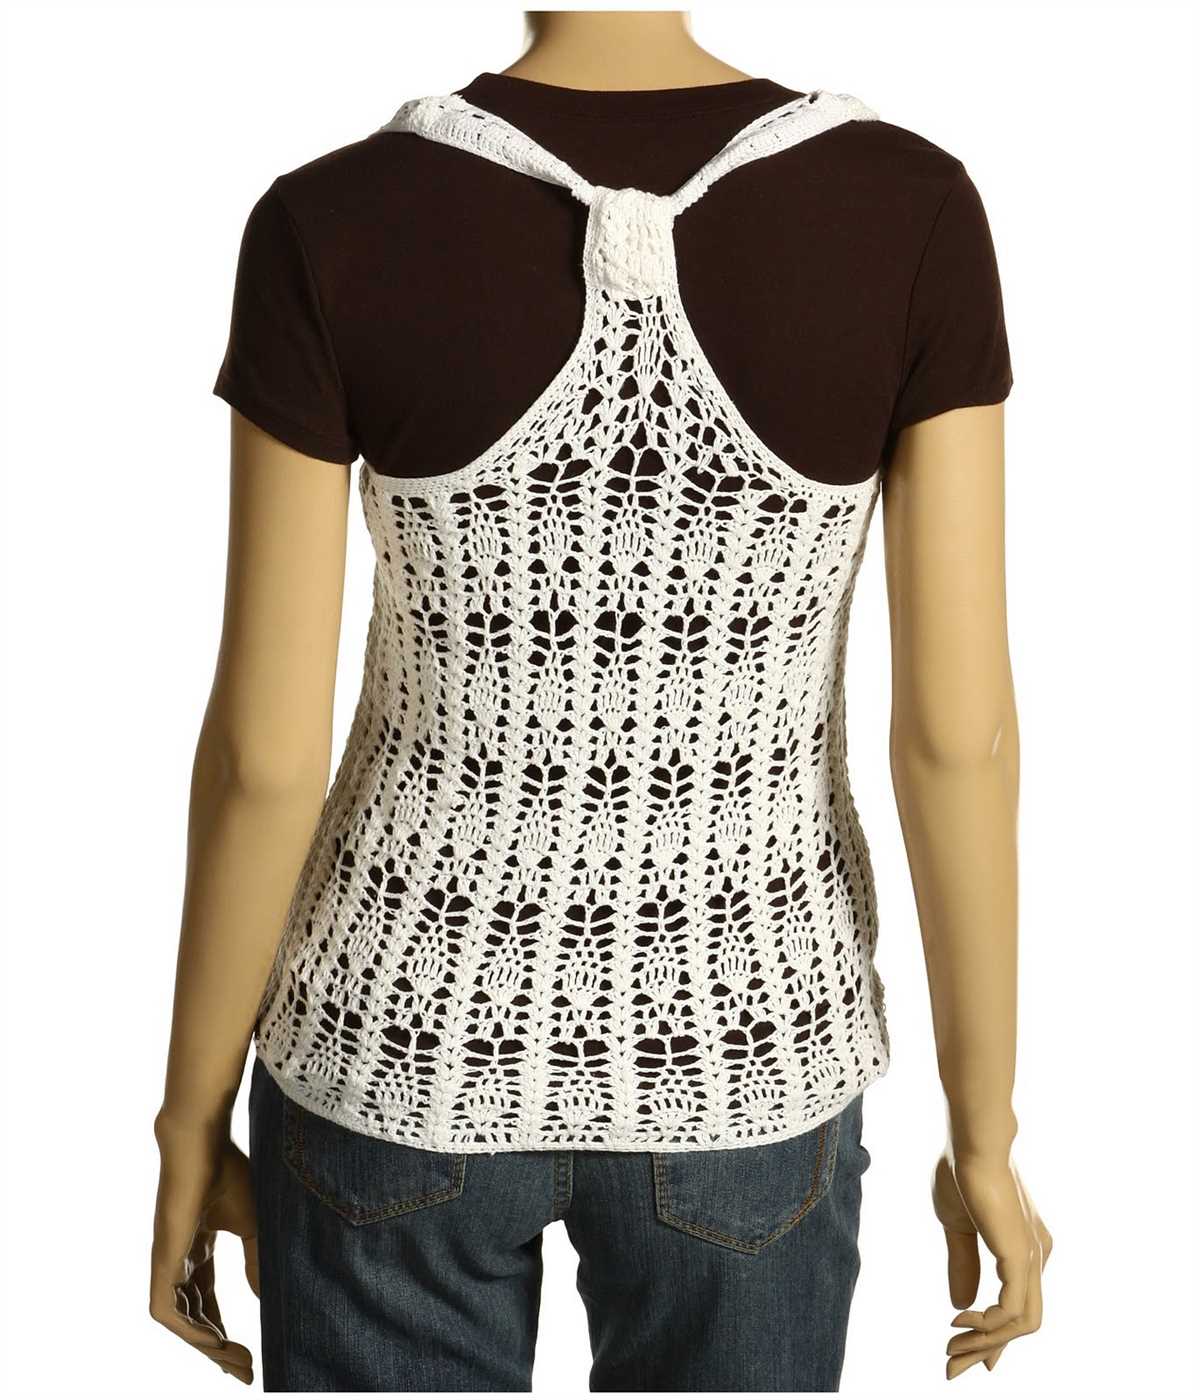
Lace Panel Vest Pattern
If you are looking for a beautiful and feminine vest pattern, the lace panel vest pattern is the perfect choice. This pattern combines the elegance of lace knitting with the practicality of a vest, creating a versatile garment that can be dressed up or down.
The lace panel vest pattern features a delicate lace panel down the center front and back of the vest. The lace pattern adds an intricate and eye-catching detail to the vest, making it a standout piece in any wardrobe. The rest of the vest is knitted in a simple stockinette stitch, allowing the lace panel to take center stage.
To knit this vest, you will need a medium weight yarn and US size 8 knitting needles. The pattern is written for sizes small, medium, and large, with instructions for adjusting the length and width to fit your body. The lace panel is knitted using a combination of knit and purl stitches, creating an open and airy pattern that is perfect for warmer weather.
This lace panel vest pattern is perfect for intermediate knitters who are looking to challenge themselves with a more intricate stitch pattern. The end result is a stunning and unique vest that will be a cherished addition to any wardrobe. Whether you wear it over a dress for a special occasion or with jeans for a casual look, this lace panel vest is sure to impress.
Color Block Vest Pattern
If you’re looking for a stylish and modern vest pattern to add to your wardrobe, the color block vest pattern is a perfect choice. This pattern combines different colors and textures to create a bold and eye-catching design. With its simple knit and purl stitches, it’s also a great project for knitters of all skill levels.
Materials:
- Worsted weight yarn in three different colors.
- Size 8 (5mm) knitting needles.
- Tapestry needle for weaving in ends.
- Scissors.
Instructions:
- Using Color A, cast on 100 stitches.
- Knit in garter stitch (knit every row) for 2 inches.
- Switch to Color B and work in stocking stitch (knit one row, purl one row) for 4 inches.
- Switch to Color C and work in garter stitch for 2 inches.
- Repeat steps 3 and 4, alternating between Color B and Color C, until the vest measures desired length.
- Switch to Color A and knit in garter stitch for 2 inches.
- Bind off all stitches and weave in ends.
This color block vest pattern allows you to get creative with different color combinations and textures. You can choose neutrals for a more understated look or go bold with bright and contrasting colors. The possibilities are endless!
Tips:
- Make sure to check your gauge before starting to ensure the correct fit.
- You can easily adjust the length of the vest by adding or subtracting rows in the color block sections.
- Experiment with different yarn weights and needle sizes to create different effects.
- If you want a more fitted vest, try adding shaping by decreasing stitches at the waist.
With its modern design and versatility, this color block vest will be a stylish addition to your wardrobe. Whether you wear it over a t-shirt or layer it with a long-sleeved blouse, it’s sure to become a favorite go-to piece.
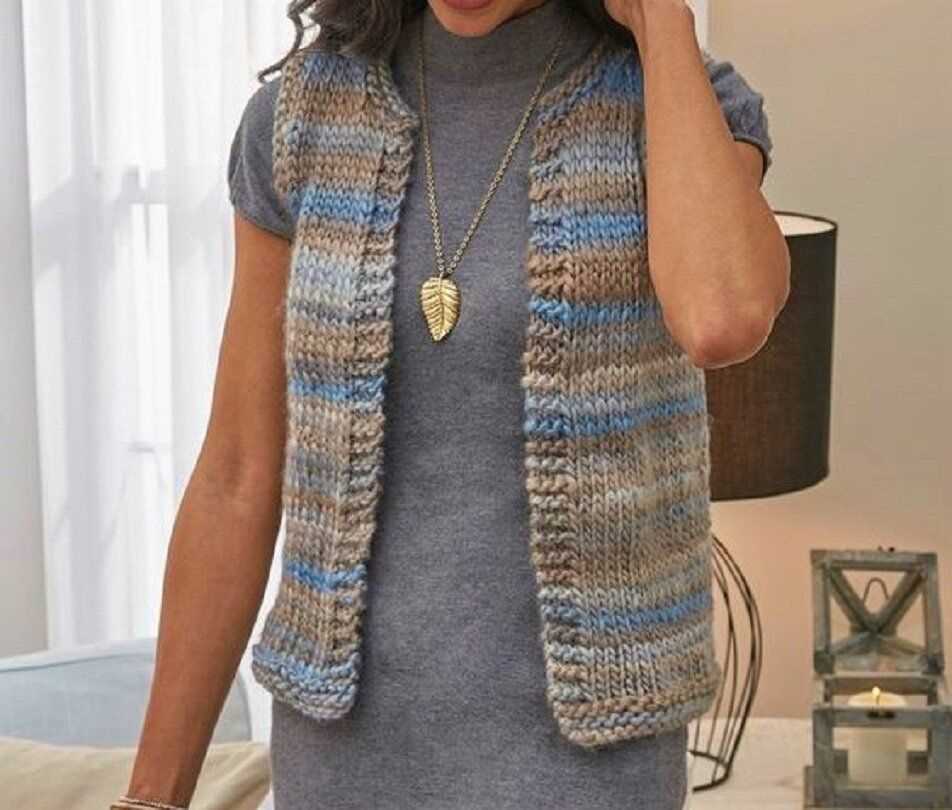
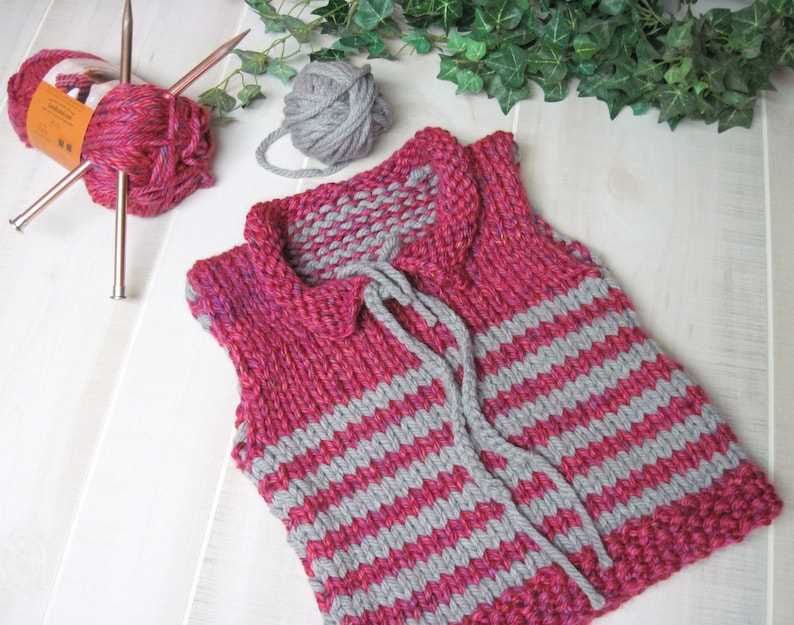
Striped Vest Pattern
This easy knitted vest pattern features a classic striped design that adds a touch of style to any outfit. The pattern is perfect for knitters of all skill levels, whether you’re a beginner looking for a simple project or an experienced knitter looking for a quick and satisfying knit. The vest is worked in the round from the bottom up, making it seamless and easy to customize the fit.
Materials:
- Worsted weight yarn in two contrasting colors
- Circular knitting needles in the appropriate size
- Stitch markers
- Tapestry needle
Instructions:
- Using the long-tail cast-on method, cast on the desired number of stitches. Join in the round, being careful not to twist the stitches.
- Begin the striped pattern by working a set number of rounds in Color A, then switch to Color B and work the same number of rounds.
- Continue alternating colors in this manner until the vest reaches the desired length, ending with a set number of rounds in Color A.
- Next, work the armhole shaping by binding off a certain number of stitches at each side of the vest. This will create openings for the armholes.
- Continue working in the established striped pattern until the vest measures the desired length from the armhole bind-offs.
- Finish the vest by binding off all stitches and weaving in any loose ends.
This versatile striped vest pattern can be easily customized by changing the number of rounds worked in each color or by adding additional stripes. It’s a great project for using up leftover yarn and creating a unique and stylish wardrobe staple.
Buttoned Vest Pattern
A buttoned vest is a versatile and stylish addition to any wardrobe. This easy knitted vest pattern is perfect for beginners and experienced knitters alike. With its simple design and classic button front, it can be dressed up or down for any occasion.
To knit this buttoned vest, you will need a medium-weight yarn and size 8 knitting needles. The pattern is worked in a simple rib stitch, which gives the fabric a stretchy and textured look. You will begin by casting on the desired number of stitches for your size, and then work in rib stitch for the body of the vest.
Once the body is complete, you will divide for the armholes and continue knitting the front and back separately. For the front, you will add a buttonband by working a few stitches in garter stitch at the edge. The back will be worked in the same rib stitch pattern as the body.
After completing the front and back, you will sew the shoulder seams together and then pick up stitches around the armholes to knit the armhole ribbing. Finally, you will add buttons to the buttonband to complete the vest.
This buttoned vest pattern is a great project for knitters looking to expand their skills and create a functional and fashionable garment. With its classic design and customizable options, this vest can be personalized to suit your style. Whether worn over a blouse for a polished look or layered with a long-sleeved shirt for extra warmth, this buttoned vest is sure to become a wardrobe staple.
Textured Stitch Vest Pattern
In search of a stylish and cozy knitted vest pattern? Look no further than the Textured Stitch Vest Pattern. This pattern is perfect for knitters of all skill levels, whether you’re a beginner or an experienced pro. The textured stitch adds depth and interest to the vest, while the free pattern ensures that you can create your own unique piece without breaking the bank.
To create the Textured Stitch Vest, you will need a set of knitting needles and your choice of yarn. The pattern uses a textured stitch pattern, which is created by alternating knit and purl stitches. This creates a visually interesting fabric that adds depth and texture to the vest.
To start, cast on the desired number of stitches, then work the textured stitch pattern in rows until the vest reaches the desired length. The pattern provides detailed instructions on how to work the textured stitch pattern, so even if you’re new to knitting, you can easily follow along.
Once the vest is the desired length, shape the armholes and neckline by following the instructions provided in the pattern. This will give your vest a professional and polished look. Finally, finish off the vest by seaming the sides and adding any desired embellishments, such as buttons or pockets.
The Textured Stitch Vest Pattern is not only stylish, but also versatile. It can be worn casually with a pair of jeans, or dressed up with a skirt or dress pants. The pattern is also customizable, allowing you to create a vest that fits your unique style and preferences.
With the Textured Stitch Vest Pattern, you can create a cozy and stylish knitted vest that will become a staple in your wardrobe. Whether you’re a beginner or an experienced knitter, this pattern is sure to become a favorite. Download the free pattern today and get started on your own Textured Stitch Vest.
Oversized Vest Pattern
Are you looking for a comfortable and stylish knit vest to add to your wardrobe? Look no further than this oversized vest pattern! With its loose and cozy fit, this vest is perfect for layering over your favorite shirts and dresses.
This pattern is ideal for beginners as it uses basic knitting stitches and techniques. The oversized design makes it forgiving in terms of fit, so you can confidently create a beautiful vest even if you’re new to knitting.
To make this vest, you will need:
- Super bulky weight yarn in your chosen color
- Size 15 (10 mm) knitting needles
- Scissors
- Tapestry needle
Follow these simple steps to knit your oversized vest:
- Cast on 70 stitches.
- Knit every row until the vest measures your desired length.
- Bind off all stitches.
- Using a tapestry needle, sew the side seams of the vest together.
- Weave in any loose ends.
You can customize your vest by adding pockets or a decorative border if desired. Feel free to experiment with different yarn colors and textures to create a unique look that matches your personal style.
Once your vest is complete, you’ll have a versatile piece that can be dressed up or down. Pair it with jeans and a t-shirt for a casual look, or wear it over a dress for a more polished ensemble. The oversized fit adds a trendy and effortless touch to any outfit.
So, grab your knitting needles and get ready to create a cozy and stylish addition to your wardrobe. This oversized vest pattern is the perfect project for knitters of all skill levels. Happy knitting!
Q&A:
Where can I find easy knitted vest patterns for free?
You can find easy knitted vest patterns for free on websites like Ravelry, Lion Brand, and Knitting Pattern Central.
Are there any beginner-friendly knitted vest patterns available?
Yes, there are many beginner-friendly knitted vest patterns available. Look for patterns that use simple knitting stitches and techniques, such as garter stitch or ribbing.
What materials do I need to knit a vest?
To knit a vest, you will need yarn in the weight and color of your choice, knitting needles in the appropriate size for your yarn, scissors, stitch markers, and a tapestry needle for weaving in ends.
Can I modify a knitted vest pattern to fit my size?
Yes, you can modify a knitted vest pattern to fit your size. You can adjust the number of stitches and rows, as well as the length and width of the vest, to make it larger or smaller as needed.