
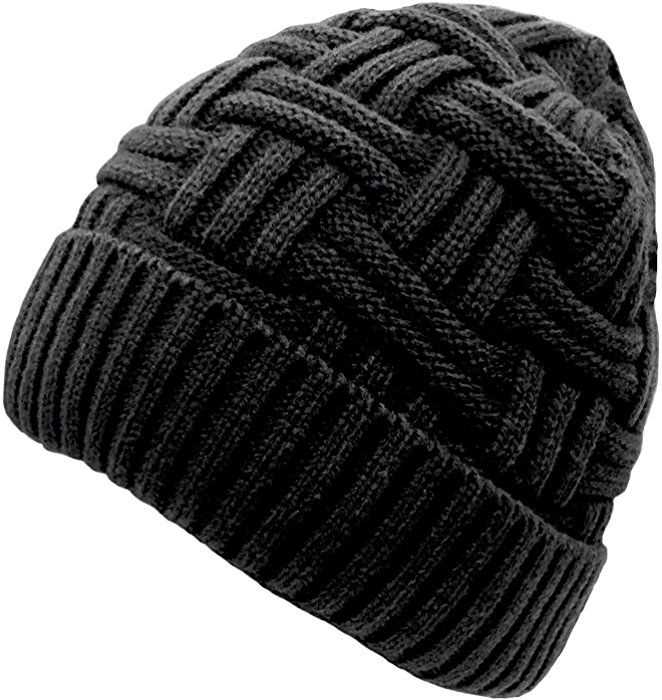
Looking to knit a stylish and cozy skull cap? We’ve got you covered with this free knitting pattern! Whether you’re a beginner or an experienced knitter, this pattern is perfect for anyone looking to make a trendy accessory for themselves or as a gift.
The skull cap is a versatile accessory that can be worn year-round. It’s not only a great way to keep your head warm in colder months, but it’s also a fashionable accessory that can add a touch of style to any outfit. With this free knitting pattern, you can easily create your own unique skull cap in no time.
One of the best things about this pattern is that it’s completely customizable. You can choose your favorite yarn colors and experiment with different stitch patterns to create a skull cap that’s as unique as you are. Plus, since it’s a free pattern, you can make as many skull caps as you want without breaking the bank.
How to find a free skull cap knitting pattern online
The internet is a treasure trove of free knitting patterns, and finding a free skull cap knitting pattern online is no exception. Whether you’re a beginner knitter or an experienced one looking for a new project, there are plenty of resources available to help you find the perfect pattern.
1. Knitting pattern websites: Many websites specialize in providing free knitting patterns for all types of projects, including skull caps. Some popular knitting pattern websites include Ravelry, Knitty, and LoveKnitting. These sites often have search filters that allow you to narrow down your options by skill level, size, and style, making it easy to find a skull cap pattern that suits your needs.
2. Online knitting communities: Online knitting communities, such as knitting forums or social media groups, can be a great source of free knitting patterns. Members often share their own patterns or links to patterns they’ve found online. Participating in these communities not only helps you find great patterns, but it also allows you to connect with other knitters and learn from their experiences.
3. Online libraries and archives: Some organizations, such as museums or knitting associations, have digitized their pattern collections and made them available for free online. These archives can be a treasure trove of vintage or unique skull cap patterns. Online libraries, such as the Internet Archive, also have a vast collection of vintage knitting books that may include skull cap patterns.
4. Video tutorials: For visual learners, video tutorials on platforms like YouTube can be a valuable resource for finding skull cap knitting patterns. Many knitting enthusiasts share their patterns through detailed video instructions, allowing you to follow along step by step.
When searching for a free skull cap knitting pattern online, it’s important to read the pattern carefully and make sure it matches your skill level and desired style. Don’t be afraid to experiment and customize the pattern to make it your own. With the abundance of resources available online, you’re sure to find the perfect pattern for your next knitting project.
Tips for choosing the right skull cap knitting pattern
When it comes to knitting skull caps, finding the right pattern is essential to ensure a successful and enjoyable knitting experience. Here are some tips to help you choose the right skull cap knitting pattern:
Consider your skill level:
Before diving into a skull cap knitting project, it’s important to assess your skill level. Beginner knitters may want to start with simpler patterns that use basic stitches and techniques. Intermediate or advanced knitters can challenge themselves with more intricate designs or patterns that incorporate different stitches and techniques.
Take into account the intended recipient:
When choosing a skull cap knitting pattern, consider who the cap is for. If you’re knitting for a child or a person with a smaller head, opt for a pattern designed for smaller sizes. On the other hand, if you’re knitting for an adult or someone with a larger head, look for patterns that offer size options or adjustable fit.
Consider the style and design:
Skull caps come in various styles and designs, so choose a pattern that matches your personal style or the style of the person you’re knitting for. Look for patterns that feature different stitch patterns, colorwork, or decorative elements like cables or lace. Pay attention to the overall shape and fit of the cap as well, as some patterns may have a slouchy or snugger fit.
Take yarn weight and fiber into consideration:
The yarn you choose for your skull cap will greatly affect the final result. Consider the recommended yarn weight and fiber content specified in the pattern. Thicker yarns will create a warmer and bulkier cap, while lighter yarns will result in a lighter and more breathable cap. Also, consider the fiber content of the yarn and choose one that suits your preferences, whether it’s wool, acrylic, alpaca, or a blend.
Read reviews and check for errata:
Before starting a skull cap knitting pattern, take some time to read reviews from other knitters who have attempted the pattern. This can give you insight into any potential issues or challenges you may encounter. Additionally, check to see if there are any published errata for the pattern, as this can help you avoid any mistakes or confusion during the knitting process.
By considering these tips and carefully selecting the right skull cap knitting pattern, you can ensure an enjoyable knitting experience and end up with a beautifully finished cap. Happy knitting!
Materials needed for a skull cap knitting project
Knitting a skull cap can be a fun and rewarding project for crafters of all skill levels. Whether you’re a beginner or an experienced knitter, it’s important to gather the right materials before you start. Here is a list of essential materials you’ll need for a skull cap knitting project:
- Yarn: Choose a yarn that is suitable for hats and has good stretch and recovery. You can use any type of yarn you prefer, but medium-weight yarn is commonly used for skull caps.
- Knitting needles: Select knitting needles that are appropriate for the yarn you’ve chosen. The size of the needles will depend on your tension and the desired gauge for your skull cap.
- Tape measure: It’s important to have a tape measure or ruler on hand to ensure accuracy while knitting. This will help you measure your gauge and determine the size of your skull cap.
- Scissors: A pair of sharp scissors is essential for cutting the yarn and any excess thread while working on your project.
- Stitch markers: Stitch markers are helpful for marking specific stitches or sections in your pattern. They can be used to indicate the beginning of a round or a specific stitch pattern.
- Darning needle: A darning needle, also known as a yarn needle, is used for weaving in loose ends and sewing pieces together. It’s an essential tool for finishing your skull cap.
With these materials in hand, you’ll be well-prepared to start your skull cap knitting project. Make sure to choose yarn and needles that you enjoy working with, and have fun creating a cozy and stylish accessory!
Step-by-step instructions for knitting a basic skull cap
Knitting a skull cap is a fun and rewarding project that can be completed relatively quickly. Whether you’re a beginner or an experienced knitter, this simple pattern is perfect for creating a cozy and stylish accessory. Follow these step-by-step instructions to create your own basic skull cap.
Materials:
- Worsted weight yarn in your desired color
- Size 8 knitting needles
- Tapestry needle
- Scissors
Instructions:
- Start by casting on 88 stitches using the long-tail cast on method. This will create the brim of the skull cap. If you prefer a smaller or larger brim, you can adjust the number of stitches accordingly.
- Once you have cast on, join the ends of your yarn to form a circle.
- Continue knitting in the round using a knit stitch until the brim measures approximately 2 inches in length. This will give the skull cap a comfortable and secure fit.
- After completing the brim, switch to a stockinette stitch pattern by knitting every round. Continue knitting in this pattern until the skull cap measures approximately 6 inches from the brim.
- To shape the crown of the skull cap, you will begin decreasing stitches. Knit 8 stitches, then knit 2 stitches together. Repeat this pattern until the end of the round.
- On the next round, knit all stitches.
- Continue decreasing stitches by knitting 7 stitches, then knitting 2 stitches together, and repeating this pattern until the end of the round.
- On the following round, knit all stitches.
- Repeat the decreasing pattern, knitting 6 stitches, then knitting 2 stitches together, and continuing until the end of the round.
- Continue knitting in this manner, decreasing the number of stitches by one each round, until there are only a few stitches remaining. Cut the yarn, leaving a long tail.
- Thread the tail of yarn through a tapestry needle, and slip the needle through the remaining stitches. Pull tight to close the top of the skull cap.
- Weave in any loose ends of yarn using the tapestry needle to ensure a neat finish.
Once you’ve completed these steps, you’ll have a basic skull cap that is ready to be worn or customized with additional embellishments. Experiment with different yarn colors and stitch patterns to create unique and personalized skull caps for yourself or as gifts for others.
Advanced techniques for skull cap knitting
Knitting a skull cap can be a fun project that allows you to showcase your skills and creativity. If you’re looking to take your knitting to the next level, here are some advanced techniques that you can incorporate into your skull cap patterns.
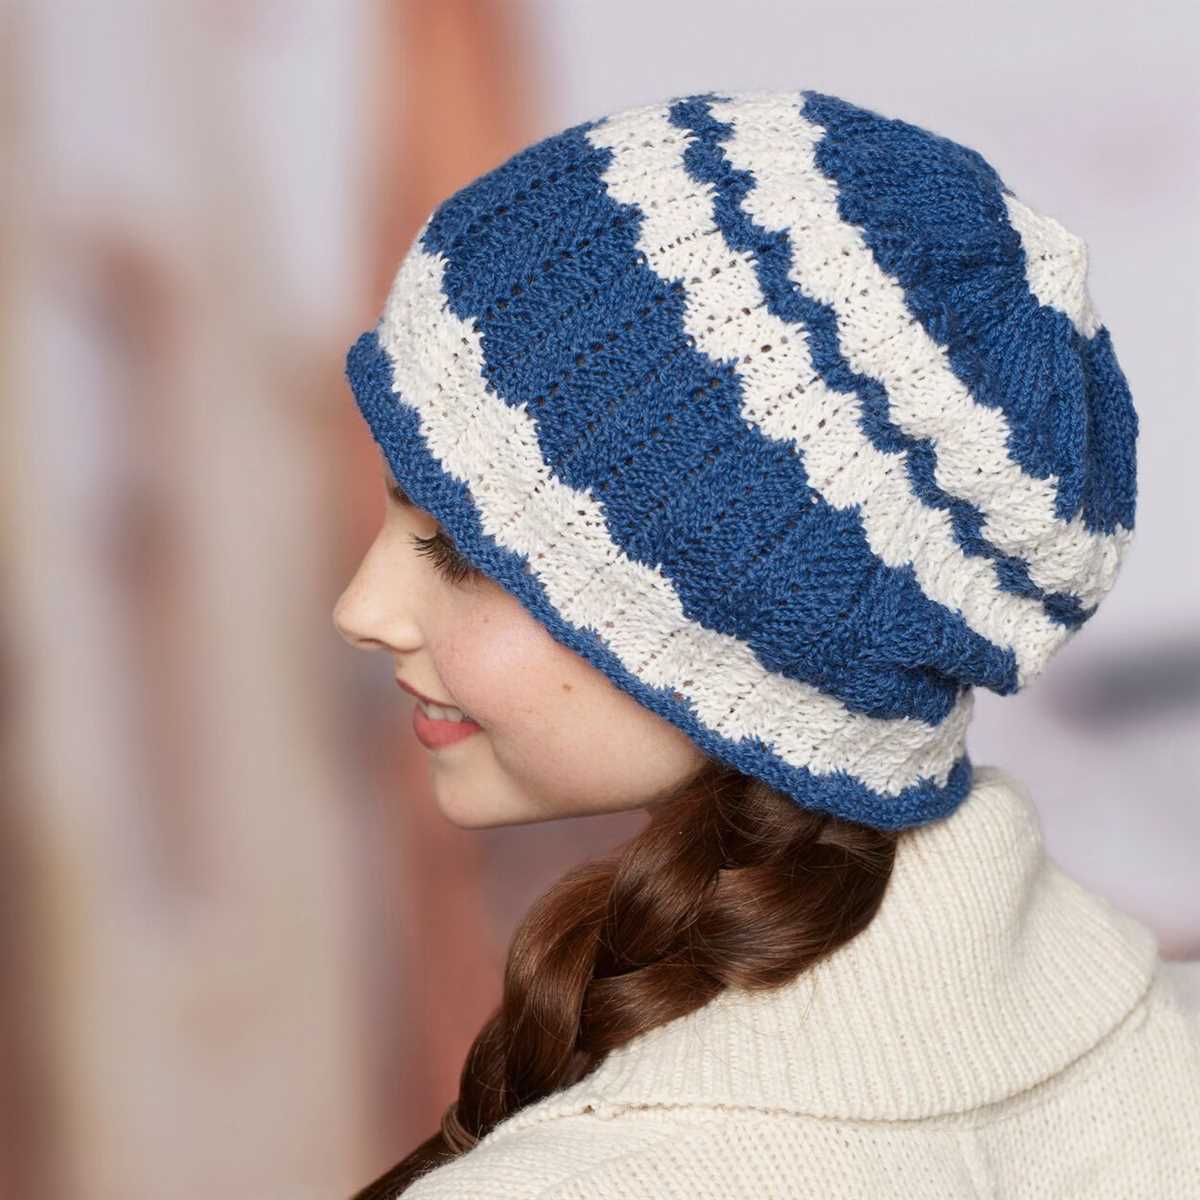
1. Colorwork
Add more visual interest to your skull caps by incorporating colorwork techniques. Fair Isle and stranded knitting are popular methods that involve working with multiple colors to create intricate patterns. You can experiment with different color combinations to create unique designs that make your skull caps stand out.
2. Lace knitting
For a delicate and feminine touch, try incorporating lace patterns into your skull cap designs. Lace knitting involves creating intricate patterns with holes and yarn overs, resulting in a beautiful and airy fabric. You can choose from a wide variety of lace patterns, from simple eyelets to more complex motifs.
3. Cables
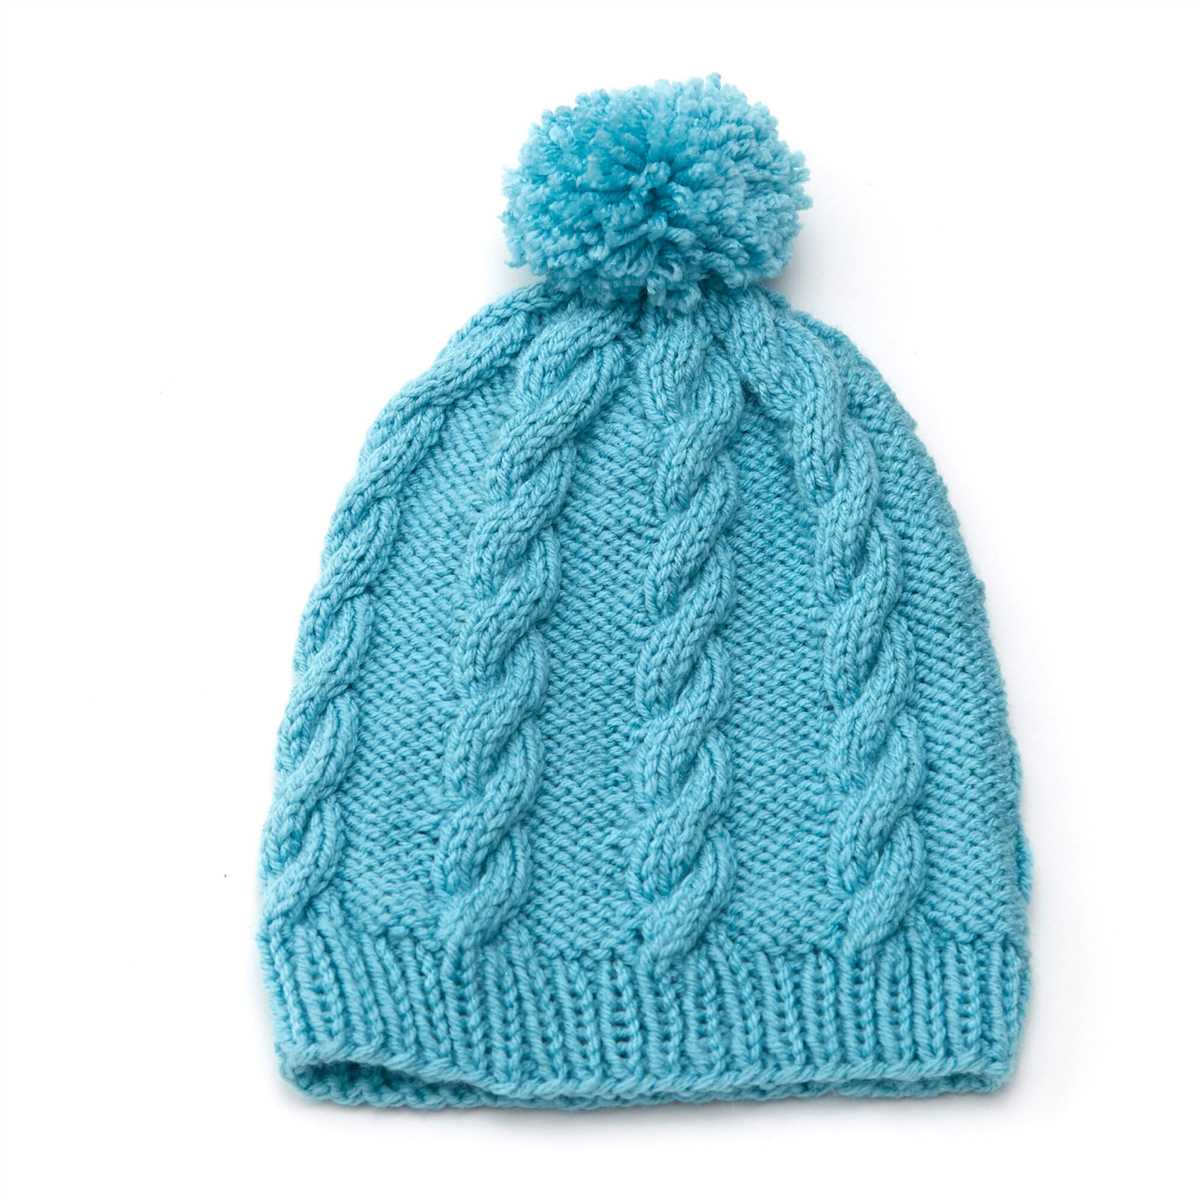
Add texture and depth to your skull caps by incorporating cable knitting techniques. Cables involve crossing stitches over each other to create beautiful twisted patterns. You can experiment with different cable designs, such as braids, diamonds, or honeycombs, to add a unique and sophisticated look to your skull caps.
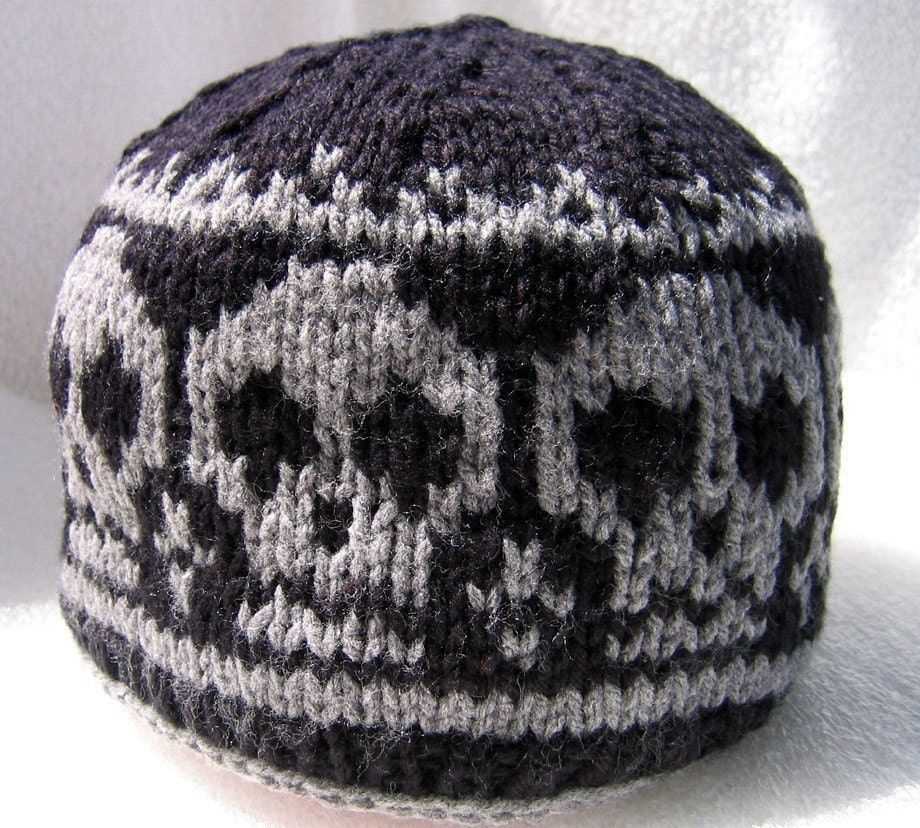
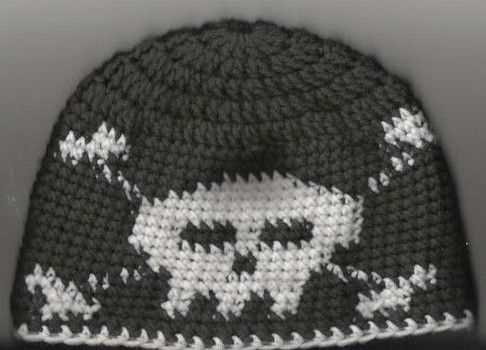
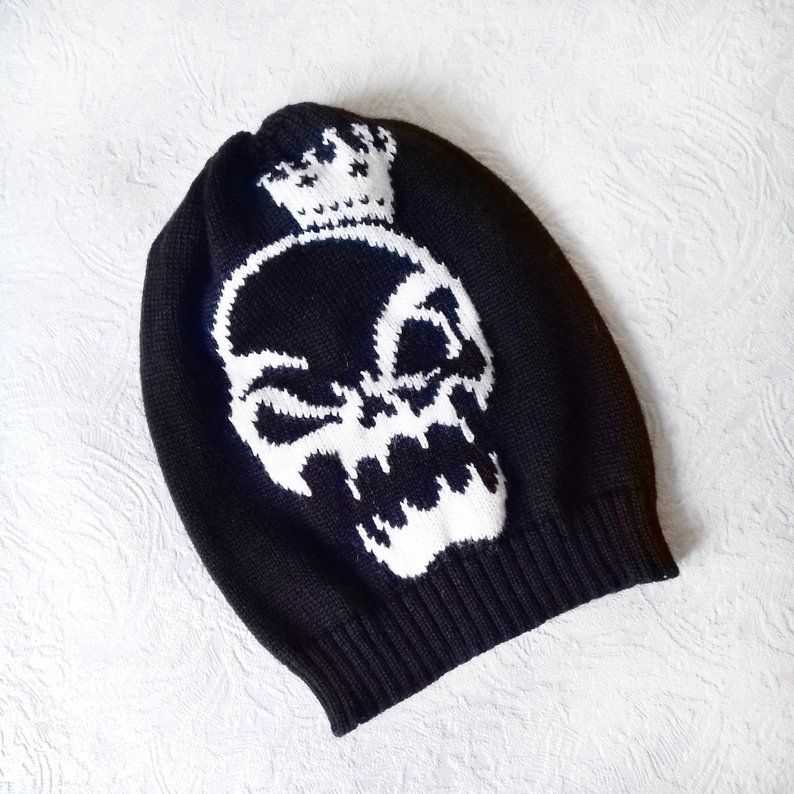
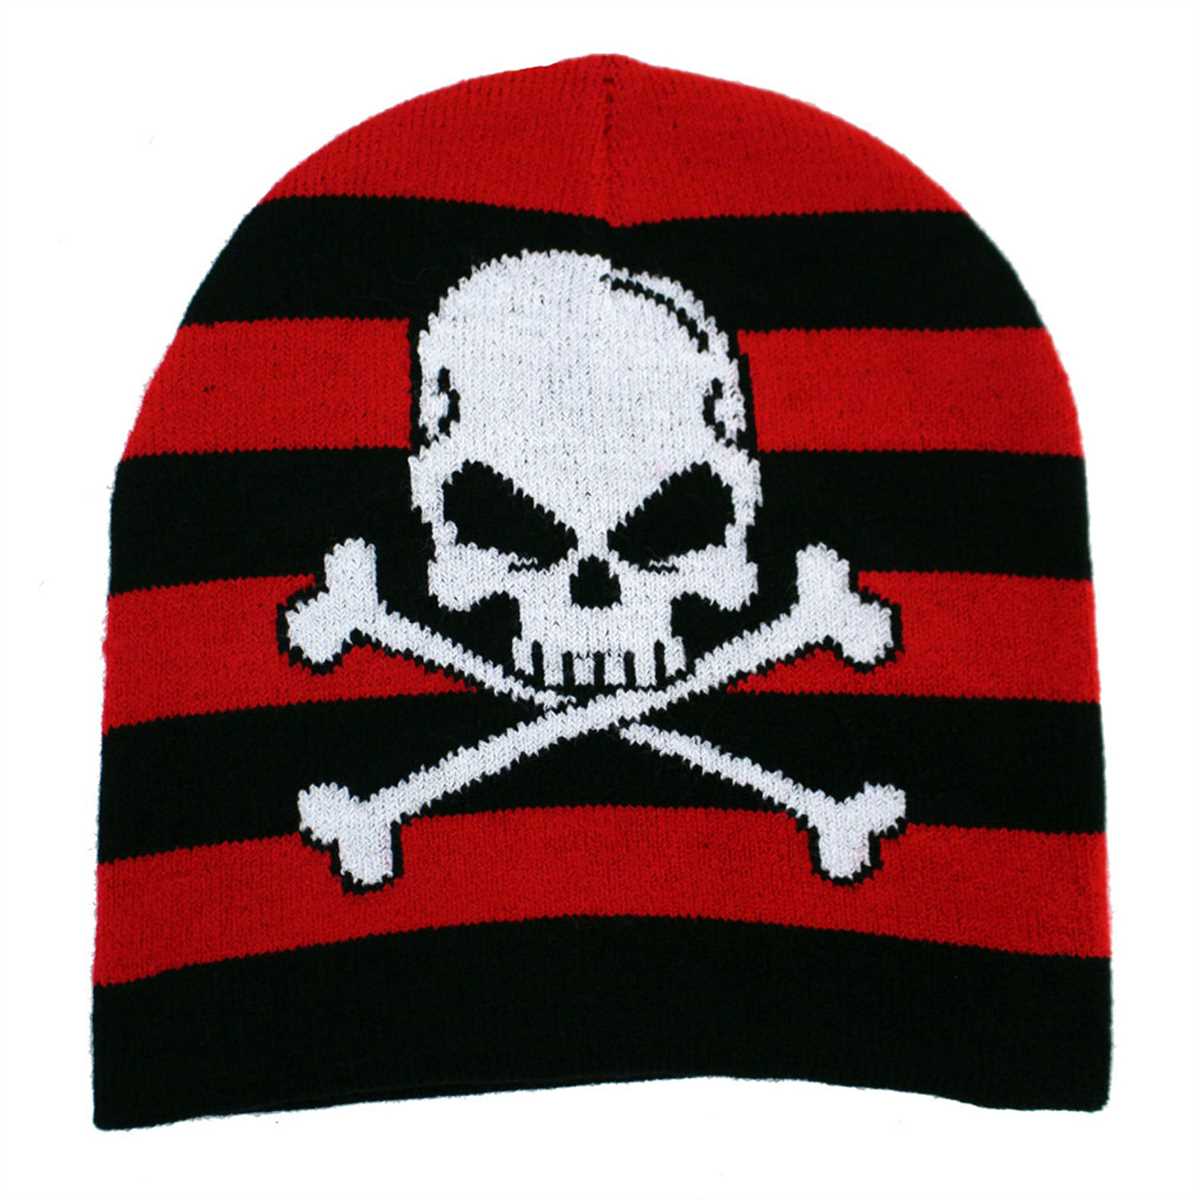
4. Intarsia
If you want to create intricate designs or images on your skull caps, try using the intarsia technique. Intarsia involves knitting with different colors to create large blocks of color in your pattern. This technique allows you to create detailed and complex designs, such as letters, shapes, or pictures, making your skull caps truly one-of-a-kind.
5. Beads and embellishments
To add some sparkle and glamour to your skull caps, consider incorporating beads and embellishments into your designs. You can use beads to create intricate patterns or add a touch of elegance to the edges of your skull caps. Additionally, you can experiment with sequins, buttons, and other embellishments to make your skull caps truly unique and eye-catching.
By incorporating these advanced techniques into your skull cap knitting, you can elevate your projects to the next level and create stunning and unique designs that showcase your skills and creativity. Don’t be afraid to experiment and try new techniques to add a personal touch to your skull caps.
Adding Embellishments to Your Skull Cap
When knitting a skull cap, you have the opportunity to add embellishments that can make your hat unique and personalized. Whether you want to add a touch of elegance or a pop of color, there are various ways to embellish your skull cap to make it stand out.
1. Pompoms: One of the easiest ways to add a fun and playful touch to your skull cap is by attaching a pompom to the top. Pompoms can be made using yarn in a contrasting color or even using faux fur for a more luxurious look. They are simple to make and can be sewn or glued securely to the center of your hat.
2. Ribbons and bows: Another way to add a feminine touch to your skull cap is by incorporating ribbons and bows. You can choose a ribbon in a complementary color and tie it around the base of the hat, creating a stylish bow at the side or back. This adds a charming and delicate detail to your cap.
3. Appliques: If you want to make a statement with your skull cap, consider adding appliques or patches. These can be in the form of embroidered designs, sequins, or even iron-on patches. You can creatively place them on the front, side, or back of the cap, adding personality and individuality to your accessory.
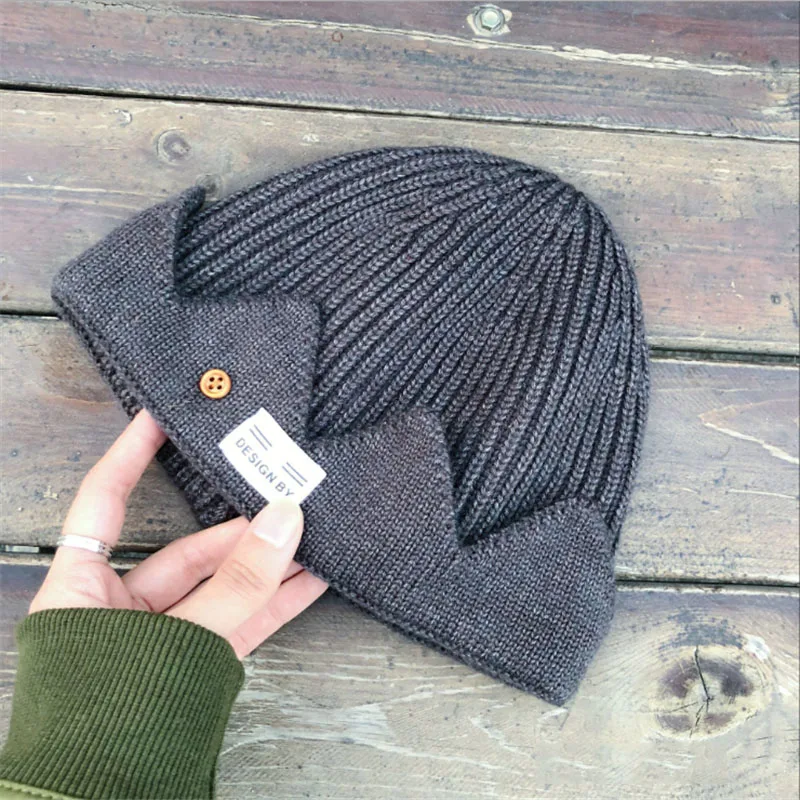
4. Buttons: Adding buttons to your skull cap can create an interesting and eye-catching detail. Choose buttons that match or contrast with the color of your hat. You can sew them onto the brim, along the side, or even create a button-up flap for added functionality. Buttons add a touch of elegance and can make your cap more versatile.
5. Lace: For a feminine and delicate touch, consider incorporating lace into your skull cap. You can knit or crochet a lace panel and sew it onto the lower edge of the hat, or even create a lace insert for added visual interest. Lace adds a touch of elegance and can transform a plain skull cap into a stylish accessory.
Remember, adding embellishments to your skull cap is a great way to make it truly your own. Whether you choose to go bold with sequins or keep it simple with a delicate bow, these embellishments can elevate your skull cap from a basic accessory to a true statement piece.
Customizing a skull cap knitting pattern to fit your style
Knitting a skull cap is a fun and rewarding project that allows you to showcase your personal style and creativity. By customizing a knitting pattern, you can add your own unique touches and make a skull cap that perfectly fits your style.
One way to customize a skull cap knitting pattern is by choosing a color palette that reflects your personality. Whether you prefer bold and vibrant hues or subtle and muted tones, selecting yarn in your favorite colors can make your skull cap truly one-of-a-kind. You can also experiment with different yarn textures, such as fuzzy or sparkly yarn, to create a more eye-catching design.
Another way to customize a skull cap knitting pattern is by adding embellishments. You can incorporate decorative stitches, such as cables or lace, to give your skull cap an intricate and sophisticated look. Additionally, you can sew on buttons, beads, or appliques to add a touch of whimsy or glamour. These small details can make a big difference in the overall appearance of your skull cap.
Furthermore, you can adjust the size and fit of the skull cap to ensure it suits your head perfectly. If the pattern provides multiple size options, you can choose the one that best matches your head circumference. Alternatively, you can modify the pattern by adding or subtracting stitches to achieve a snug or slouchy fit. Additionally, you can experiment with different needle sizes to achieve the desired tension and drape for your skull cap.
In conclusion, customizing a skull cap knitting pattern allows you to infuse your own personal style into your project. By selecting the right colors, adding embellishments, and adjusting the size and fit, you can create a skull cap that truly reflects your individuality. So grab your knitting needles and let your creativity soar!
Common mistakes to avoid when knitting a skull cap
Knitting a skull cap can be a fun and rewarding project, but it’s important to avoid some common mistakes to ensure that your finished cap turns out as desired. Here are some tips on what to avoid:
1. Not checking gauge
One of the most common mistakes knitters make is not checking their gauge before starting a project. Gauge refers to the number of stitches and rows per inch. Failing to knit at the correct gauge can result in a skull cap that doesn’t fit properly. Take the time to knit a gauge swatch and measure it to ensure that you’re following the pattern accurately.
2. Using the wrong yarn weight
Another mistake to avoid is using the wrong yarn weight for your skull cap. Yarn weight determines the thickness of the yarn, and using the wrong weight can affect the fit and appearance of your cap. Make sure to check the recommended yarn weight in the pattern and choose a yarn that matches it. This will help ensure that your finished cap has the right texture and drape.
3. Skipping the blocking process
Blocking is an important step in knitting that involves shaping and stretching the finished piece to achieve the desired fit and shape. Some knitters skip this step, but it can result in a skull cap that looks uneven or doesn’t sit properly on the head. Take the time to block your cap according to the pattern instructions to ensure that it looks its best.
4. Ignoring stitch counts
Many skull cap patterns provide specific stitch counts for each section or round of knitting. Ignoring these stitch counts or failing to keep track of them can result in an uneven or misshapen cap. It’s important to pay attention to the stitch counts and use stitch markers or a row counter to keep track of your progress. This will help ensure that your skull cap turns out symmetrical and well-proportioned.
5. Not swatching for colorwork or textured patterns

If you’re planning to incorporate colorwork or textured patterns into your skull cap, it’s crucial to swatch before diving into the project. Swatching will allow you to practice the pattern and check the tension to ensure that the colorwork or texture looks even and doesn’t affect the fit of the cap. Skipping this step can result in a skull cap with uneven colorwork or texture that doesn’t match the desired pattern.
Avoiding these common mistakes when knitting a skull cap will help ensure that your finished project turns out beautifully. Take the time to follow the pattern instructions accurately, check your gauge, choose the right yarn weight, block your cap, pay attention to stitch counts, and swatch when necessary. With these tips in mind, you’ll be well on your way to knitting a stunning skull cap!
Frequently asked questions about skull cap knitting
When it comes to knitting skull caps, beginners often have a lot of questions. Here are some frequently asked questions and their answers:
1. How do I choose the right yarn for a skull cap?
When choosing yarn for a skull cap, it’s important to consider both the fiber and the weight. Opt for a yarn that is soft and not itchy, as the cap will be worn directly on the skin. Worsted or light worsted weight yarns are typically a good choice, as they provide enough warmth without being too bulky.
2. How do I determine the size of a skull cap?
To determine the size of a skull cap, you’ll need to measure the circumference of the wearer’s head. Use a flexible measuring tape and wrap it around the widest part of the head, typically just above the ears. Make sure the tape is snug but not too tight. This measurement will help you determine the number of stitches to cast on and the overall size of the cap.
3. What are some common stitch patterns for skull caps?
There are various stitch patterns you can use to create interesting textures and designs in a skull cap. Some popular options include ribbing (knit and purl stitches alternating), seed stitch (a combination of knit and purl stitches in a specific pattern), and cables (twisted stitches that create a braided appearance). Experiment with different stitch patterns to find the one you like best.
4. How do I shape the crown of a skull cap?
The crown of a skull cap is typically shaped using decrease stitches to create a round or dome shape. Common decrease stitches include knit two together (k2tog), slip slip knit (ssk), and slip slip knit pass slipped stitches over (sskpsso). Follow a pattern or experiment with different decrease stitches to achieve the desired shape.
5. Can I customize a skull cap pattern?
Absolutely! One of the great things about knitting is the ability to customize patterns to suit your preferences. You can experiment with different yarns, stitch patterns, and even add embellishments like pom-poms or embroidery. Don’t be afraid to get creative and make a skull cap that reflects your unique style.
6. How long does it typically take to knit a skull cap?
The time it takes to knit a skull cap can vary depending on factors like your knitting speed and the complexity of the pattern. A simple skull cap can usually be completed in a few evenings of dedicated knitting. More intricate patterns or larger sizes may take longer. It’s always a good idea to give yourself plenty of time to complete the project.
- In summary, when knitting a skull cap, choose a soft yarn of the right weight, measure the head circumference, experiment with different stitch patterns, shape the crown using decrease stitches, customize the pattern to add personal touches, and allow enough time to complete the project.
Alternative Skull Cap Knitting Patterns
If you’re tired of the same old skull cap knitting pattern and are looking for something new and exciting, you’re in luck! There are a variety of alternative skull cap knitting patterns available that can help you create a unique and stylish accessory for yourself or someone you love.
1. Cable Knit Skull Cap: One alternative skull cap knitting pattern that adds a touch of sophistication to your wardrobe is the cable knit skull cap. This pattern features intricate cables that create a beautiful texture and add depth to the design. It’s a great choice if you want to challenge yourself and learn some advanced knitting techniques.
2. Fair Isle Skull Cap: The Fair Isle skull cap is perfect for those who love colorful and vibrant designs. This pattern typically incorporates multiple colors and uses stranded knitting to create intricate patterns. It’s a great way to add a pop of color to your winter wardrobe and keep your head warm at the same time.
3. Lace Skull Cap: If you prefer a more delicate and feminine look, the lace skull cap is a great choice. This pattern typically incorporates lace motifs and creates an elegant and airy design. It’s perfect for special occasions or when you want to add a touch of elegance to your everyday outfit.
4. Slouchy Skull Cap: For a more relaxed and casual look, consider knitting a slouchy skull cap. This pattern typically features a looser fit and a longer length, allowing you to wear it in a variety of ways. It’s a great choice if you want to add some style to your outfit while keeping it comfortable and laid-back.
- Conclusion:
These are just a few examples of alternative skull cap knitting patterns that you can try. Whether you’re looking for a more intricate design or a relaxed and casual style, there’s a pattern out there that will suit your preferences. So why stick to the same old pattern when you can experiment with different styles and create a unique and personalized skull cap?
Troubleshooting tips for common issues in skull cap knitting projects
Knitting a skull cap can be a fun and rewarding project, but sometimes you may encounter some common issues along the way. Here are some troubleshooting tips to help you overcome these challenges and successfully complete your skull cap.
Tangled or knotted yarn
If you find yourself with tangled or knotted yarn while knitting your skull cap, the best approach is to take a deep breath and remain calm. Trying to forcibly untangle the yarn can make the situation worse. Instead, gently pull the knot apart or carefully unravel the tangle using your fingers. If the knot is too tight to untangle, you may need to cut the yarn and rejoin it, weaving in the ends later to secure them.
Uneven or inconsistent tension
Having uneven or inconsistent tension in your skull cap can affect the overall appearance and fit. One way to avoid this issue is to pay attention to the way you hold your knitting needles. Make sure your grip is relaxed and not too tight. Additionally, try using stitch markers to help keep your tension consistent throughout the project. If you notice uneven tension in your work, you can also try blocking the finished skull cap to help even out the stitches.
Wrong gauge or size
It can be frustrating to realize that your skull cap doesn’t fit properly or that you’ve gotten the wrong gauge. To avoid this problem, it’s important to check your gauge before starting the project. If your stitches per inch don’t match the pattern, you may need to use a different needle size or adjust your tension. If you’ve already started knitting and notice that the size is off, you can try changing the needle size or adjusting the number of stitches to achieve the desired fit.
Errors in the pattern
While using a skull cap knitting pattern, you may come across errors or confusing instructions. If you encounter this issue, double-check the pattern for any errata or corrections that may have been published by the designer or on the publisher’s website. Additionally, don’t hesitate to reach out to the knitting community for help and clarification. Online forums and social media groups dedicated to knitting can be great resources for troubleshooting pattern issues.
In conclusion, knitting a skull cap can be a rewarding project, but it’s important to be prepared for some common issues that may arise. By following these troubleshooting tips and staying patient, you’ll be able to overcome any challenges that come your way and successfully complete your skull cap.