
If you’re a yoga enthusiast and like to take your mat with you everywhere you go, a knitted yoga mat bag is a must-have accessory. Not only will it keep your mat clean and protected, but it’ll also add a touch of style to your practice. Plus, knitting your own yoga mat bag allows you to customize it to your liking, choosing colors and patterns that speak to you.
This article will provide you with a knitted yoga mat bag pattern that’s suitable for all skill levels. Whether you’re a beginner or an experienced knitter, you’ll find this pattern easy to follow and rewarding to complete. The bag is knitted in the round, using circular needles, which means there’s no need for seaming. It features a drawstring closure to keep your mat secure and a comfortable strap for easy carrying.
To get started, gather your materials, including your favorite yarn in the color of your choice, circular needles, a set of double-pointed needles, and a stitch marker. Then, simply follow the step-by-step instructions provided in this pattern. In no time, you’ll have a beautiful knitted yoga mat bag that’s sure to turn heads at your next yoga class.
Knitted Yoga Mat Bag Pattern
Are you tired of carrying your yoga mat around with you? Do you wish there was a stylish and convenient way to transport it? Look no further than this knitted yoga mat bag pattern! With just a few simple steps, you can create a beautiful and functional bag to hold your yoga mat.
To begin, gather your materials. You will need:
- Yarn in your preferred color
- Knitting needles
- A crochet hook
- A tape measure
- A button or zipper for closure
Once you have all your materials ready, you can start knitting. Begin by casting on the desired number of stitches, depending on the width of your mat. Then, work in stockinette stitch until the desired length of the bag is reached.
Next, you will need to create the strap for your bag. This can be done by knitting a long strip of fabric, or by crocheting a chain of stitches. Attach the strap to the sides of the bag, making sure it is securely fastened.
To finish off your bag, you can choose to add a closure. This can be done by sewing on a button or attaching a zipper. Make sure the closure is placed in a convenient location and allows for easy access to your mat.
Once your bag is complete, you can proudly carry your yoga mat to your next class. The knitted fabric will protect your mat and keep it clean, while the strap ensures easy transport. Enjoy your knitting project and happy yoga practice!
Why you need a yoga mat bag
Transporting your yoga mat to and from class can be a hassle without a proper bag. Investing in a good quality yoga mat bag can make your life much easier, while also protecting your mat from damage and dirt.
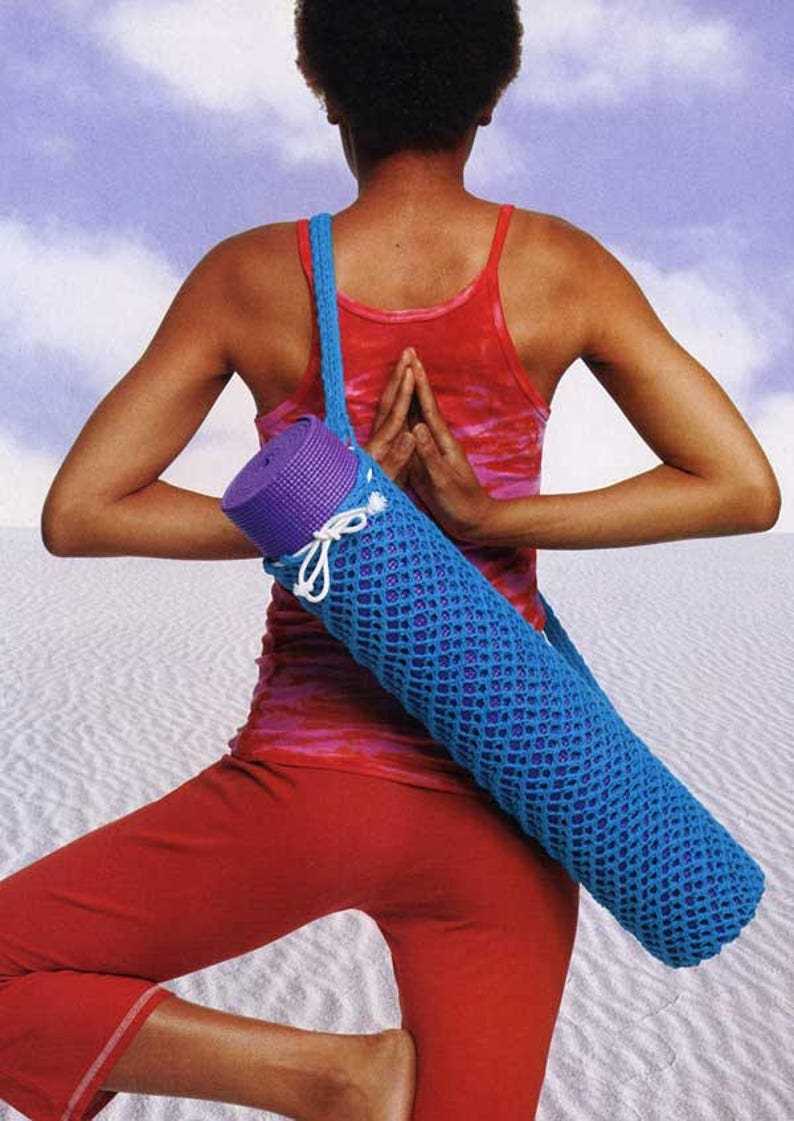
A yoga mat bag serves as a convenient and practical solution to carry your mat comfortably on your back or shoulder. It provides a dedicated space for your mat, helping to keep it clean and preventing it from unrolling or getting tangled with other belongings.
Organization: Yoga mat bags often come with additional storage compartments, allowing you to carry all your yoga essentials in one place. You can easily fit in your towel, water bottle, phone, and keys, eliminating the need for multiple bags or having to juggle various items.
Protection: A good yoga mat bag will provide cushioning and protection to your mat, preventing it from getting dents, scratches, or any other damage. This is particularly important if you have invested in a premium quality mat that you want to keep in perfect condition for a long time.
Portability: Carrying a rolled-up yoga mat can be cumbersome, especially if you have to travel long distances or use public transportation. A yoga mat bag offers a more convenient way to transport your mat, allowing you to walk, bike, or commute with ease.
Style: Apart from the practical aspects, yoga mat bags also come in a variety of designs, colors, and materials, allowing you to express your personal style. You can choose a bag that matches your yoga clothing, or opt for a more unique and eye-catching design that reflects your personality.
Benefits of using a knitted yoga mat bag
Yoga has become a popular form of exercise and relaxation, and many people enjoy the benefits it brings to their physical and mental well-being. If you practice yoga regularly, having a knitted yoga mat bag can enhance your experience in several ways.
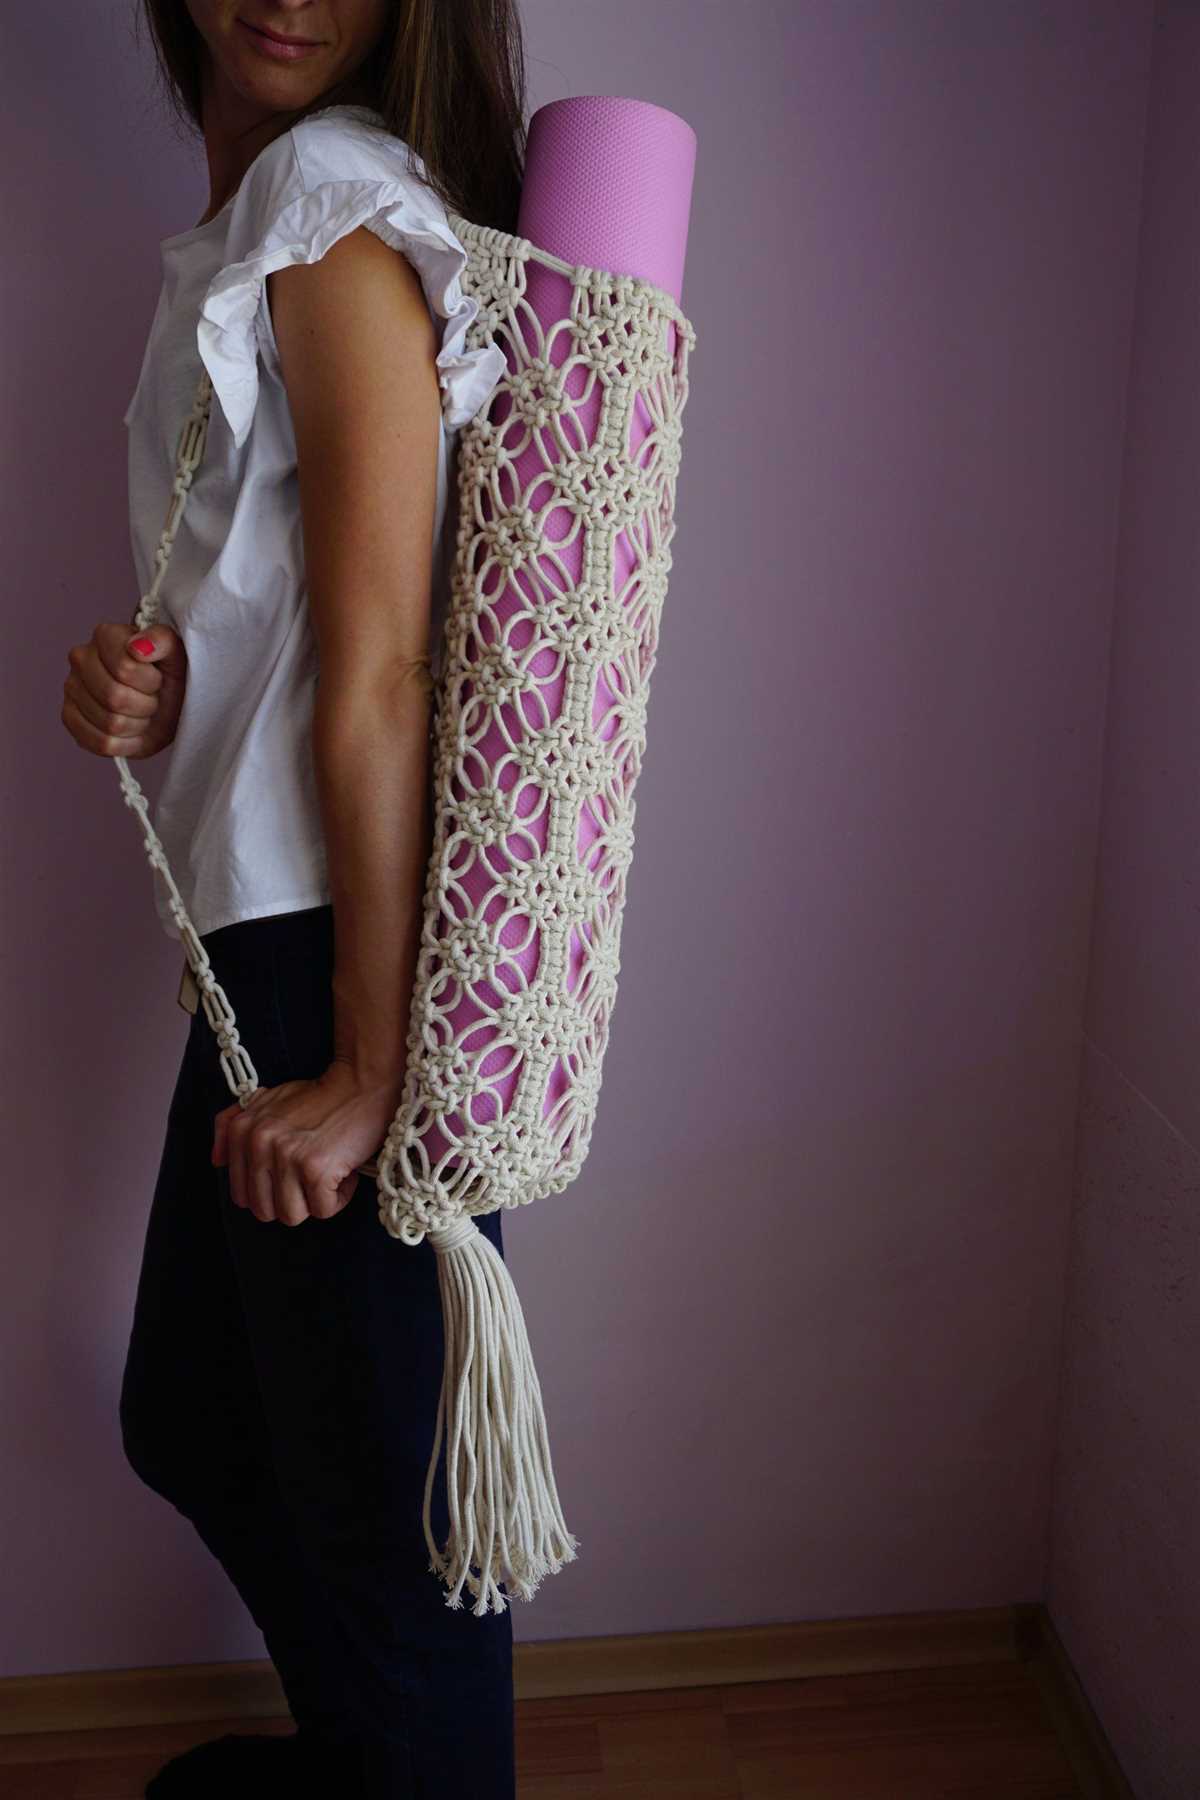
1. Easy transportation and storage

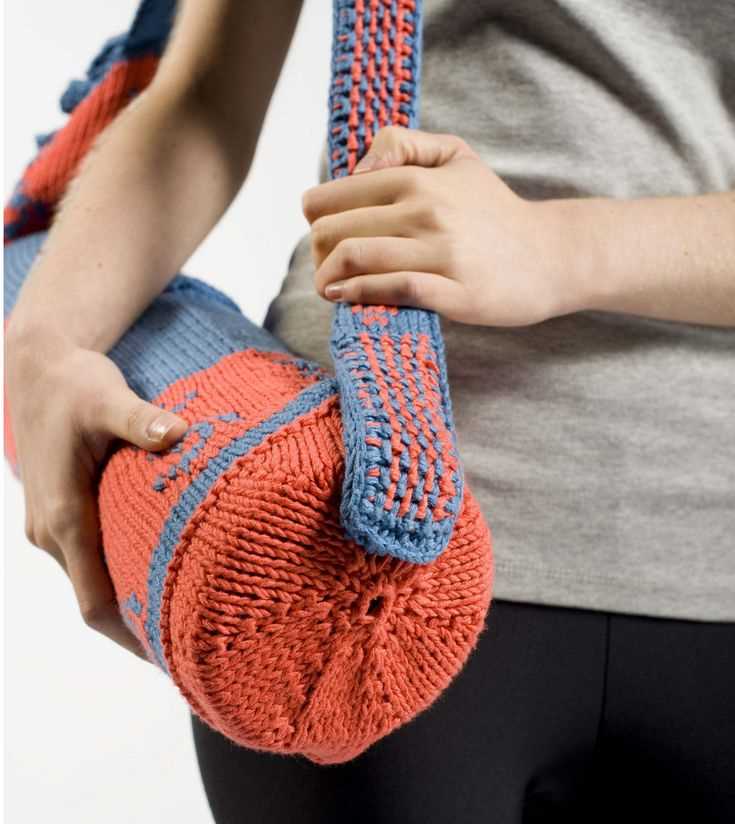
A knitted yoga mat bag provides a convenient solution for transporting and storing your yoga mat. The bag is designed to fit a standard-sized yoga mat and typically has a long strap that allows you to carry it comfortably over your shoulder. This means you can easily take your yoga mat with you to the studio, gym, or wherever you choose to practice, without worrying about it getting dirty or damaged.
2. Protection for your yoga mat
Yoga mats can be quite expensive, and it’s important to take care of them to ensure they last a long time. A knitted yoga mat bag offers an extra layer of protection for your mat, keeping it safe from dirt, moisture, and other potential damage. The bag’s sturdy construction and close-knit pattern help to protect the mat from accidental bumps or scratches, extending its lifespan.
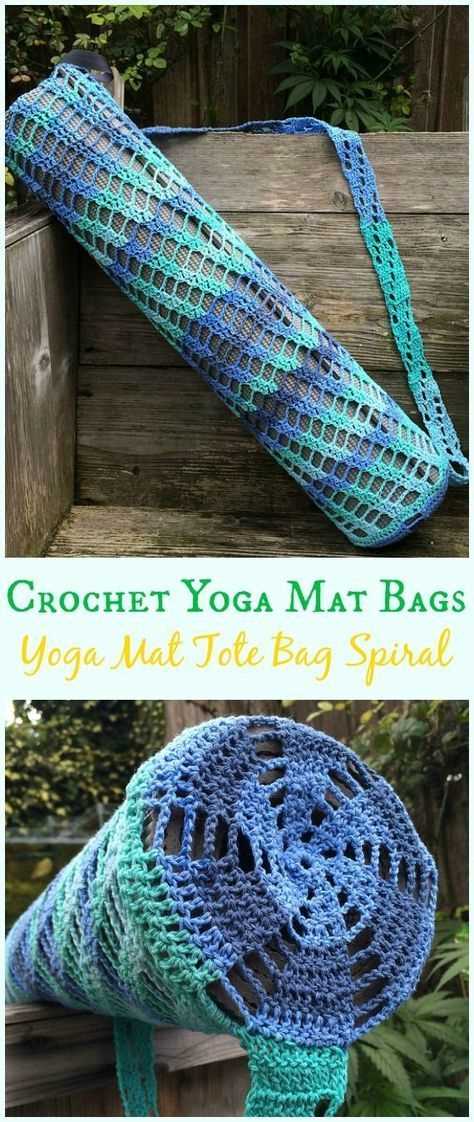
3. Stylish and customizable
One of the benefits of choosing a knitted yoga mat bag is that it adds a stylish touch to your yoga practice. Knitted bags come in a variety of designs, colors, and patterns, allowing you to express your personal style and make a fashion statement. Additionally, many knitters enjoy the process of creating their own bag, as it gives them an opportunity to customize the design and showcase their knitting skills.
4. Eco-friendly option
If you’re conscious about the environment, opting for a knitted yoga mat bag is a sustainable choice. Knitting is often considered a more eco-friendly alternative to mass-produced bags made from synthetic materials. By using a knitted bag, you’re reducing your carbon footprint and contributing to a more sustainable lifestyle.
5. Versatile usage
A knitted yoga mat bag can also have multiple uses beyond carrying your yoga mat. It can serve as a multi-purpose bag for carrying your water bottle, towel, and other essentials to the studio. Additionally, some knitted bags come with additional pockets or compartments, allowing you to keep your phone, keys, and wallet organized and easily accessible during your yoga practice.
In conclusion, using a knitted yoga mat bag offers numerous benefits, including easy transportation and storage, protection for your mat, style customization, eco-friendliness, and versatility. Consider investing in a knitted yoga mat bag to enhance your yoga practice and enjoy these advantages.
Materials required for the project
To create a knitted yoga mat bag, you will need the following materials:
- Yarn: Choose a soft and durable yarn that is suitable for knitting. You will need approximately 400-500 yards of yarn, depending on the size of your bag.
- Knitting needles: Use circular knitting needles in the appropriate size for your chosen yarn. The size of the needles will depend on your desired gauge and the thickness of your yarn.
- Stitch markers: These will help you keep track of your stitches and designate important points in the pattern.
- Tape measure: Use a tape measure to ensure that you are achieving the correct dimensions and gauge as you knit your bag.
- Scissors: You will need a pair of scissors to cut your yarn and trim any loose ends.
- Yarn needle: This tool is essential for weaving in loose ends and finishing your knitting project.
Once you have gathered all the necessary materials, you will be ready to start knitting your yoga mat bag. Make sure to choose high-quality materials that will provide durability and comfort for your bag.
Step-by-Step Instructions for Knitting the Bag
Knitting your own yoga mat bag can be a fun and rewarding project. With just a few materials and simple stitches, you can create a stylish and functional bag to carry your yoga mat. Follow these step-by-step instructions to get started:
Materials Needed:
- Worsted weight yarn in the color of your choice
- Size 8 knitting needles
- Tapestry needle
- Scissors
Step 1: Cast on
Start by casting on 60 stitches using the long-tail cast-on method. This will create the foundation for your bag.
Step 2: Knit the body
Row 1: Knit across all stitches.
Row 2: Purl across all stitches.
Repeat these two rows until the bag reaches your desired length, typically around 24 inches.
Step 3: Create the drawstring casing
Knit across the first 10 stitches of the next row.
Purl across the next 40 stitches.
Knit across the last 10 stitches.
Repeat this row for the next 5 rows to create the drawstring casing.
Step 4: Bind off
Bind off all stitches, leaving a long tail for sewing the bag together later.
Step 5: Fold and sew the bag
Fold the knitted piece in half, with the right sides facing each other. Use the tail from the bind off to sew the side seams of the bag using a mattress stitch or your preferred sewing method.
Step 6: Add the drawstring
Thread a length of yarn through the drawstring casing using the tapestry needle. Tie the ends of the yarn together to create the drawstring for your bag.
And there you have it, your very own knitted yoga mat bag! Now you can proudly carry your yoga mat to your next class in style.
Choosing the right yarn for your bag
When it comes to knitting a yoga mat bag, choosing the right yarn is essential. The yarn you select will determine the durability, strength, and overall look of your finished bag. Here are a few factors to consider when choosing the yarn for your knitted yoga mat bag:
Type of yarn:
There are various types of yarn available on the market, including cotton, acrylic, wool, and blends. Each type of yarn has its own characteristics and advantages. Cotton yarn is breathable and absorbent, making it an excellent choice for yoga mat bags that may get sweaty during practice. Acrylic yarn is durable and easy to care for, making it a great option for frequent use. Wool yarn provides warmth and insulation, making it suitable for colder climates. Consider the qualities you desire in your bag and choose the appropriate type of yarn accordingly.
Weight of yarn:
The weight of yarn refers to its thickness. The weight of yarn you choose will affect the size and drape of your bag. Thicker yarns, such as bulky or chunky weight, will create a sturdy and substantial bag. They may also work up faster due to their larger size. On the other hand, thinner yarns, like fingering or sport weight, will result in a lightweight and more delicate bag. Consider the desired final look and feel of your bag and choose the weight of yarn that best suits your preferences.
Color and texture:
The color and texture of the yarn can significantly impact the appearance of your yoga mat bag. Think about the overall aesthetic you want to achieve and choose a yarn color that complements your style and taste. Additionally, consider if you want a yarn with a smooth texture or one with more texture, such as a bouclé or tweed yarn. The texture can add visual interest and dimension to your finished bag. It’s helpful to swatch different yarns to see how they look and feel before committing to a specific yarn for your project.
By considering the type, weight, color, and texture of the yarn, you can make an informed decision when choosing the perfect yarn for your knitted yoga mat bag. Take your time to explore different options and remember to prioritize the qualities that are important to you and your practice. Happy knitting!
Adding Style to Your Bag with Different Stitch Patterns
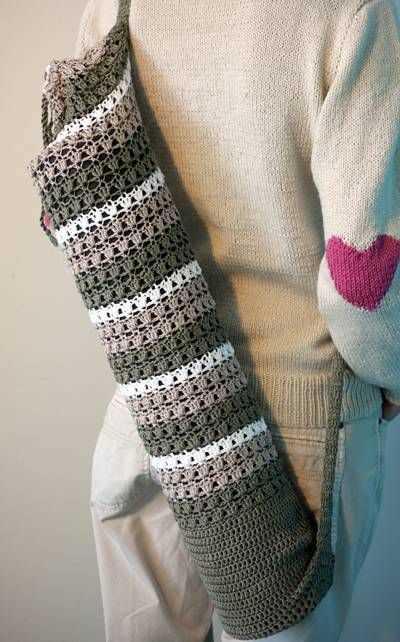
When it comes to knitting a yoga mat bag, choosing the right stitch pattern can make all the difference in terms of style and visual appeal. While a simple stockinette stitch can create a clean and minimalist look, incorporating different stitch patterns can add texture, interest, and even a touch of sophistication to your bag.
One popular stitch pattern to consider is the seed stitch. This pattern creates a dense, bumpy texture that adds depth and visual interest to your bag. The seed stitch is achieved by alternating between knit and purl stitches in a specific pattern, resulting in a fabric that is both visually appealing and durable.
Check out these stitch patterns to consider for your knitted yoga mat bag:
- Mock Cable Stitch: This stitch pattern creates the illusion of cables without the need for a cable needle. It involves a combination of knit and purl stitches to mimic the look of a traditional cable. The mock cable stitch adds a touch of elegance to your bag, making it a stylish choice.
- Ribbing: Ribbing is a classic stitch pattern that creates vertical columns of knit and purl stitches. This pattern not only adds texture but also provides elasticity to your bag, ensuring a snug fit for your yoga mat.
- Lace Stitch: For those looking for a more delicate and feminine touch, a lace stitch pattern can be a great choice. Lace patterns typically involve yarnovers and decreases to create an open, airy fabric. Incorporating lace stitches into your bag can make it look elegant and sophisticated.
- Cable Stitch: If you prefer a more traditional and timeless look, cable stitches can be a great option. Cables are created by crossing stitches over each other, resulting in a raised pattern that adds depth and texture to your bag. Cable stitches can give your bag a classic and sophisticated appearance.
By choosing the right stitch pattern for your knitted yoga mat bag, you can enhance its style and create a unique and visually appealing accessory. Experiment with different stitch patterns to find the one that best complements your personal style and expresses your creativity.
Tips for creating a sturdy and durable bag
When creating a knitted yoga mat bag, it is important to ensure that it is sturdy and durable enough to withstand the weight of the yoga mat and any other items that may be carried. Here are some tips to help you create a bag that will last:
Choose the right yarn
The yarn you choose plays a big role in the durability of your bag. Opt for a yarn that is strong and durable, such as a cotton or acrylic blend. Avoid using delicate or fuzzy yarns, as they may not hold up well over time.
Knit with a tight gauge
A tight gauge will help create a dense fabric that is less likely to stretch or break. Use smaller needles than recommended for the yarn to achieve a tight and sturdy fabric for your bag.
Reinforce stress points
The stress points of a bag, such as the bottom and the handles, are more likely to experience wear and tear. Reinforce these areas by knitting double strands of yarn or adding extra stitches to ensure they can handle the weight and repeated use.
Add a lining
Incorporating a lining into your knitted bag can add an extra layer of protection and stability. Choose a durable fabric, such as canvas or nylon, and sew it into the bag to provide added strength and prevent stretching.
Consider adding pockets or compartments
Adding pockets or compartments to your yoga mat bag can help distribute the weight more evenly and prevent strain on the main body of the bag. These additional storage spaces can also help organize smaller items and keep them from getting lost or damaged.
By following these tips, you can create a knitted yoga mat bag that is not only stylish but also strong and durable, ensuring it will last for many yoga sessions to come.
Customizing your bag with embellishments
Make your yoga mat bag truly unique by adding personalized embellishments. Whether you prefer a minimalistic look or enjoy adding pops of color and texture, there are endless possibilities for customizing your bag.
Embroidery: One way to add a personal touch to your bag is by incorporating embroidery. You can embroider your initials, a meaningful symbol, or a simple design onto the fabric. Choose embroidery thread in a complementary or contrasting color to make the design stand out.
Beads and sequins: Another option for embellishing your bag is by attaching beads or sequins. You can create patterns or designs using these decorative elements, or simply scatter them across the fabric for a whimsical look. Use a needle and thread to securely attach the beads or sequins to your bag.
Fabric appliqués: If you enjoy working with fabric, consider adding fabric appliqués to your bag. Cut out shapes or designs from different fabrics and adhere them to the bag using fabric glue or by sewing them on. You can create a collage effect or choose a single bold design to make a statement.
Pom poms and tassels: For a playful and bohemian touch, add pom poms or tassels to your bag. These fun embellishments can be easily made by wrapping yarn around a piece of cardboard or using pre-made ones. Attach them to the corners or edges of your bag using a needle and thread.
Remember to consider the functionality of your bag when adding embellishments. Make sure they won’t interfere with the bag’s opening and closing mechanism or become a hindrance during transportation. With a little creativity and the right embellishments, you can create a yoga mat bag that is uniquely yours and reflects your personal style.
How to Care for Your Knitted Yoga Mat Bag
A knitted yoga mat bag is not only a practical accessory for carrying your yoga mat, but it can also be a stylish addition to your yoga gear. To ensure that your knitted yoga mat bag stays in good condition and lasts for a long time, it’s important to give it proper care and maintenance.
1. Hand wash: Since knitted items can be delicate, it’s best to hand wash your yoga mat bag. Fill a sink or basin with lukewarm water and a mild detergent. Gently agitate the bag in the water, making sure to pay special attention to any soiled areas. Rinse the bag thoroughly with clean water and gently squeeze out any excess moisture. Avoid wringing or twisting the bag, as this can stretch or damage the knitted fibers.
2. Air dry: After washing, lay your yoga mat bag flat on a clean towel or drying rack to air dry. Avoid hanging the bag, as this can cause it to stretch out of shape. Reshape the bag as it dries to ensure it maintains its original form. It’s important to let the bag dry completely before storing or using it again.
3. Store properly: When not in use, store your knitted yoga mat bag in a cool, dry place. Avoid storing it in direct sunlight, as this can cause the colors to fade over time. Folding the bag neatly and placing it in a drawer or on a shelf will help prevent any unnecessary stretching or damage.
4. Repair any snags: If you notice any snags or loose threads on your yoga mat bag, it’s important to address them right away. Use a crochet hook or a needle to carefully pull the snagged yarn through to the wrong side of the bag, securing it in place. This will prevent further unraveling and keep your bag looking its best.
By following these simple care tips, you can ensure that your knitted yoga mat bag remains in great condition and continues to serve you well during your yoga practices for years to come.
Variations of the Bag Pattern
If you’d like to give your knitted yoga mat bag a personal touch, there are several variations of the pattern that you can try.
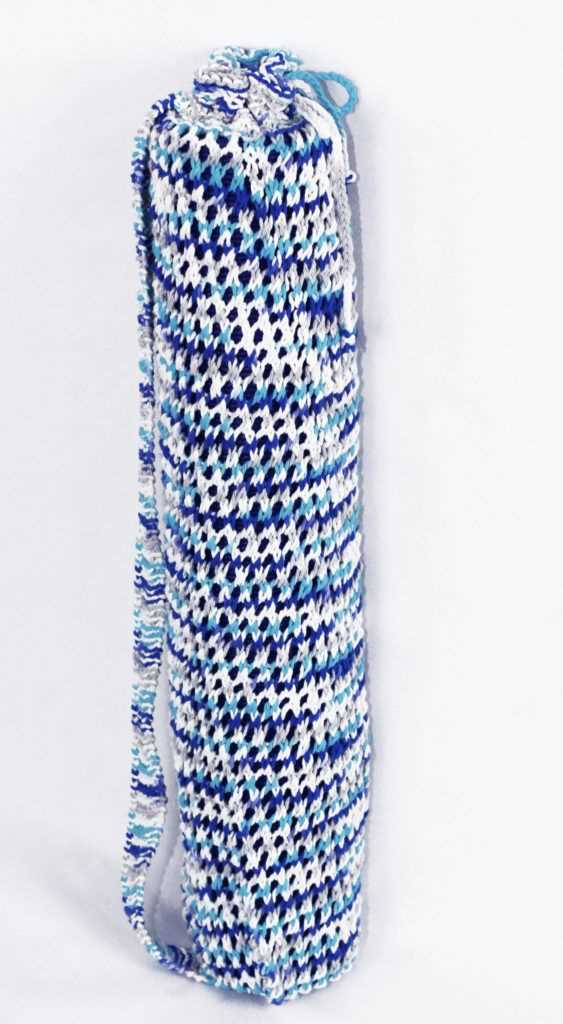
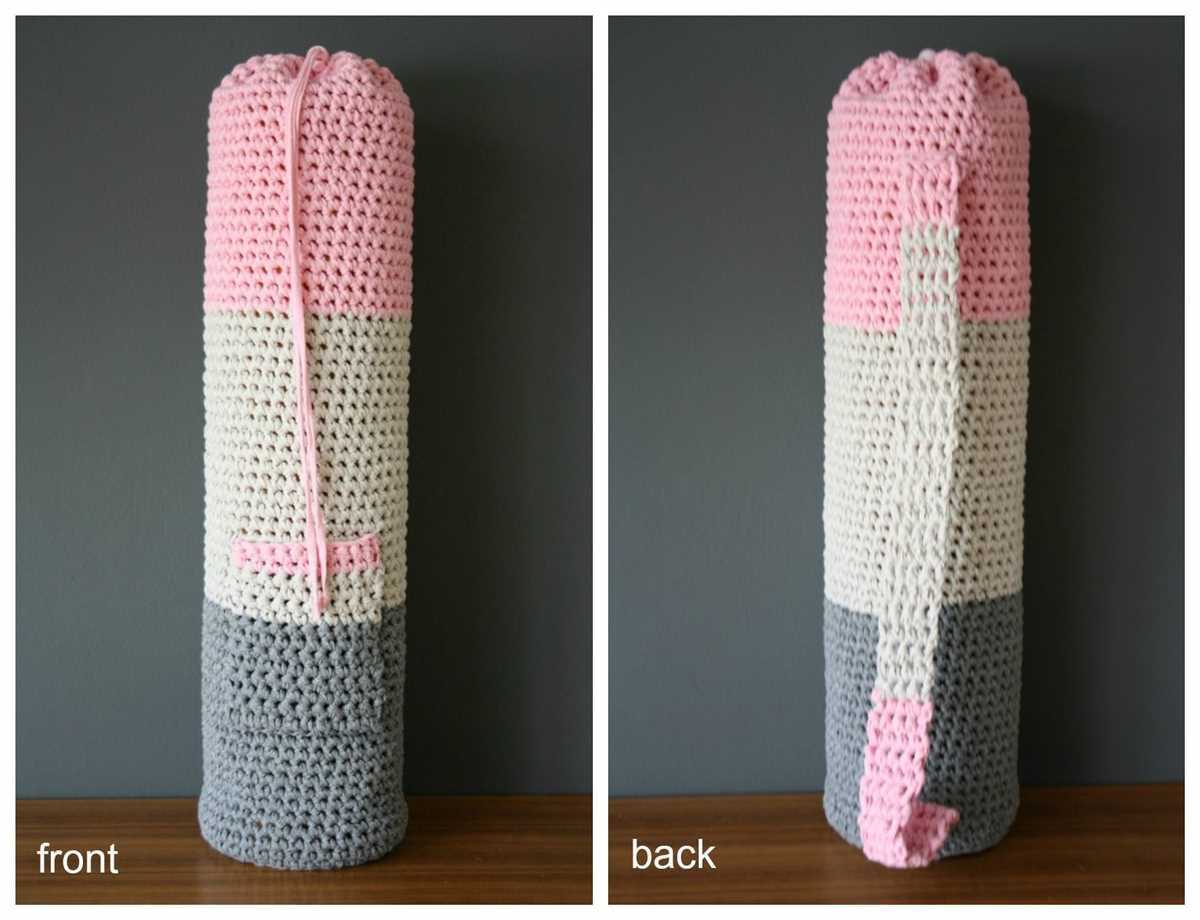
Color Options
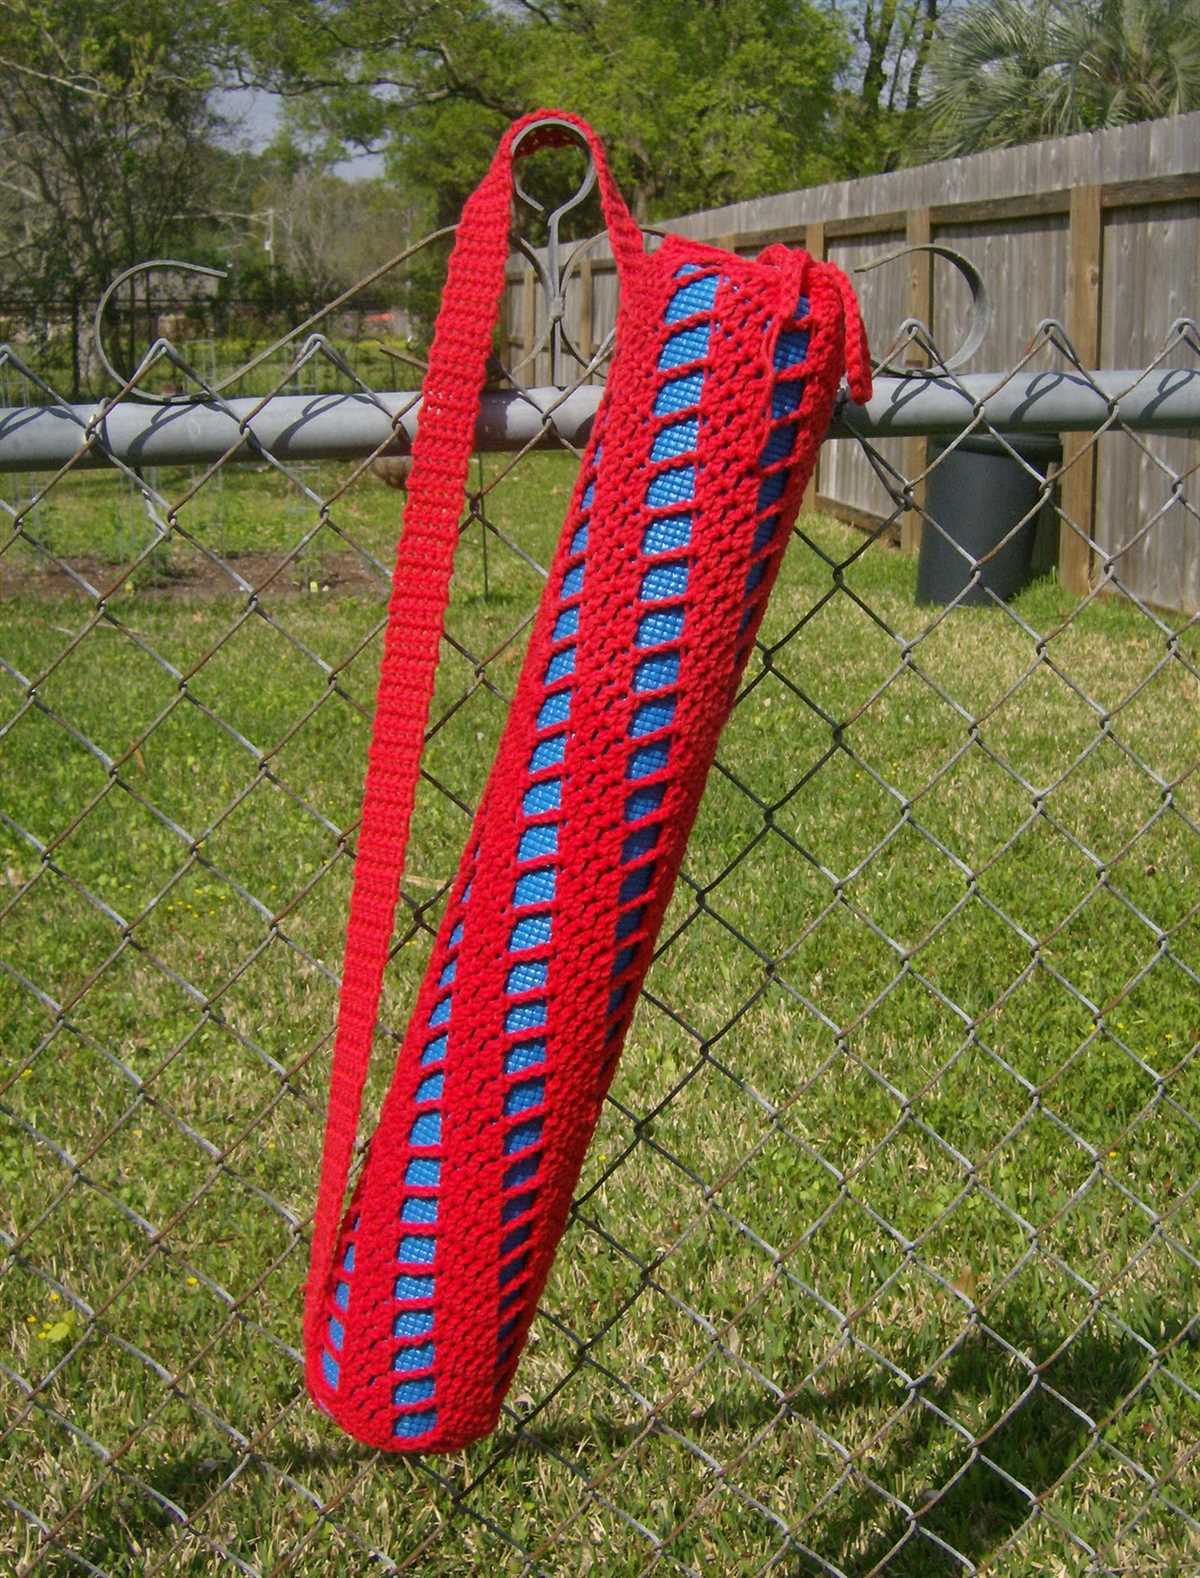
One way to make your bag unique is by playing with the color scheme. Instead of using a single color for the entire bag, you can opt for a multicolored design. You can create stripes of different colors or use variegated yarn to add more visual interest to your bag. Additionally, you can also experiment with different color combinations to match your personal style or yoga mat.
Pattern Stitch
Another variation you can try is using a different pattern stitch for your bag. The basic pattern usually involves knitting in the round with a simple stitch, but you can explore other stitch patterns such as ribbing, cables, or lacework to create a more intricate design. Just make sure to adjust your stitch count and gauge accordingly to ensure that the bag fits your yoga mat properly.
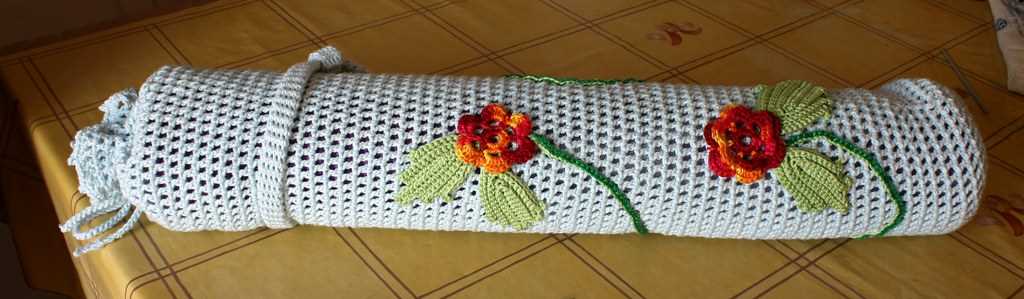
Embellishments
If you want to add some extra flair to your bag, consider adding embellishments. You can sew on buttons, beads, or crochet flowers to give your bag a decorative touch. Another option is to incorporate different knitting techniques, such as pom-poms or tassels, to add texture and dimension to your bag. Get creative and experiment with different embellishments to make your bag truly one-of-a-kind.
Size Adjustments
If you have a larger or smaller yoga mat, you can easily adjust the pattern to fit your specific needs. To make a bigger bag, you can cast on more stitches and add extra rounds to accommodate a larger mat. Conversely, if you have a smaller mat or prefer a more snug fit, you can decrease the number of stitches and rounds accordingly. Just be sure to keep track of your measurements and make any necessary adjustments to the pattern as you go.
Inspiring designs and color combinations
When it comes to designing your own knitted yoga bag, the possibilities are endless. You can choose from a wide range of patterns and color combinations to create a bag that not only reflects your personal style, but also enhances your yoga practice. Whether you prefer bold and vibrant colors or subtle and calming hues, there is a design out there that will inspire you.
One popular design idea is to incorporate different stitch patterns into your knitting. You can create geometric patterns, lacy details, or textured areas to add visual interest and dimension to your bag. Experimenting with stitch patterns can also help you practice new techniques and expand your knitting skills.
Another design option is to play with color combinations. You can choose two or more colors that complement each other and create a harmonious look. You can also use color blocking techniques to create bold and eye-catching designs. Mixing different shades and tones can add depth and richness to your bag, making it a true work of art.
If you’re feeling adventurous, you can also customize your bag with embroidery, beads, or other embellishments. This can add a unique and personal touch to your bag, making it truly one-of-a-kind.
Remember, the most important thing is to have fun and enjoy the process of creating your own knitted yoga bag. Let your creativity and imagination run wild, and don’t be afraid to try new things. With the right design and color combination, you’ll have a bag that not only looks great, but also makes you feel great during your yoga practice.
Q&A:
What is a knitted yoga mat bag pattern?
A knitted yoga mat bag pattern is a set of instructions or guidelines on how to knit a bag specifically designed to hold a yoga mat. The pattern typically includes details on the type of yarn, needles, and stitches to use, as well as step-by-step instructions on how to knit the bag.
Why would I want to knit a yoga mat bag?
Knitting a yoga mat bag allows you to create a personalized and unique accessory to carry your yoga mat. It can also be a fun and creative way to practice your knitting skills. Additionally, knitting your own bag can be more cost-effective and environmentally-friendly compared to buying a pre-made bag.
Where can I find a knitted yoga mat bag pattern?
You can find knitted yoga mat bag patterns in various places. Online knitting websites, such as Ravelry and Etsy, often have a wide selection of patterns available for purchase or for free. Additionally, you can find patterns in knitting magazines or books, or even create your own pattern by adapting existing bag patterns to fit the size of your yoga mat.
What materials do I need to knit a yoga mat bag?
To knit a yoga mat bag, you will typically need knitting needles, yarn, and a tapestry needle. The specific size of the needles and the type of yarn will depend on the pattern you choose. It’s important to choose a yarn that is durable and can withstand the weight of a yoga mat, as well as a needle size that will create a tight enough stitch to hold the mat securely.