
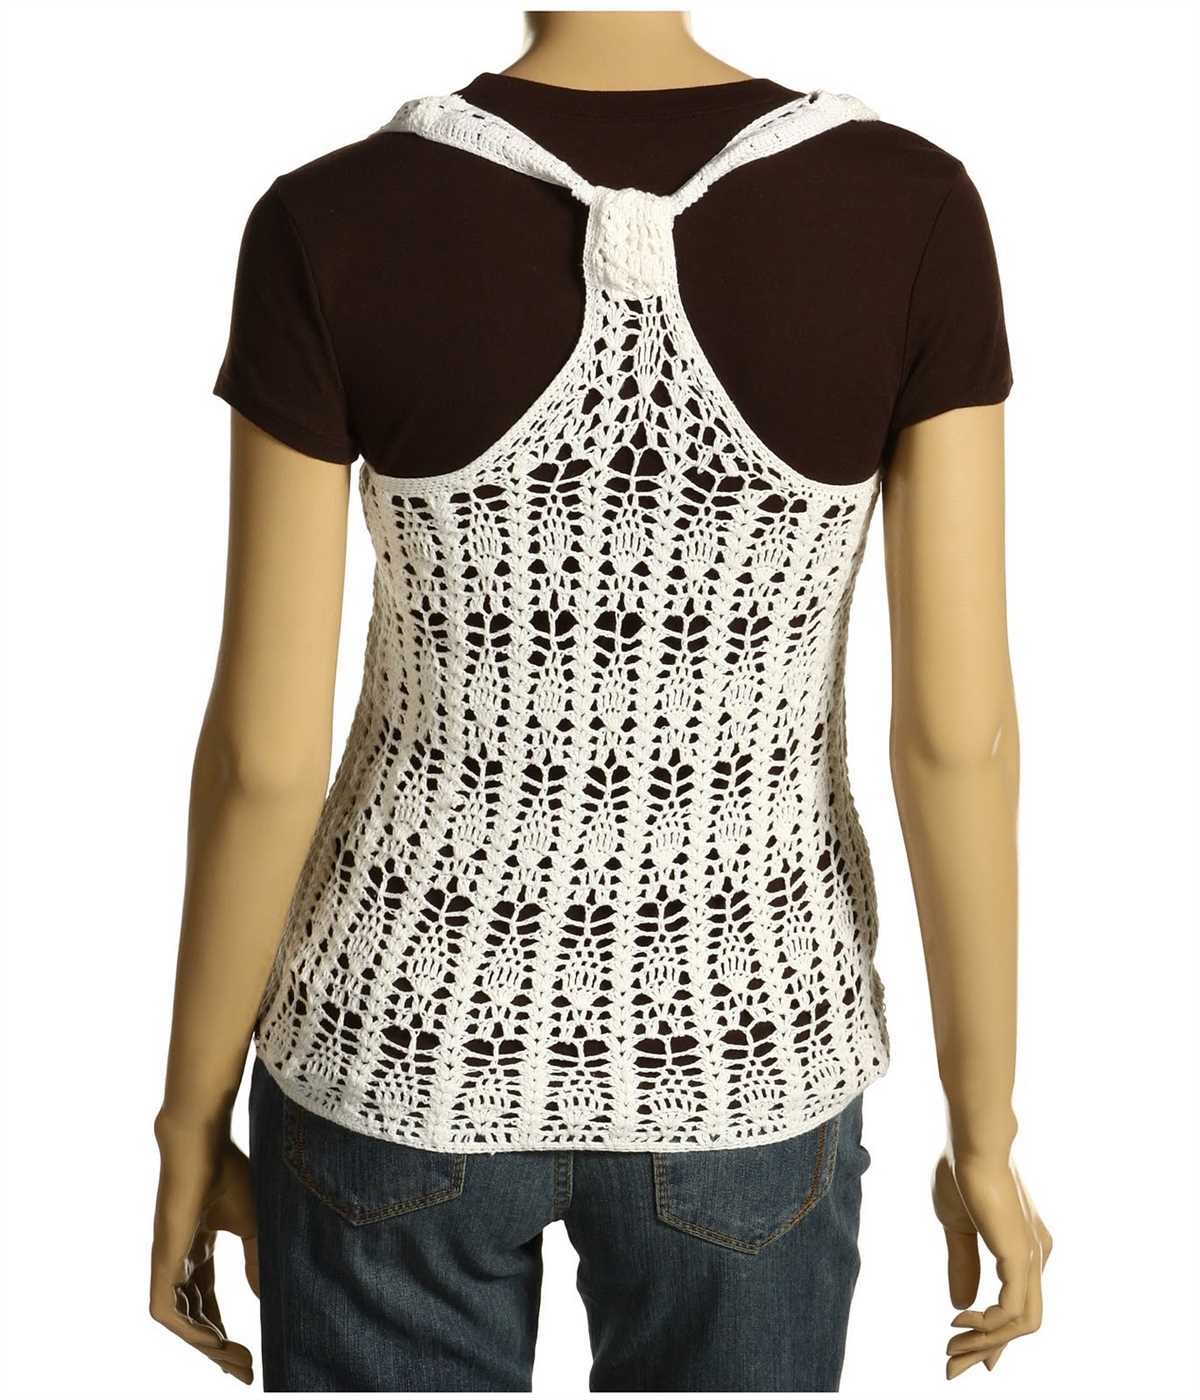
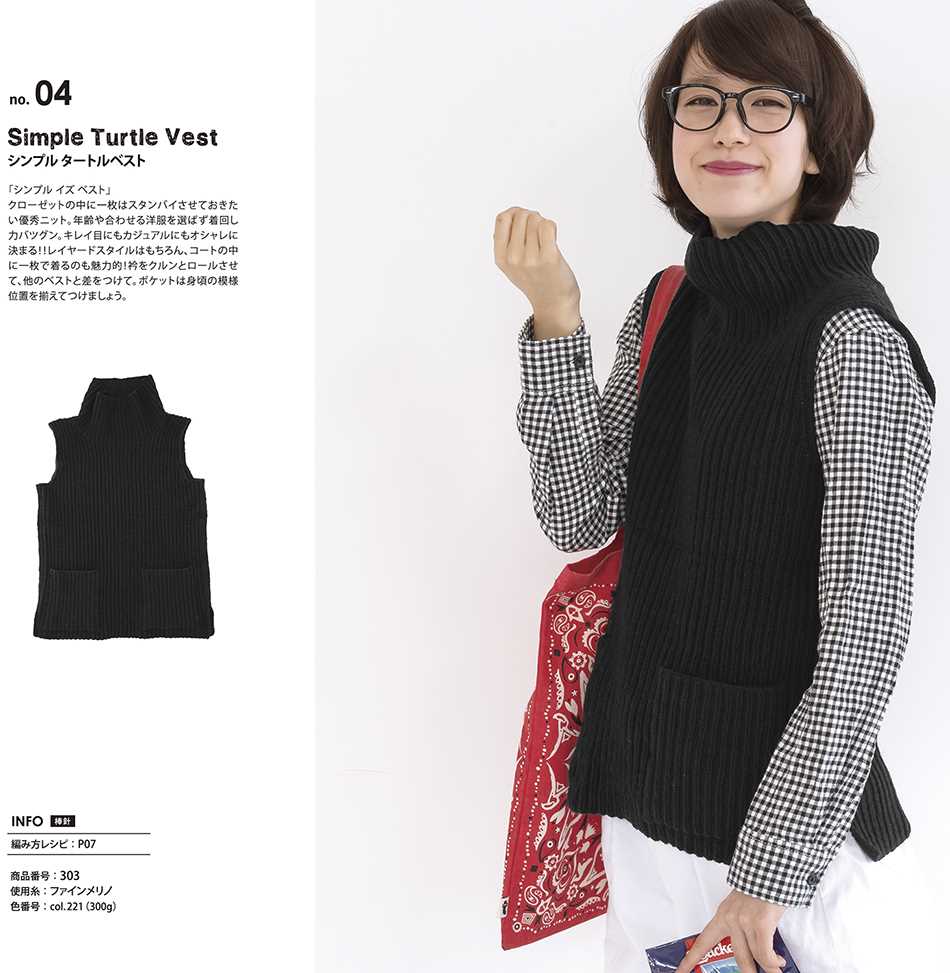
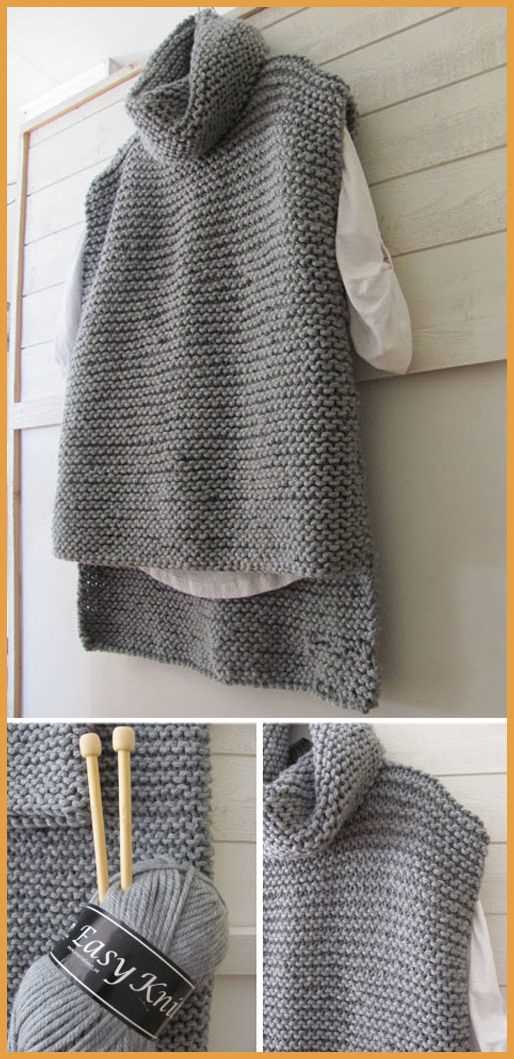
If you are a knitting enthusiast and love to create beautiful and fashionable garments, then this free knitted women’s vest pattern is perfect for you! Vests are a versatile clothing item that can be worn in any season and can be easily paired with different outfits. Whether you are a beginner or an experienced knitter, this pattern is suitable for all skill levels.
This pattern provides step-by-step instructions on how to create a stylish and cozy vest using basic knitting techniques. The pattern is designed to fit most women’s sizes and can be easily customized to suit your preferences. The best part is, this pattern is absolutely free!
By following this pattern, you will be able to knit a vest that is not only warm and comfortable but also trendy and fashionable. You can choose your favorite colors and yarns to create a unique and personalized vest that will be the perfect addition to your wardrobe. So, grab your knitting needles and start knitting this beautiful women’s vest today!
Choosing the right yarn for your vest
When knitting a women’s vest, one of the most important decisions you’ll have to make is choosing the right yarn. The yarn you select will not only affect the look and feel of your finished garment, but also its durability and ease of care. Here are a few factors to consider when making your choice:
1. Fiber Content:
The first thing you should consider is the fiber content of the yarn. Different fibers have different properties and characteristics. For a vest, you’ll want to choose a yarn that is breathable and comfortable to wear. Natural fibers like cotton, linen, or merino wool are great options as they are soft, lightweight, and have good moisture-wicking properties.
2. Weight and Gauge:
Another important factor to consider is the weight of the yarn and the gauge it produces. Your vest pattern will specify a recommended gauge, which is the number of stitches and rows per inch. It’s important to choose a yarn that will allow you to achieve the correct gauge. If the yarn is too thick or too thin, your vest may come out too big or too small. Most vest patterns will recommend a specific weight of yarn, such as fingering, sport, or worsted, so be sure to check the pattern for guidance.
3. Color and Texture:
The color and texture of the yarn will also play a role in the overall look of your vest. Consider the style and design of your pattern and choose a yarn color and texture that will complement it. Solid colors and smooth textures are versatile and can be dressed up or down, while variegated or textured yarns can add visual interest and dimension to your vest.
4. Care Instructions:
Lastly, consider the care instructions for the yarn. Some yarns may require special care, such as handwashing or dry cleaning, while others can be machine washed and dried. Think about how you plan to care for your vest and choose a yarn that aligns with your lifestyle and preferences.
By considering these factors and choosing the right yarn for your vest, you can ensure that your finished garment will not only be stylish but also comfortable and durable. Happy knitting!
Selecting the perfect needles
When starting a knitting project, one of the most important decisions you have to make is selecting the perfect needles. The choice of needles can greatly influence the outcome of your project, so it’s important to choose wisely.
Material: Knitting needles can be made of various materials, such as wood, metal, or plastic. Each material has its own unique characteristics. Wood needles are known for their warmth and smoothness, while metal needles provide speed and durability. Plastic needles are often preferred for their lightness.
Size: The size of the needles determines the size of the stitches. It is essential to match the needle size with the recommended gauge in your knitting pattern. Using the wrong size of needles can result in a project that is too tight or too loose.
Note: Gauge refers to the number of stitches and rows per inch in a knitted fabric. To achieve the desired gauge, choose needles that give you the same number of stitches as indicated in the pattern.
Type: There are different types of needles, such as straight needles, circular needles, and double-pointed needles. The type of needles you choose depends on the type of project you’re working on. Straight needles are commonly used for flat projects, like scarves or blankets. Circular needles are versatile and can be used for both flat and circular projects. Double-pointed needles are typically used for small, circular projects, like socks or gloves.
Length: The length of the needles is another factor to consider. Longer needles are suitable for larger projects, as they can hold more stitches, while shorter needles are more convenient for smaller projects. It’s important to choose the appropriate length to ensure comfortable and efficient knitting.
In conclusion, selecting the perfect needles involves considering the material, size, type, and length. By taking these factors into account, you can ensure a successful and enjoyable knitting experience.
Understanding the basic stitches
In order to create a knitted women’s vest, it is essential to understand the basic stitches used in knitting. These stitches form the foundation of the pattern and determine the overall look and texture of the final product.
Garter stitch: This stitch is created by knitting every stitch in every row, resulting in a fabric with ridges. It is one of the easiest stitches to learn and is often used as a beginner pattern. The garter stitch provides a lot of stretch and is great for creating warm and cozy garments.
Stockinette stitch: The stockinette stitch is created by alternating rows of knitting and purling stitches. This creates a smooth fabric with a “v” pattern on one side and a bumpy texture on the other side. It is one of the most common stitches used in knitting and is perfect for creating a sleek and polished look.
Ribbing: Ribbing is a stitch pattern that is commonly used for cuffs, collars, and edges. It is created by alternating knit and purl stitches in a specific pattern, such as knit two stitches, purl two stitches. Ribbing provides added stretch and elasticity to garments, making them more comfortable to wear.
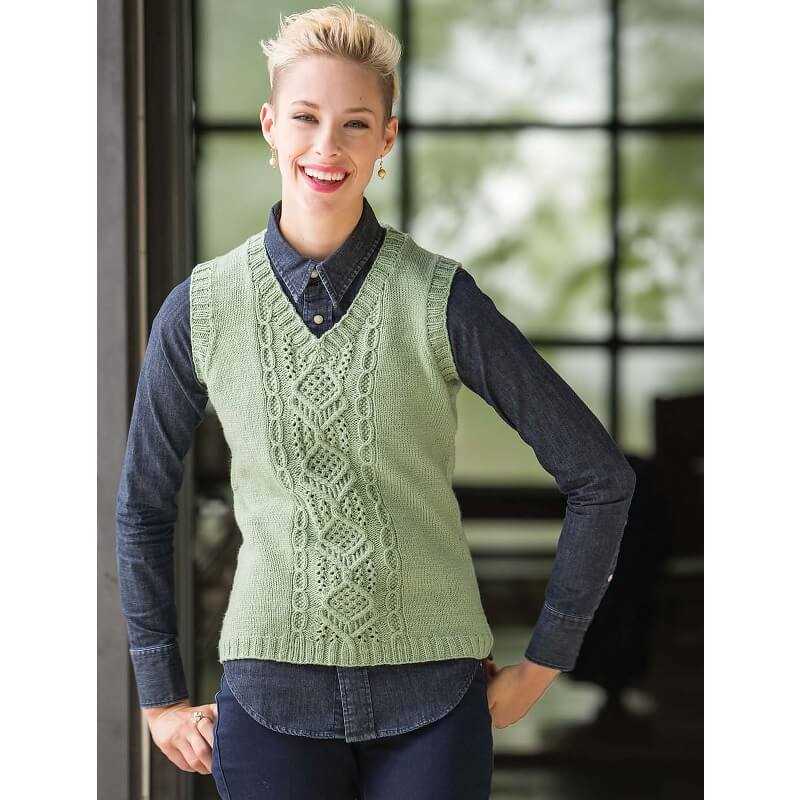
Seed stitch: The seed stitch is a textured stitch pattern that is created by alternating knit and purl stitches across rows. This stitch creates a fabric with small, raised bumps, resembling seeds. It adds visual interest and depth to the knitted fabric and is often used for decorative purposes.
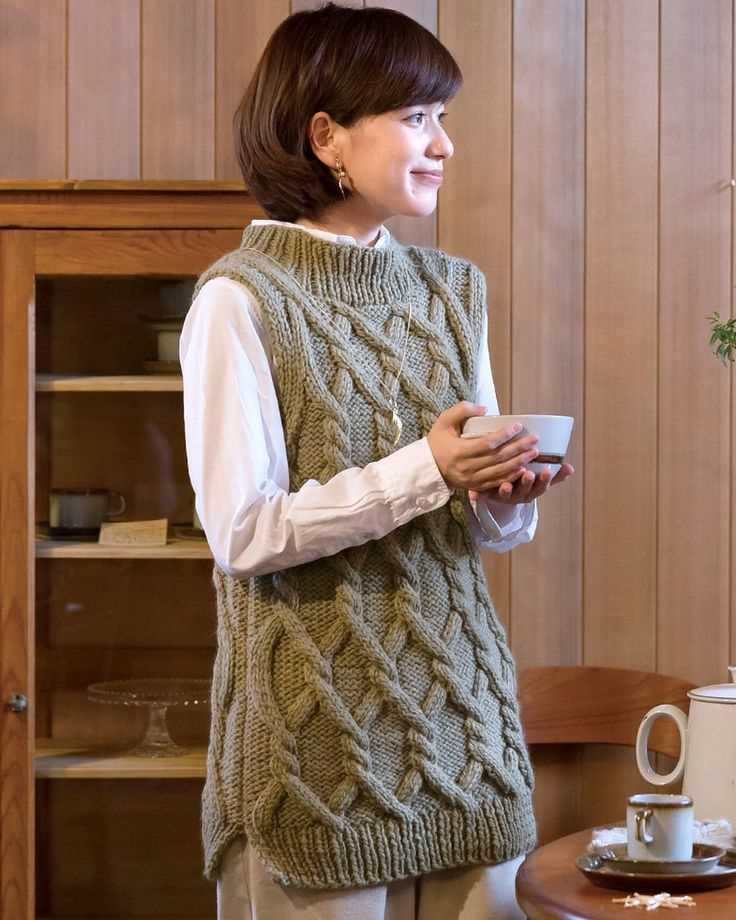
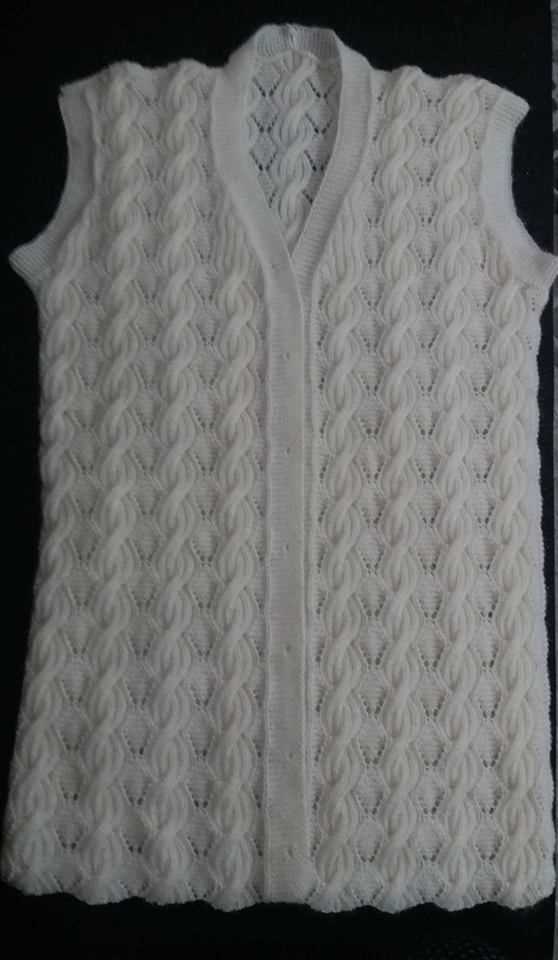
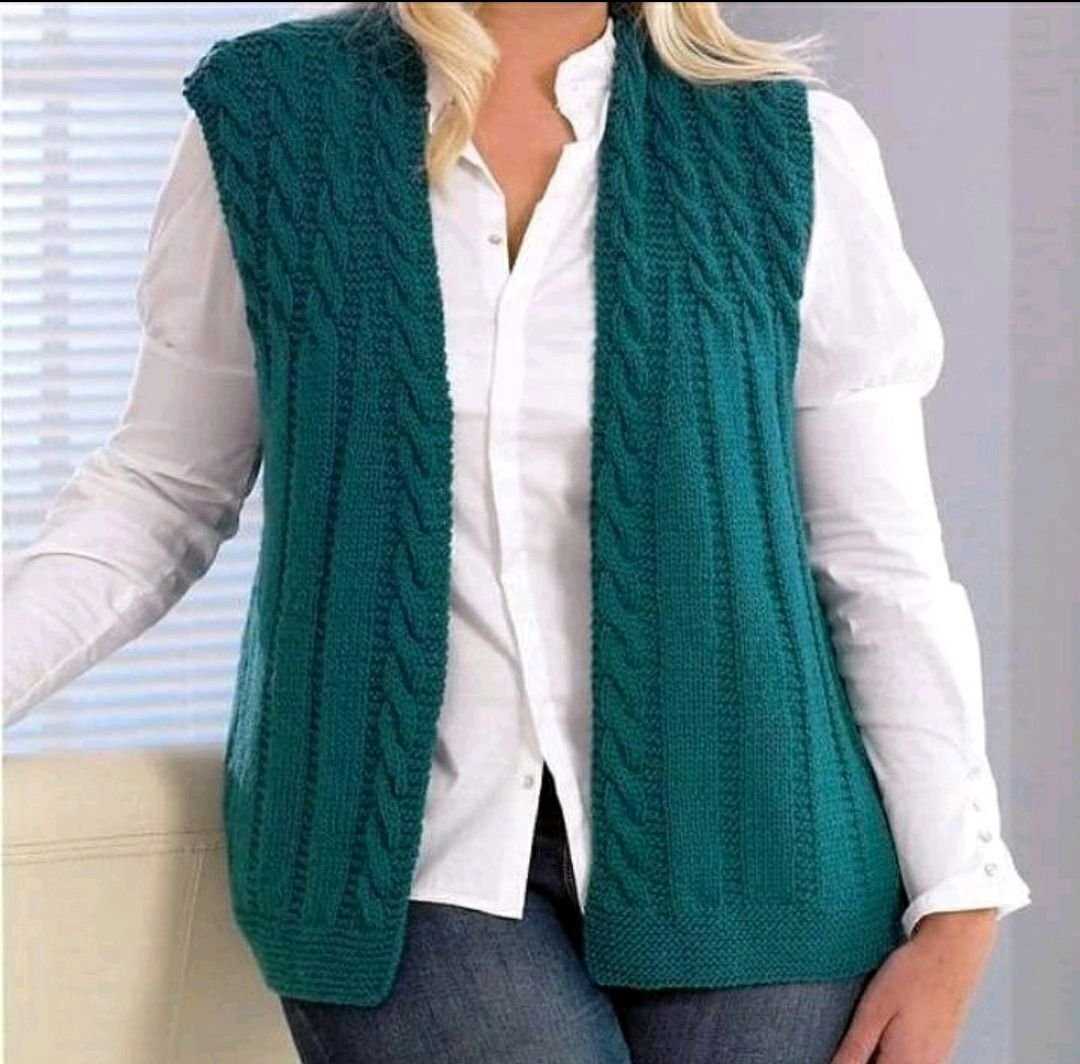
Cables: Cable stitches are created by crossing stitches over each other, resulting in a braided or twisted pattern. This stitch creates a beautiful and intricate design that adds depth and texture to the fabric. Cables are often used in more advanced knitting patterns and can be challenging for beginners.
Understanding these basic stitches is crucial for successfully knitting a women’s vest pattern. By mastering these stitches, knitters can create a variety of textures and patterns, allowing them to customize their projects to their liking.
Tips for successful pattern reading
Reading a knitting pattern can sometimes be confusing, especially if you are new to knitting or unfamiliar with certain knitting terms. However, with a few tips and some practice, you can become proficient in reading patterns and successfully complete your knitting projects.
1. Understand the abbreviations: Knitting patterns often use abbreviations for different stitches and techniques. Make sure to familiarize yourself with these abbreviations before you start reading the pattern. You can find a list of common knitting abbreviations online or in knitting reference books. It is also helpful to keep a knitting abbreviation cheat sheet handy while working on your project.
2. Read the pattern thoroughly: Before you begin knitting, take the time to read the entire pattern from start to finish. This will give you an overall understanding of the project and help you anticipate any challenging sections or techniques. Pay attention to any special instructions or notes provided by the pattern designer.
3. Take note of the gauge: Gauge is an important measurement that ensures your finished project will be the correct size. Before you start knitting, check the gauge information provided in the pattern. If your gauge does not match the pattern’s gauge, you may need to adjust your needle size or tension to achieve the correct gauge.
4. Use stitch markers: Stitch markers are helpful tools that can help you keep track of your stitches and make it easier to follow the pattern instructions. Place a stitch marker at the beginning of each pattern repeat or at key points in the pattern, such as where increases or decreases are made.
5. Make use of a row counter: A row counter is another useful tool that can help you keep track of your rows and easily refer back to the pattern instructions. You can use a physical row counter or download a row counting app on your smartphone or tablet.
6. Take breaks and rest your eyes: Reading a pattern for an extended period of time can strain your eyes and make it difficult to concentrate. Take regular breaks, rest your eyes, and stretch your hands and fingers to prevent fatigue.
7. Ask for help if needed: If you come across a section of the pattern that you do not understand or need clarification on, do not hesitate to ask for help. Reach out to fellow knitters, join knitting communities online, or consult knitting tutorials and videos for additional guidance.
By following these tips and practicing with different patterns, you will become more comfortable with pattern reading and be able to tackle more complex knitting projects with confidence.
How to cast on for your vest project
Before you begin knitting your women’s vest, you will need to cast on to your knitting needles. This is the process of creating the foundation row of stitches that will form the base of your project. Here is a step-by-step guide on how to cast on for your vest:
1. Choose your cast on method
There are several different methods for casting on in knitting, and the one you choose will depend on your personal preference and the effect you want to achieve. Some common cast on methods include the long tail cast on, the knit cast on, and the cable cast on. Research different methods and choose the one that you find most comfortable and suitable for your project.
2. Prepare your yarn and needles
Before you begin casting on, make sure you have the appropriate yarn and knitting needles for your project. Consult the pattern instructions to determine the recommended yarn weight and needle size. Ensure that your yarn is wound into a ball or skein, and that your needles are clean and free from any damage.
3. Make a slipknot
To start your cast on, create a slipknot. Leaving a long tail, make a loop with the yarn, bringing the end through the loop to create a slipknot. Slip this knot onto one of your knitting needles, leaving the long tail end hanging free.
4. Begin casting on
Using your chosen cast on method, begin creating stitches by working them onto your knitting needle. Follow the specific instructions for your chosen method, making sure to keep the tension even and the stitches snug but not too tight. Work carefully and take your time to ensure accuracy.
5. Cast on the required number of stitches
Continue casting on until you have the required number of stitches specified in your vest pattern. It is important to count your stitches periodically to ensure accuracy. If you make a mistake, simply undo the stitches back to the error and correct it before proceeding.
Once you have completed the cast on, you are ready to begin knitting your women’s vest. Remember to consult your pattern instructions for the specific stitch pattern and techniques required for your project. Happy knitting!
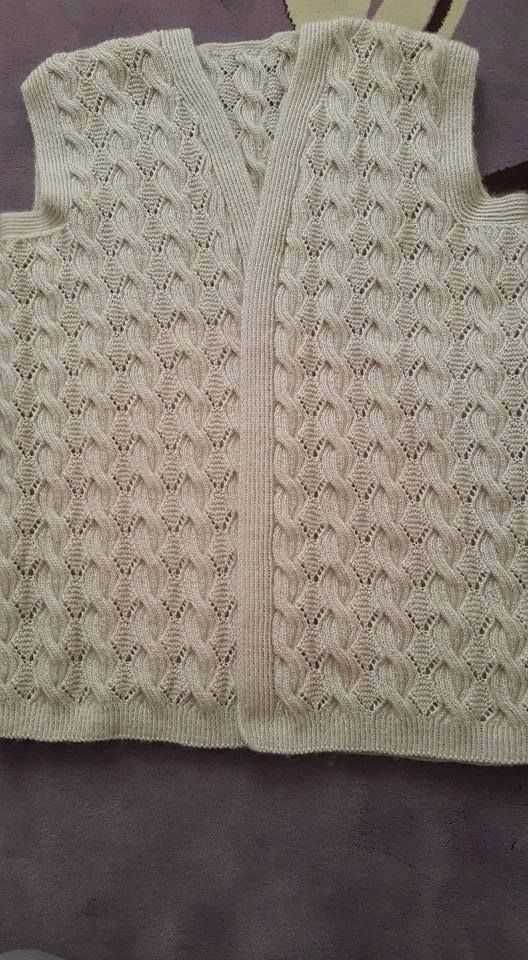
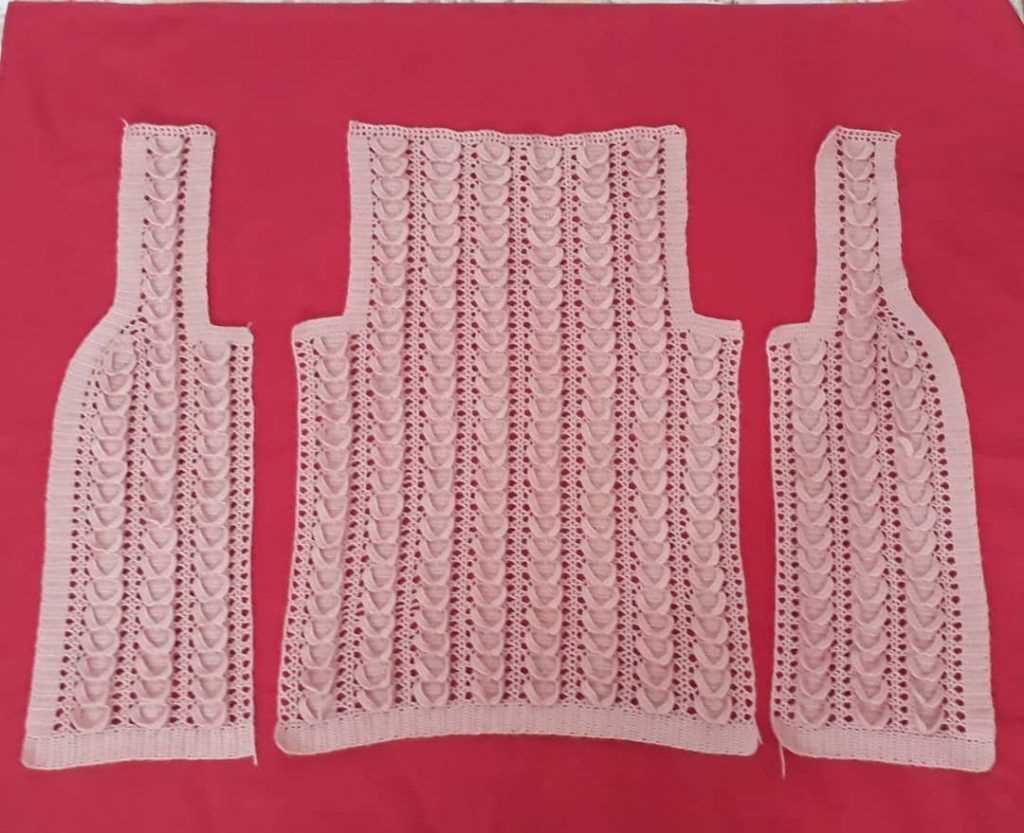
Knitting the body of the vest
Once you have finished knitting the neckline, it’s time to move on to the body of the vest. This is where the main part of the pattern comes together, and you’ll start to see the vest take shape.
To begin, you’ll need to continue knitting in the stitch pattern that you established for the neckline. This could be a simple stockinette stitch, a rib stitch, or any other pattern that you have chosen. Make sure to follow the instructions for your specific pattern in order to maintain consistency.
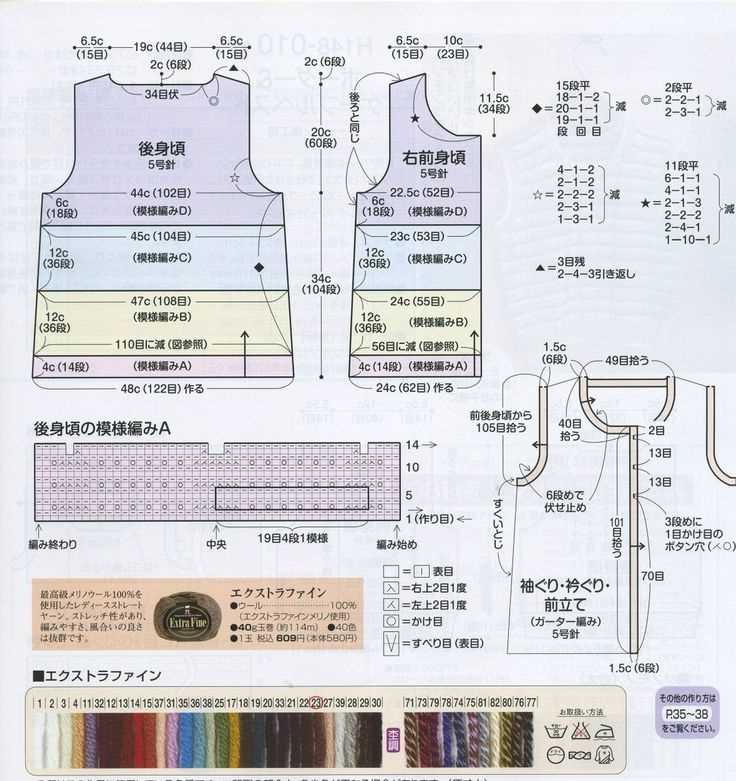
If your pattern includes shaping for the waist or hips, you may need to decrease or increase stitches at certain points. This will help create a more fitted shape and ensure that the vest lays nicely on your body. Follow the instructions provided in your pattern for these shaping techniques, and make sure to keep track of your stitches as you go along.
As you continue knitting the body of the vest, you may also need to incorporate any additional design elements, such as cables, colorwork, or lace patterns. These details can add interest and texture to the finished piece, so take the time to carefully follow the instructions for these sections.
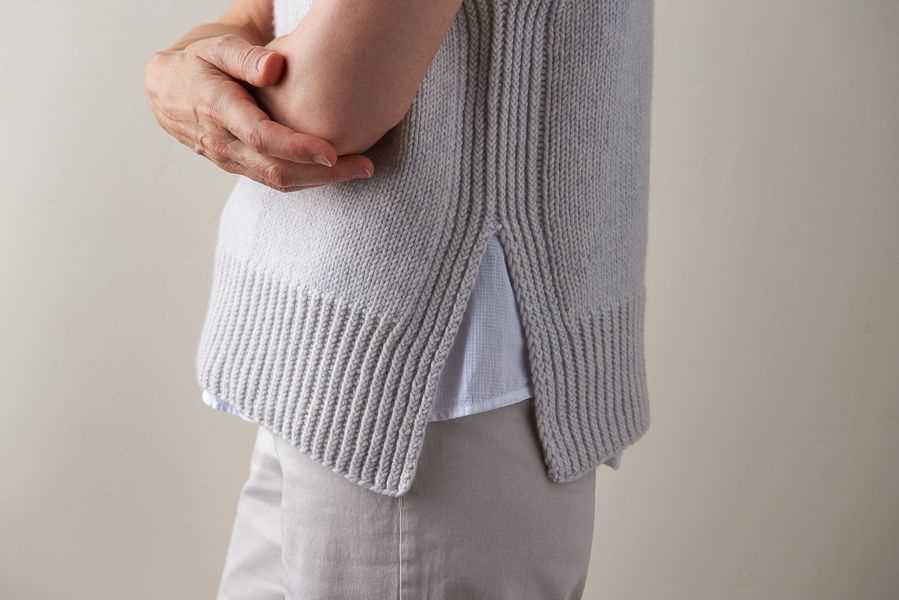
Finally, once you have completed the desired length for the body of the vest, you can move on to finishing the edges. This could involve knitting ribbing, adding a border, or creating a button band, depending on the design of your pattern. Make sure to follow the instructions carefully to achieve the desired result.
Overall, knitting the body of the vest requires attention to detail and following the pattern instructions closely. Take your time, enjoy the process, and soon you’ll have a beautiful knitted vest to wear and show off!
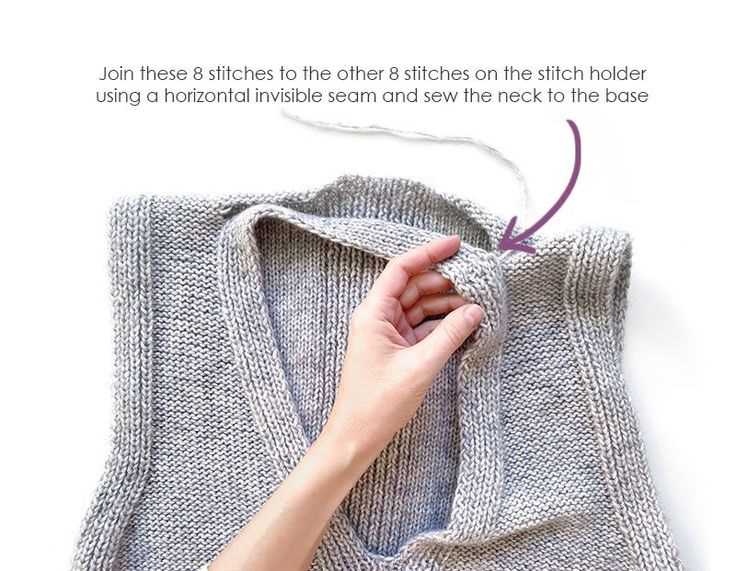
Creating the armholes and neck shaping
Before continuing with the knitting pattern for the women’s vest, it is important to create the armholes and shape the neck. These steps will ensure a proper fit and comfort when wearing the vest.
To create the armholes, the pattern will instruct you to bind off a certain number of stitches on each side of the work. This will create openings for the arms to go through. The number of stitches to bind off will depend on the size you are making and the desired armhole size. Make sure to follow the pattern instructions carefully to ensure accurate measurements.
Next, the pattern will guide you in shaping the neck of the vest. This is done by binding off a specific number of stitches in the center of the work, creating a dip in the neckline. The number of stitches to bind off will again depend on the size and desired shape of the neckline. It is important to take accurate measurements and follow the pattern instructions to achieve the desired result.
It may be helpful to use stitch markers to keep track of where the armholes and neck shaping begin and end. This will ensure that you are following the pattern correctly and can easily count the number of stitches to bind off.
Remember to take your time and carefully follow the pattern instructions for creating the armholes and shaping the neck. These steps are crucial in achieving a well-fitting and comfortable women’s vest. Happy knitting!
Finishing touches: adding buttons or closures
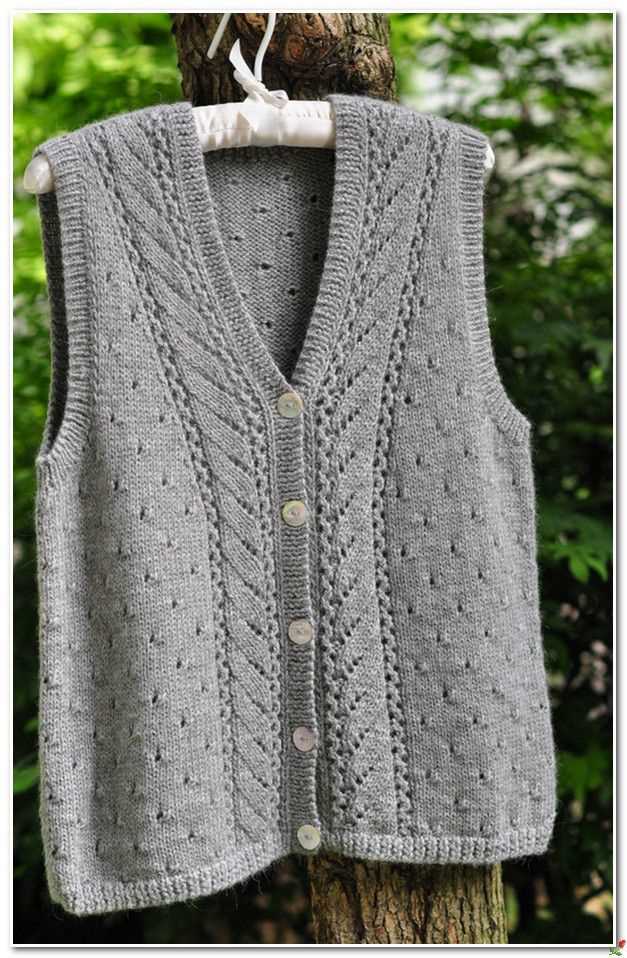
When it comes to finishing a knitted women’s vest, adding buttons or closures is an important step that adds both functionality and style to the garment. Whether you choose to add buttons, snaps, or a zipper, the right choice can make a huge difference in the final look of your vest.
When selecting buttons, consider the overall style and color scheme of your vest. If you want to keep it simple and classic, opt for traditional round buttons made of wood or plastic in a neutral color. For a more modern and trendy look, you can choose buttons in vibrant colors, unique shapes, or even with decorative patterns. The size of the buttons should complement the size and design of the vest, so choose accordingly.
If you prefer a more secure closure, you can opt for snaps or a zipper instead of buttons. Snaps are convenient and easy to use, and they come in various sizes and finishes to match your vest. Zippers provide a sleek and seamless closure, and they are great for adding a touch of sophistication to your vest.
Regardless of the closure method you choose, it’s important to properly attach them to the vest. Make sure to sew buttons securely, checking that they are aligned properly and evenly spaced. For snaps, follow the manufacturer’s instructions to attach them securely. If you are attaching a zipper, make sure it is sewn in straight and smooth to ensure easy opening and closing.
Adding buttons or closures to your knitted women’s vest is the final step that completes your project. With the right choice of buttons or closures, you can elevate the style and functionality of your vest, giving it the perfect finishing touch.
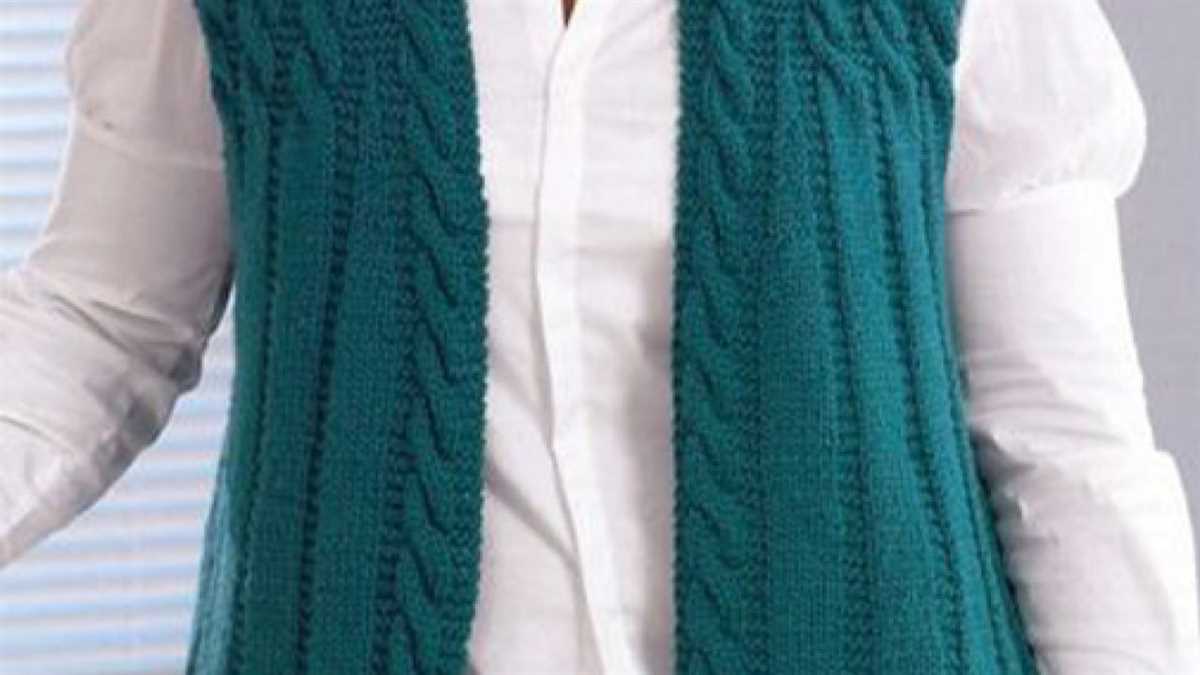
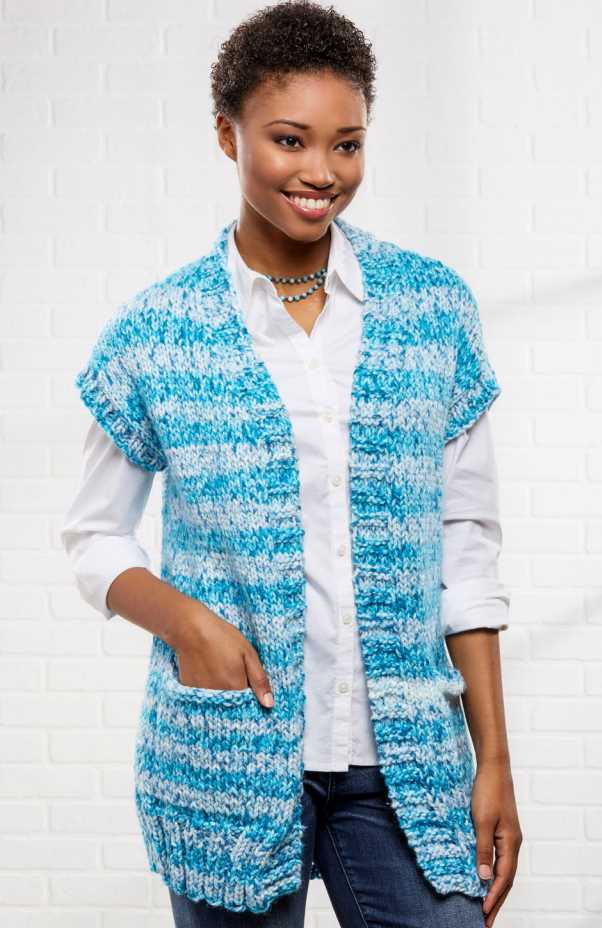
Styling and Wearing Your Knitted Vest
Knitted vests are versatile and stylish, adding a layer of warmth and texture to any outfit. Here are a few styling tips and ideas to help you make the most of your knitted vest:
1. Layer it up
Wearing your knitted vest over a collared shirt or blouse instantly adds a chic and polished look. You can also layer it under a blazer or cardigan for extra warmth and style. Experiment with different layers to create unique and fashionable outfits.
2. Dress it up or down
A knitted vest can be dressed up for a more formal look or dressed down for a casual and relaxed vibe. Pair it with tailored pants or a skirt for a professional ensemble, or wear it with jeans and a t-shirt for a laid-back and comfortable outfit. The versatility of a knitted vest allows you to style it according to the occasion.
3. Play with textures and colors
Knitted vests come in various textures and colors, so have fun mixing and matching with different pieces in your wardrobe. Create a monochromatic look by pairing your vest with items in the same color family, or add a pop of color by choosing a contrasting shade. You can also experiment with different yarn types to achieve different textures and visual effects.
4. Accessorize to complete the look
Add accessories like statement necklaces, scarves, or belts to elevate your knitted vest outfit. A belt can cinch in the waist and create a more defined silhouette, while a scarf adds an extra layer of coziness. Experiment with different accessories to personalize your look and make it your own.
In conclusion, a knitted vest is a versatile and stylish addition to any wardrobe. Whether you choose to dress it up or down, layer it with other pieces, or experiment with different textures and colors, the knitted vest offers endless possibilities for creating fashionable and cozy outfits.