
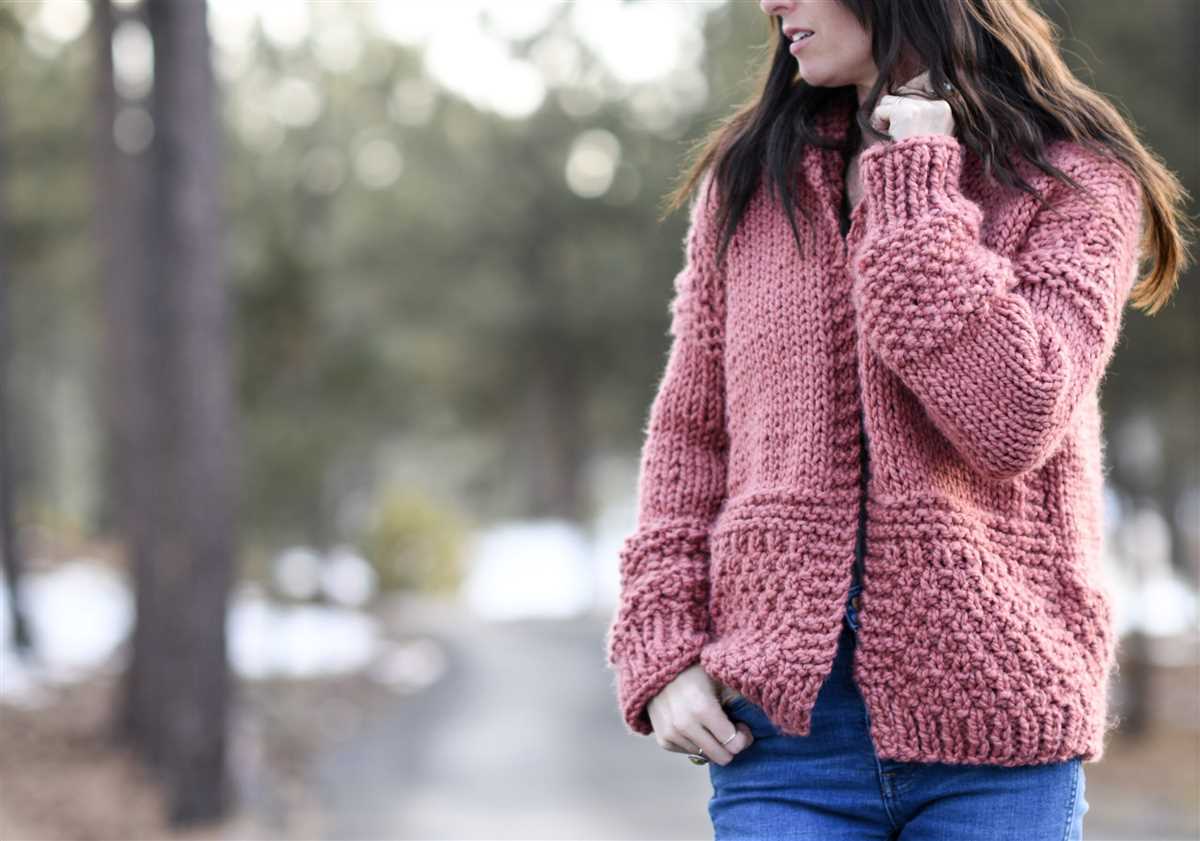
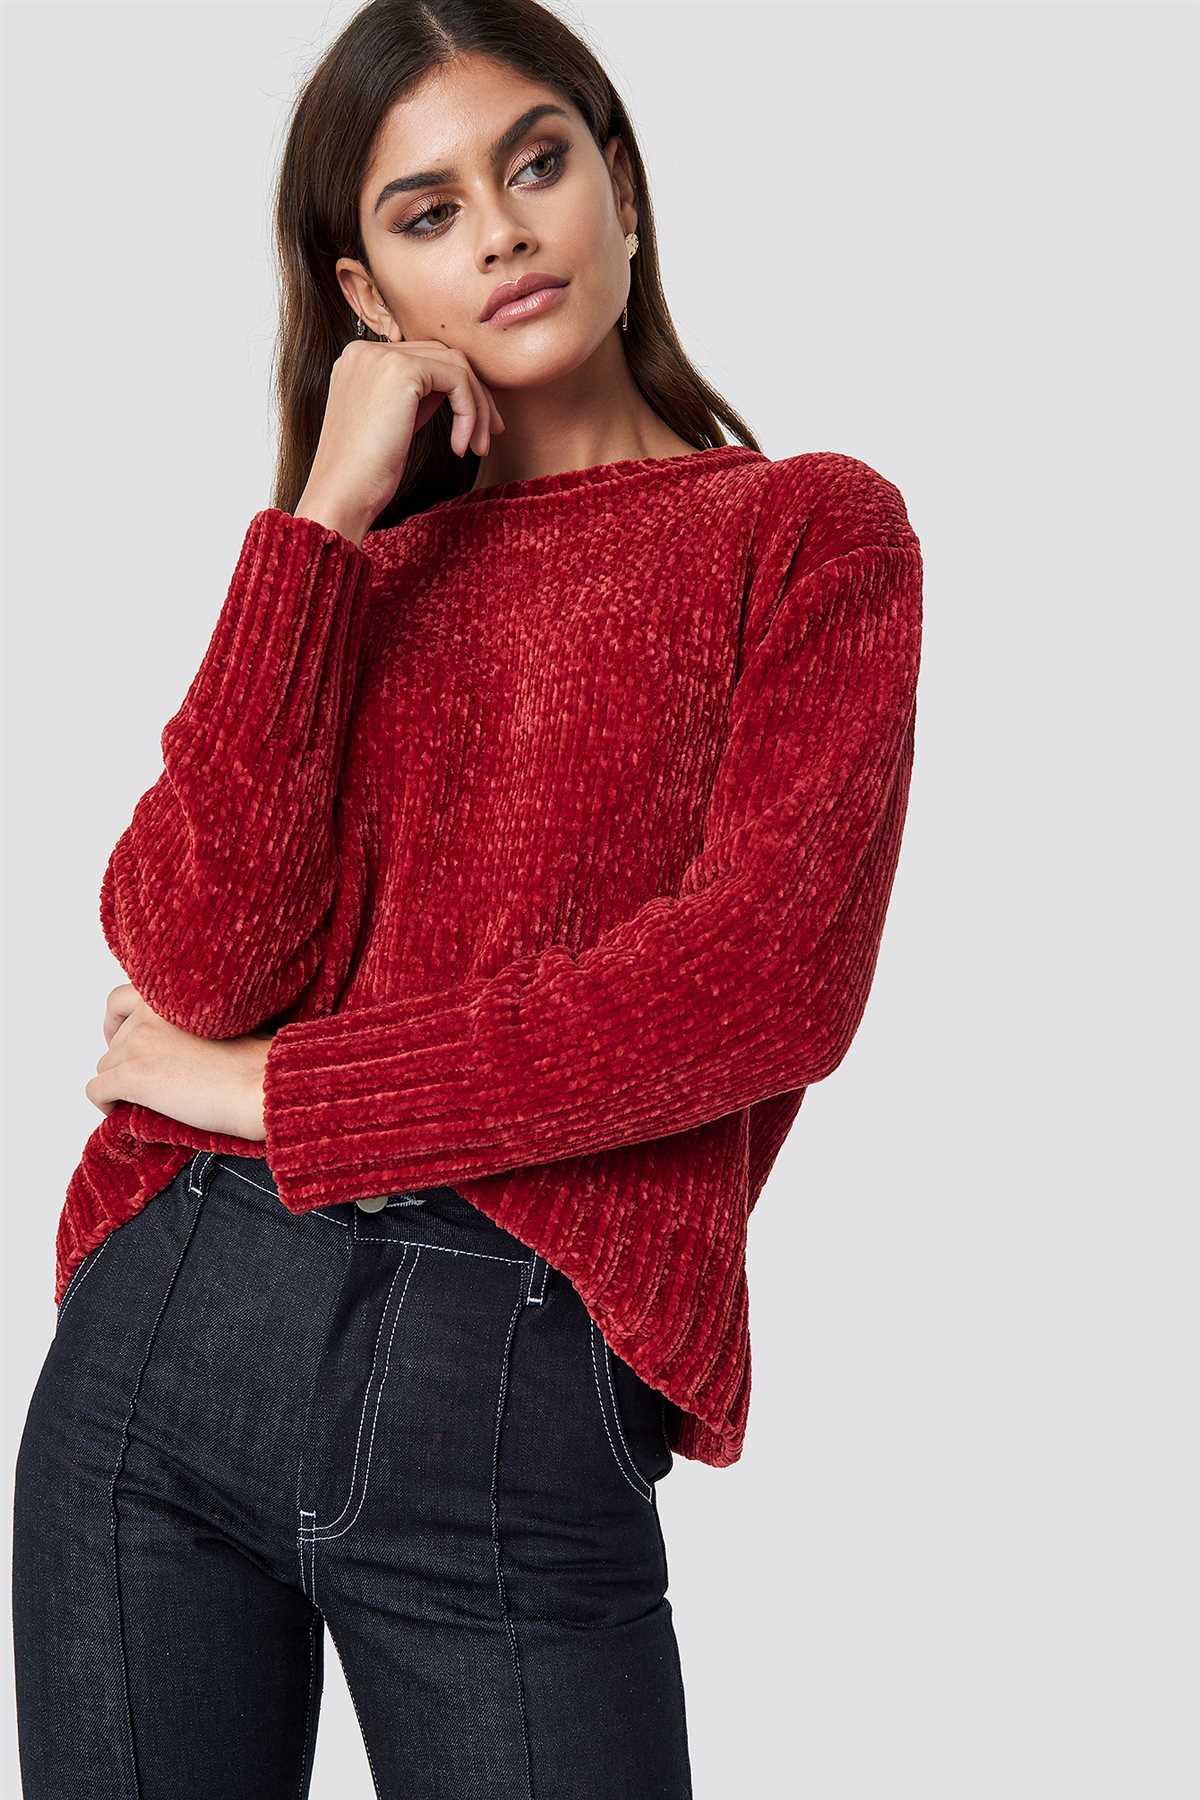
Are you looking for a cozy and luxurious sweater to add to your wardrobe? Look no further than a velvet sweater! Velvet is a soft and smooth fabric that adds a touch of elegance to any garment. Knitting a velvet sweater can be a rewarding and enjoyable project, and with the right pattern, you can create a one-of-a-kind piece that is perfect for cooler weather.
When it comes to choosing a velvet sweater knitting pattern, there are plenty of options available. You can opt for a classic crewneck sweater for a timeless look, or try a trendy oversized style for a more relaxed and fashion-forward vibe. Whatever your style preference, there is a velvet sweater pattern out there that will suit your needs.
One of the great things about knitting with velvet yarn is the luxurious texture it creates. The smooth and silky feel of the yarn adds a touch of luxury to the finished garment, making it a joy to wear. Additionally, velvet yarn is often made from synthetic fibers, which means it is easy to care for and can be machine washed without worry.
So, whether you are a seasoned knitter or just starting out, consider trying your hand at knitting a velvet sweater. With a wide range of patterns available and the softness and elegance of velvet yarn, you are sure to create a stunning and cozy sweater that you will love to wear.
How to Knit a Velvet Sweater: Beginner’s Guide
Knitting a velvet sweater can be a rewarding and cozy project for beginners. With the right materials and basic knitting skills, you can create a luxurious and soft sweater that is perfect for colder seasons. Follow this beginner’s guide to get started on your velvet sweater knitting journey.
Gather Your Materials
Before you begin knitting your velvet sweater, make sure you have all the necessary materials. You will need velvet yarn, knitting needles in the appropriate size for your chosen yarn, stitch markers, a tapestry needle, and scissors. Choose a velvet yarn that is easy to work with and has a beautiful drape. It’s also important to select knitting needles that are comfortable for you to hold and that match the recommended gauge for your yarn.
Choose a Pattern
Next, choose a velvet sweater knitting pattern that suits your skill level. Look for patterns specifically designed for beginners, as they will provide detailed instructions and guidance. Make sure to read through the pattern and familiarize yourself with any special techniques or stitches before you start knitting. This will help you understand the construction of the sweater and ensure successful results.
Practice Basic Stitches
Before jumping into knitting your velvet sweater, it’s essential to practice basic knitting stitches. This will help you become comfortable with the motions and tension required for knitting. Begin by casting on stitches and practicing the knit stitch. Once you’ve mastered the knit stitch, move on to the purl stitch. These two stitches are the building blocks of most knitting patterns, including the velvet sweater. Practice until you feel confident in your ability to knit and purl consistently.
Follow the Pattern Instructions
Once you’re comfortable with the basic stitches, it’s time to start knitting your velvet sweater following the pattern instructions. Take your time to read the pattern thoroughly and understand each step. Use stitch markers to help keep track of important sections, such as increases or decreases. Be sure to check your gauge as you go to ensure the correct fit of your sweater. If the pattern includes any special techniques or stitches, refer to online tutorials or knitting resources for assistance.
Finishing and Blocking

After completing the final rows of your velvet sweater, it’s time to finish off the garment. This may involve binding off stitches, sewing seams, and adding any necessary trim or closures. Once your sweater is finished, blocking is an important step to ensure a professional and polished look. Follow the blocking instructions provided with your yarn or consult online resources for proper blocking techniques.
With patience and practice, you can successfully knit a velvet sweater as a beginner. Enjoy the process and embrace the cozy warmth of your handmade creation!
Choosing the Right Velvet Yarn for Your Sweater
Making a velvet sweater is a luxurious and cozy project that requires careful consideration of the type of yarn used. Here are some key factors to keep in mind when choosing the right velvet yarn for your sweater:
1. Fiber Content
Consider the fiber content of the velvet yarn you are choosing. Common options include acrylic, polyester, rayon, and nylon. Each fiber has its own unique qualities and characteristics. Acrylic and polyester blends are often affordable and easy to care for, while rayon and nylon blends provide a softer, more drapey texture.
2. Weight and Thickness
Different velvet yarns come in various weights and thicknesses. Consider the style and design of your sweater when selecting the weight of the yarn. Thicker yarns can create a chunkier, more textured look, while thinner yarns may be better suited for lighter, more delicate designs.
3. Color Options
Vibrant and rich colors are often associated with velvet yarn. Consider the color options available and choose a shade that complements your skin tone or goes well with your desired outfit. Velvet yarn often looks stunning in jewel tones, deep hues, and muted neutrals.
4. Knitting Needles
Think about the size of knitting needles you will need to work with the chosen velvet yarn. Different yarns may require different needle sizes to achieve the desired gauge and tension. Check the yarn label for recommended needle sizes, and make sure you have the appropriate tools on hand.
Overall, choosing the right velvet yarn for your sweater involves considering factors such as fiber content, weight and thickness, color options, and knitting needle sizes. Taking the time to select the perfect yarn will help ensure that your velvet sweater turns out beautifully and is a joy to wear.
Understanding the Basic Knitting Stitches
When it comes to knitting, it is essential to understand the basic stitches that form the foundation of any knitted project. Whether you are a beginner or an experienced knitter, having a solid grasp of these stitches will allow you to create beautiful and intricate designs.
There are several basic knitting stitches that you should become familiar with. The first is the knit stitch, also known as the garter stitch. This stitch is created by inserting the right needle into the first stitch on the left needle, wrapping the yarn around the right needle, and pulling it through the stitch. The knit stitch creates a smooth and even fabric, making it a popular choice for sweaters and scarves.
Another fundamental stitch is the purl stitch. The purl stitch is the opposite of the knit stitch, creating a raised, textured surface on the fabric. To work a purl stitch, insert the right needle from right to left into the first stitch on the left needle, wrap the yarn counterclockwise around the right needle, and pull it through the stitch. The purl stitch is commonly used in combination with the knit stitch to create different patterns, such as the stockinette stitch or the rib stitch.
Alongside the knit and purl stitches, there are a few other essential stitches to learn, such as the yarn over (YO), which creates an extra stitch and an eyelet, and the slip stitch, which involves passing a stitch from the left to the right needle without knitting or purling it. These additional stitches add versatility to your knitting projects and can be used to create lace patterns, decorative borders, or unique textures.
To master these basic knitting stitches, it is helpful to practice them individually before attempting a complete project. Start with a small swatch and practice knitting and purling in different combinations and patterns. As you become more comfortable with the stitches, you can begin experimenting with more complex designs and techniques to create truly unique knitted pieces.
Getting Started: Casting on Stitches

Before you begin knitting your velvet sweater, you’ll need to cast on stitches to create the foundation of your project. Casting on involves creating a row of loops on your knitting needle that will be used to work your first row of stitches. Here are a few methods you can use to cast on stitches for your velvet sweater:
Long Tail Cast-On:
The long tail cast-on method is a popular choice for many knitters. To start, you’ll need to estimate the length of the yarn tail you’ll need to create your stitches. Make a slip knot near the end of the yarn, leaving a tail that’s about three times the width of your desired project. Place the slip knot on your knitting needle, and then begin casting on stitches by creating a loop with your thumb and forefinger, and slipping the loop onto the needle. Repeat this process until you’ve cast on the desired number of stitches.
Knitted Cast-On:
The knitted cast-on method is another option for casting on stitches. To begin, make a slip knot and place it on your knitting needle. Insert the right needle into the slip knot stitch, wrapping the yarn around the needle from back to front. Pull the loop through the slip knot and onto the right needle, creating a new stitch. Continue this process, inserting the right needle into the stitch on the left needle, wrapping the yarn around, and pulling a new stitch through. Repeat until you have cast on the desired number of stitches.
Both the long tail cast-on and knitted cast-on methods are commonly used for a variety of knitting projects. It’s important to choose the method that you feel most comfortable with and that will create a sturdy foundation for your velvet sweater. Once you’ve cast on your stitches, you’ll be ready to start knitting the body of your sweater. Happy knitting!
Knitting the Body of the Sweater
Once you have completed the ribbing for the neckline and cuffs of your velvet sweater, it is time to start knitting the body. This is where the sweater really starts to take shape and you can see your progress.
To begin, you will need to determine the total number of stitches you will be working with, based on your desired size and gauge. You can refer to the pattern instructions for specific measurements and stitch counts. Once you have the correct number of stitches, you can start working in the desired stitch pattern.
Depending on the pattern, you may need to continue with the same stitch pattern used for the ribbing, or switch to a different stitch pattern for the body. This can add interesting texture and detail to the sweater. It is important to follow the pattern instructions carefully to ensure you are using the correct stitch pattern and maintaining the correct stitch count.
As you knit the body of the sweater, you may need to make shaping adjustments to create the desired fit. This could involve decreasing or increasing stitches at certain points to create a more tailored shape. The pattern instructions should provide guidance on when and how to make these adjustments.
Continue knitting the body of the sweater until you reach the desired length, as specified in the pattern. This will typically be measured from the cast-on edge to the bottom of the sweater. Once you have reached the desired length, you can move on to knitting the sleeves or other finishing touches, depending on the pattern.
- Start knitting the body of the sweater after completing the ribbing
- Determine the total number of stitches based on desired size and gauge
- Follow the pattern instructions for the stitch pattern
- Make shaping adjustments as needed to create a tailored fit
- Continue knitting until reaching the desired length
- Proceed to the next step of the pattern, such as knitting the sleeves
Adding Sleeves to Your Velvet Sweater
Adding sleeves to your velvet sweater is a great way to customize your design and give it a unique touch. It can also provide added warmth and comfort, making it a perfect choice for colder weather. Follow these steps to seamlessly incorporate sleeves into your velvet sweater pattern:
1. Choose a Sleeve Style
Before you begin the knitting process, decide on the type of sleeve you want to add to your velvet sweater. You can opt for a traditional set-in sleeve, a raglan sleeve, or even a bell sleeve for a more dramatic effect. Consider the overall look you want to achieve and choose a sleeve style that complements your sweater design.
2. Calculate Sleeve Measurements
Measurements are key when adding sleeves to your velvet sweater. Take accurate measurements of your arm circumference, sleeve length, and armhole depth to ensure a proper fit. Refer to your knitting pattern or garment measurements guide to determine the appropriate numbers for your specific size.
3. Incorporate Sleeves into Knitting Pattern
Once you have your measurements, it’s time to incorporate the sleeves into your velvet sweater pattern. This can be done by adjusting the stitch count of your sweater body to accommodate the sleeves. Follow the instructions provided in your pattern or consult a knitting expert for guidance on how to modify the pattern to add sleeves.
4. Knit the Sleeves
Now that your pattern is adjusted, it’s time to knit the sleeves. Use the recommended needle size and yarn weight for your velvet sweater to ensure consistency. Follow the stitch patterns and instructions provided in your knitting pattern, keeping in mind the measurements you took earlier to shape the sleeves properly.
5. Seam the Sleeves
Once you have completed knitting the sleeves, it’s time to seam them to the sweater body. Use a tapestry needle and the same yarn used for knitting to sew the sleeves to the armholes. Take care to line up the sleeve seams with the shoulder seams to ensure a professional finish.
With these steps, you can easily add sleeves to your velvet sweater and create a stylish and cozy garment to enjoy during the colder months. Take your time, follow the instructions, and enjoy the process of customizing your sweater to make it truly yours.
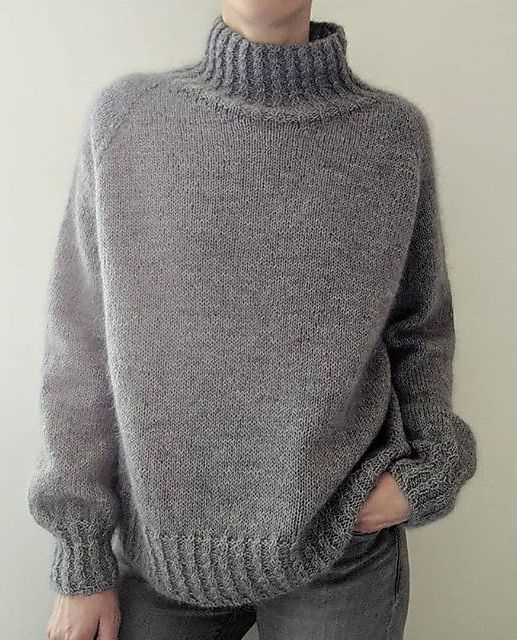
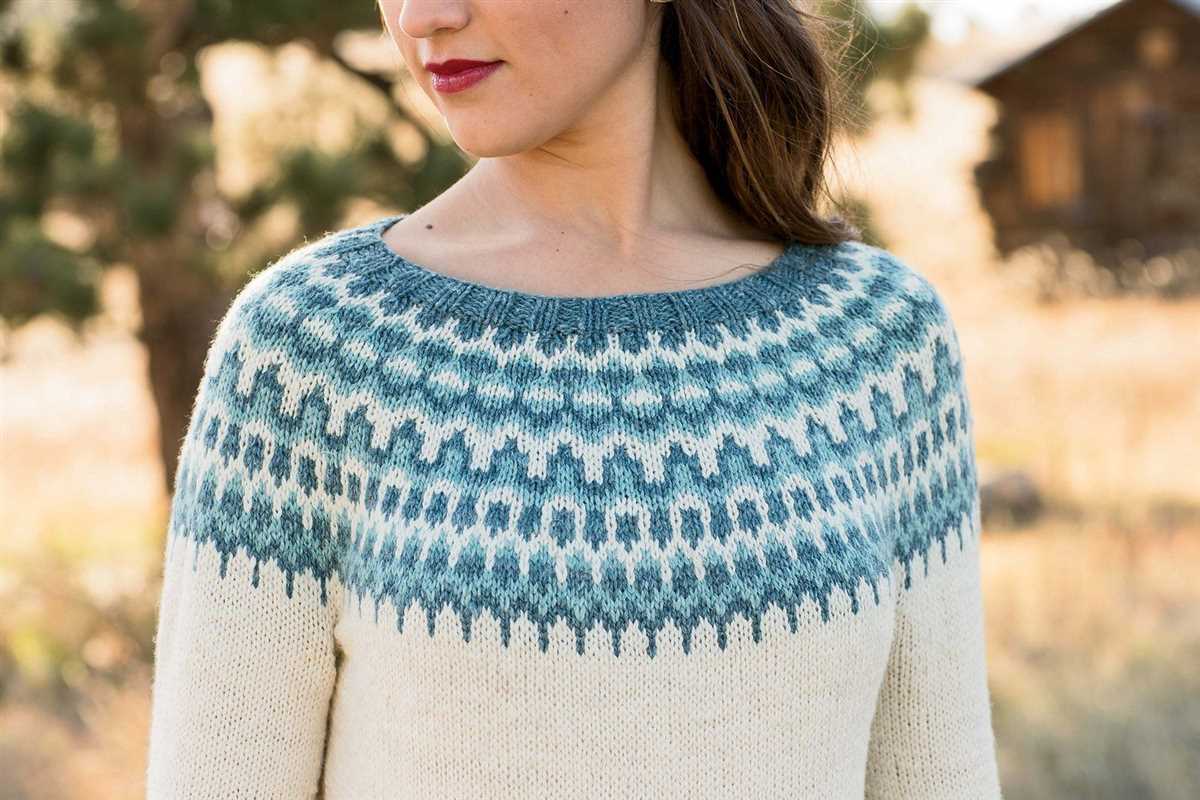
Creating a Ribbed Collar
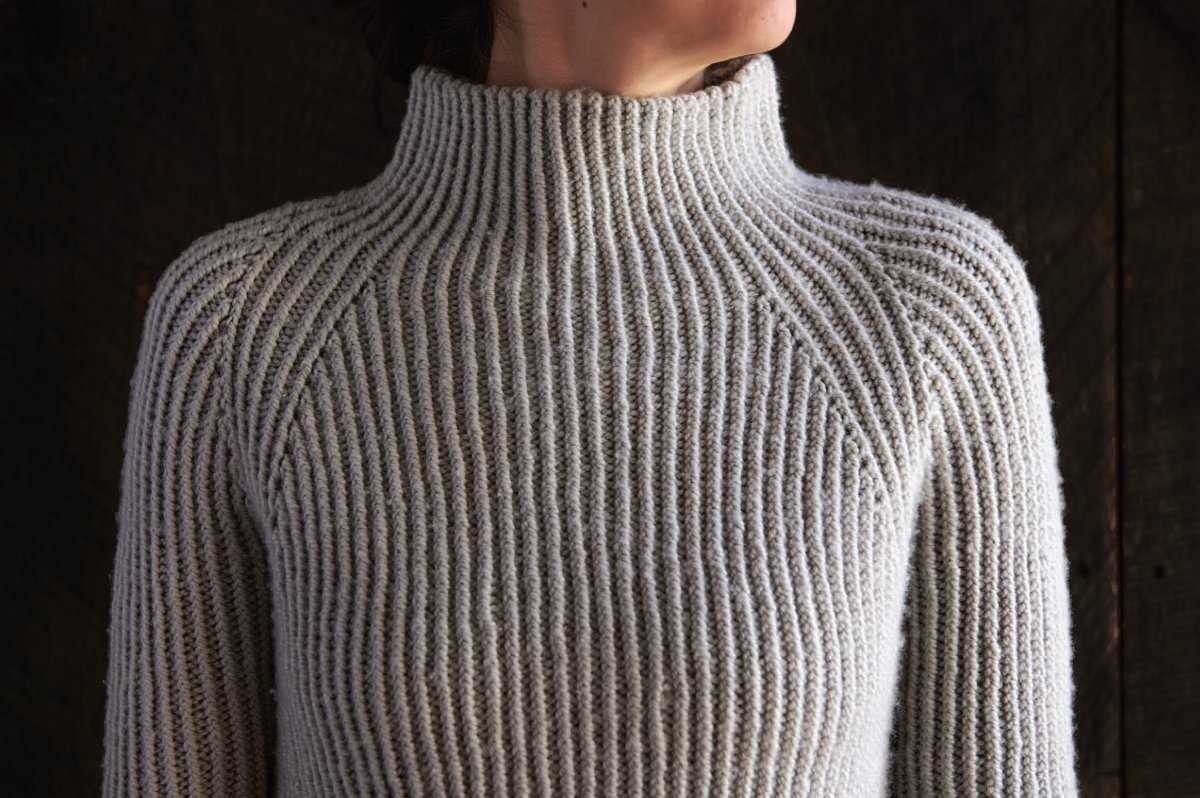
When knitting a velvet sweater, one of the most important elements to consider is the collar. The collar not only adds a finishing touch to the sweater, but it also provides comfort and warmth to the wearer. One popular type of collar for velvet sweaters is the ribbed collar. The ribbed collar is not only stylish but also adds elasticity to the neckline, allowing for easy stretching and putting on the sweater.
To create a ribbed collar, you will need to use a combination of knit and purl stitches. Typically, a ribbed collar is created by alternating between knitting and purling stitches in a specific pattern. The most common ribbing pattern is the 1×1 rib, which is created by knitting one stitch and then purling the next stitch, repeating this pattern across the row. This creates a fabric with vertical lines, providing a stretchy and textured effect.
When knitting the ribbed collar, it is important to pay attention to the tension of your stitches. It is recommended to use smaller needles than the main body of the sweater to create a snug fit. Additionally, it is advisable to start with a few rows of knit stitches before beginning the ribbing pattern to create a neat edge. This will prevent the collar from rolling or curling.
Moreover, the length of the ribbed collar is also important. It should be long enough to comfortably fit around the neckline, but not too long that it bunches or feels constricting. You can adjust the length of the ribbed collar by knitting more or fewer rows in the ribbing pattern.
Here is a step-by-step guide to creating a ribbed collar:
- Using smaller needles, knit a few rows in plain knit stitches for a neat edge.
- Switch to the ribbing pattern, following the 1×1 rib stitch by alternating between knitting and purling stitches.
- Continue knitting the ribbing pattern for the desired length of the collar, adjusting as needed.
- To finish the collar, bind off the stitches loosely to maintain the elasticity.
- Weave in any loose ends and give the collar a good blocking to shape it properly.
By following these steps, you can create a beautiful and functional ribbed collar for your velvet sweater. The ribbed collar will add a touch of elegance to your garment and ensure a snug and comfortable fit.
Shaping Your Velvet Sweater: Decreases and Increases
When knitting a velvet sweater, the shaping process is an important step to achieve the desired fit and style. Decreases and increases are two common techniques used to shape the sweater in specific areas such as the waist, bust, and sleeves.
Decreases: Decreases are used to create narrower sections in the sweater, such as the waist or armholes. The most common decrease stitch is the knit two together (k2tog), which involves knitting two stitches together as one. This decrease technique can be used on both the right and wrong sides of the fabric, depending on the pattern instructions. Alternatively, a slip, slip, knit (ssk) decrease can be used to achieve a left-leaning decrease. Other decrease methods, such as the purl two together (p2tog) or the centered double decrease (cdd), may also be used depending on the pattern and desired effect.
Increases: Increases, on the other hand, are used to add stitches and create wider sections in the sweater, such as the bust or sleeves. The most common increase stitch is the yarn over (yo), which involves wrapping the yarn around the needle to create a new stitch. This increase technique is commonly used on the right side of the fabric. Another popular increase method is the make one (M1), where a new stitch is created by picking up the horizontal loop between stitches and knitting into it. Like decreases, there are also different increase methods available, such as the knit front and back (kfb) increase or the lifted increase (also known as lifted bar increase).
When shaping your velvet sweater, it is important to follow the pattern instructions for the specific decreases and increases required. These techniques will help you achieve the perfect fit and style while maintaining the luxurious and cozy texture of the velvet yarn.
Finishing Touches: Binding off Stitches
Once you have completed knitting your velvet sweater, it’s time to finish off your work by binding off the stitches. Binding off is the process of creating a neat edge on your knitting project and securing the stitches in place. It is an essential step in any knitting project, as it gives your work a polished and professional-looking finish.
To bind off stitches, start by knitting the first two stitches as usual. Then, using your left-hand needle, lift the first stitch over the second stitch and off the right-hand needle. This essentially “binds off” one stitch. Repeat this process for each stitch until there is only one stitch left on your right-hand needle. Cut the yarn, leaving a long tail, and pull it through the last stitch to secure it.
Pro tip: When binding off, make sure not to bind off too tightly, as it can create an edge that is too rigid and restricts the stretchiness of your finished project. Conversely, binding off too loosely can result in a sloppy and loose edge. Find a balance that creates a firm but flexible edge.
There are several variations of binding off stitches, depending on the desired final appearance of your project. For a basic bind off, the above method works well. However, if you want a more decorative edge, you can try different methods such as picot bind off, lace bind off, or stretchy bind off. These variations add an extra touch of elegance to your knitting and can be a fun way to experiment with different techniques.
Once you have bound off all your stitches, you can weave in any loose ends and block your velvet sweater to give it a professional finish. Blocking involves gently washing or dampening your knitted piece, then reshaping and allowing it to dry flat. This helps to even out any irregularities and gives your sweater its final shape and drape.
In conclusion, binding off stitches is an important step in knitting as it gives your project a clean and polished finish. Whether you opt for a basic bind off or experiment with decorative variations, take the time to bind off your stitches carefully and consider blocking your finished piece for the best results.
Blocking and Caring for Your Velvet Sweater
Once you have finished knitting your velvet sweater, it is important to block it to achieve the perfect fit and drape. Blocking is the process of shaping and setting your knitted garment to its final measurements. To block your velvet sweater, you will need to gently wash it and then reshape it while it is damp.
Washing: To wash your velvet sweater, fill a basin or sink with lukewarm water and a gentle wool wash detergent. Immerse the sweater in the water, making sure it is fully saturated. Gently agitate the water to remove any dirt or impurities. Avoid wringing or twisting the sweater, as this can cause damage. Rinse the sweater in clean, lukewarm water until all the detergent is removed.
Reshaping: Once the sweater is clean, remove it from the water and gently squeeze out the excess moisture. Lay the sweater flat on a clean towel and gently reshape it to the desired measurements. Use blocking pins to secure the edges and ensure that the sweater maintains its shape. Allow the sweater to dry completely on the towel.
Caring: To care for your velvet sweater, it is important to avoid hanging it, as this can cause the fabric to stretch. Instead, fold the sweater and store it in a drawer or on a shelf. It is also important to keep the sweater away from direct sunlight, as this can cause the color to fade over time. If your sweater gets wrinkled, you can gently steam it with a garment steamer to remove any creases.
Conclusion: Blocking and caring for your velvet sweater is essential to maintain its shape, fit, and overall appearance. By following these steps, you can ensure that your sweater will look beautiful and last for many seasons to come. Take the time to properly care for your knitting masterpiece, and you will be rewarded with a cozy and stylish sweater that you can cherish for years.
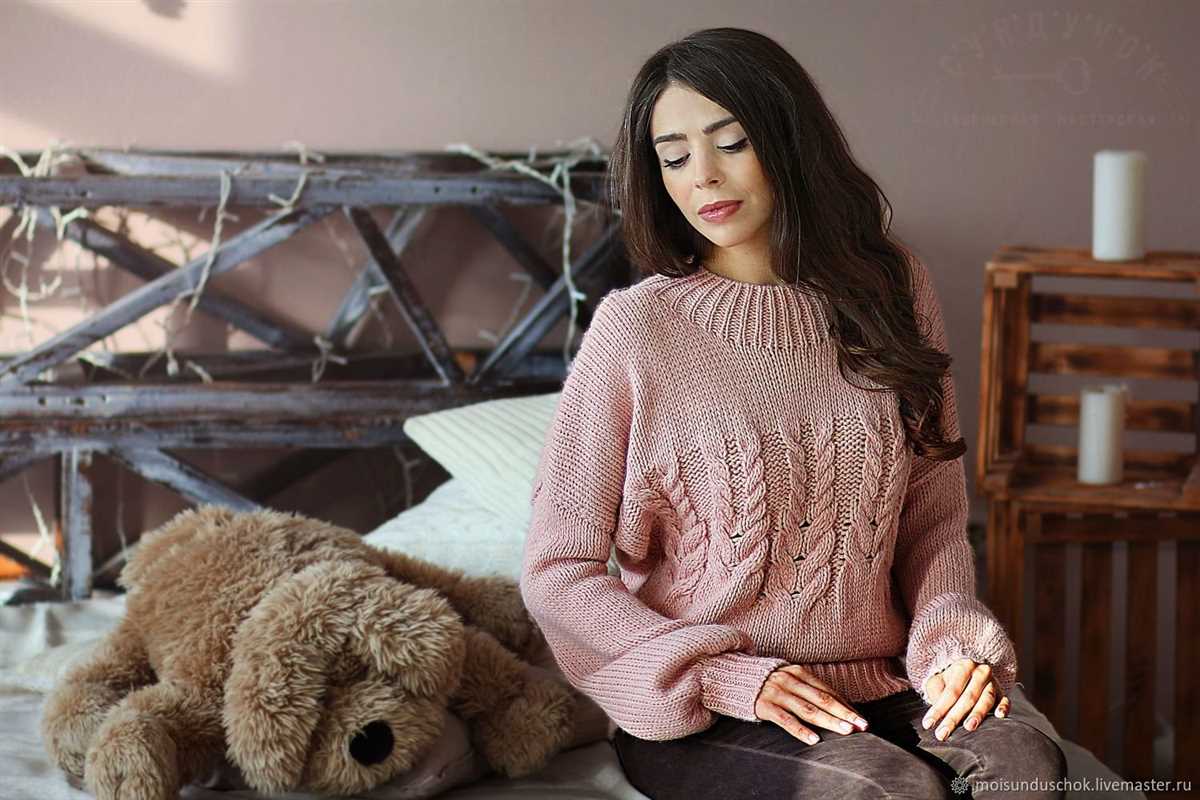
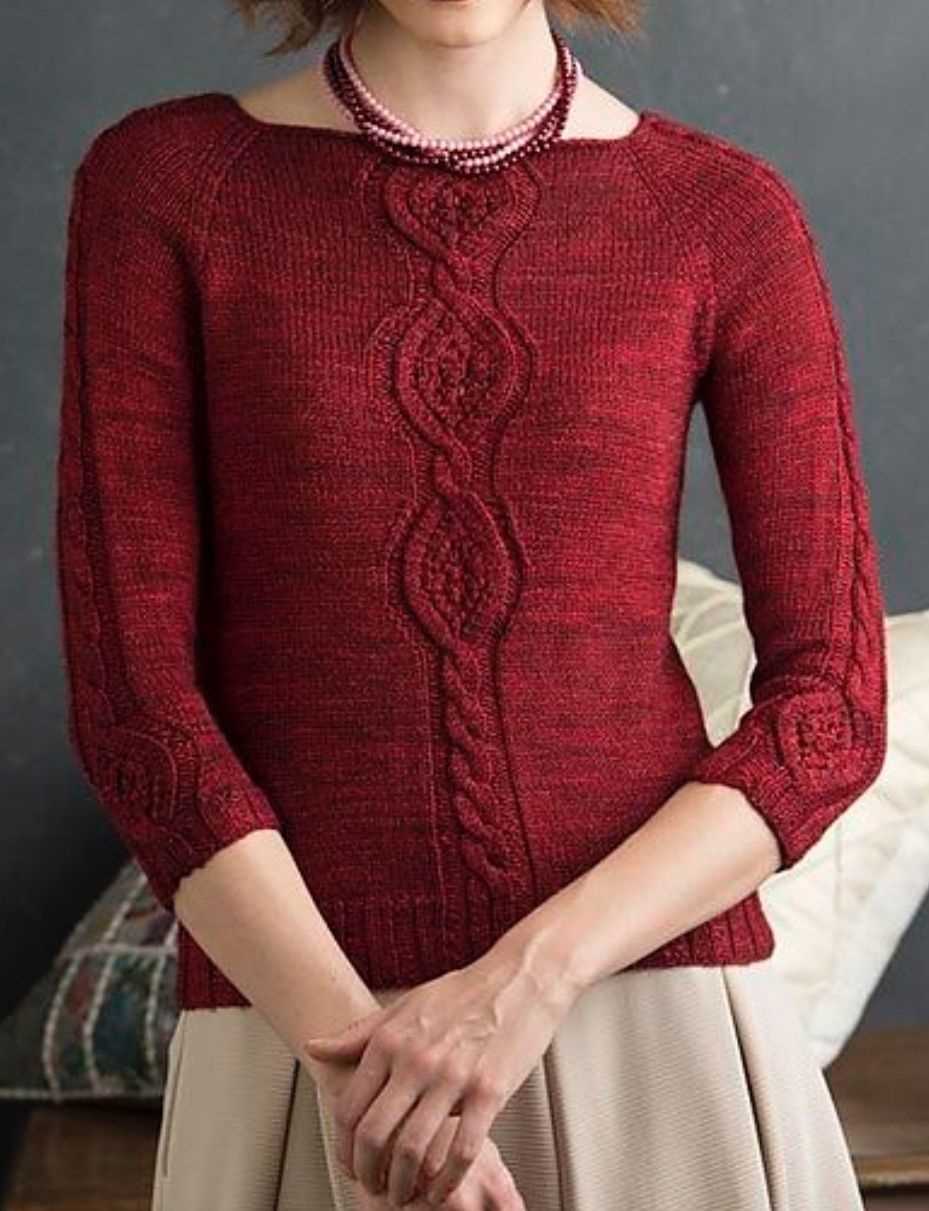
Variations and Customizations: Adding Patterns and Embellishments
Once you have mastered the basic velvet sweater knitting pattern, you can take your project to the next level by adding additional patterns and embellishments. This allows you to create a unique and personalized sweater that reflects your individual style and creativity.
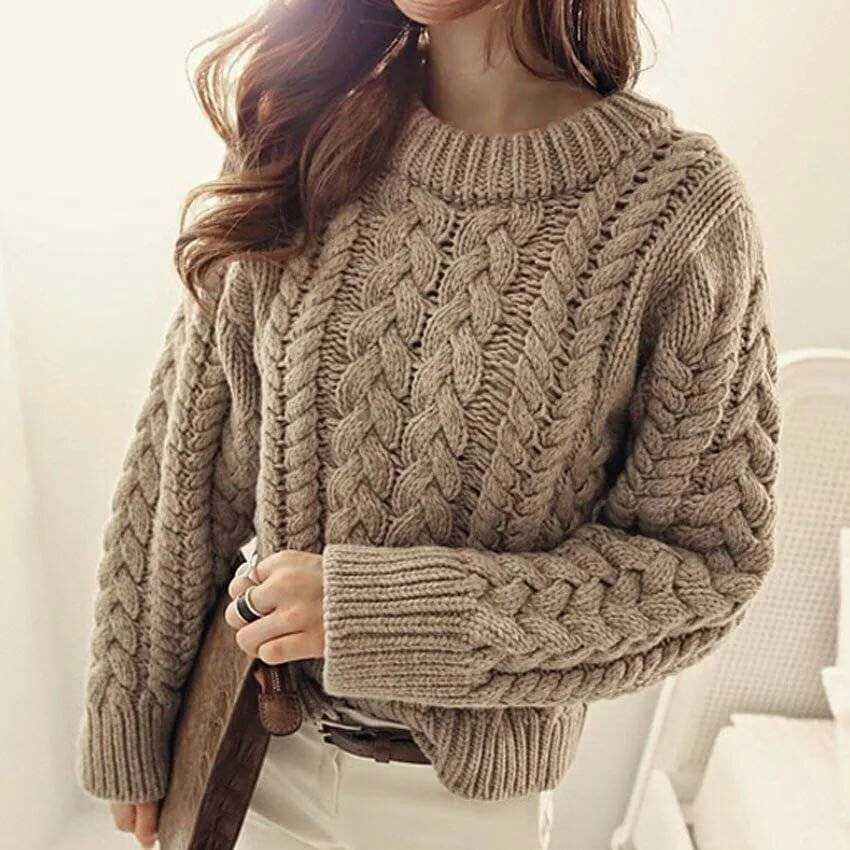
One way to add patterns to your velvet sweater is by incorporating different stitch patterns into the design. For example, you can use a cable stitch pattern to create a textured panel down the front or back of the sweater. Alternatively, you can experiment with lace stitch patterns to create delicate and intricate details on the sleeves or neckline.
Another option for customizing your velvet sweater is by adding embellishments such as beads, sequins, or embroidery. You can sew these embellishments onto specific areas of the sweater to create eye-catching accents or use them to create an overall pattern. For a more subtle touch, you can also add a contrasting color trim or border using a different yarn.
When incorporating patterns and embellishments into your velvet sweater, it’s important to consider the overall design and balance. Too many patterns or embellishments can overwhelm the sweater and make it look busy. It’s best to choose one or two focal points and keep the rest of the design simple to maintain a cohesive and elegant look.
Summary:
- Adding patterns and embellishments to your velvet sweater can elevate its style and make it unique.
- Experiment with different stitch patterns such as cables or lace to create interesting textures.
- Consider adding beads, sequins, or embroidery for extra embellishment.
- Balance is key – choose focal points and keep the rest of the design simple.