
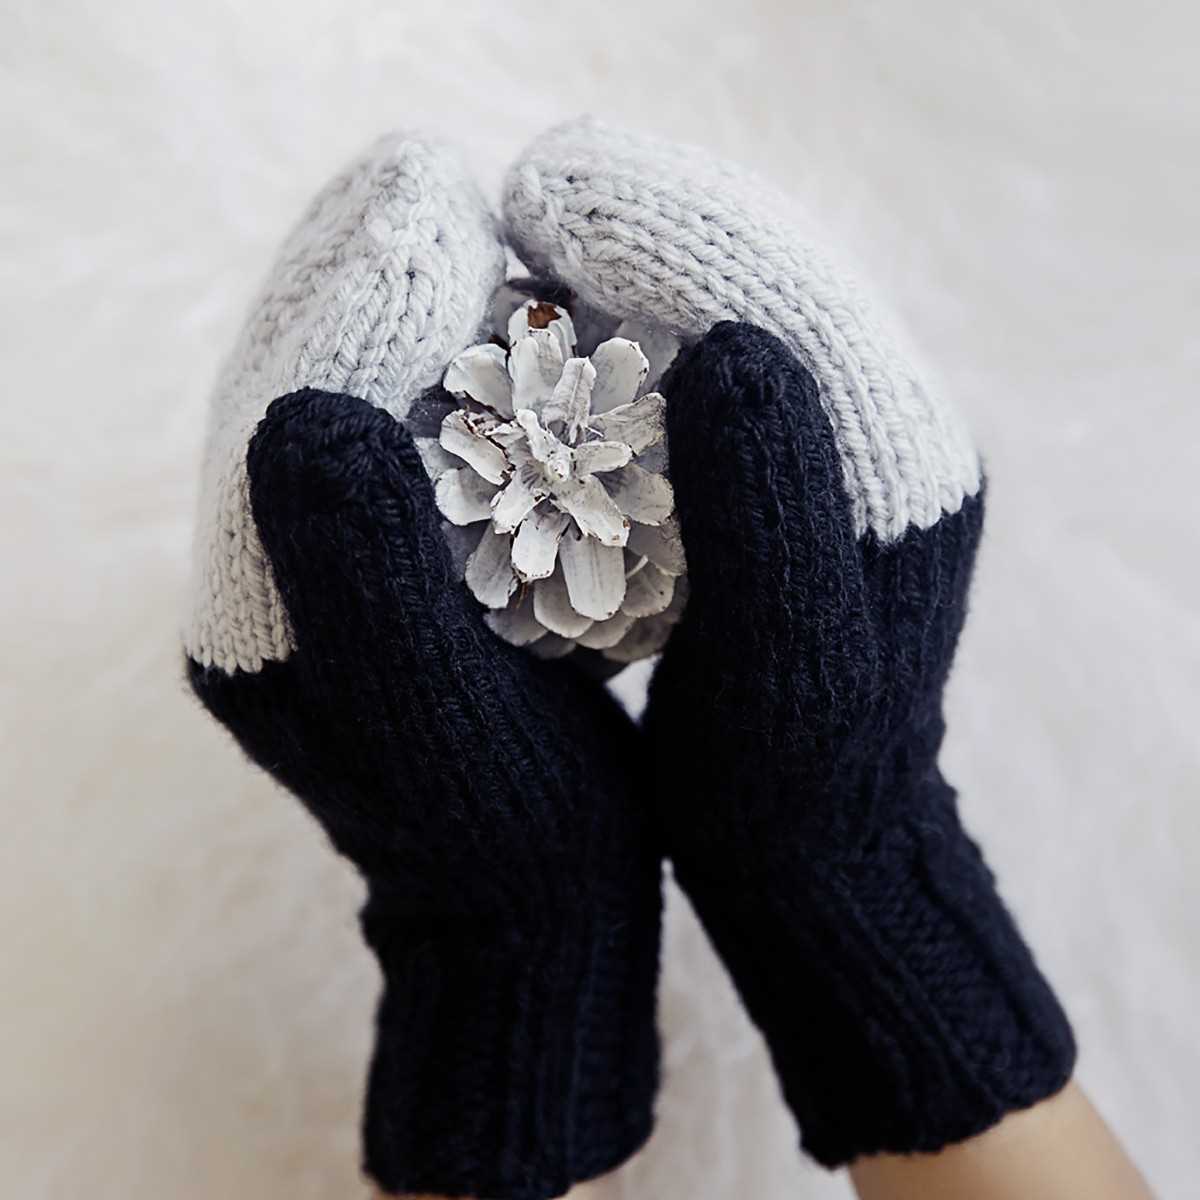
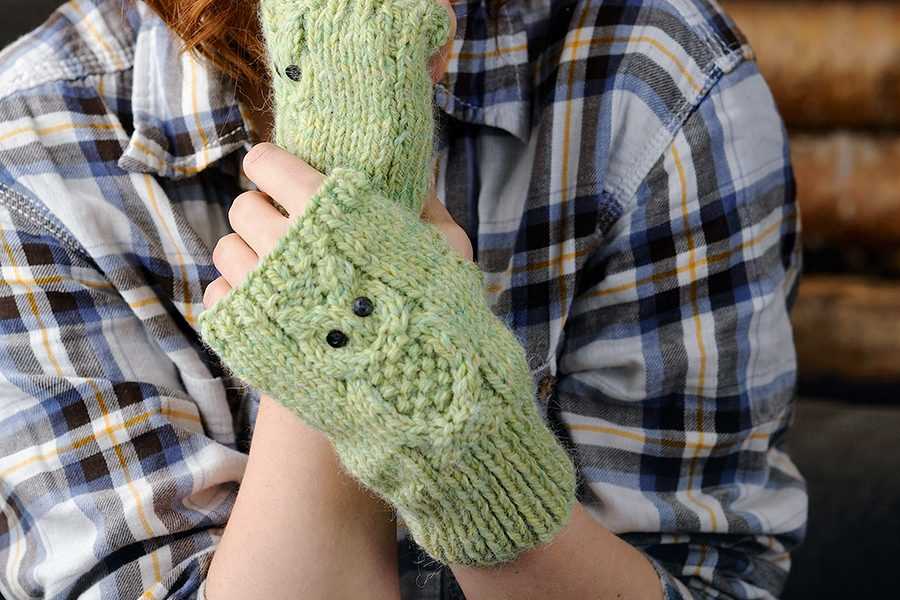
Knitting mittens on circular needles can be a fun and rewarding project for knitters of all levels. Not only does this method eliminate the need for double-pointed needles, but it also creates a more seamless and comfortable fit. With this free knitting pattern, you can create a cozy pair of mittens that are perfect for keeping your hands warm during the colder months.
This pattern is suitable for knitters who are comfortable working in the round and have basic knowledge of knitting techniques such as knit, purl, and decreasing stitches. If you are new to knitting with circular needles, don’t worry! This pattern includes step-by-step instructions and helpful tips to guide you through the process.
With just a few skeins of your favorite yarn, a pair of circular needles, and some time and patience, you’ll soon have a stylish and functional pair of mittens to wear or give as a thoughtful handmade gift. So grab your needles, choose your favorite color, and let’s get started on this exciting knitting adventure!
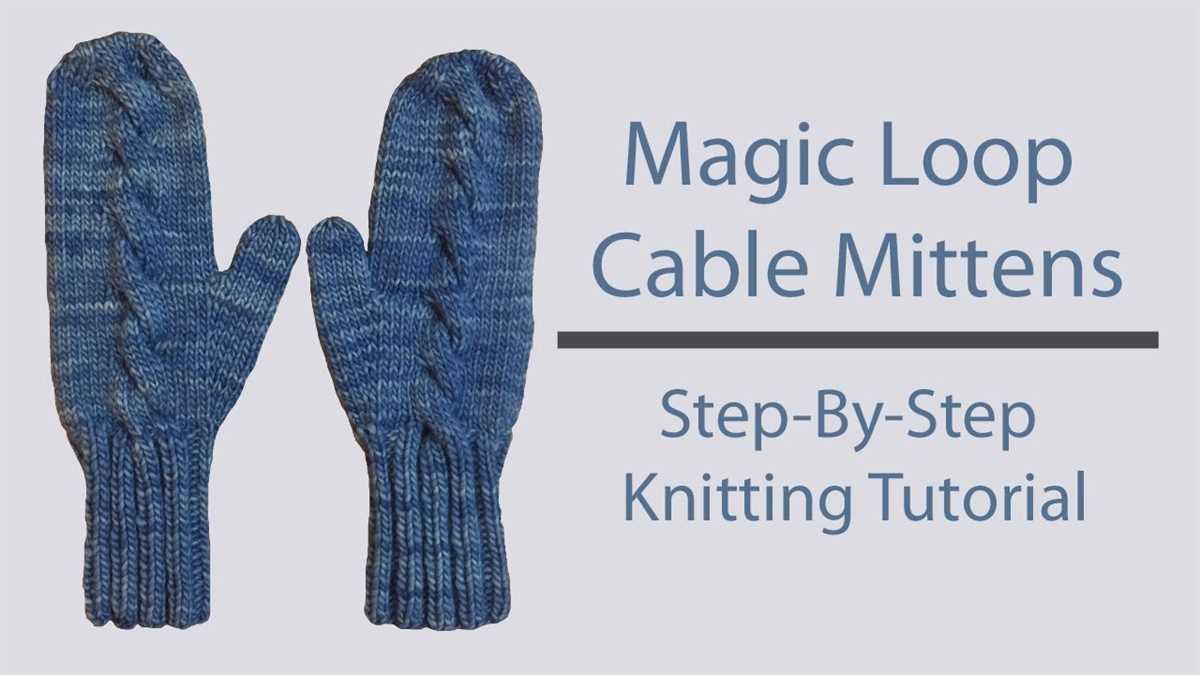
How to Knit Mittens on Circular Needles: Free Knitting Pattern and Instructions
If you’re looking for a free knitting pattern and instructions to make mittens on circular needles, you’ve come to the right place. Knitting mittens can be a fun and rewarding project, and using circular needles can make the process even easier. With this knitting pattern and instructions, you’ll be able to create cozy and stylish mittens for yourself or to give as a thoughtful gift.
To begin, you’ll need to gather your materials. Here’s what you’ll need:
- Circular knitting needles, size US 7 or the size needed to obtain gauge
- Double-pointed knitting needles, size US 7 or the size needed to obtain gauge
- Worsted weight yarn, approximately 200 yards
- Tapestry needle
- Stitch markers
- Scissors
Once you have your materials ready, you can start knitting your mittens. Here are the step-by-step instructions:
- Cast on 32 stitches onto the circular needles.
- Place a stitch marker to indicate the beginning of the round.
- Join in the round, being careful not to twist the stitches.
- Knit in a 2×2 rib stitch pattern for 2 inches.
- Switch to stockinette stitch and knit for 2 inches.
- Decrease rounds: *K2, k2tog; repeat from * to end of round.
- Continue knitting in stockinette stitch for 2 inches.
- Switch to 2×2 rib stitch pattern and knit for 2 inches.
- Bind off all stitches and weave in any loose ends.
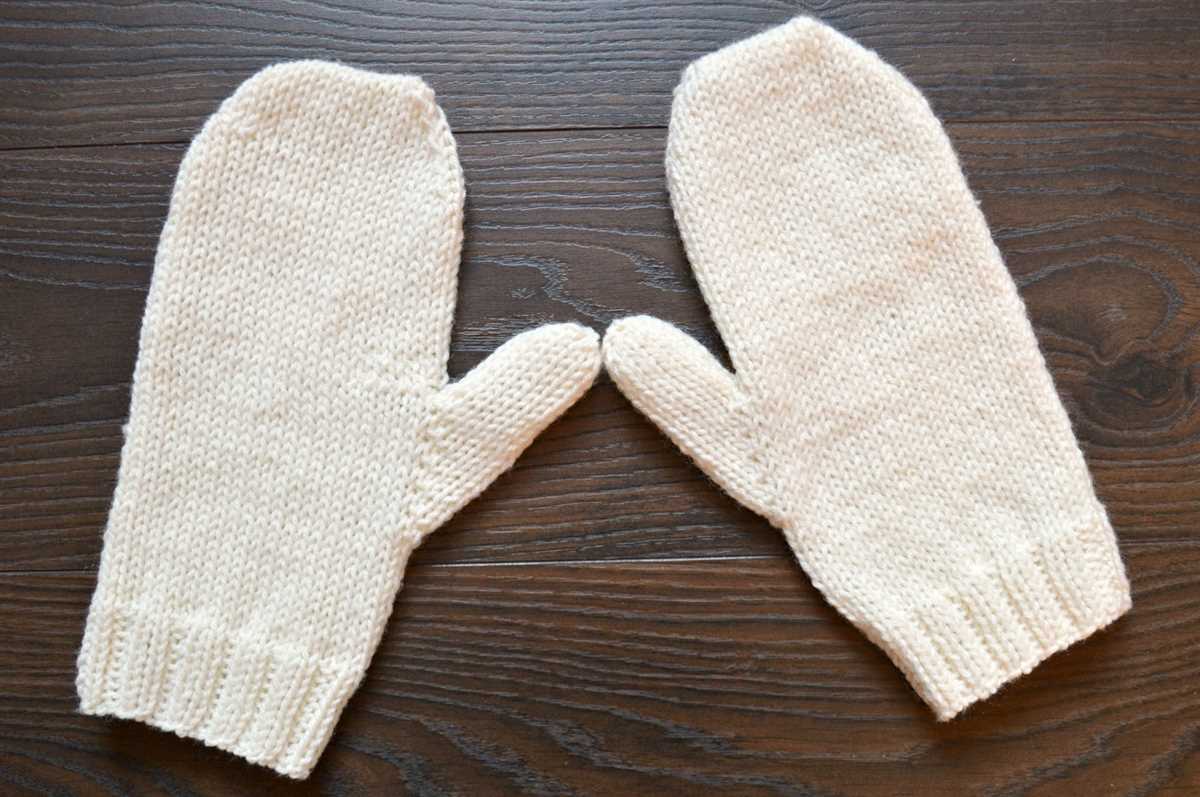
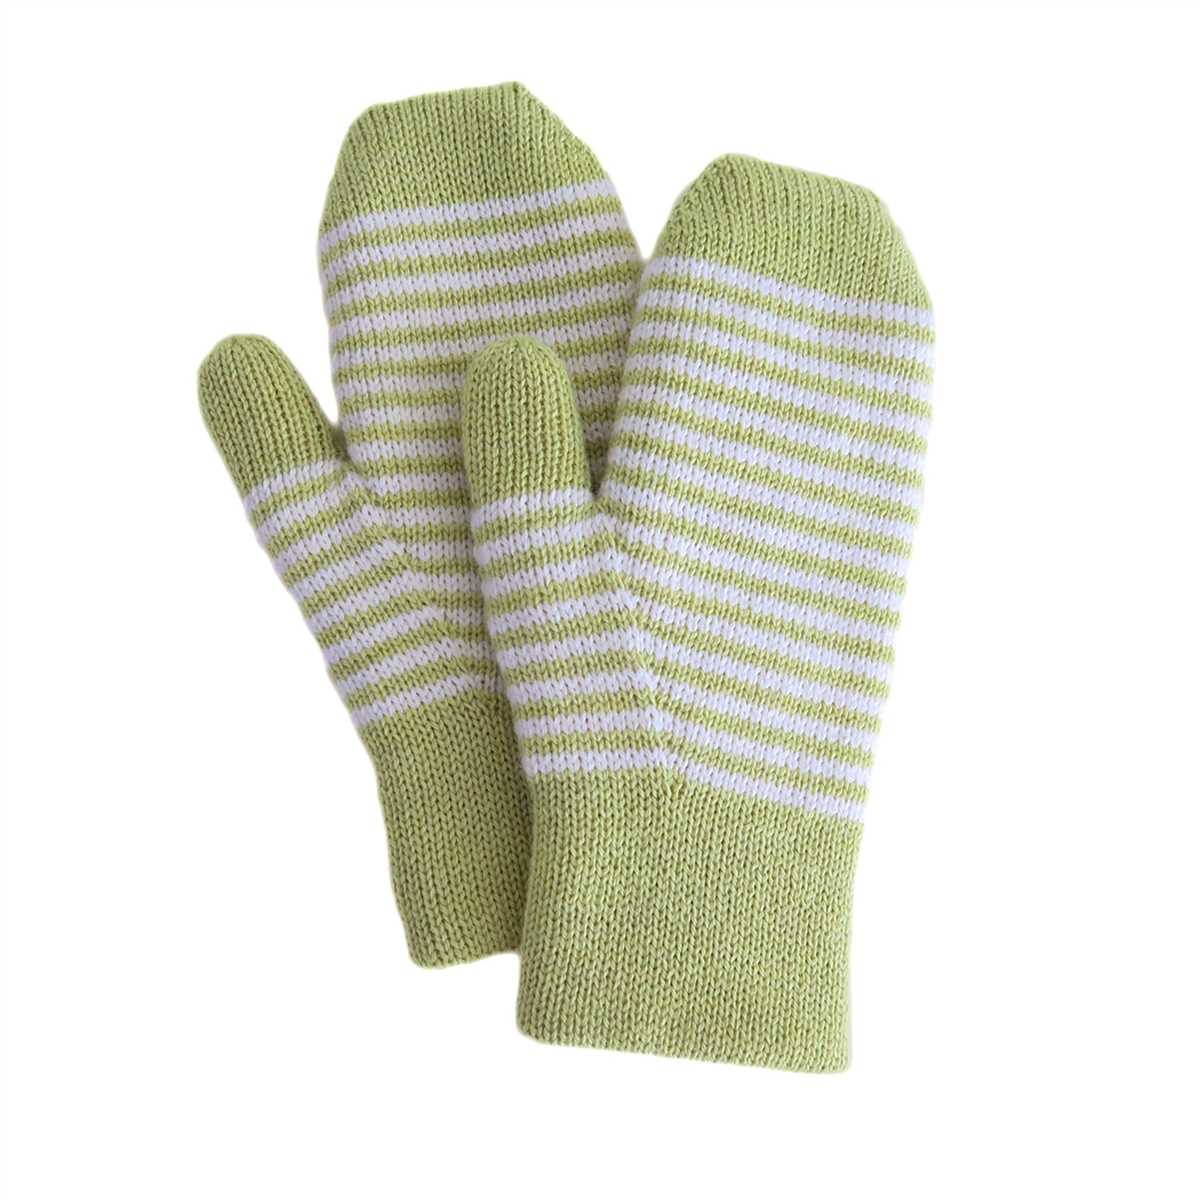
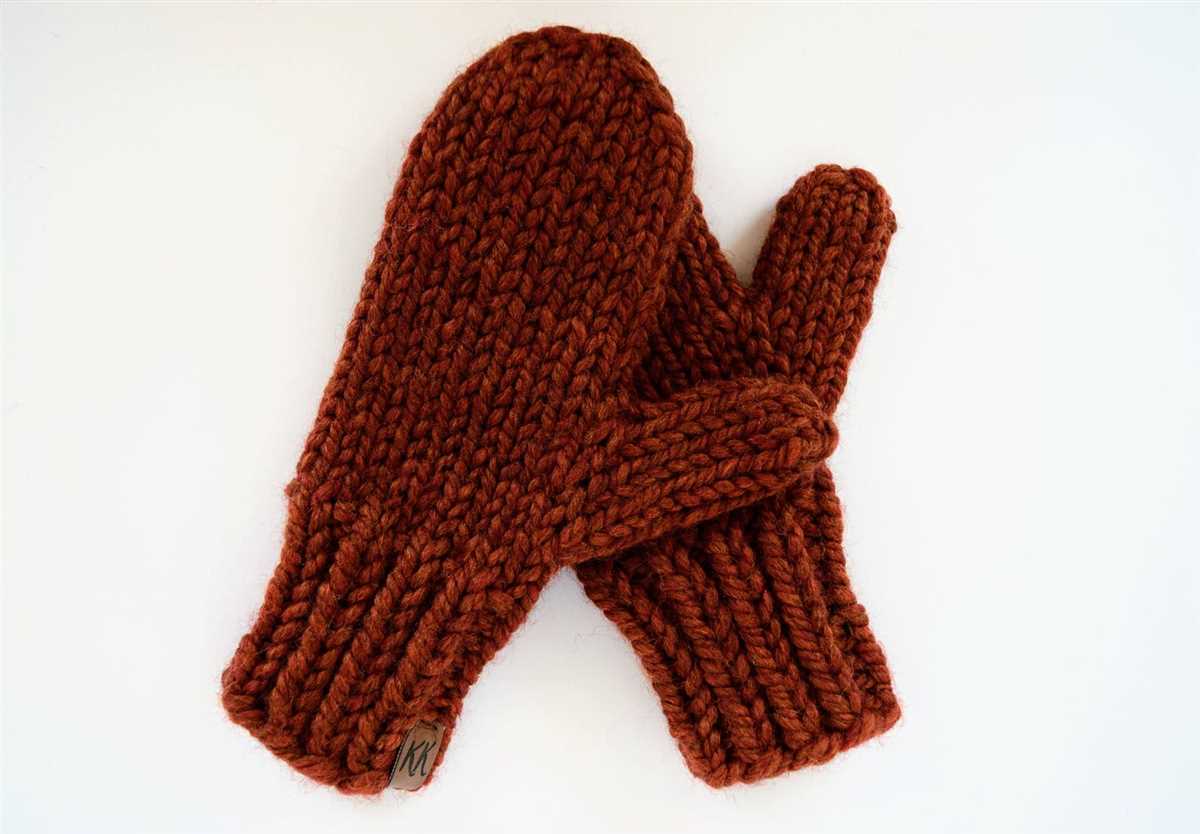
Repeat these instructions to make the second mitten. Once both mittens are complete, you can wear them with pride or gift them to someone special. These mittens are sure to keep your hands warm and stylish during the cold winter months. Happy knitting!
Gather Materials and Tools
Before starting your knitting project, it’s important to gather all the necessary materials and tools. Here is a list of items you will need:
- Circular needles: You will need a set of circular needles of the appropriate size for your desired mitten pattern. Circular needles are ideal for knitting in the round.
- Yarn: Choose a yarn that is suitable for mittens. Look for a yarn that is warm, soft, and durable. The yarn should also be of the appropriate weight for your pattern.
- Tape measure: A tape measure will be useful for taking measurements and ensuring the correct sizing of your mittens.
- Stitch markers: Use stitch markers to help keep track of your stitches and mark important areas in your pattern.
- Tapestry needle: A tapestry needle with a large eye is needed for weaving in loose ends and finishing your project.
- Scissors: A pair of small, sharp scissors will come in handy for cutting yarn and trimming any excess.
- Stitch holders or scrap yarn: If your pattern requires you to put certain stitches on hold, you will need stitch holders or scrap yarn to keep those stitches secure.
Once you have gathered all these materials and tools, you will be well-prepared to start your knitting project. Make sure to have everything within reach and organized before you begin, as it will make the process much smoother and more enjoyable.
Choose the Right Yarn and Needles
When it comes to knitting mittens on circular needles, selecting the right yarn and needles is crucial for the success of your project. The yarn and needle combination not only affects the final appearance and fit of the mittens but also influences the overall knitting experience.
Yarn: The choice of yarn for your mittens can greatly impact their warmth, durability, and comfort. It is recommended to use a yarn that is suitable for the intended purpose of the mittens. For winter mittens, opt for a bulky or worsted weight yarn that provides insulation and protection against cold temperatures. Additionally, considering yarns with natural fibers like wool, alpaca, or cashmere can enhance their warmth and softness. If you prefer a lighter weight mitten for transitional seasons, a sport or DK weight yarn would be a better option. For mittens that will be used in wet conditions, consider using a yarn that is water-resistant or can be treated with waterproofing sprays.
Needles: Choosing the right needles is equally important for a successful mitten knitting project. Circular needles are commonly used for knitting mittens as they allow you to easily knit in the round without the need for seaming. The size of your needles should correspond to the thickness of the yarn you have chosen. It is recommended to use a needle size that creates a fabric with the desired gauge as specified in the pattern. Additionally, consider the material of the needles. Metal or wooden needles offer different knitting experiences, with metal needles providing a smoother and faster knitting process, while wooden needles offer more grip and control. It is ultimately a matter of personal preference.
- Choose a yarn suitable for the intended purpose of the mittens.
- Consider natural fibers for enhanced warmth and softness.
- Opt for bulky or worsted weight yarn for winter mittens.
- Use a sport or DK weight yarn for lighter weight mittens.
- Select a circular needle size that corresponds to the yarn thickness.
- Consider the material of the needles based on personal preference.
By carefully selecting the right yarn and needles, you can ensure that your mittens not only turn out beautifully but also provide the desired warmth and comfort. Remember to check the pattern for any specific yarn or needle recommendations before starting your project. Happy knitting!
Measure and Cast On
Before you start knitting your mittens, it’s important to measure your hand to ensure a proper fit. Use a measuring tape or ruler to measure the widest part of your hand, excluding your thumb. Record this measurement for reference.
Once you have your hand measurement, you can determine the appropriate number of stitches to cast on. Most knitting patterns will provide a gauge, or number of stitches per inch, which you can use to calculate the cast-on stitches. For example, if the pattern states a gauge of 4 stitches per inch and your hand measurement is 7 inches, you would cast on 28 stitches (4 stitches per inch x 7 inches).
When casting on for mittens on circular needles, it’s important to make sure your cast-on stitches are evenly distributed around the circular needle. You can use stitch markers to mark the beginning and end of your round, and also to divide the stitches evenly if needed.
Once you have cast on the appropriate number of stitches, you can join in the round and begin knitting your mittens. Make sure to follow the pattern instructions carefully, paying attention to any specific stitch patterns or shaping that may be required.
Start Knitting the Ribbing
Before you begin knitting the ribbing for your mittens, make sure you have all the necessary materials. You will need a pair of circular knitting needles, preferably size 4 or 5, and yarn in your chosen color. It’s always a good idea to have a skein of spare yarn in case you run out during the project.
To start the ribbing, cast on your stitches using the long-tail cast-on method. This will create a neat and stretchy edge for your mittens. For a standard-sized mitten, you will need to cast on around 40-50 stitches. Adjust the number of stitches if you want a larger or smaller mitten.
Once you have cast on your stitches, join the round by bringing the last stitch to meet the first stitch, being careful not to twist the stitches. Place a stitch marker at the beginning of the round to help you keep track of your progress. This is especially important when working in the round.
Now, you can begin working the ribbing pattern. The most common ribbing pattern is a combination of knit and purl stitches. For example, you can start with the sequence of knitting two stitches and purling two stitches. Repeat this sequence until you reach the end of the round.
Continue working the ribbing pattern for about 1-2 inches, or until the ribbing looks sufficiently stretchy. This will help the mittens fit snugly around the wrists and prevent cold air from entering. Don’t worry if your ribbing looks a bit scrunched up at this stage; it will stretch out nicely once the mittens are finished.
Once you’ve completed the ribbing, you can move on to the main body of the mittens, where you will introduce new stitches and create the desired pattern. But for now, enjoy the rhythmic motions of knitting the ribbing, and anticipate the cozy and warm mittens that will be waiting for you at the end of the project.
Transition to the Body of Mittens
Now that you have completed the cuff of the mittens, it’s time to transition to the body. This is where you will start knitting in the round on your circular needles.
To begin, make sure that your stitches are evenly divided onto your needles. If you have an odd number of stitches, you can place the extra stitch on a stitch holder or divide it evenly between two needles.
Round 1: Knit all stitches in the round.
Round 2: Purl all stitches in the round.
Continue knitting in a knit 1, purl 1 rib pattern for the desired length of the mittens body. This ribbing will give the mittens a snug and stretchy fit. You can adjust the length based on your preference, but typically knitting for about 2-3 inches should be sufficient.
If you want to add any decorative elements or different stitch patterns to the body of the mittens, you can do so now. Just make sure that your stitch count remains the same throughout.
Next, you will need to shape the thumb gusset. This is done by increasing stitches on either side of a marker.
Place a stitch marker to mark the beginning of the round. Knit until 3 stitches before the marker, make a yarn over (YO), knit 1 stitch, make another YO, and then slip the marker. Continue knitting until the end of the round.
Repeat this increase round every other round until you have reached the desired number of thumb stitches. This will depend on the size of the mittens and the width of the thumb you want. Typically, increasing until you have about 8-10 thumb stitches should be enough.
Now you are ready to continue knitting the body of the mittens, using your chosen stitch pattern if desired. Keep knitting until the body measures the desired length, typically about 4-5 inches from the cuff.
At this point, you can start shaping the top of the mittens to create the finger section. This will be done by decreasing stitches gradually. There are various ways to shape the top of mittens, so choose a method that works best for you and matches the desired style of the mittens.
Once you have reached the desired number of stitches for the top of the mittens, you can finish off by closing the stitches using the Kitchener stitch or by binding off and sewing the seam.
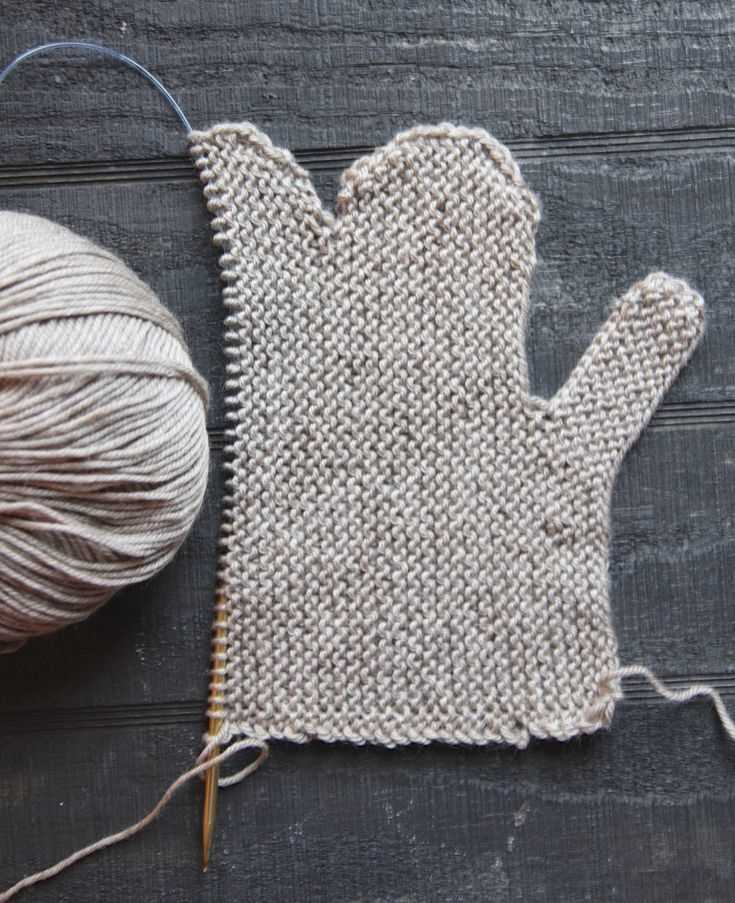
Knit the Thumb Gusset
In this step, you will be knitting the thumb gusset, which is the section of the mitten that allows for flexibility and movement in the thumb. This is an important part of the mitten construction, as it will determine the fit and comfort of the finished product.
To start, you will need to place the stitches for the thumb gusset onto a set of stitch holders or scrap yarn. This will separate them from the rest of the stitches, allowing you to work on them separately. Make sure to place a stitch marker to indicate the start of the gusset stitches.
Next, you will knit across the rest of the stitches in the round, following the pattern as instructed. Once you have completed a round of knitting, you will begin increasing the number of stitches in the thumb gusset. This is done by making one stitch, either by knitting into the front and back of a stitch or by picking up a stitch from the row below.
Continue knitting the thumb gusset in this manner, making the specified number of increases every few rounds. This will gradually shape the gusset and create the desired fit for the thumb. Make sure to follow the pattern carefully to ensure the correct number of increases are made.
Once you have completed the required number of increases, you can continue knitting the rest of the mitten as instructed. The thumb gusset will be incorporated back into the main stitch pattern, creating a seamless and comfortable fit. Make sure to weave in any loose ends and block the finished mittens to give them a polished look.
Create the Opening for the Thumb
Once you have finished knitting the main body of the mitten up to the desired length, it’s time to create the opening for the thumb. This step is crucial to ensure the mitten fits properly and provides the necessary flexibility for movement.
To create the opening, you will need to determine the number of stitches to set aside for the thumb. This will depend on the size of the mitten, but a typical range is around 8-12 stitches. Mark this section on your circular needles using stitch markers to make it easier to keep track.
Option 1: Afterthought Thumb Method
If you prefer a more traditional approach, you can use the afterthought thumb method. This involves placing waste yarn in the desired thumb location instead of actual stitches. Simply knit to the marked thumb section, then take a length of waste yarn and knit the designated number of stitches with the waste yarn. Slip these waste yarn stitches back onto the left needle, then continue knitting with the main yarn.
Once the mitten is complete, you will go back to the thumb opening and carefully remove the waste yarn. This will leave a gap in the knitting where the thumb will be. You can then pick up the live stitches on either side of the gap and use them to knit the thumb in the desired pattern.
Option 2: Thumb Gusset Method
If you prefer a more integrated thumb, the thumb gusset method is a great option. This involves increasing stitches in the thumb section to create a gusset, providing additional room for the thumb. To do this, knit to the marked thumb section and then begin increasing stitches by knitting into the front and back of certain stitches. This will gradually widen the thumb section.
Continue knitting the thumb gusset until you have reached the desired width. Then, transfer the thumb stitches to a stitch holder or waste yarn and continue knitting the rest of the mitten. Once the main mitten is complete, you can go back to the thumb stitches, place them back on the needles, and use them to knit the thumb in the desired pattern.
Knit the Hand Section
After completing the cuff section, it’s time to move on to the hand section of the mittens. This is where you will be shaping the mitten to fit your hand comfortably.
To begin, continue knitting in the round with your circular needles. Follow the pattern instructions to knit the desired length for the hand section. This will vary depending on the size of your hand and the length you prefer for your mittens.
Thumb Opening: When you reach the desired length for the hand section, it’s time to create the thumb opening. To do this, you will need to place a certain number of stitches on hold to create a gap for the thumb.
Note: The pattern will specify how many stitches to place on hold for the thumb opening. Typically, this is around 7-8 stitches.
Next, you will continue knitting the remaining stitches in the round, excluding the ones on hold for the thumb opening. This will create a tube-like shape, with a gap where the thumb opening will be.
Hand Shaping: Once the thumb opening is created, you will continue knitting the hand section according to the pattern instructions. This may include shaping the top of the mitten, decreasing the number of stitches gradually to create a tapered effect.
Note: Be sure to read the pattern carefully and follow the instructions for the hand shaping section. The pattern will specify how many stitches to decrease and when to do so.
Continue knitting following the pattern instructions until the desired length for the hand section is reached. Once completed, you can move on to the final section of the mittens, which is usually the thumb section.
Shape the Top of the Mittens
Once you have completed the body of the mittens, it is time to shape the top to create a snug fit and ensure a comfortable wear. Follow these steps to shape the top of the mittens:
- Decrease Rows: Start by decreasing the number of stitches in each round. This is done by knitting two stitches together at regular intervals. You can use a stitch marker to help keep track of where each decrease is made.
- Continue Decreasing: After the initial decrease round, continue to decrease in each subsequent round until the desired number of stitches remain. This will depend on the size of the mittens you are making and the fit you prefer.
- Switch to Double-Pointed Needles: As the top of the mittens becomes more narrow, you may find it easier to switch from circular needles to double-pointed needles. This will allow you to continue decreasing and shaping the top more easily.
- Bind Off: Once you have reached the desired number of stitches, it is time to bind off. Cut the yarn, leaving a long tail, and thread it through the remaining stitches. Pull tight to secure the top of the mittens.
By following these steps, you will be able to shape the top of your mittens and create a finished product that fits comfortably and snugly. Remember to adjust the number of decreases and the size of the needle depending on the pattern you are following and the size of the mittens you are making.
Knit the Thumb
After completing the hand section of the mittens, it’s time to move on to knitting the thumb. The thumb is an essential part of the mitten, allowing for better dexterity and movement. To start knitting the thumb, make sure to have separate stitches reserved for it.
Step 1: Using the circular needles, place the reserved thumb stitches onto the needles. These stitches are usually held on a stitch holder or waste yarn while you knit the hand section.
Step 2: Divide the thumb stitches evenly onto three double-pointed needles or use the magic loop method if you prefer. This will allow you to knit the thumb in the round.
Step 3: Begin knitting the thumb by following the thumb stitch pattern indicated in the pattern. This may involve knitting in stockinette stitch, ribbing, or any other stitch pattern specified.
Step 4: Continue knitting the thumb until it reaches the desired length or until the pattern instructs you to stop. Make sure to check the fit of the thumb as you go along to ensure it is comfortable and fits well.
Step 5: Once the thumb is complete, securely bind off the stitches and weave in any loose ends. Make sure to leave a long enough tail for weaving in to prevent unraveling.
Step 6: Repeat the process for the second mitten to complete the pair.
- Remember to consult the knitting pattern for any specific instructions regarding the thumb section, as different patterns may have variations in the thumb shaping or stitch patterns.
- Be sure to try on the mittens after knitting the thumb to ensure a proper fit before finishing the project.
- Feel free to customize the thumb section by adding decorative elements such as cables, colorwork, or textured stitches to match your personal style.
Finishing Touches: Sewing and Weaving in Ends
After completing your mittens on circular needles, there are a few finishing touches to make them perfect. Sewing and weaving in ends is an important step in the knitting process to ensure your mittens are secure and neat.
First, you will need a tapestry needle and scissors. Thread the tapestry needle with the tail end of your yarn. Starting from the inside of the mitten, stitch the tail end through the stitches on the fabric, securing it in place. Repeat this process for any other loose ends from changing colors or adding new yarn.
Note: It is important to weave in the ends securely to prevent them from unraveling with wear. Take your time and make sure each end is properly secured before moving on to the next one.
Once you have sewn in all the ends, use the scissors to carefully trim any excess yarn, making sure not to cut the stitches. Be mindful of the length you leave, as you don’t want any loose ends sticking out.
Pro tip: To avoid a bulky appearance, trim the ends as close to the fabric as possible without risking them coming loose. Be careful not to cut the actual knitting!
To keep track of your progress and ensure you have sewn in all the ends, it can be helpful to create a checklist. You can use a simple table to list the number of ends you have sewn in for each mitten, making it easier to keep track and make sure you don’t miss any.
- Mitten 1: 4 ends sewn in
- Mitten 2: 4 ends sewn in
By taking the time to sew and weave in the ends properly, you will have beautifully finished mittens that are comfortable and durable. So don’t rush this step and enjoy the satisfaction of completing your project with a professional touch!
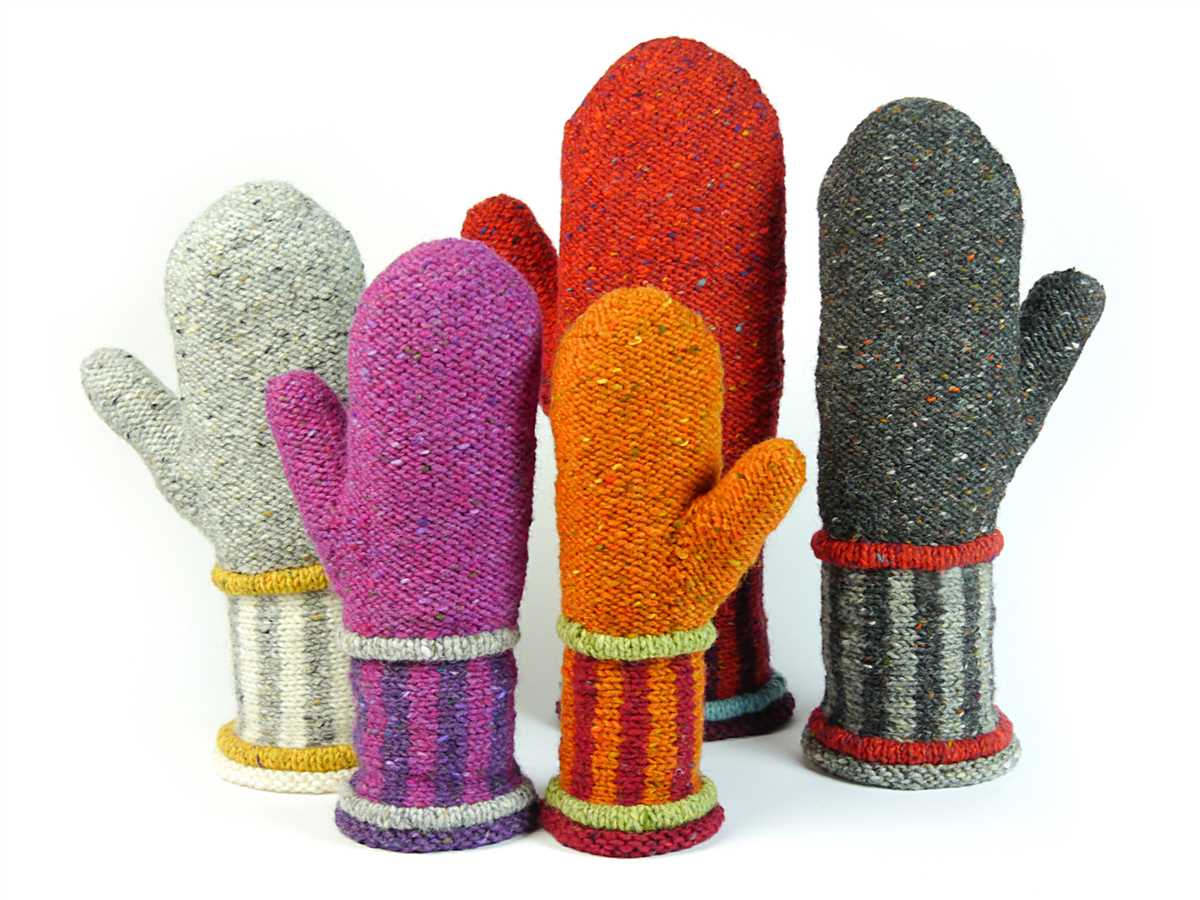
Enjoy Your Hand-Knit Mittens!
Congratulations! You have completed your beautiful hand-knit mittens using a circular needle. Now it’s time to enjoy the warmth and style they bring to your winter wardrobe. Whether you’re keeping your hands cozy on a chilly day or giving them as a thoughtful gift, these mittens are sure to bring joy and comfort to the wearer.
With their unique design and personalized touch, your hand-knit mittens are truly one-of-a-kind. The time and effort you put into creating them make them even more special. Show off your craftsmanship and enjoy the compliments that come your way.
Not only are your mittens practical and stylish, but they also provide a great opportunity for self-expression. Add your own flair by choosing different colors, patterns, or stitch variations. Let your creativity shine through and make each pair of mittens uniquely yours.
Remember to take good care of your mittens to ensure their longevity. Hand-wash them gently in lukewarm water using mild detergent, then lay them flat to dry. Avoid twisting or wringing them out, as this can damage the delicate fibers. With proper care, your hand-knit mittens will last for many winters to come.
So, go ahead and embrace the warmth and comfort of your hand-knit mittens. Whether you’re out for a stroll in the snow or curling up by the fireplace with a cup of hot cocoa, these mittens will keep your hands cozy and stylish. Enjoy the satisfaction of wearing something handmade and knowing that you created something beautiful with your own two hands.