
Knitting has always been a popular craft, and one of the most enjoyable projects to take on is creating your own knitted pumpkin. These charming autumn decorations are perfect for adding a cozy touch to your home during the fall season. What makes these pumpkins even more special is using chunky yarn, which creates a soft and squishy texture that adds extra warmth and charm.
With a knitted pumpkin pattern, you’ll have the opportunity to let your creativity shine. From choosing the perfect shades of orange and green to adding intricate details like knitted leaves or unique stitches, you can make each pumpkin truly one-of-a-kind. Whether you’re a beginner or an experienced knitter, there are patterns available to suit every skill level and style preference.
So, why not give your home a touch of homemade beauty this autumn? With a knitted pumpkin pattern and some chunky yarn, you can create a cozy and charming decoration that will be the envy of all your friends and family. Get your needles and yarn ready, and let’s start knitting some adorable pumpkins!
What is a knitted pumpkin?
A knitted pumpkin is a small decorative item that is made using knitted techniques. It is shaped like a pumpkin and can be used to add a touch of autumnal charm to your home decor. Knitted pumpkins are typically created using chunky yarn, which gives them a cozy and textured appearance.
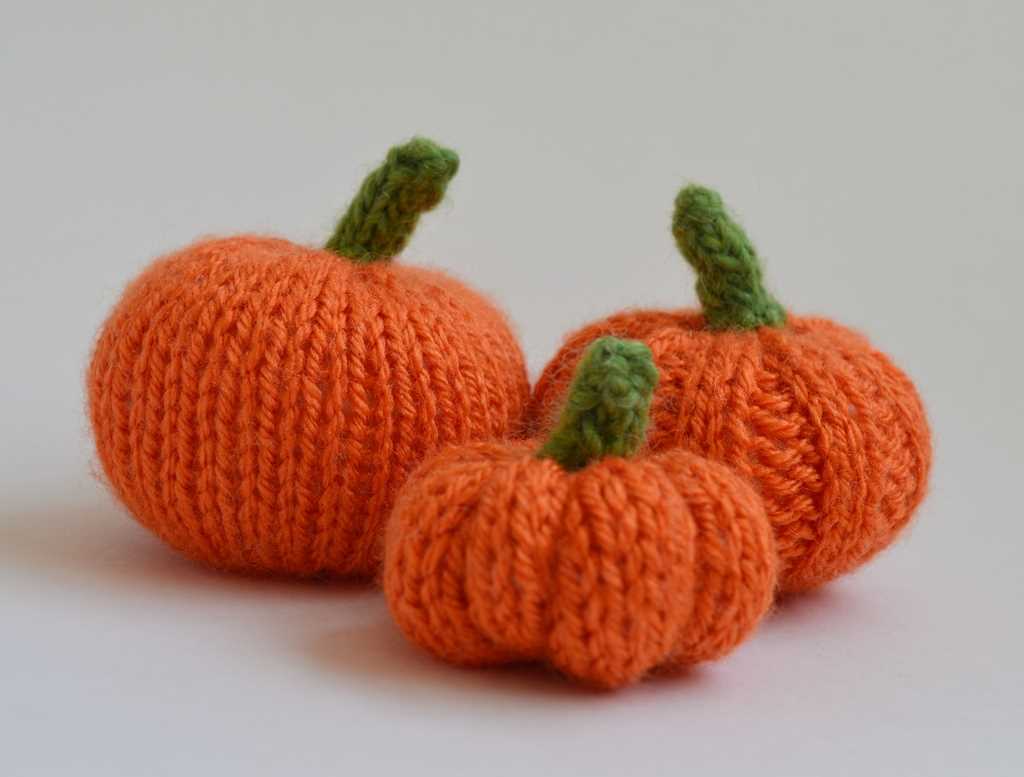
Knitted pumpkins can be made in a variety of sizes, ranging from small tabletop decorations to larger ones that can be placed on the floor. They can be used to create a centerpiece for your dining table, placed on your mantel, or used as part of a fall-themed display.
Materials needed for knitting a pumpkin
- Chunky yarn in autumnal colors
- Knitting needles (size will depend on the thickness of your yarn)
- Stuffing material
- Tapestry needle
- Scissors
Knitting techniques for making a pumpkin
- Cast on the required number of stitches
- Knit in the round to create the body of the pumpkin
- Shape the pumpkin by increasing and decreasing stitches
- Stuff the pumpkin with the stuffing material
- Close up the top of the pumpkin and secure tightly
Once the knitted pumpkin is complete, you can personalize it by adding a stem and leaves using additional yarn or fabric. You can also experiment with different patterns and textures to create unique and one-of-a-kind pumpkins.
Why use chunky yarn for knitting pumpkins?
If you are looking to create a unique and eye-catching Halloween or fall decoration, knitting pumpkins with chunky yarn is a great option. Chunky yarn is thicker and bulkier than regular yarn, which makes it perfect for creating bold and large knitted items like pumpkins.
1. Speed and efficiency: Chunky yarn allows you to easily knit larger stitches, which means you can complete your pumpkin project much faster than if you were using thinner yarn. This is especially useful if you are looking to knit multiple pumpkins or have a deadline to meet.
2. Texture and appearance: The thick and chunky nature of this yarn gives your knitted pumpkins a cozy and rustic appearance, perfect for adding warmth and charm to your fall decor. The texture of the chunky yarn also adds depth and dimension to the pumpkins, making them stand out and look more lifelike.
3. Durability: Chunky yarn is made from thicker strands of fiber, which makes the finished pumpkins more durable and less prone to wear and tear. This is especially important if you plan on using your knitted pumpkins year after year as part of your seasonal decorations.
4. Versatility: Chunky yarn comes in a wide variety of colors and textures, allowing you to customize your pumpkins to suit your personal style and decor. Whether you prefer vibrant and bold colors or more natural and earthy tones, there is a chunky yarn out there that will meet your needs.
Overall, using chunky yarn for knitting pumpkins is a practical and enjoyable choice. It offers speed, durability, and a unique aesthetic that will make your knitted pumpkins stand out as a beautiful addition to your seasonal decor.
Materials needed for a knitted pumpkin
In order to knit a pumpkin, you will need a few materials to get started. Here is a list of what you will need:
- Chunky yarn: Choose a chunky yarn in a color that resembles a pumpkin, such as orange or a mix of orange and brown. The chunky yarn will help create a textured and cozy look for your knitted pumpkin.
- Knitting needles: You will need a pair of knitting needles suitable for the chunky yarn you have chosen. Make sure the size of the needles matches the recommended size for the yarn.
- Stuffing: To give your knitted pumpkin its shape and fullness, you will need stuffing. You can use polyester fiberfill or any other type of stuffing that is soft and lightweight.
- Tapestry needle: A tapestry needle will come in handy for sewing up the seams of your knitted pumpkin and weaving in any loose ends.
- Scissors: You will need a pair of scissors to cut the yarn and trim any excess threads.
- Stitch markers: Stitch markers are helpful for keeping track of your stitches and counting rows. They can be placed on the knitting needles or attached directly to the yarn.
Once you have gathered all of these materials, you will be ready to start knitting your pumpkin. The chunky yarn, knitting needles, stuffing, tapestry needle, scissors, and stitch markers are essential tools that will help you create a beautiful and decorative knitted pumpkin. Follow a knitted pumpkin pattern specific to chunky yarn to get started on your project and enjoy the process of bringing your pumpkin to life with your knitting skills.
Step-by-step instructions for knitting a pumpkin
If you want to create a cozy and decorative pumpkin for your home, knitting one out of chunky yarn is a perfect option. Not only is it a fun and relaxing project, but the end result will add a touch of warmth and charm to your decor. Follow these step-by-step instructions to create your very own knitted pumpkin.
Materials you will need:
- Chunky yarn in your desired color(s)
- Knitting needles (size recommended for your chosen yarn)
- Scissors
- Tapestry needle
- Polyester fiberfill or another stuffing material
- Stitch marker or safety pin
Instructions:
- Start by casting on the desired number of stitches, depending on how big you want your pumpkin to be. It’s recommended to start with around 30 stitches.
- Join in the round, placing a stitch marker or safety pin to mark the beginning of the round.
- Continue knitting in the round using the stockinette stitch or any other stitch pattern you prefer. Knit until your work measures approximately 4-5 inches in height.
- Switch to a contrasting color of yarn to create the pumpkin’s segments. Continue knitting in the round, but this time alternating between knitting and purling rows to create a textured effect for the segments.
- Continue knitting until your work measures approximately 8-9 inches in height.
- Decrease the number of stitches gradually to shape the top of the pumpkin. This can be done by knitting two stitches together at regular intervals throughout the round.
- When you have only a few stitches remaining, cut the yarn, leaving a long tail. Thread the tail through a tapestry needle and pass it through the remaining stitches, pulling tight to close the top of the pumpkin.
- Turn the pumpkin inside out and stuff it firmly with polyester fiberfill or another stuffing material of your choice.
- Cinch the bottom of the pumpkin by pulling the yarn tightly and securing it. Weave in any loose ends.
- To add a stem, cut a small piece of a branch or use a twisted piece of yarn. Attach it to the top of the pumpkin using a tapestry needle and some yarn.
Once your knitted pumpkin is complete, you can display it on a shelf, use it as a centerpiece, or even give it as a gift. Enjoy the cozy and festive atmosphere it brings to your home!
Tips for achieving the perfect knitted pumpkin shape
Knitting a pumpkin with chunky yarn can be a fun and rewarding project. To ensure that your knitted pumpkin comes out with the perfect shape and texture, there are a few tips to keep in mind.
Choose the right yarn
When knitting a pumpkin, it’s important to choose the right type of yarn. Chunky yarn, such as a super bulky weight yarn, will give your pumpkin a fuller and more defined shape. Look for a yarn that has a good amount of elasticity and provides excellent stitch definition.
Use the right needle size
The needle size you choose can also affect the shape of your knitted pumpkin. Using a smaller needle size will result in a tighter and more compact pumpkin, while using a larger needle size will give your pumpkin a more open and airy feel. Experimenting with different needle sizes can help you achieve the perfect shape for your pumpkin.
Increase and decrease strategically
To achieve the rounded shape of a pumpkin, you will need to strategically increase and decrease stitches. Start by casting on a smaller number of stitches and then gradually increase the stitch count as you work your way up. Once you reach the desired width of your pumpkin, start decreasing stitches evenly to create a tapered top. Following a knitted pumpkin pattern can provide guidance on when and where to make these increases and decreases.
Add stuffing for a fuller shape
To give your knitted pumpkin a realistic and full shape, consider adding stuffing. Stuffing can be added before closing up the top of the pumpkin or as you go along. Use a polyester fiberfill or similar material to create a smooth and even shape. Fill the pumpkin firmly, but be careful not to overstuff, as this can distort the shape.
By considering these tips and techniques, you can achieve the perfect knitted pumpkin shape with chunky yarn. Whether you’re using your pumpkin as a decorative piece for the fall season or as a fun toy, the right shape will make it stand out.
Ideas for Decorating Knitted Pumpkins
Knitted pumpkins add a cozy touch to any autumn or Halloween decor. These chunky yarn pumpkins are not only fun to knit, but they also provide endless opportunities for creative decorating. Whether you want to keep it simple or go all out, here are some ideas for decorating your knitted pumpkins.
Pom-Pom Embellishments
Add a playful twist to your knitted pumpkins by attaching pom-poms as embellishments. You can use matching or contrasting colored pom-poms to create a fun and eye-catching look. Simply sew the pom-poms onto the pumpkin using a needle and thread, or use a hot glue gun for a secure and quick attachment.
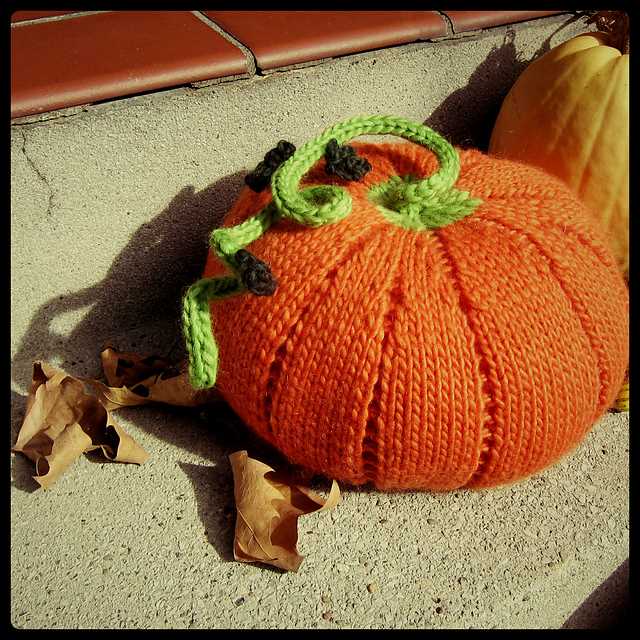
Faux Leaves and Twigs
To give your knitted pumpkins a more realistic look, consider adding some faux leaves and twigs. Use small artificial leaves and twigs that you can find at craft stores, and attach them to the pumpkin using a hot glue gun. This will create a natural and rustic feel, perfect for autumn-themed decor.
Painted Designs
If you’re feeling artistic, you can paint designs onto your knitted pumpkins using fabric paint or acrylic paint. Whether you want to create intricate patterns, simple shapes, or even faces, painting can add a personalized touch to your pumpkins. Take your time and let your creativity flow!
Ribbon and Bow Accents
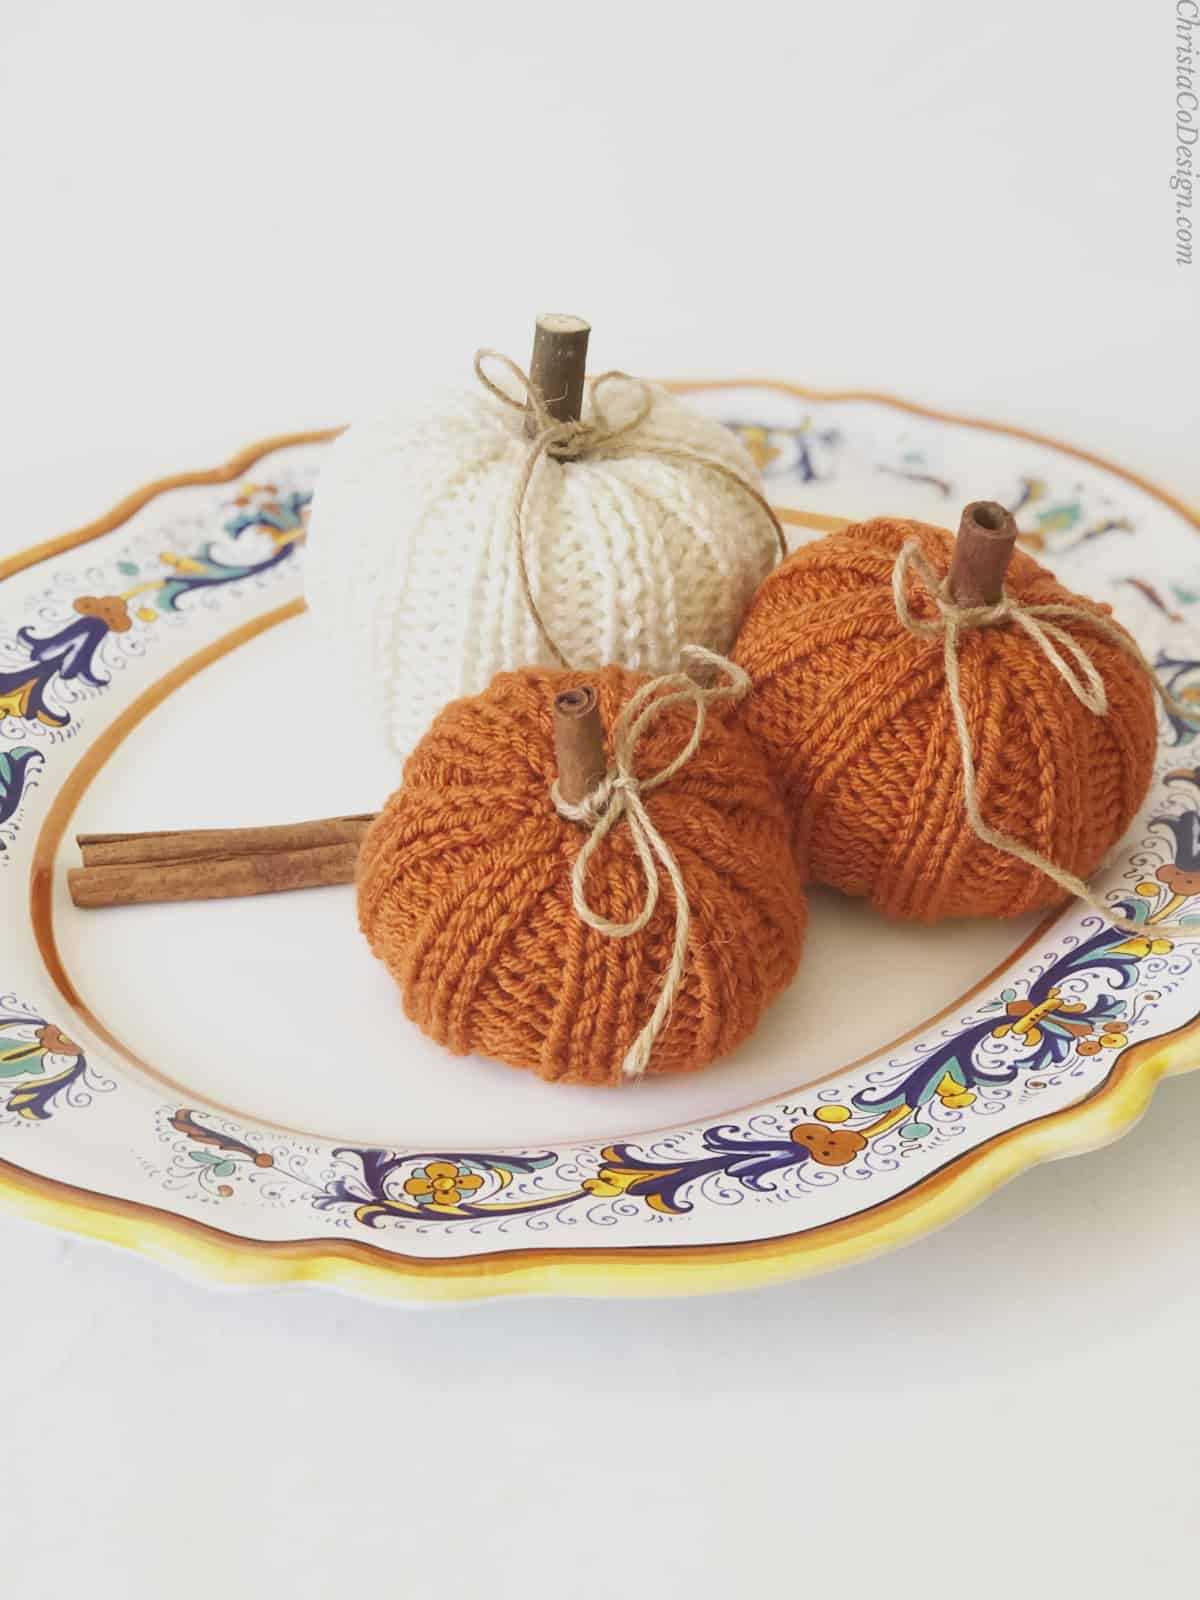
Add some elegance to your knitted pumpkins by incorporating ribbons and bows. You can wrap a ribbon around the pumpkin’s stem for a classy look, or tie a bow around the base of the pumpkin. Choose ribbons in colors and patterns that complement your existing decor or go for a contrasting pop of color.
Table Centerpiece Display
Arrange a group of knitted pumpkins in varying sizes and colors as a centerpiece for your dining table or coffee table. Add some dried leaves, pinecones, or acorns for an extra touch of nature. This will create a warm and inviting atmosphere that will surely impress your guests.
When it comes to decorating knitted pumpkins, the sky’s the limit. Let your imagination run wild and have fun creating unique and personalized decorations for your home.
Alternative patterns for knitted pumpkins
If you’re looking to add some variety to your collection of knitted pumpkins, there are plenty of alternative patterns that you can try. Whether you’re a beginner or an experienced knitter, these patterns offer unique designs and techniques that will help you create pumpkins with different textures and styles.
1. Cable Knit Pumpkin: This pattern incorporates cable knitting, creating a cozy and textured look for your pumpkin. By using chunky yarn, you can enhance the definition of the cables and give your pumpkin a more rustic feel.
2. Striped Pumpkin: Add some color to your pumpkin collection by knitting striped pumpkins. You can experiment with different color combinations and widths of stripes to create a fun and playful effect. This pattern is great for using up leftover yarn.
3. Lace Pumpkin: For a more delicate and elegant design, try knitting a lace pumpkin. This pattern uses lace stitch patterns, creating a beautiful and intricate texture. Use a lighter weight yarn to emphasize the delicate details.
4. Bobble Stitch Pumpkin: Give your pumpkin some extra texture by using the bobble stitch. This pattern creates small, raised bobbles all over the pumpkin, adding dimension and interest. You can use a single color or experiment with multiple colors to create a unique look.
5. Fair Isle Knit Pumpkin: If you’re up for a challenge, try knitting a Fair Isle pumpkin. This pattern incorporates stranded colorwork, allowing you to create intricate and colorful designs. Choose a combination of autumn-inspired colors to bring your pumpkin to life.
6. Ruffled Pumpkin: Add a feminine touch to your pumpkin collection by knitting a ruffled pumpkin. This pattern uses ruffle stitches to create a frilly and textured look. Choose a soft and lightweight yarn to enhance the ruffles and create a whimsical effect.
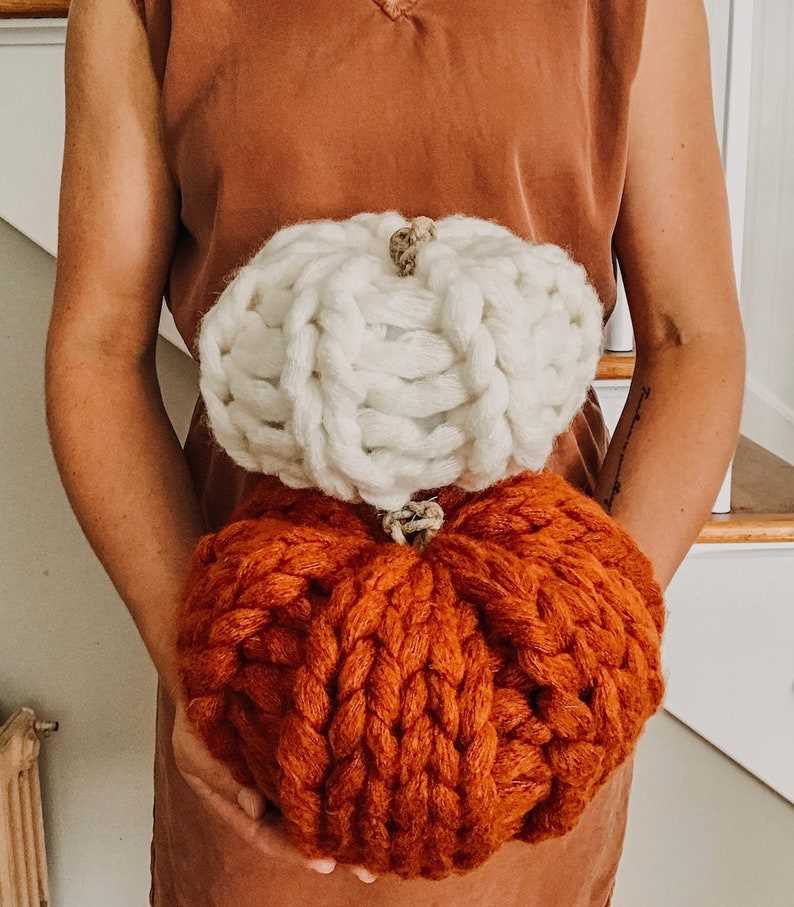
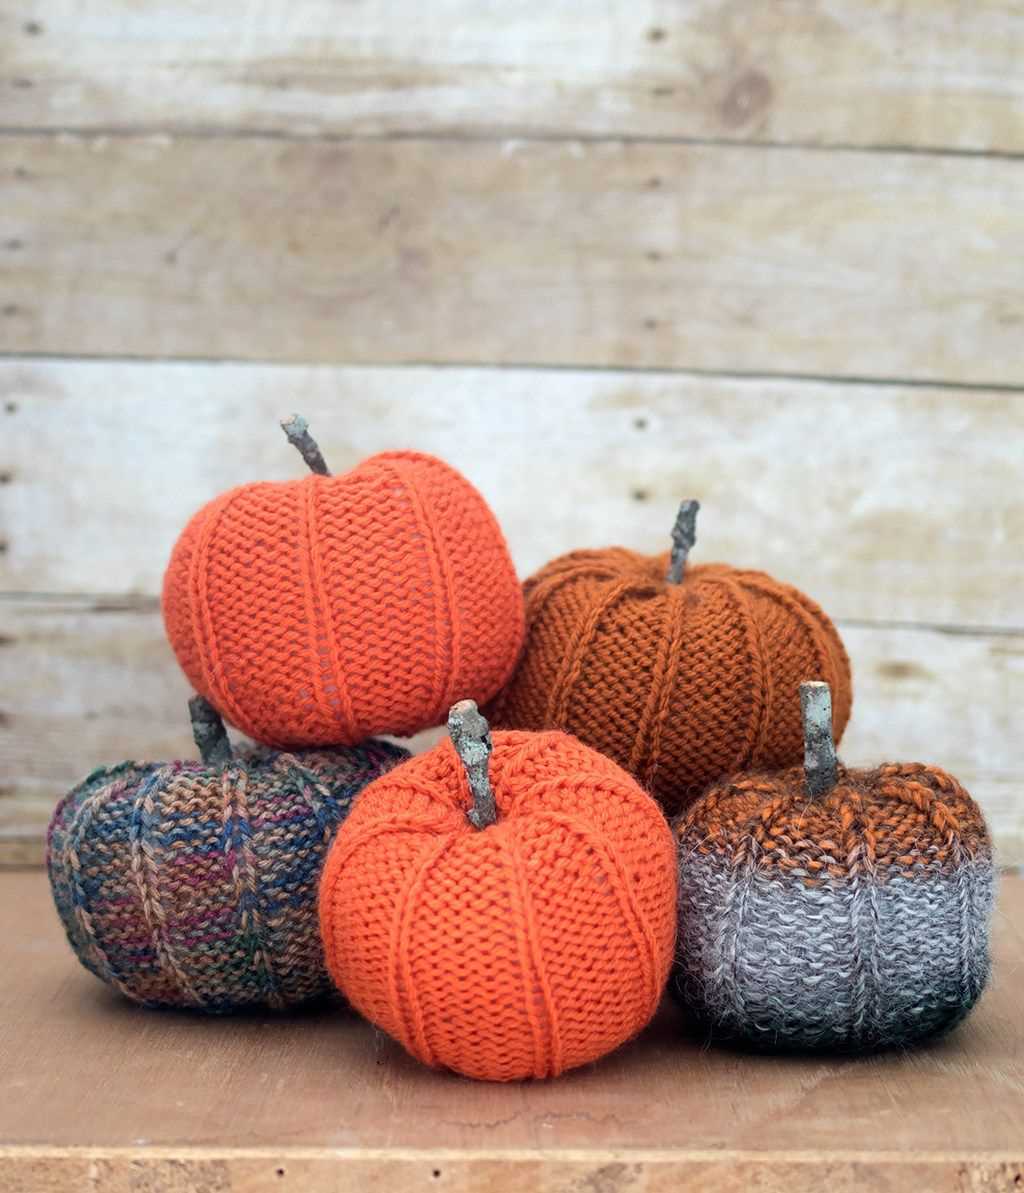
Examples of knitted pumpkins using chunky yarn
Chunky yarn is a great option for knitting pumpkins as it creates a beautiful textured look and allows you to quickly make larger-sized pumpkins. Here are some examples of knitted pumpkins using chunky yarn:
-
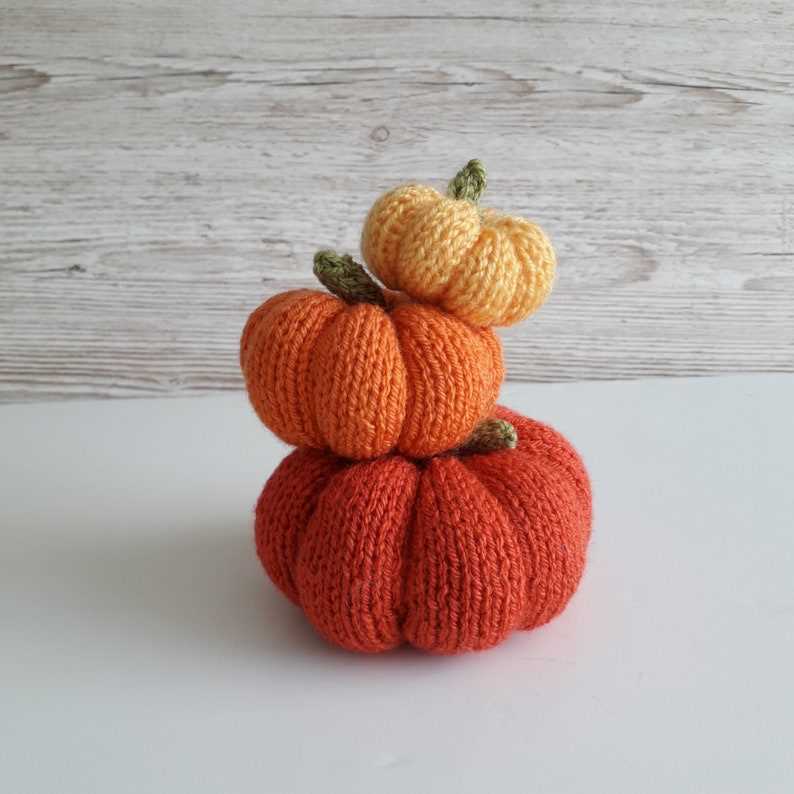
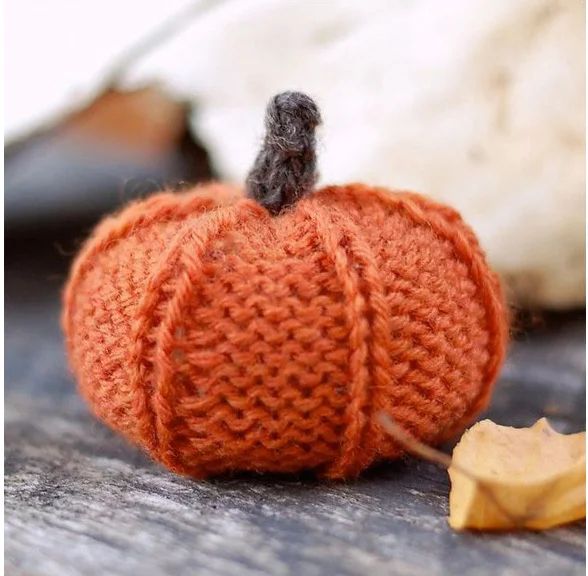
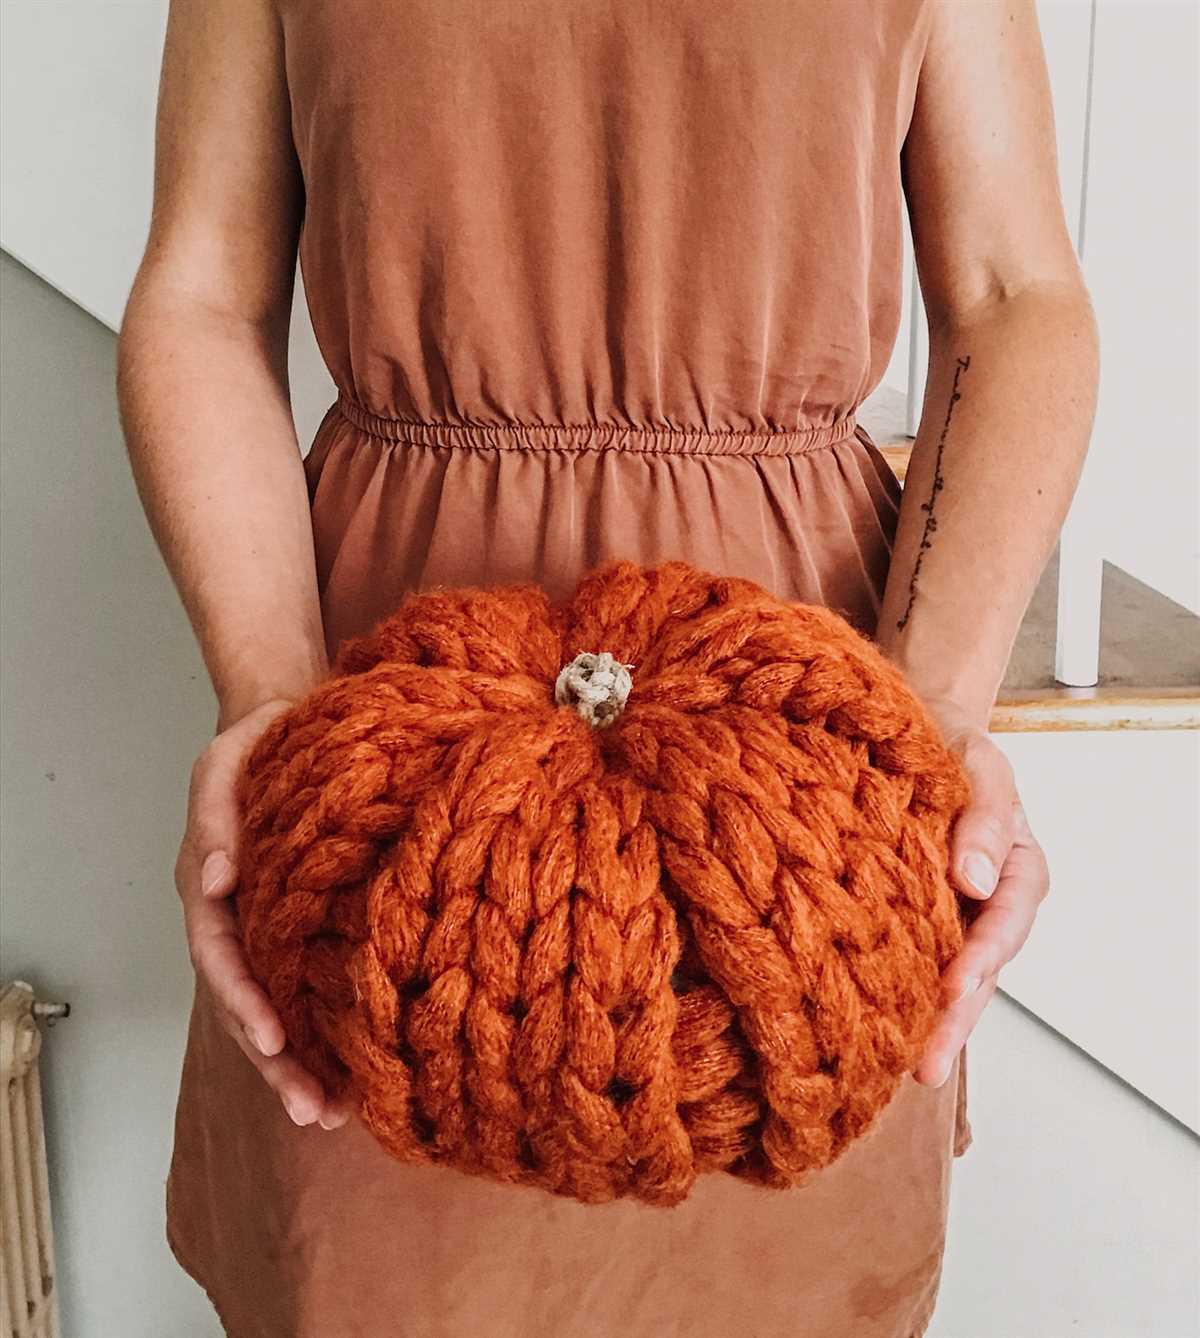
Orange knitted pumpkin: This pumpkin is made using a vibrant orange chunky yarn. The chunky texture adds an extra dimension to the pumpkin, making it visually appealing. The size of the pumpkin can vary depending on the number of stitches and rows you knit.
-
Striped knitted pumpkin: For a playful and colorful effect, you can use different colors of chunky yarn to create stripes on your pumpkin. This can be done by alternating between different colors for each row.
-
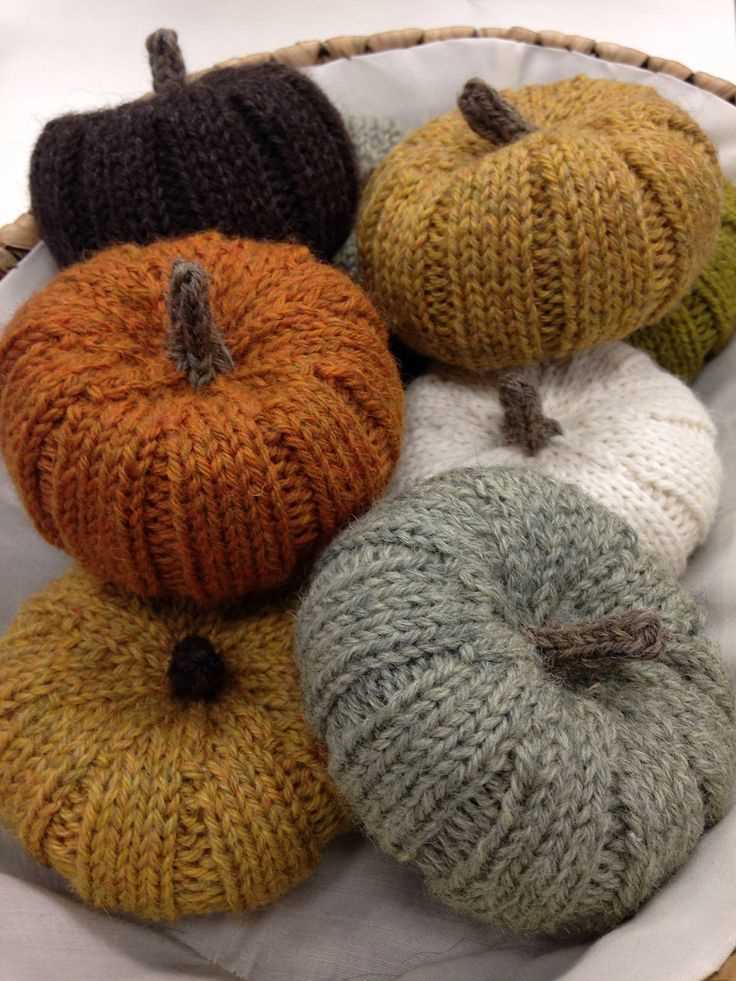
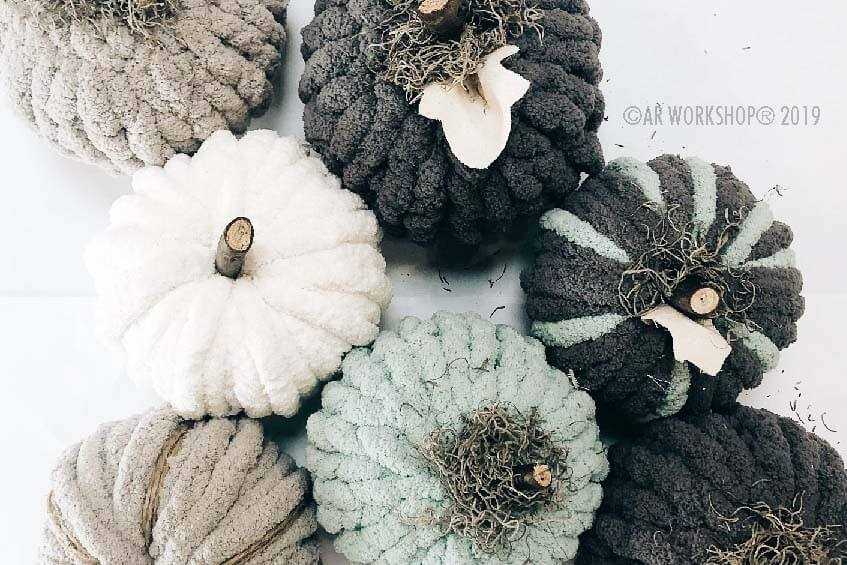
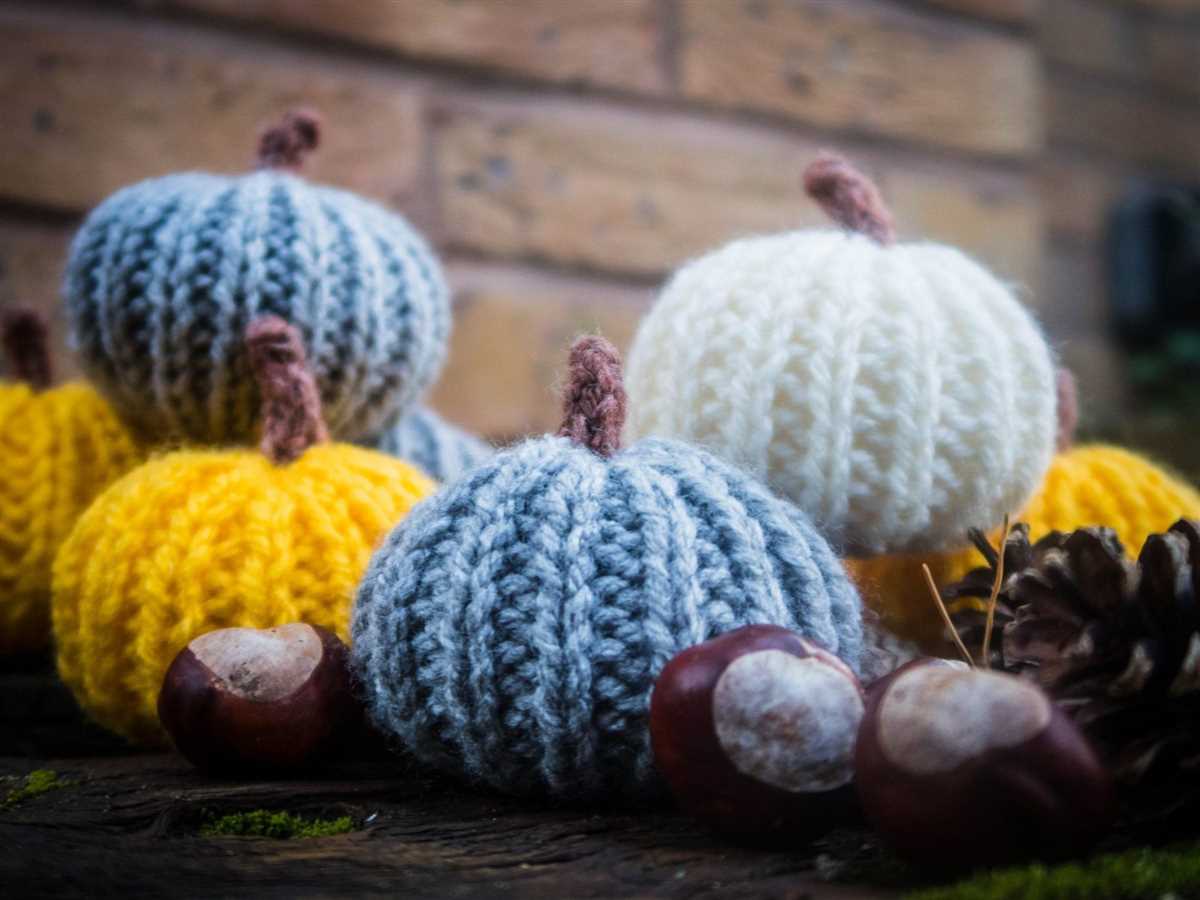
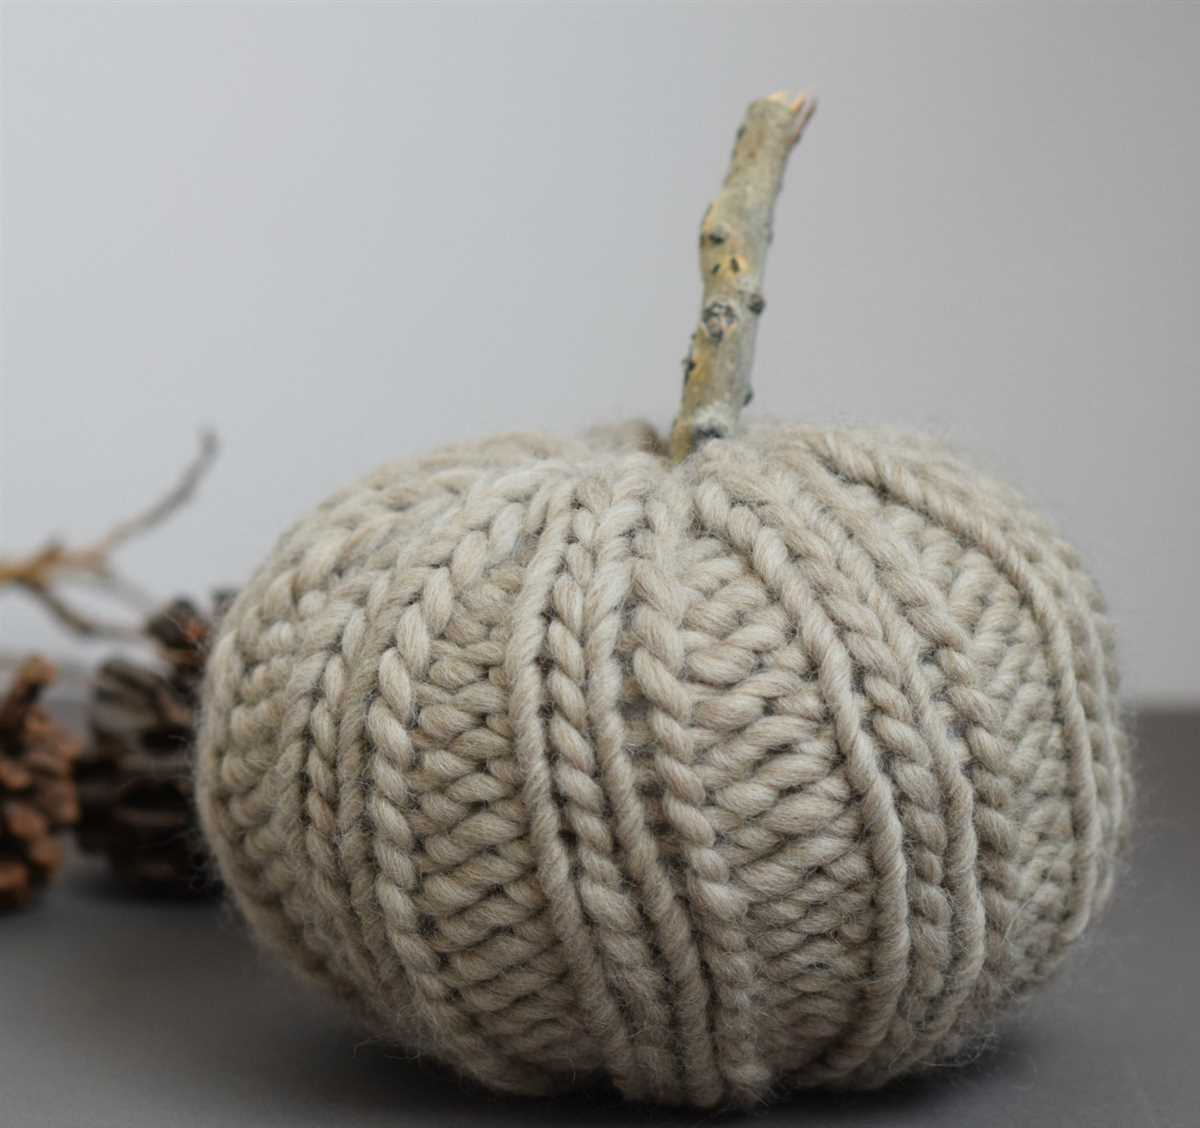
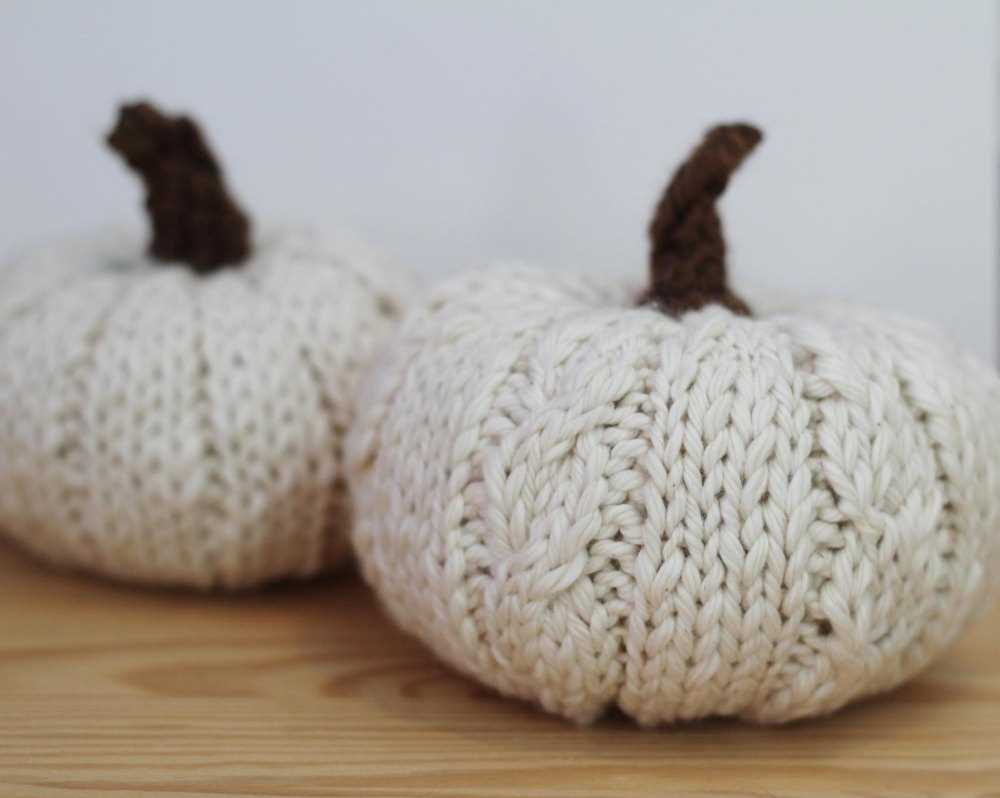
Neutral-toned knitted pumpkins: If you prefer a more subtle and natural look, you can use neutral-toned chunky yarn such as beige or brown. These pumpkins can easily blend in with your home decor and give a cozy autumn feel to any space.
-
Textured knitted pumpkin: Chunky yarn allows for different knitting techniques to be easily showcased. You can experiment with cable stitches, popcorn stitches, or other textured patterns to give your pumpkin a unique and eye-catching look.
Knitting pumpkins using chunky yarn is a fun and rewarding project that can add a touch of autumn to your home decor. With the right yarn and knitting techniques, you can create beautiful pumpkins that will be a standout piece in any room. So grab your chunky yarn and knitting needles and start making your own knitted pumpkins today!