
Knitting is a popular craft loved by many. It allows individuals to create beautiful and functional items using just a pair of needles and some yarn. One of the most common items knitters like to make are socks. Socks are not only practical, but they can also be a fun and rewarding project to work on.
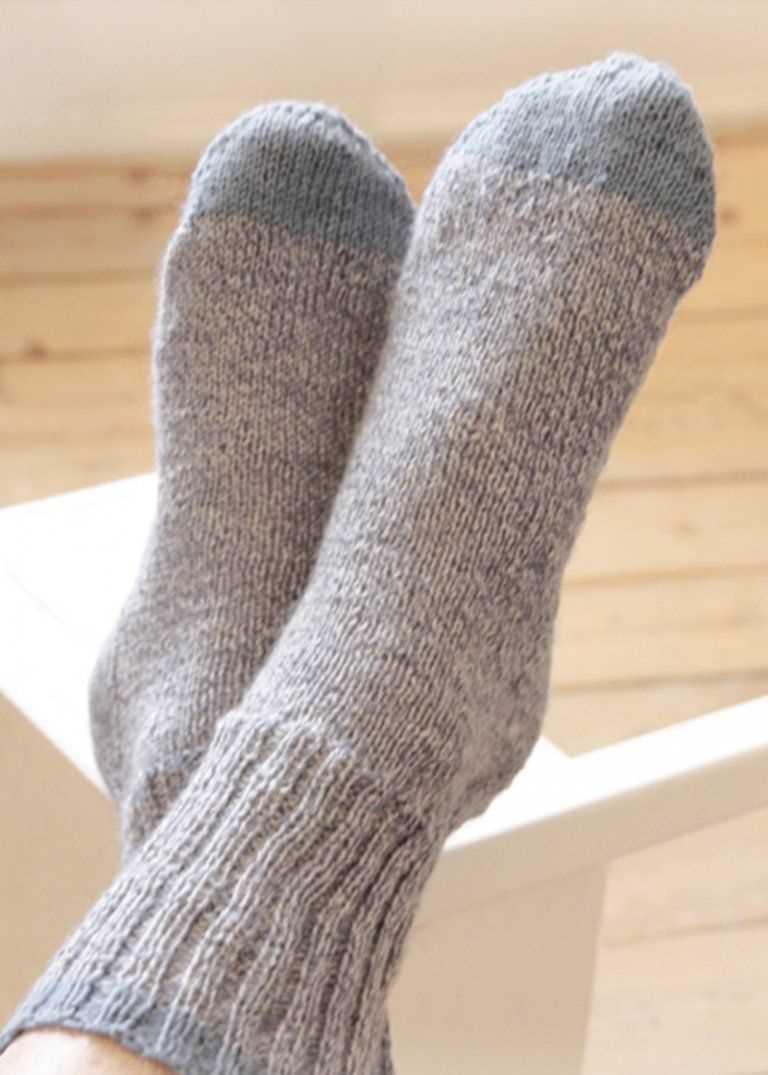
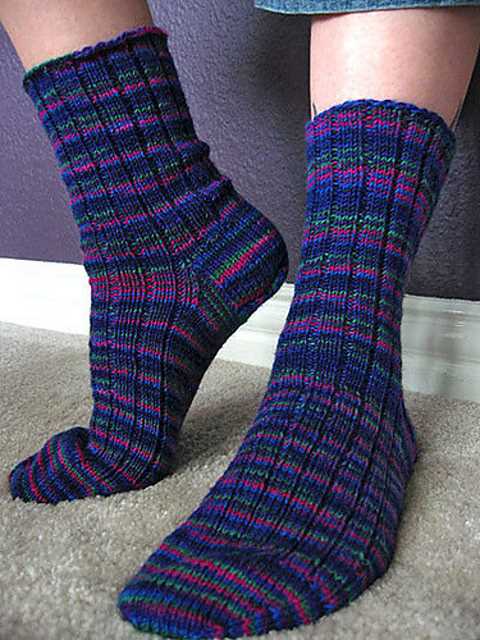
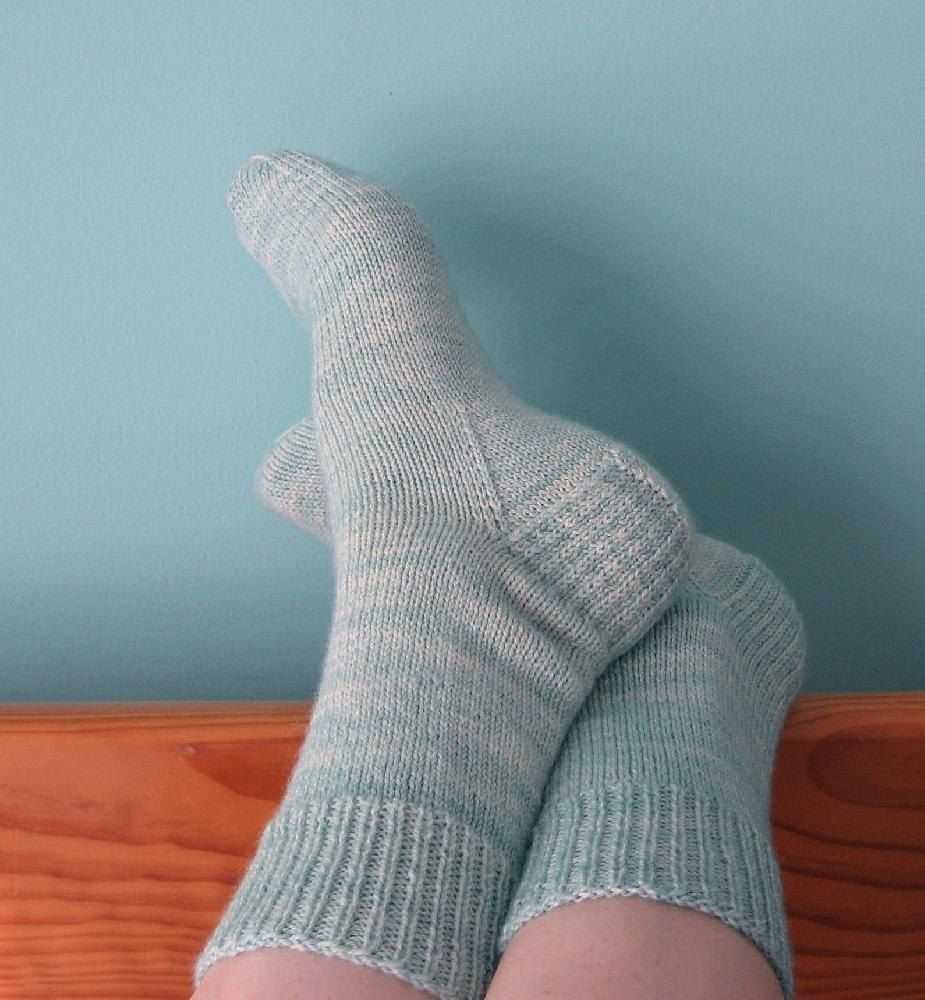
If you’re looking for a new sock pattern to try, look no further than the men’s ribbed socks knitting pattern. Ribbing is a popular technique in knitting that creates a stretchy and snug fabric. It is perfect for socks as it provides a comfortable fit that hugs the foot and helps to keep the socks in place.
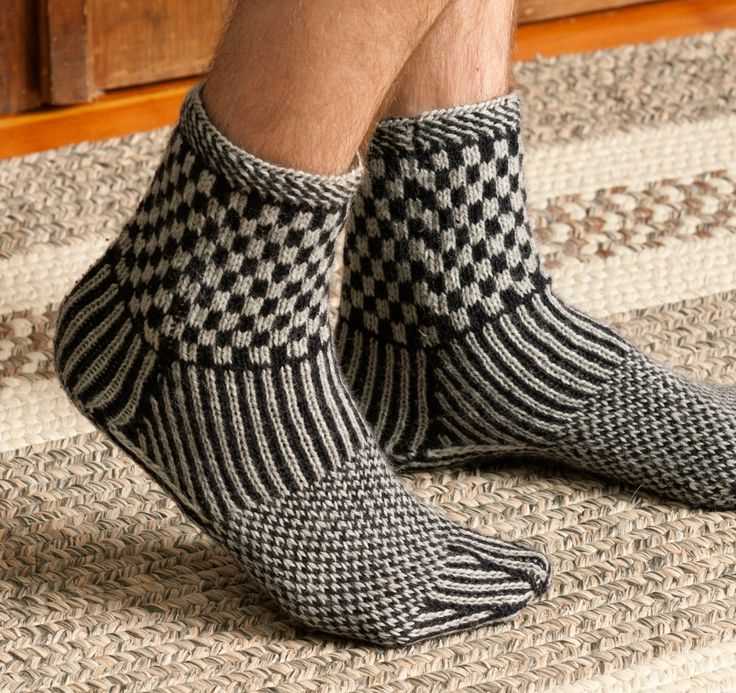
The men’s ribbed socks knitting pattern is suitable for both experienced knitters and those who are new to the craft. The pattern is worked from the cuff down and features a classic ribbed design that is both stylish and versatile. Whether you’re knitting for yourself or someone else, these socks are sure to be a hit.
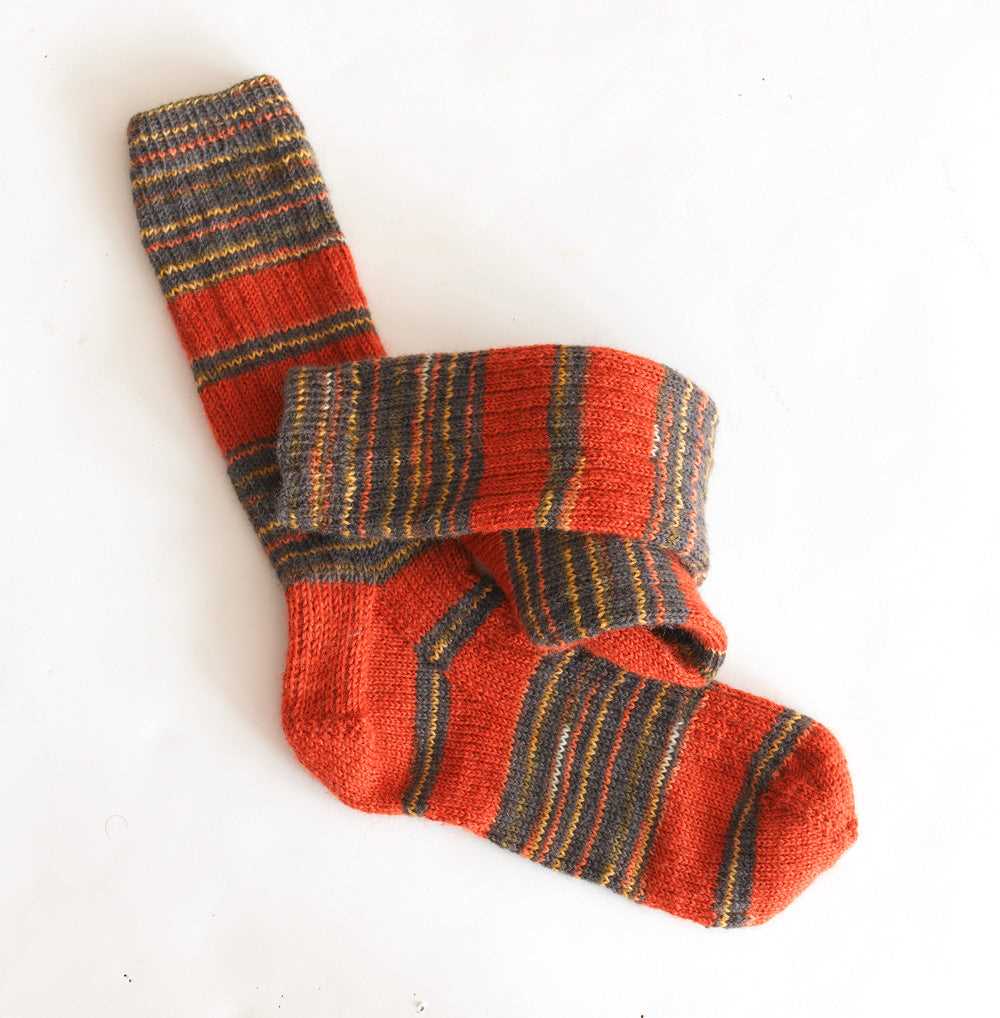
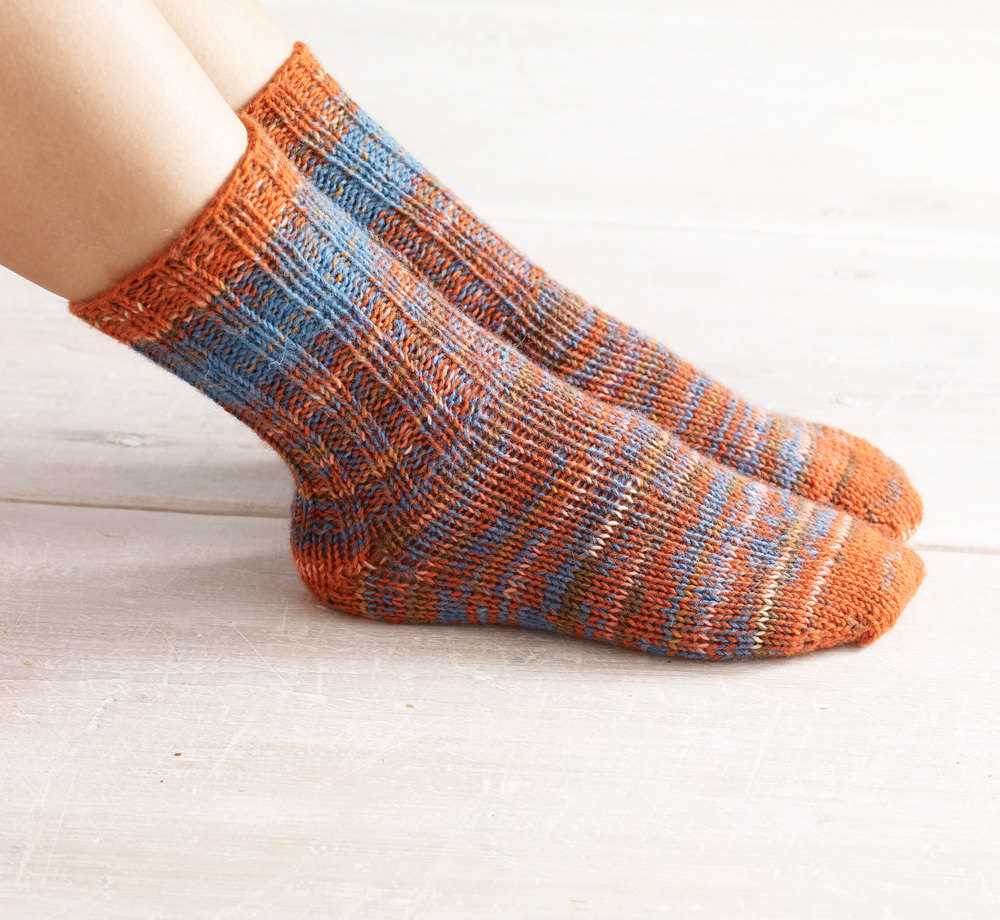
With this pattern, you can choose your own yarn and needle size to create a pair of socks that are personalized to your preferences. You can also experiment with different colors and yarn weights to create a unique pair of socks that will stand out from the crowd.
So, if you’re looking for a new knitting project or want to try your hand at making socks for the first time, give the men’s ribbed socks knitting pattern a try. You’ll be able to create a cozy and stylish pair of socks that are perfect for any occasion.
Men’s Ribbed Socks Knitting Pattern
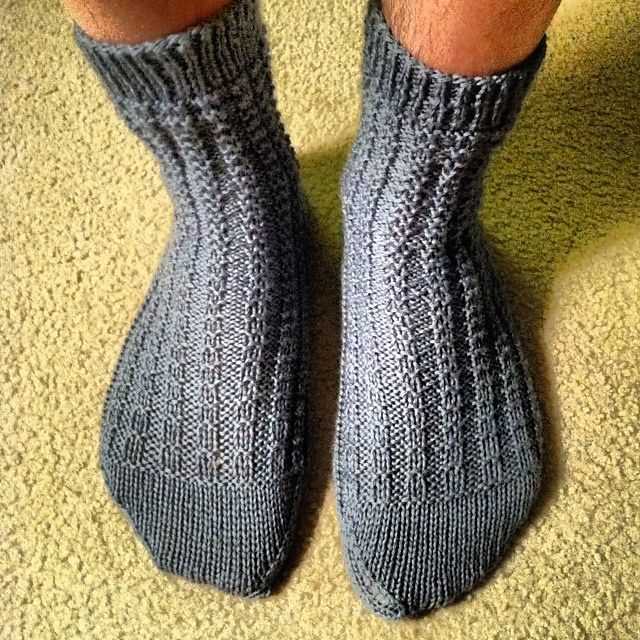
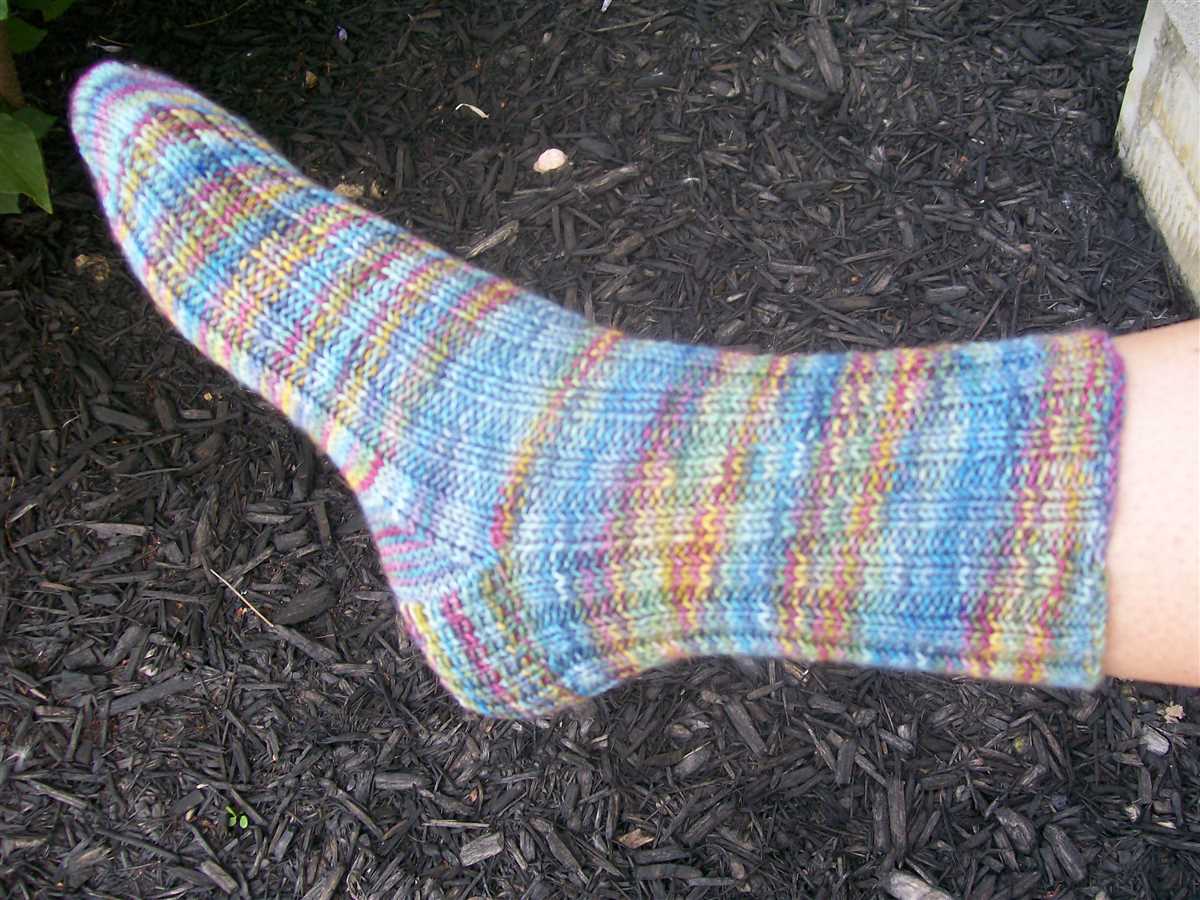
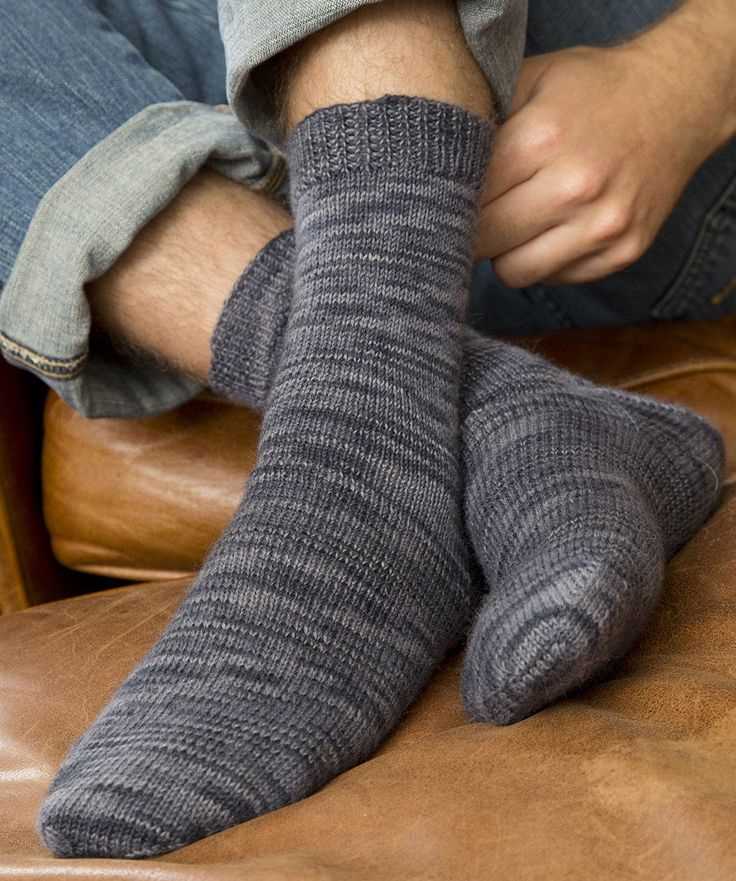
Knitting your own socks is a rewarding and practical project, and a ribbed pattern is perfect for men’s socks. The ribbed design provides elasticity and a snug fit, making these socks comfortable to wear and easy to put on. Whether you are a beginner or an experienced knitter, this pattern is simple and versatile, allowing you to customize the size and length of your socks.
To start knitting your ribbed socks, you will need the following materials: DPN (double-pointed needles) or a circular needle, worsted weight yarn in your choice of color, a tape measure, and a yarn needle. You can use any size of needles and yarn that you prefer, but it is recommended to use a size that will give you a gauge of about 7-8 stitches per inch.
Instructions:
- Cast on 64 stitches using the long-tail cast-on method.
- Divide the stitches evenly onto three or four needles, depending on your preference.
- Join in the round, being careful not to twist the stitches.
- Work the knit 2, purl 2 rib pattern for the entire sock. Repeat this pattern until the sock reaches your desired length.
- For the heel, you can choose between a short-row or heel flap method. Follow the instructions for your chosen method.
- Continue knitting in the rib pattern for the remainder of the sock, working the gusset and toe decreases as necessary.
- Once the sock is complete, weave in any loose ends and block if desired.
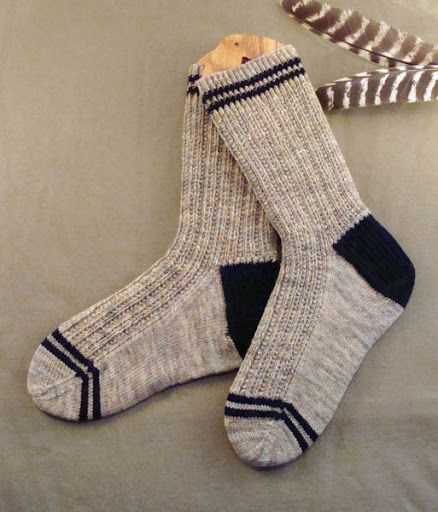
This ribbed sock knitting pattern is a great project for all skill levels, and the finished socks are sure to be a wardrobe staple for any man. Whether you make them for yourself or as a gift, these socks will keep your feet warm and stylish.
The Basics of Knitting

Knitting is a centuries-old craft that involves creating fabric by interlocking loops of yarn with knitting needles. It is a popular hobby and a practical skill that allows individuals to create their own garments, accessories, and home decor items. Whether you are a beginner or an experienced knitter, understanding the basics of knitting is essential to successfully complete any project.
Materials and Tools
To start knitting, you will need a few basic materials and tools. These include knitting needles, yarn, and scissors. Knitting needles are typically long, slender rods with a pointed end. They come in different sizes, which determine the gauge or tension of your stitches. Yarn can be made from various materials, such as wool, cotton, or acrylic, and comes in a wide range of colors and thicknesses. Scissors are used to cut the yarn during the knitting process.
Basic Stitches

There are two fundamental stitches in knitting: the knit stitch (also known as the garter stitch) and the purl stitch. The knit stitch creates a smooth, V-shaped pattern on the fabric, while the purl stitch creates a bumpy texture. By combining these two stitches in different patterns, you can create a variety of designs and textures in your knitting. Other common stitches include the stockinette stitch, rib stitch, and seed stitch.
Patterns and Charts
Knitting patterns provide instructions on how to create various designs and shapes using different stitches and techniques. They often include written instructions as well as charts, which use symbols or diagrams to represent the stitches. Reading and understanding knitting patterns is a skill that comes with practice, but once you grasp the basics, you can create intricate designs.
Finishing Techniques
Once you have completed your knitting project, whether it’s a scarf, a sweater, or a blanket, you will need to finish it off. This involves weaving in the loose ends of yarn to secure them and prevent unraveling. Depending on your project, you may also need to block your finished piece, which involves gently shaping and stretching it to the desired dimensions.
Conclusion
Knitting is a versatile craft that allows individuals to unleash their creativity and create unique items. By understanding the basics of knitting, including the materials and tools, stitches, patterns, and finishing techniques, you can embark on your knitting journey and enjoy the process of creating beautiful and functional pieces with your own hands.
Choosing the Right Yarn and Needles
When it comes to knitting men’s ribbed socks, choosing the right yarn and needles is essential to create a comfortable and durable pair of socks. There are several factors to consider when selecting yarn and needles, including the desired thickness, fiber content, and needle size.
Thickness: The thickness of the yarn will determine the thickness and warmth of the socks. For ribbed socks, it is best to choose a medium-weight yarn, such as a DK (Double Knit) or worsted weight. These yarns will provide a balance between warmth and breathability.
Fiber Content: Different yarn fibers have different properties, and choosing the right fiber content will contribute to the comfort and longevity of the socks. Natural fibers like wool and alpaca are popular choices for socks as they offer warmth, moisture-wicking properties, and durability. However, if the recipient has sensitive skin or allergies, you may consider using a hypoallergenic synthetic yarn.
Needle Size: The needle size you choose will determine the gauge and the size of the stitches. It is important to follow the pattern’s recommended needle size to achieve the correct tension and size of the socks. The pattern will typically specify the needle size and gauge, but if you are adjusting the pattern or using a different yarn, you may need to swatch and adjust your needle size accordingly.
- Tip: When choosing needles, consider using circular needles with a long cable. This will allow you to knit the socks in the round and avoid the need for seams.
- Tip: If you prefer using double-pointed needles, make sure to use a set that accommodates the sock’s circumference comfortably.
In summary, selecting the right yarn and needles is crucial for knitting men’s ribbed socks. Choosing the appropriate thickness, fiber content, and needle size will contribute to the comfort, durability, and overall success of your project. So take your time to consider these factors and make the best choices for your knitting endeavor.
Getting Started with the Cuff
If you’re looking to knit a pair of ribbed socks for men, starting with the cuff is the first step. The cuff is the top part of the sock that sits around the leg, and it’s typically made with a ribbed pattern to ensure a snug fit. To begin, you’ll need to gather your materials and choose a suitable yarn and needle size. Keep in mind that ribbed patterns work best with elastic yarns that have a good amount of stretch.
Once you have your materials ready, it’s time to cast on the stitches for the cuff. The number of stitches you’ll need will depend on the size of the sock and your desired rib pattern. Typically, a 2×2 or 3×1 rib pattern is used for men’s socks. This means that you’ll alternate between knitting two stitches and purling two stitches, or knitting three stitches and purling one stitch. It’s a good idea to make a gauge swatch to determine the correct number of stitches per inch for your desired rib pattern.
Step 1: Start by making a slip knot and placing it on your needle. Hold the needle with the slip knot in your right hand and the empty needle in your left hand.
Step 2: Insert the right needle into the slip knot from left to right, going under the left needle. Pull the yarn through the slip knot, creating a new loop on the right needle.
- Note: If you’re new to knitting, it may be helpful to watch video tutorials or consult knitting books for visual step-by-step instructions.
Step 3: Repeat step 2 until you have cast on the desired number of stitches for the cuff. Make sure to keep the tension even throughout the cast-on process.
Step 4: Once all the stitches are cast on, you can begin working the ribbed pattern. Follow the instructions for your chosen rib pattern, knitting and purling the stitches in the specified order. Repeat the pattern until you reach the desired length for the cuff.
Step 5: When you’re finished with the cuff, you can move on to the next part of the sock, such as the leg or the heel. Follow the knitting pattern instructions for the specific design you’re using, adapting as needed for the size and style of sock you want to create.
Knitting socks can be a rewarding and enjoyable project, and starting with the cuff sets the foundation for a well-fitting and comfortable pair of socks. Take your time, follow the instructions, and don’t be afraid to ask for help if you need it. Happy knitting!
Creating the Ribbed Pattern
To create the ribbed pattern for men’s socks, you will need to have a basic understanding of knitting and how to read knitting patterns. The ribbed pattern is commonly used in sock knitting as it creates a stretchy and snug fit around the leg and foot.
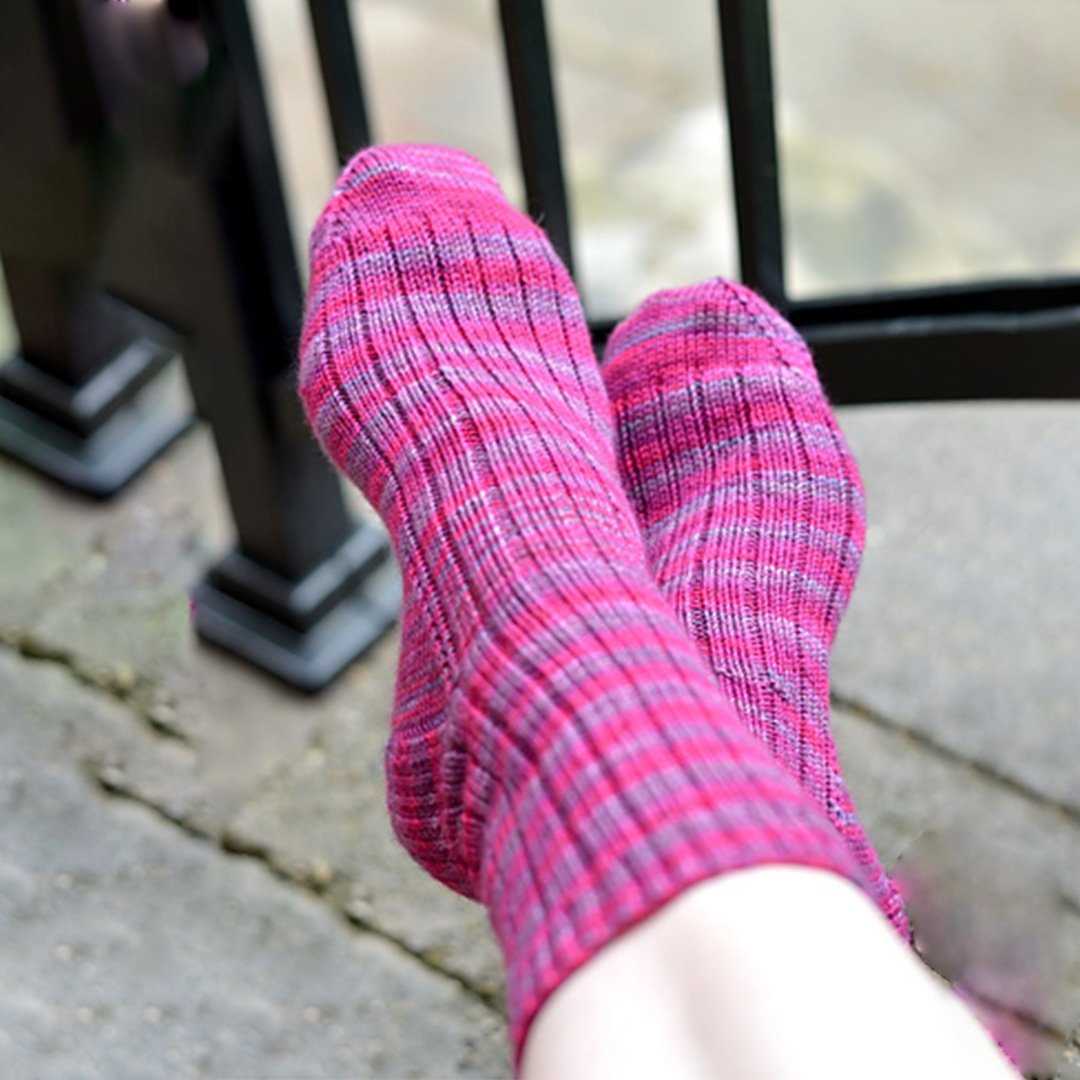
The ribbed pattern is achieved by alternating stitches of knit and purl. This creates a textured pattern that is not only aesthetically pleasing but also practical in terms of comfort and fit. The most common ribbed pattern used for socks is the 1×1 rib, which means one knit stitch followed by one purl stitch.
To start knitting the ribbed pattern, cast on the required number of stitches for your sock size. Then, begin by knitting one stitch and purling one stitch and repeat this pattern until the desired length is achieved. To maintain the ribbed pattern, make sure to always knit the knit stitches and purl the purl stitches as you continue knitting the rounds.
When knitting the ribbed pattern, it’s important to keep an even tension to ensure that the stitches are consistent and the ribbing is uniform. Make sure to keep your knitting needles and yarn taut so that the stitches are not too loose or too tight. This will ensure a comfortable fit and prevent the socks from stretching out or being too constricting.
Overall, the ribbed pattern is a versatile and classic choice for men’s socks. With its stretchy and snug fit, it provides both comfort and style. Whether you’re a beginner or an experienced knitter, knitting men’s ribbed socks can be a rewarding project that results in a practical and fashionable pair of socks.
Transitioning to the Heel
Once you have completed the ribbing for the leg portion of the sock, it’s time to transition to the heel. This is an important step in the sock-making process as it lays the foundation for the heel flap and gusset.
To begin, you will need to divide your stitches evenly onto two needles. This will create the division between the front and back of the sock. You can do this by simply slipping half of the stitches onto the second needle. It’s helpful to use stitch markers or different colored yarn to differentiate the two sections.
Next, you will start working on the heel flap. This typically involves knitting back and forth in rows to create a sturdy and reinforced section that will protect the heel of the sock. You can use a basic stitch pattern, such as the traditional slip stitch pattern, to add extra durability and stretch to the flap. Make sure to follow the specific pattern instructions for the number of rows and stitches to knit in the flap.
Once the heel flap is complete, you will move on to the gusset. This is the section that wraps around the sides of the foot and connects the heel flap to the instep. Typically, the gusset involves decreasing stitches along each side of the flap to create a smoother and more fitted sock. This can be achieved through a series of decreases, such as knit two together (k2tog) or slip slip knit (ssk), depending on the specific pattern instructions.
After the gusset is finished, you will be ready to continue knitting the foot of the sock. This is the section that will cover the bottom of the foot and continue all the way to the toe. The foot portion of the sock can be worked in a basic stockinette stitch or with any other desired stitch pattern. Make sure to follow the pattern instructions for the appropriate number of stitches and rows to knit for the desired length of the foot.
With the heel and gusset complete, you have successfully transitioned from the leg portion of the sock to the foot. From here, you can continue following the pattern to shape the toe and finish off the sock. Don’t forget to weave in any loose ends and block your finished socks for a polished and professional look. Happy knitting!
Working the Heel Flap
The heel flap is an essential part of knitting ribbed socks. It is where the heel of the sock is formed, providing added cushioning and durability. To work the heel flap, you will begin by knitting a certain number of stitches on the right side of the sock.
Step 1: After completing the required number of ribbed rows for the leg of the sock, you’ll start the heel flap by turning your work and working on the wrong side.
Step 2: On the wrong side, you will begin by purling a specific number of stitches. This creates a textured pattern on the right side of the sock.
Step 3: Repeat the pattern of knitting a row on the right side and purling a row on the wrong side until the desired length of the heel flap is reached. This length can vary depending on the size of the sock and personal preference.
By working the heel flap in a ribbed pattern, you are creating a stretchy and snug fit around the heel, which is important for comfort and a secure fit. The ribbing also adds extra reinforcement to the sock, making it more durable and long-lasting.
Once you have completed the heel flap, you will move on to shaping the heel and creating the gusset. This involves picking up stitches along the sides of the heel flap and working decreases to shape the foot of the sock. Stay tuned for the next steps in the Men’s Ribbed Socks knitting pattern!
Creating the Gusset
One important step in knitting men’s ribbed socks is creating the gusset. The gusset is the part of the sock that helps provide a comfortable fit and accommodate the natural shape of the foot. It is created by increasing the stitches on either side of the sock.
Step 1: Knitting the heel flap
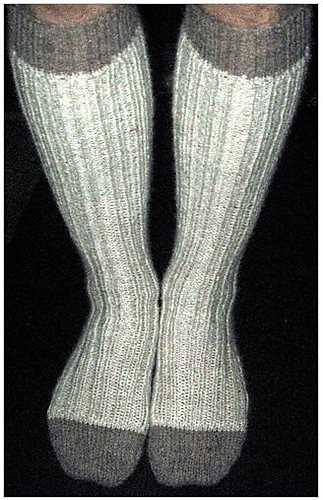
To begin creating the gusset, first knit the heel flap. This is typically done in a sturdy stitch pattern, such as a slip stitch or garter stitch, to add durability to the sock. Knit the desired number of rows for the heel flap, usually around 20-30 rows, depending on the size of the sock and the desired length of the flap.
It’s recommended to use a reinforcing yarn for the heel flap, as this area of the sock tends to experience more wear and tear. This can be a contrasting color yarn or a stronger type of yarn, such as a blend with nylon or acrylic.
Step 2: Turning the heel

After the heel flap is knitted, the next step is to turn the heel. This is done by creating short rows to shape the heel and provide a comfortable fit. Follow the specific instructions for turning the heel in the pattern you are using.
Typically, this involves knitting a certain number of stitches, then turning the work and working back in the opposite direction, leaving some stitches unworked. This creates a series of triangular shapes that form the heel. The number of short rows and the specific shaping may vary depending on the sock pattern.
Step 3: Picking up stitches for the gusset
Once the heel is turned, the next step is to pick up stitches along the edges of the heel flap. This is done to begin shaping the gusset and adding the extra width needed for the foot.
Using a double-pointed needle or circular needle, start picking up stitches along one side of the heel flap. Insert the needle into the edge of the flap, then wrap the working yarn around the needle and pull it through to create a new stitch. Continue picking up stitches until you reach the desired number specified in the pattern.
Repeat this process on the other side of the heel flap to pick up the same number of stitches. These stitches will be added to the existing stitches on the needle and will be used to continue knitting the foot of the sock.
Once the stitches are picked up, continue following the pattern to complete the gusset and finish knitting the sock.
Shaping the Toe
When knitting the toe of the men’s ribbed socks, you will need to decrease the number of stitches gradually in order to create the desired shape. This shaping technique ensures a comfortable fit and allows the sock to conform to the natural contours of the foot.
To begin shaping the toe, you will first need to divide the stitches evenly onto two needles. This will allow you to decrease the stitches in a symmetrical manner. You can use stitch markers to mark the beginning and end of each needle.
Next, you will start the decrease rounds. This is done by knitting two stitches together at the beginning and end of each needle. This decreases the stitch count by two for each decrease round. You will continue to work these decrease rounds until approximately one-third of the original stitches remain.
Once you have reached this point, you will switch to working the decreases on every other round. This creates a more gradual decrease and helps to maintain the shape of the toe. Continue working these decrease rounds until approximately one-fourth of the original stitches remain.
Finally, when you have reached the desired number of stitches, you can cut the yarn leaving a long tail for weaving in the ends. Thread the tail onto a yarn needle and slip the needle through the remaining stitches, removing them from the knitting needles. Pull the tail tight to secure the toe and weave in any loose ends.
Shaping the toe of the men’s ribbed socks is an essential step in creating a comfortable and well-fitted garment. By following these instructions, you can ensure that your socks will be both stylish and comfortable to wear.
Finishing the Sock
Once you have completed knitting the ribbed sock according to the pattern, it’s time to finish off the sock and make it ready to wear. The finishing steps are crucial to ensure that the sock fits well and has a clean, professional look.
Weaving in the Ends
The first step in finishing the sock is to weave in all the loose ends of yarn. These ends are created when you change colors or join a new skein of yarn. To weave in the ends, thread them onto a tapestry needle and carefully stitch them into the back of the work, following the existing stitches. Make sure to weave in the ends securely so that they won’t come undone with wear.
Joining the Toe
Next, it’s time to join the toe of the sock. This can be done using the Kitchener stitch, which creates an invisible seam. To do this, you will need a tapestry needle and two sets of live stitches. Follow the instructions in the pattern to join the toe stitches together, ensuring a smooth and seamless finish.
Blocking the Sock
Blocking is an important step in finishing any knitting project, including socks. It helps to even out the stitches and give the sock its final shape. To block the sock, soak it in lukewarm water for about 20 minutes and then gently squeeze out the excess water. Lay the sock flat on a clean towel and shape it into the desired size and shape. Allow it to dry completely before wearing.
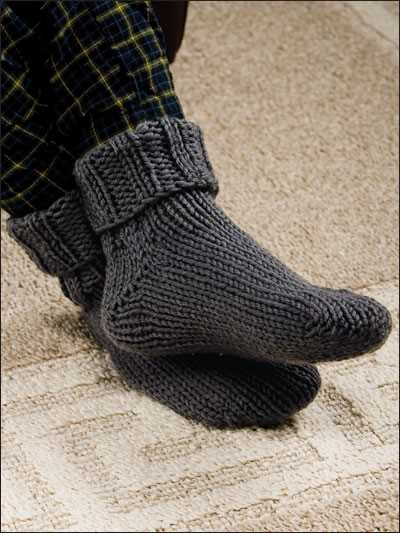
Adding the Cuff
Lastly, you can add a cuff to the top of the sock to give it a finished look and provide extra comfort. This can be done by picking up stitches along the top edge of the sock and knitting a few rounds in the desired stitch pattern. Follow the pattern instructions to create a cuff that matches the ribbing on the rest of the sock, or get creative and add your own design!
By following these finishing steps, you can turn your knitted ribbed sock into a completed masterpiece. Take your time and pay attention to the details to ensure that your sock looks and fits just right.
Tips and Tricks for the Perfect Pair
Knitting a pair of men’s ribbed socks can be a fun and rewarding project. With the right techniques and some helpful tips, you can create a pair of socks that are not only comfortable to wear but also stylish. Here are some tips and tricks to help you achieve the perfect pair of socks:
1. Choose the Right Yarn:
When selecting the yarn for your socks, make sure to choose a yarn that is durable and suitable for socks. Look for yarns that have a blend of wool and nylon, as they provide both warmth and durability. Avoid using 100% cotton or acrylic yarns as they tend to stretch and lose shape over time.
2. Check Your Gauge:
Always make a gauge swatch before starting your sock project. Knitting socks with the right gauge ensures a better fit and avoids any surprises in the final result. If your gauge does not match the pattern, adjust your needle size accordingly to achieve the desired gauge.
3. Use a Stretchy Cast-On:
For a comfortable cuff, use a stretchy cast-on method such as the long-tail cast-on or the German twisted cast-on. These cast-ons provide enough elasticity to accommodate the leg without being too tight or too loose.
4. Add Reinforcement:
To increase the durability of your socks, consider using reinforcing thread or yarn for the heels and toes. This extra layer of reinforcement helps to prevent wear and tear in these high-stress areas and extends the life of your socks.
5. Try a Different Heel Style:
Experiment with different heel constructions such as the heel flap and gusset, short-row heel, or afterthought heel. Each style creates a different fit and aesthetic, so feel free to explore and find your favorite.
6. Pay Attention to Fit:
When knitting socks, it’s crucial to pay attention to the fit. Make sure to measure the intended wearer’s foot size accurately and adjust the pattern accordingly. Try the sock on during the knitting process to ensure a proper fit and make any necessary adjustments.
7. Finishing Touches:
When finishing your socks, weave in all loose ends securely. Take extra care when sewing the toe seams to ensure a comfortable and seamless finish. You can also consider adding ribbing or elastic to the cuff for added comfort and stability.
By following these tips and tricks, you’ll be able to create a pair of men’s ribbed socks that are not only beautiful but also comfortable and durable. Happy knitting!