
Knitting is a popular craft that has been enjoyed for centuries. People of all ages and skill levels can create beautiful and unique items with just a few simple tools and some yarn. One popular knitting project that has captured the hearts of many is the creation of stuffed animals. These cuddly creatures have become beloved companions for children and adults alike.
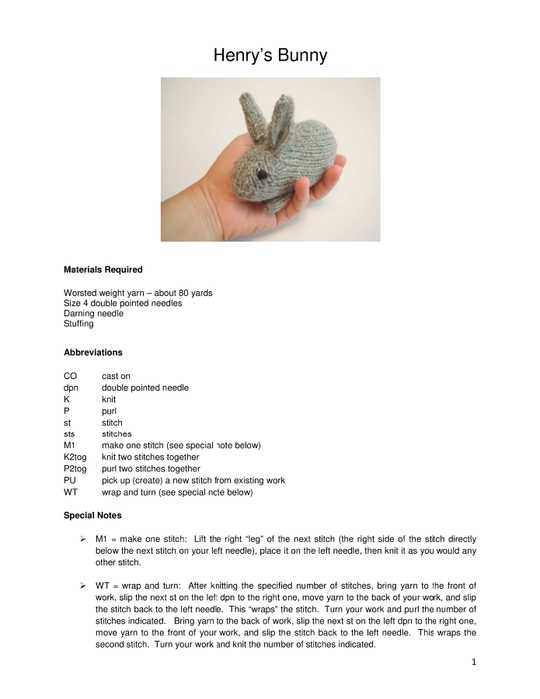
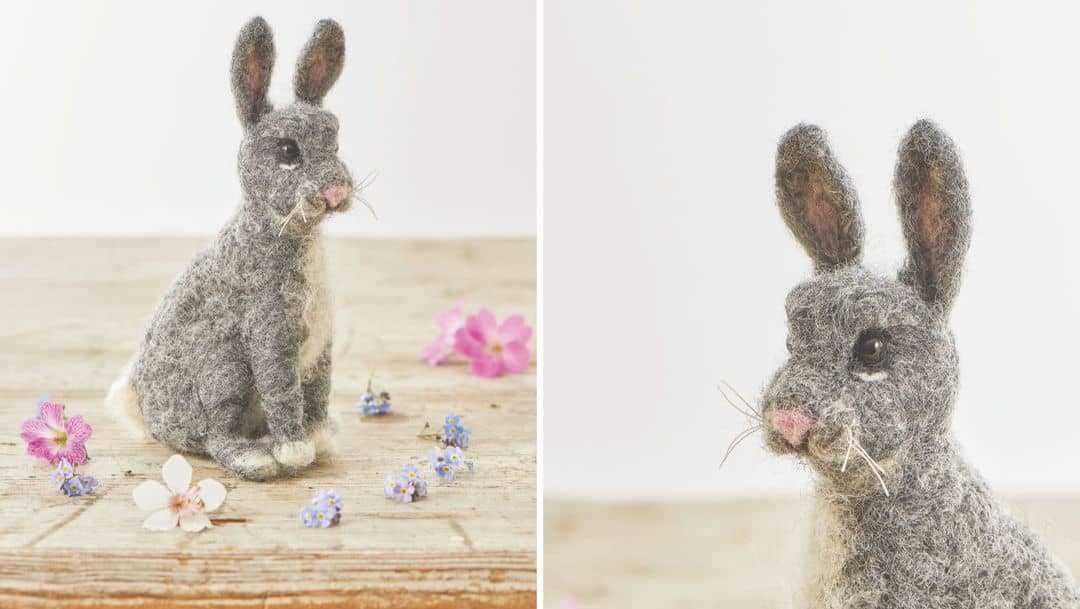
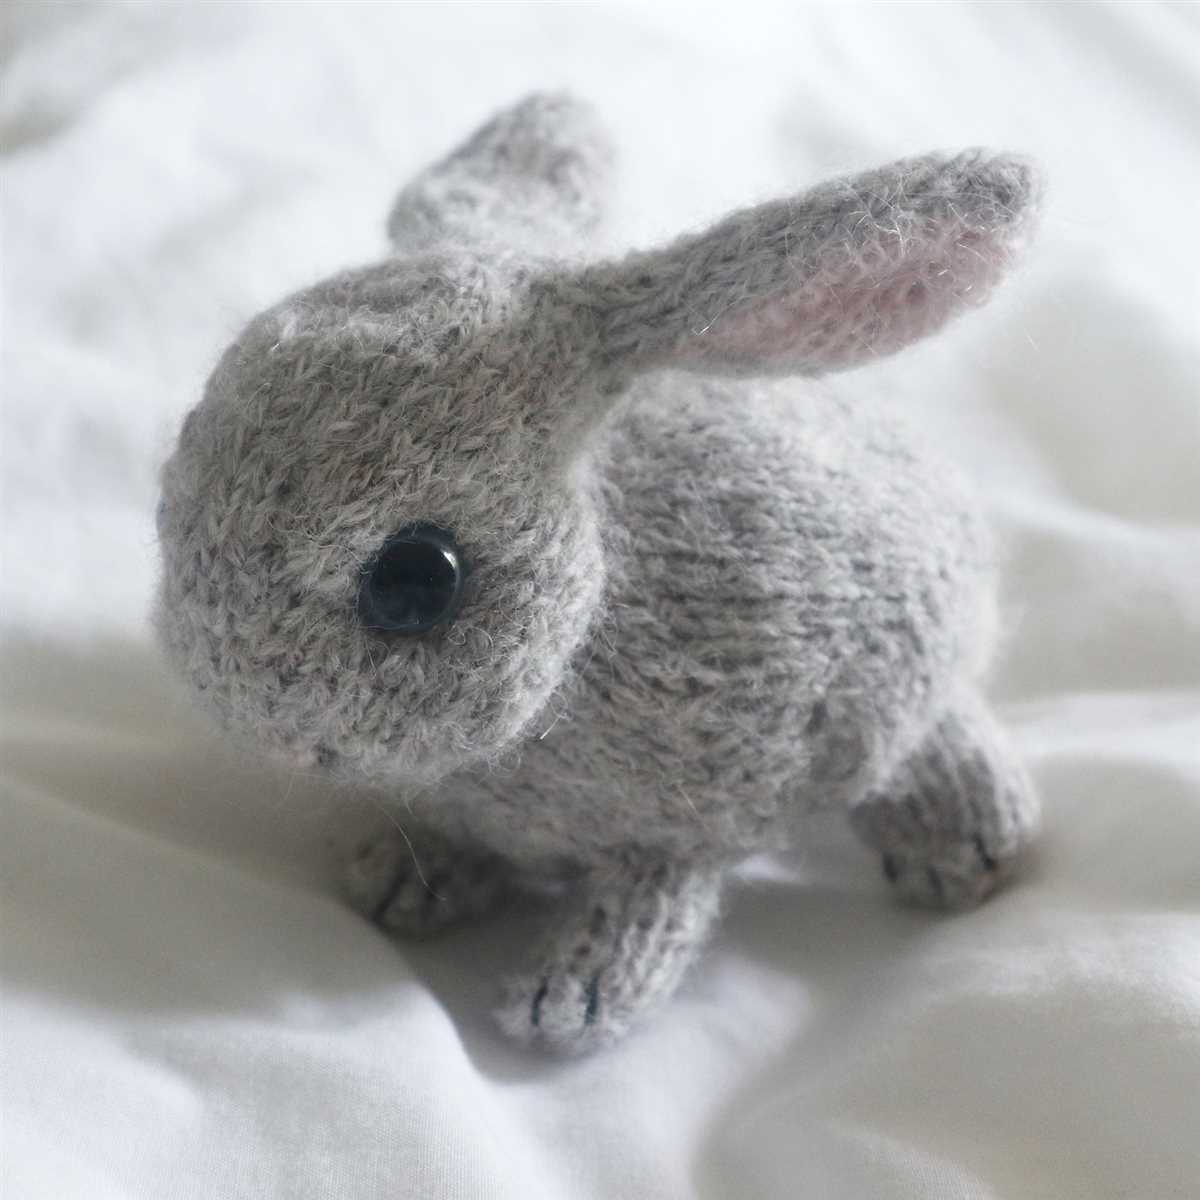
One such stuffed animal pattern that has gained a lot of attention is Henry’s bunny knitting pattern. This adorable bunny is perfect for cuddling or displaying as a decorative piece. The pattern includes step-by-step instructions, making it easy for even beginners to create their own bunny.
Henry’s bunny knitting pattern is designed to be knit in the round, giving it a seamless and professional finish. The pattern calls for basic knitting skills, such as casting on, knitting stitches, and decreasing. With a few simple techniques, you can create a bunny that is sure to become a cherished keepsake.
Overview of the knitting pattern
The knitting pattern for Henry’s bunny is a step-by-step guide on how to create an adorable stuffed toy. It is suitable for intermediate knitters who have experience with basic knitting techniques such as casting on, knit and purl stitches, and decreasing.
The pattern begins with a materials list, detailing the type and quantity of yarn needed, as well as the recommended needle size. It also includes information on additional materials required, such as stuffing, safety eyes, and a darning needle for sewing.
The pattern is divided into sections, each covering a specific part of the bunny. It starts with knitting the body, which is done in the round using double-pointed needles. The pattern provides detailed instructions on how to create the desired shape and size, including information on increasing and decreasing stitches.
Once the body is complete, the pattern moves on to the head, ears, arms, and legs. For each section, the pattern provides clear instructions on how to knit and shape the individual parts. It also includes guidance on attaching the various components together using a darning needle and yarn.
To add the finishing touches, the pattern includes instructions on embroidering the bunny’s facial features and sewing on any desired accessories, such as a bow tie or a carrot. The pattern concludes with tips on how to properly stuff the toy, and suggestions for personalizing the bunny with different colors or patterns.
Materials needed
To knit Henry’s bunny, you will need the following materials:
- Yarn: Choose a soft and chunky yarn in any color you prefer. Make sure it is suitable for knitting toys.
- Knitting needles: Use a set of double-pointed needles or circular needles in a size appropriate for your chosen yarn.
- Stuffing: Get some polyester fiberfill or other soft stuffing material to fill the bunny’s body and head.
- Yarn needle: This needle will be used for sewing up the seams and attaching any additional details.
- Scissors: Have a pair of sharp scissors ready for cutting the yarn and trimming any excess.
- Safety eyes: If you want your bunny to have eyes, you can use plastic safety eyes or sew on some yarn or felt eyes instead.
- Optional: Ribbon, buttons, or other embellishments – You can add some extra details to your bunny by attaching ribbon bows, buttons for eyes, or other cute embellishments.
Gather these materials before you start knitting, and you’ll be ready to bring Henry’s bunny to life!
Step-by-step instructions for knitting the body
In order to knit the body of the bunny, you will need to follow a series of steps to ensure that your knitting turns out just right. Here is a detailed guide to help you along the way.
Materials needed:
- Yarn in your desired color
- Knitting needles in the appropriate size
- Scissors
- Tapestry needle
- Stuffing (polyester fiberfill)
Step 1: Cast on stitches
Begin by casting on the required number of stitches for the bunny’s body, as indicated in the knitting pattern. Make sure to use the specified yarn and needle size to achieve the correct gauge.
Step 2: Knit rows
Following the instructions in the knitting pattern, knit the specified number of rows to create the length of the body. Pay attention to any shaping or pattern changes that are indicated.
Step 3: Shape the body
Next, you will need to shape the body of the bunny by decreasing stitches. This will give the body a tapering effect towards the bottom. Follow the pattern instructions for the specific decreases and their placements.
Step 4: Bind off
Once you have completed the body shaping, it is time to bind off the stitches. This can be done using a standard bind off method, making sure that the edge remains stretchy but secure.
Step 5: Finishing touches
Before moving on to the next part of the bunny, take a moment to weave in any loose yarn ends using a tapestry needle. This will give your bunny a neater finish. Additionally, consider stuffing the body lightly with polyester fiberfill to give it some shape and make it cuddly.
With these step-by-step instructions, you are now ready to move on to knitting the other parts of the bunny according to the pattern. Have fun and enjoy the process of creating your very own Henry’s bunny!
Tips for knitting the ears
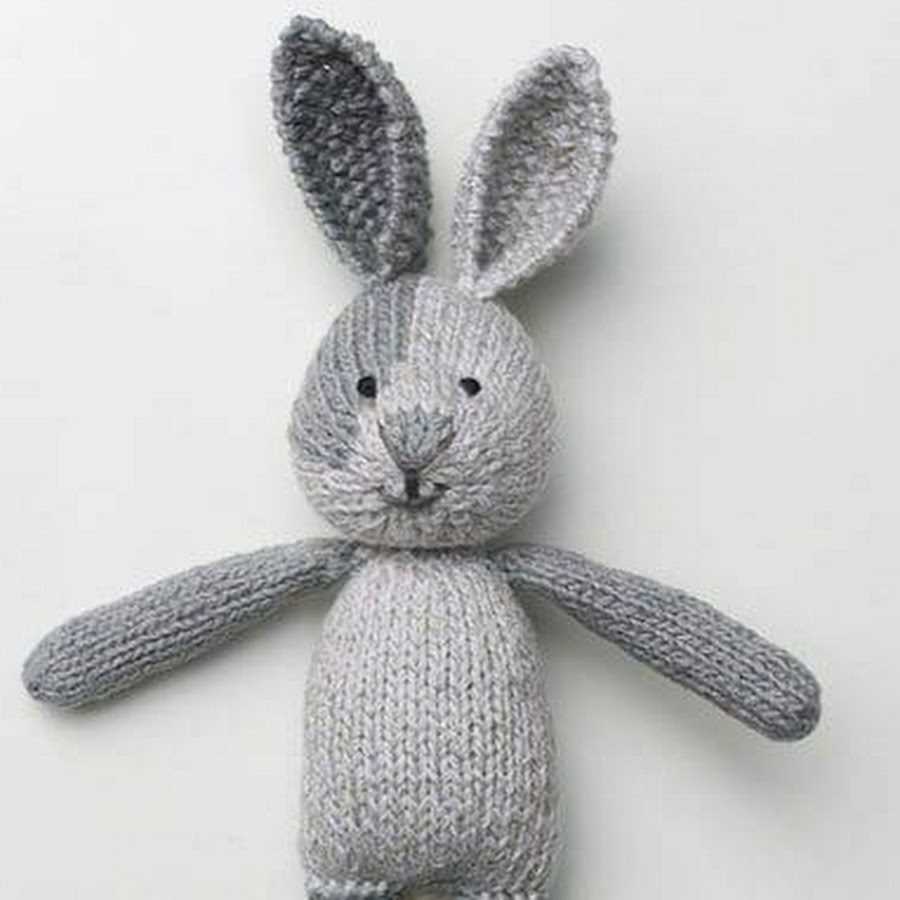
Knitting the ears for Henry’s bunny is an important step in completing this adorable toy. The ears give the bunny its characteristic look and add an extra touch of cuteness. Here are some tips to help you achieve perfect ears for your knitted bunny:
1. Use the right yarn
Choosing the right yarn for the ears is crucial. It’s best to use a yarn that matches the body of the bunny or complements its colors. A soft, smooth yarn will also create a nice texture for the ears. Consider using a slightly thicker yarn for the ears to make them stand out.
2. Follow the pattern carefully
When knitting the ears, make sure to carefully follow the instructions in Henry’s bunny knitting pattern. The pattern will guide you through the specific stitches and techniques needed to create the ears. Pay attention to any decreases or increases to achieve the desired shape.
3. Shape and position the ears
To give the ears a cute and realistic look, shape them by sewing a few stitches near the base to create a slightly curved shape. When attaching the ears to the bunny, position them slightly angled forward and towards the sides of the head. This will give the bunny a playful and attentive appearance.
4. Finishing touches
After attaching the ears, examine them closely to ensure they are secure and evenly positioned. You can use a tapestry needle to weave in any loose ends and make the ears neater. If desired, you can also add a small decorative touch to the ears, such as a ribbon or tiny bow, to elevate the bunny’s cuteness factor.
By following these tips, you’ll be able to knit the ears for Henry’s bunny with ease and create an adorable toy that will bring joy to anyone who receives it. Happy knitting!
How to knit the arms
In order to complete the adorable bunny, you will need to knit the arms. The arms are a crucial part of the bunny’s design, as they provide a sense of movement and character. Follow these step-by-step instructions to knit the arms:
- Gather your materials: To knit the arms, you will need a set of double-pointed needles in your preferred size, as well as the yarn of your choice. Make sure the needles and yarn are appropriate for the size of bunny you are creating.
- Cast on stitches: Using the long-tail cast-on method, cast on the desired number of stitches for the arms. This will depend on the size of your bunny and the desired length of the arms. It is recommended to cast on around 10-15 stitches for each arm.
- Knit in the round: Once the stitches are cast on, divide them evenly onto three double-pointed needles. Join the round, making sure not to twist the stitches, and begin knitting in the round.
- Knit the desired length: Continue knitting in the round until the arms reach the desired length. This will depend on personal preference and the overall proportions of your bunny.
- Bind off: Once the desired length is reached, bind off the stitches in a way that matches the style and aesthetic of your bunny. This could be a basic bind off, an i-cord bind off, or any other method that you prefer.
- Weave in the ends: After binding off, use a tapestry needle to weave in the loose ends of yarn to ensure a neat and seamless finish.
Following these instructions will allow you to successfully knit the arms for your bunny. Once the arms are completed, you can attach them securely to the body using a tapestry needle and matching yarn. Enjoy the process of creating these cute and cuddly creatures!
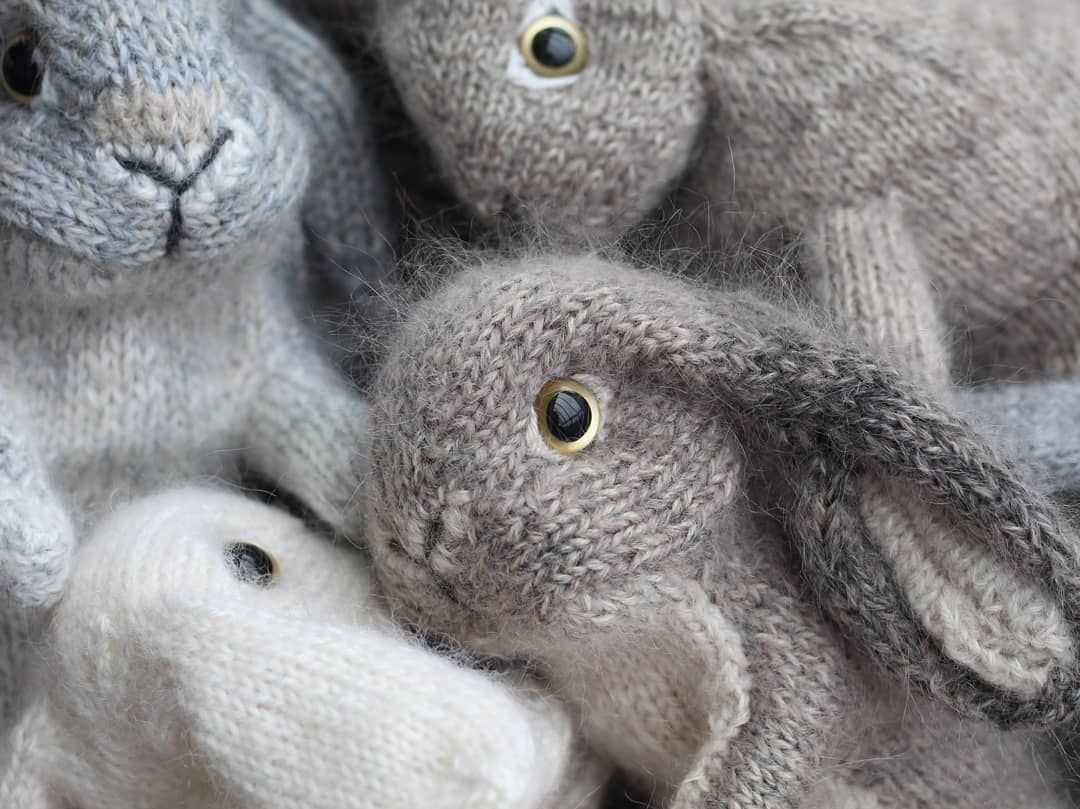
Adding details to the face
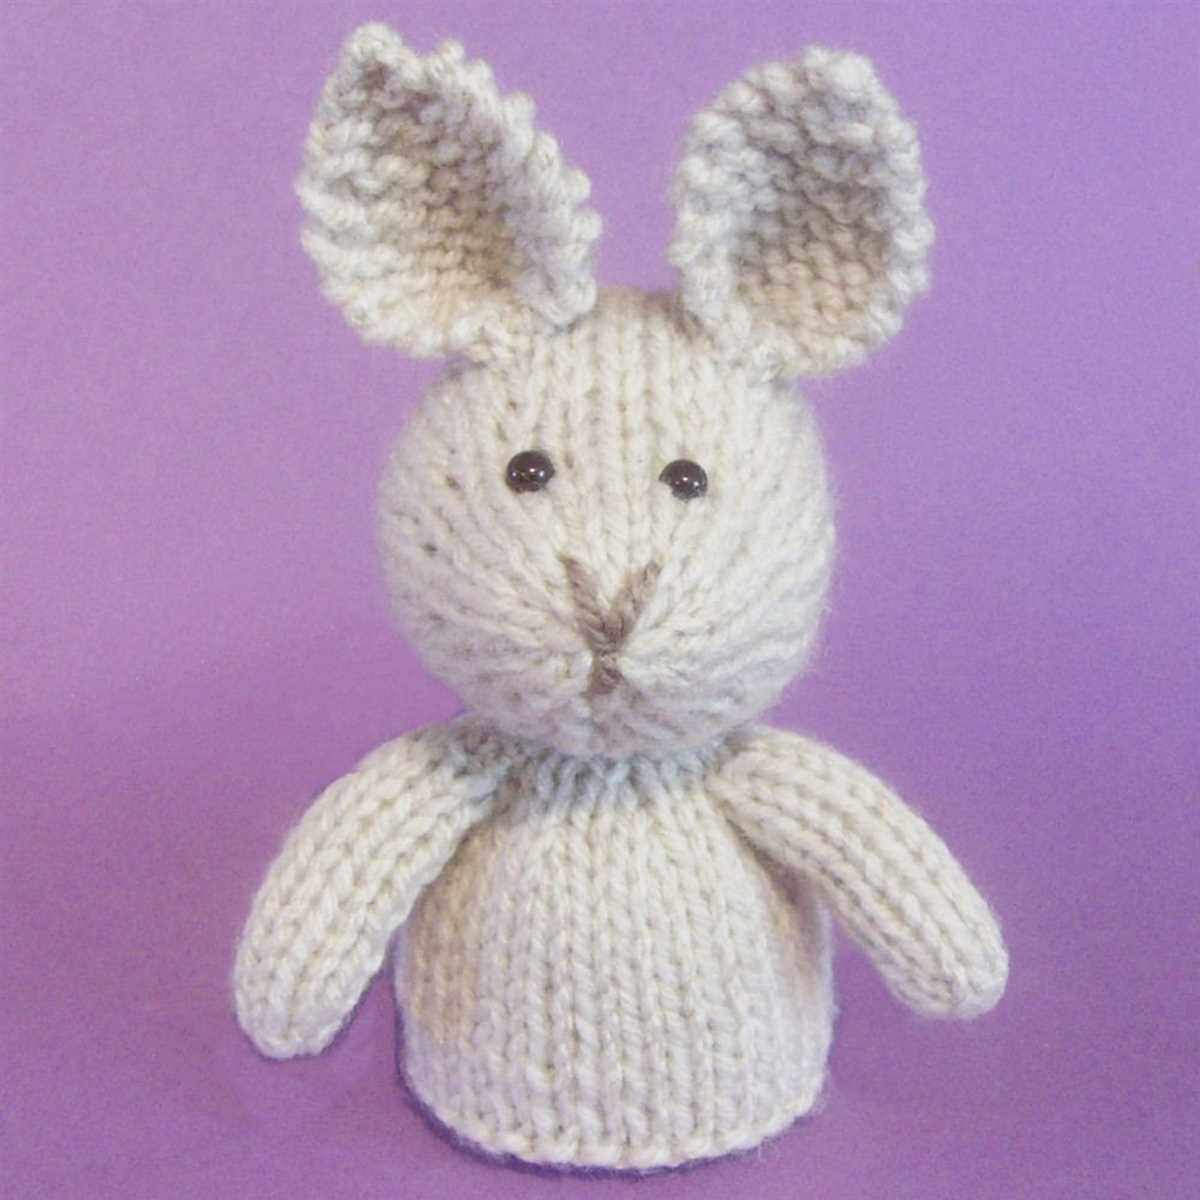
When it comes to knitting the face for Henry’s bunny, attention to detail is key. The face is what gives the bunny its character and individuality. To start, use a contrasting color yarn to create the bunny’s eyes. Thread the yarn through a tapestry needle and carefully stitch two small circles for the eyes, making sure they are evenly spaced and symmetrical.
Next, it’s time to create the bunny’s nose. Using a similar technique as with the eyes, thread a different color yarn through the tapestry needle and stitch a small triangle shape for the nose. Make sure the nose is positioned towards the center of the face, slightly below the eyes. This will give the bunny a cute and friendly expression.
For the finishing touches, you can add some additional details to the face. Using a black embroidery thread or yarn, you can create eyebrows by stitching short lines above the eyes. This will add some expression and personality to the bunny’s face. Additionally, you can add a small mouth by stitching a curved line in a color of your choice, giving the bunny a sweet smile.
Remember, when adding the details to the face, it’s important to stitch them securely to ensure they don’t come loose during playtime. Take your time and make sure the stitches are firm and tight. Once you’ve finished adding the face details, step back and admire your adorable creation – Henry’s bunny will now come to life with its charming expression!
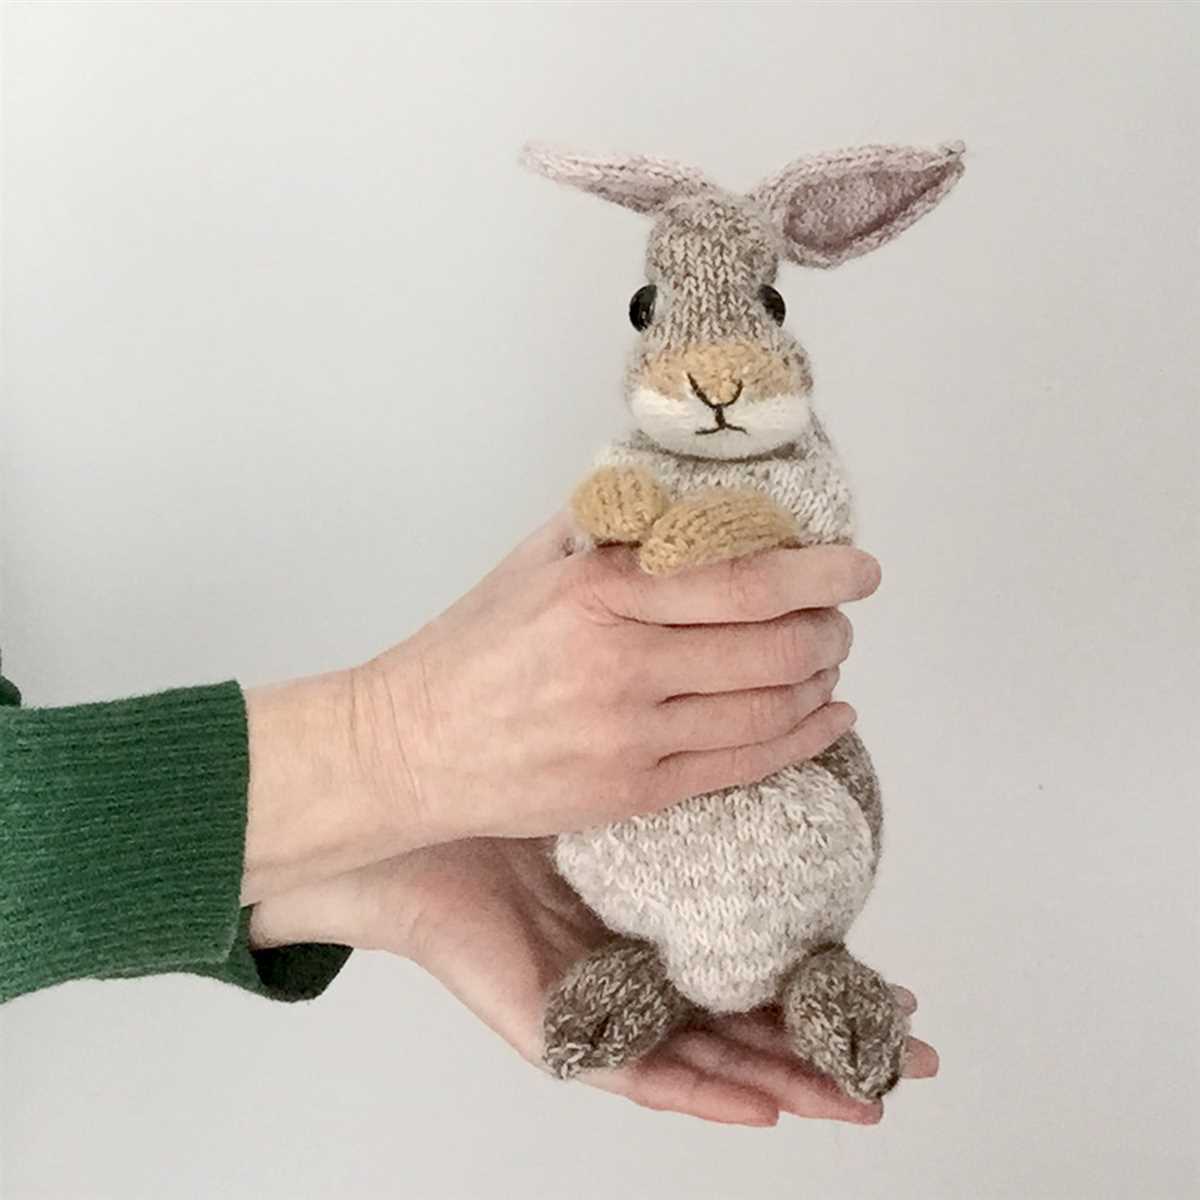
Assembly of the bunny
Once you have knitted all the pieces for the bunny, it’s time to assemble them. Follow the step-by-step instructions below to bring your bunny to life.
1. Sew the body pieces together: Start by placing the front and back body pieces together, with the right sides facing each other. Use a tapestry needle and the same yarn you used for knitting to sew the pieces together along the edges. Leave a small opening at the bottom for stuffing.
2. Attach the head to the body: Take the head piece and align it with the neck opening of the body. Securely sew the head to the body, making sure it is centered and straight. Use small stitches to achieve a neat and secure attachment.
3. Stuff the body: Using polyester fiberfill or any other stuffing material of your choice, carefully fill the body through the opening you left earlier. Make sure to stuff it sufficiently to achieve a plump and cuddly bunny.
4. Sew the bottom of the body: Once you are satisfied with the amount of stuffing, sew the bottom of the body closed using the same yarn and tapestry needle. Make sure the stitches are tight and secure to prevent any stuffing from coming out.
5. Attach the arms and legs: Place the arms and legs in their respective positions on the body. Sew them securely, making sure they are evenly spaced and aligned with the body. Take your time to ensure that the limbs are firmly attached.
6. Add the facial features: Finally, it’s time to give your bunny a face! Attach the eyes, nose, and mouth using small, tight stitches. You can also add additional details like whiskers or embroidered cheeks to personalize your bunny.
Congratulations! You have successfully assembled your bunny. Give it a good fluff and adjust any features that may need tweaking. Now, your cuddly friend is ready to be hugged and played with!
Adding finishing touches
Once you have completed knitting the bunny pattern, it’s time to add the finishing touches to bring your creation to life. These final steps will give your bunny character and make it truly unique.
First, start by sewing the different parts of the bunny together. Use a blunt needle and the yarn you used for knitting to carefully stitch the pieces together. Make sure to secure the stitches tightly to ensure durability. Begin by sewing the arms and legs to the body, followed by attaching the head to the body.
- Next, it’s time to embroider the facial features. Use a contrasting color thread and a tapestry needle to sew on the eyes, nose, and mouth. Keep in mind the desired expression you want for your bunny, whether it be cute or mischievous.
- For the ears, you have the option to add some extra details. Using a tapestry needle and a matching or contrasting color thread, you can make small stitches along the edges to create a quilted or textured effect. This will give your bunny’s ears a more realistic look.
- To add a touch of charm and personality, consider adding some accessories. You can knit a tiny scarf or bow tie using a smaller needle and colorful yarn. These little details will make your bunny stand out and make it even more adorable.
Finally, give your bunny a good brush to smooth out any loose yarn fibers. This will give it a neat and finished appearance. Now your bunny is complete and ready to be cherished or gifted to someone special. Enjoy the satisfaction of your hard work and creativity!
Care instructions for the knitted bunny
The Henry’s Bunny knitting pattern is a delicate and beautiful toy that requires special care to ensure its longevity. Here are a few care instructions to help you take care of your knitted bunny:
- Handwash only: It is recommended to handwash the bunny using lukewarm water and mild detergent. Avoid using harsh chemicals or bleach as it can damage the delicate fibers of the knitted toy.
- Gently squeeze out excess water: After washing, gently squeeze out the excess water from the bunny by pressing it between your hands. Do not wring or twist the toy as it may cause deformation.
- Dry flat: Lay the knitted bunny on a clean towel and reshape it to its original form. Allow it to air dry naturally in a well-ventilated area, away from direct sunlight or heat sources.
- Avoid friction: To prevent any damage to the bunny’s delicate knitting, avoid rubbing or scrubbing it against rough surfaces. This will help maintain the softness and integrity of the toy.
- Store properly: When not in use, it is recommended to store the knitted bunny in a clean and dry place, away from dust and moisture. You can also wrap it in tissue paper or place it inside a fabric bag to protect it from any potential damage.
By following these care instructions, you can ensure that your knitted bunny remains in excellent condition for years to come. It will continue to bring joy and comfort to both children and adults alike.
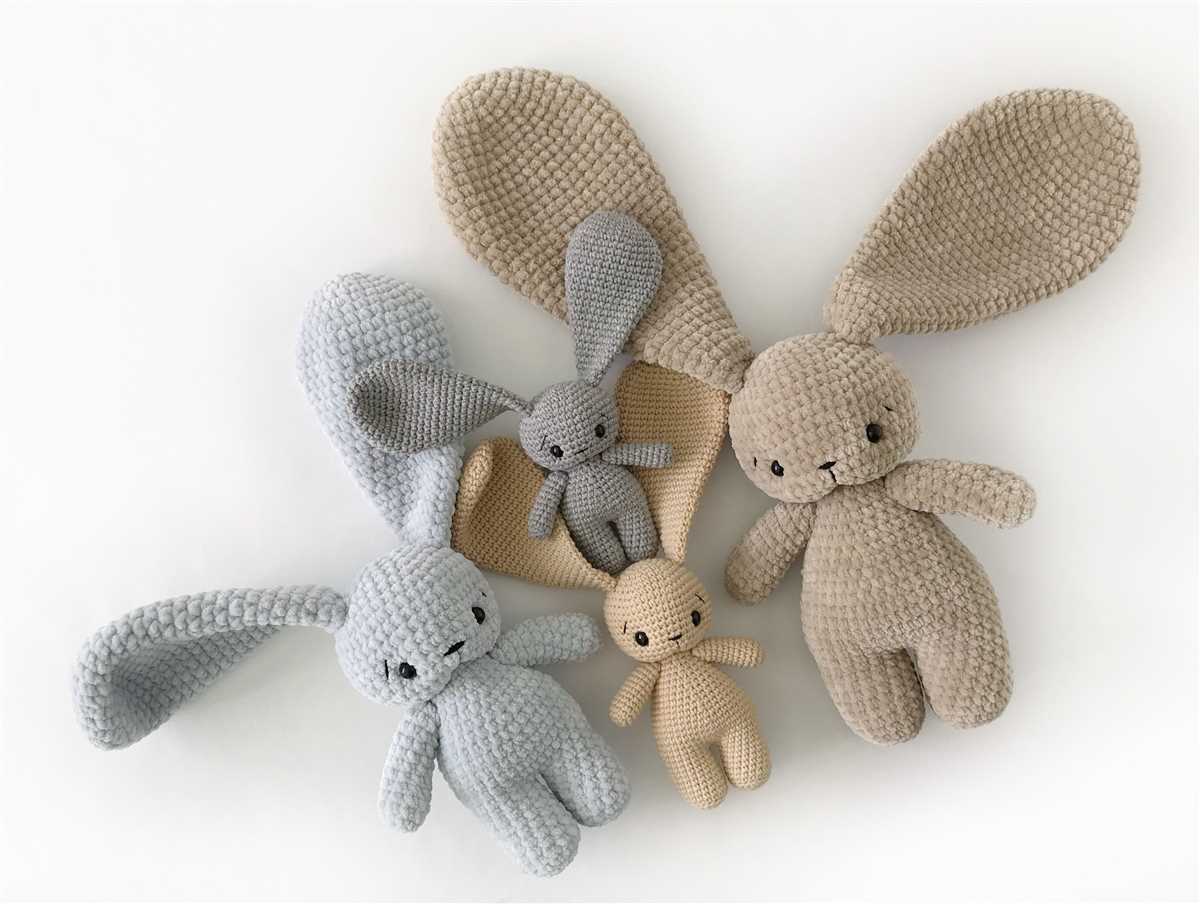
Variations and Adaptations
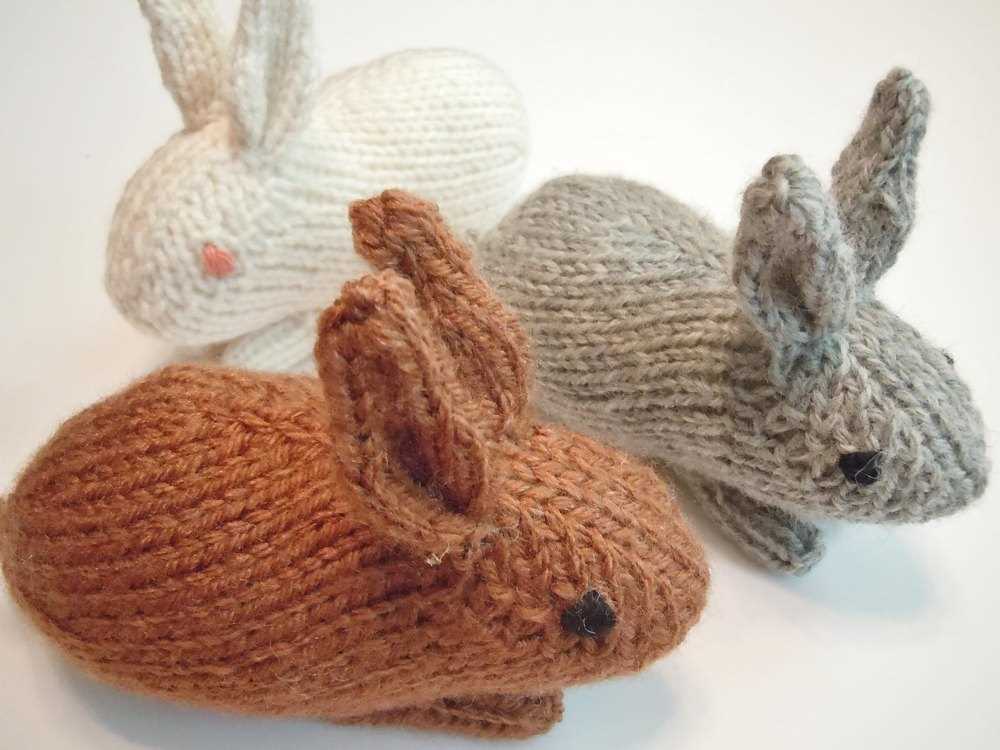
Henry’s bunny knitting pattern is a versatile design that can be adapted in various ways to create different looks or accommodate different preferences. Here are some ideas for variations and adaptations:
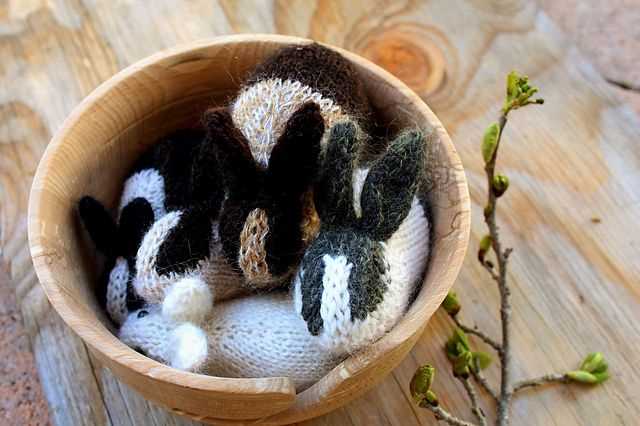
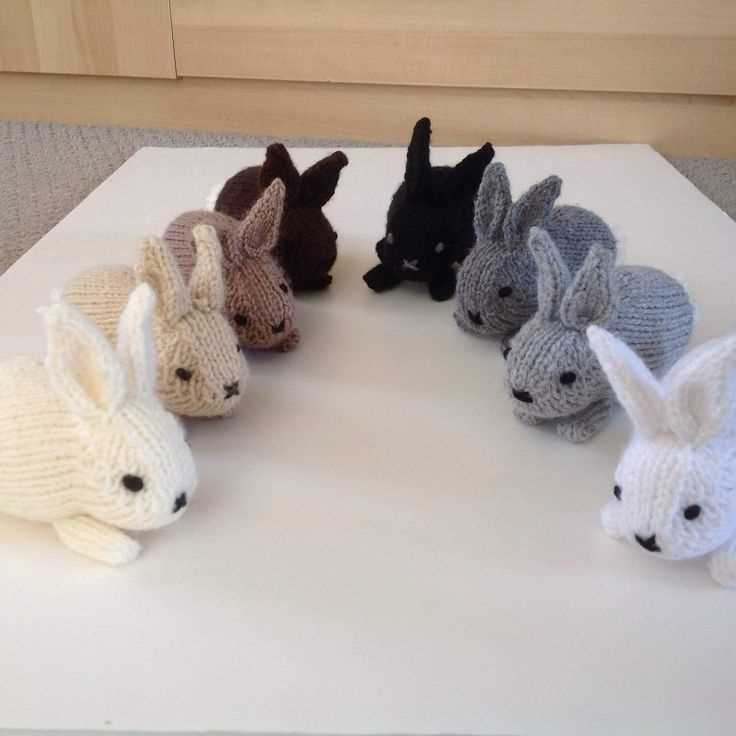
- Color variation: Instead of using the traditional white yarn, you can experiment with different colors to create bunnies in various shades. This can add a unique twist to the design and make the bunnies more personalized.
- Additional clothing: If you want to give your bunny a more sophisticated or playful look, you can knit or sew small clothing items such as hats, scarves, or even little dresses. This allows you to further customize the bunny’s appearance and add an extra level of charm.
- Size modifications: The pattern can be easily adjusted to create bunnies of different sizes. If you prefer smaller or larger bunnies, simply modify the number of stitches and rows in the pattern according to your desired dimensions.
- Embellishments: You can enhance the bunny’s features by adding small embellishments. You can sew buttons as eyes, embroider a cute nose or mouth, or attach small pom-poms for added cuteness. Get creative and make each bunny unique.
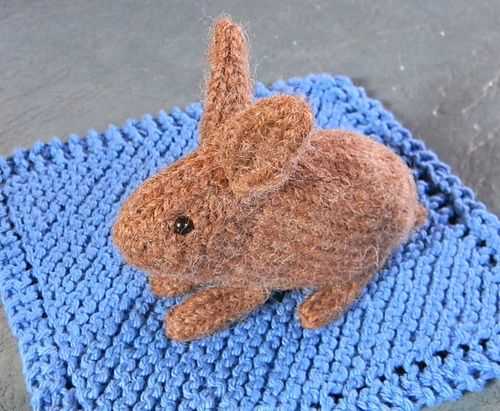
- Material substitution: While the pattern suggests using acrylic yarn, you can experiment with different yarn types and textures. Using cotton yarn would result in a softer finish, while using fuzzy yarn can give the bunny a more furry appearance.
In summary, Henry’s bunny knitting pattern is not only a simple and enjoyable project for knitters of all skill levels but also a versatile design that can be adapted to suit different preferences and create unique bunnies. Whether it’s through variations in color, additional clothing, size modifications, embellishments, or material substitution, there are endless possibilities to unleash your creativity and bring these adorable bunnies to life in your own personal style.
Q&A:
What is Henry’s bunny knitting pattern?
Henry’s bunny knitting pattern is a popular knitting pattern for making a toy bunny. It is loved by both beginners and experienced knitters due to its simplicity and adorable design.
Where can I find Henry’s bunny knitting pattern?
Henry’s bunny knitting pattern can be found online on various knitting websites and forums. You can also find it in knitting pattern books or purchase it from independent knitting designers.
What materials do I need for Henry’s bunny knitting pattern?
For Henry’s bunny knitting pattern, you will need a pair of knitting needles, yarn in desired colors, a yarn needle for sewing, stuffing for the toy, and optional embellishments like buttons or ribbons for decorating.
Is Henry’s bunny knitting pattern suitable for beginners?
Yes, Henry’s bunny knitting pattern is suitable for beginners. It uses basic knitting techniques such as knitting and purling, and the pattern usually comes with detailed instructions and photos to guide you through the process. It’s a great project for practicing and improving your knitting skills.
Can I customize Henry’s bunny knitting pattern?
Yes, you can customize Henry’s bunny knitting pattern according to your preferences. You can choose different colors of yarn, add accessories like bows or hats, or even modify the size of the toy. The pattern serves as a base, and you can let your creativity and imagination run wild.