
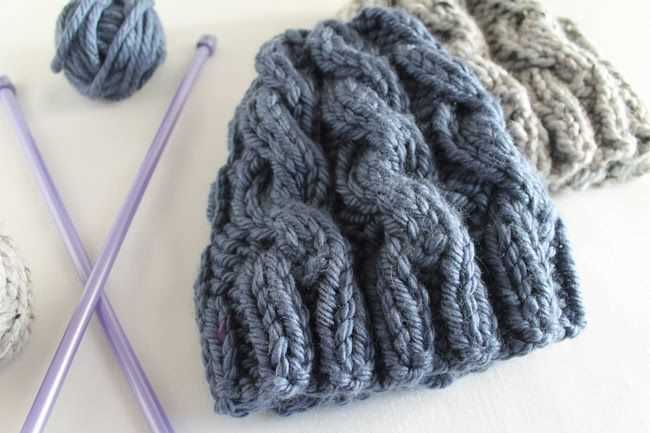
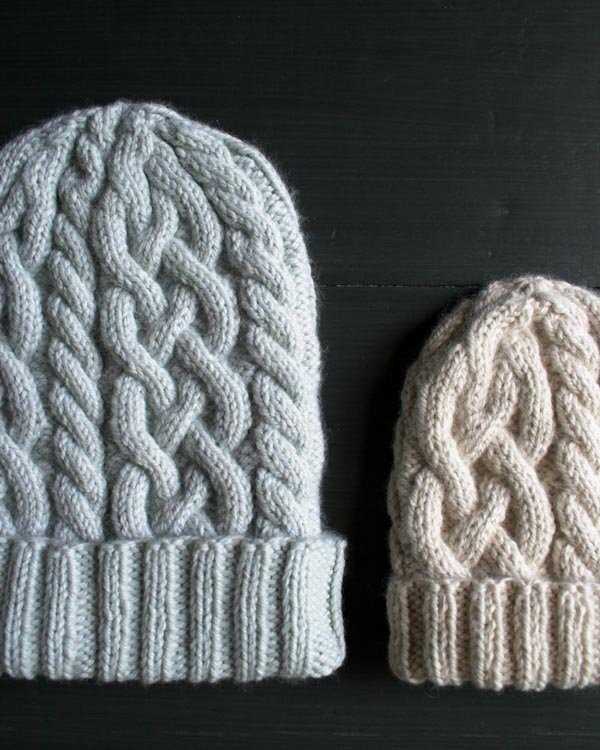
If you’re new to knitting or just looking for a quick and easy project, this cable knit hat pattern is perfect for you. With its simple yet elegant design, this hat is a great addition to any winter wardrobe. The pattern is beginner-friendly and can be completed in just a few hours, making it a perfect weekend project.
To get started, all you need is some chunky yarn and a pair of size 10 knitting needles. The pattern uses basic knitting stitches like knit and purl, so even if you’ve never knit cables before, you’ll be able to follow along easily. The cable pattern adds a touch of texture to the hat, making it look much more complicated than it actually is.
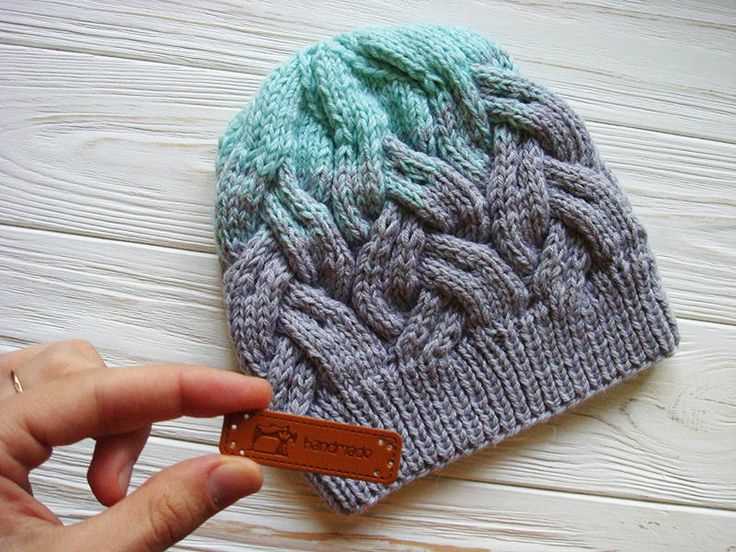
This hat also makes a great gift for friends and family. You can customize it by adding a pom-pom or a personalized tag. With its cozy and warm design, it’s sure to keep the recipient feeling stylish and toasty all winter long. So why not give it a try and add a new staple to your cold weather wardrobe?
Easy Cable Knit Hat Pattern
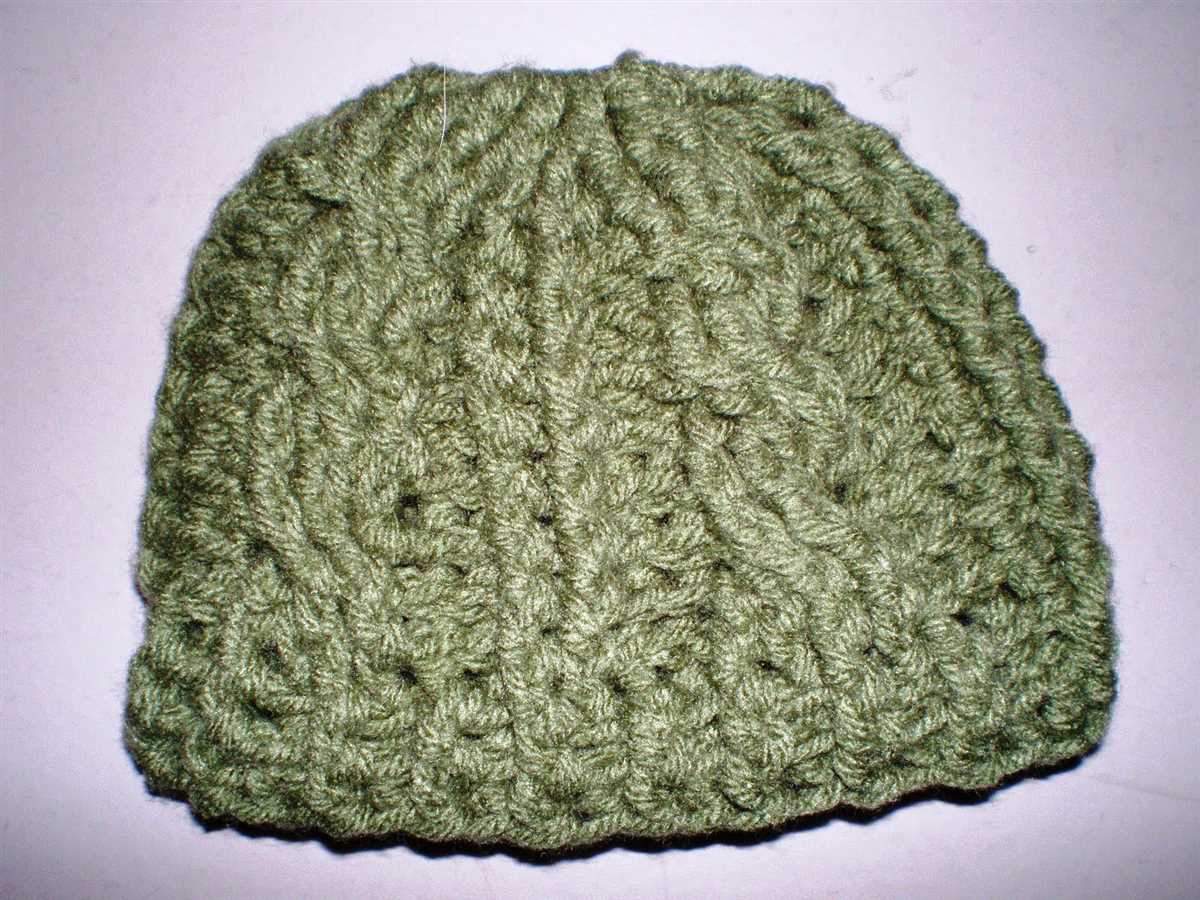
The Easy Cable Knit Hat Pattern is the perfect project for knitters of all skill levels. The pattern features a classic cable design that adds texture and interest to the hat, making it a stylish and cozy accessory for the colder months.
To knit this hat, you will need basic knitting skills, including how to cast on, knit, purl, and decrease stitches. You will also need a set of double-pointed needles and a cable needle. The pattern calls for a medium weight yarn, but you can adjust the size of the hat by using different yarn weights and needle sizes.
Materials:
- Medium weight yarn (approx. 200 yards)
- Size 8 (5 mm) double-pointed needles
- Cable needle
- Tapestry needle
Instructions:
- Cast on 80 stitches using a long-tail cast-on method.
- Divide the stitches evenly onto three double-pointed needles (each needle should have 27 stitches, and the last needle will have 26 stitches).
- Join in the round, being careful not to twist the stitches.
- Begin the cable pattern by following these steps:
- Row 1: Knit
- Row 2: Purl
- Row 3: *Place 2 stitches onto the cable needle and hold at the front of the work, knit 2 stitches from the left needle, then knit the 2 stitches from the cable needle.* Repeat from * to * across the row.
- Row 4: Purl
- Repeat rows 1-4 until the hat measures approximately 8 inches from the cast-on edge.
- Begin the decrease rounds by following these steps:
- Round 1: *Knit 6, knit 2 together.* Repeat from * to * across the round.
- Round 2: *Knit 5, knit 2 together.* Repeat from * to * across the round.
- Round 3: *Knit 4, knit 2 together.* Repeat from * to * across the round.
- Round 4: *Knit 3, knit 2 together.* Repeat from * to * across the round.
- Round 5: *Knit 2, knit 2 together.* Repeat from * to * across the round.
- Round 6: *Knit 1, knit 2 together.* Repeat from * to * across the round.
- Round 7: *Knit 2 together.* Repeat from * to * across the round.
- Round 8: *Knit 2 together.* Repeat from * to * across the round.
- Cut the yarn, leaving a long tail. Thread the tail through the remaining stitches and pull tight to close the top of the hat.
- Weave in any loose ends and your Easy Cable Knit Hat is complete!
| Size | Head Circumference |
|---|---|
| Adult Small | 20-22 inches |
| Adult Medium | 22-24 inches |
| Adult Large | 24-26 inches |
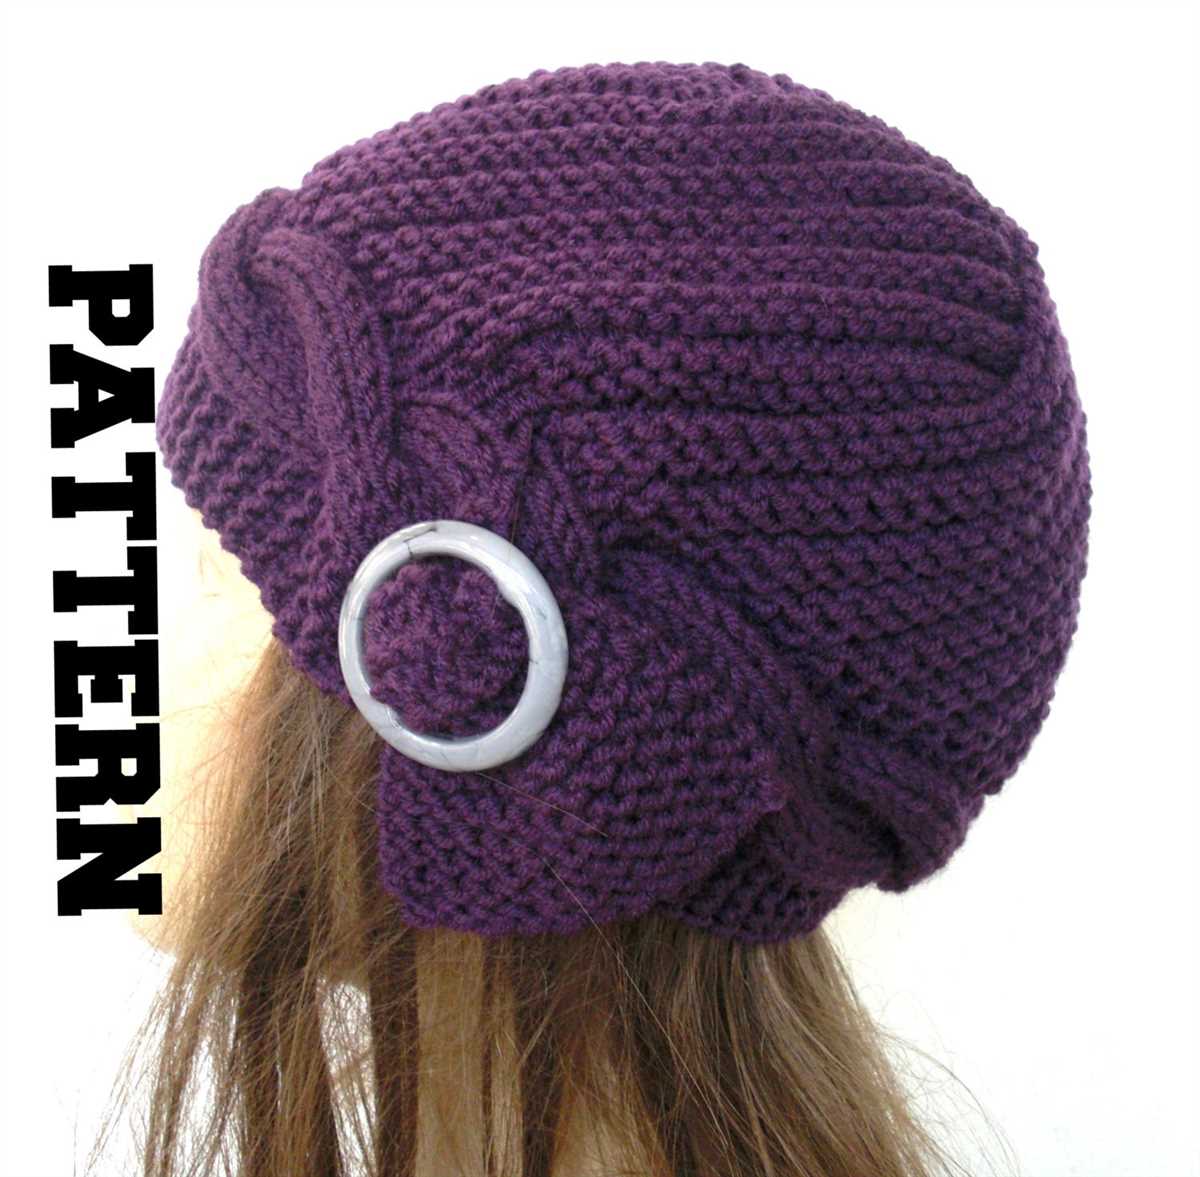
This Easy Cable Knit Hat Pattern is a versatile and stylish project that you can personalize by choosing different yarn colors and adding embellishments such as pom-poms or buttons. Give it a try and enjoy the satisfaction of creating a cozy accessory for yourself or as a thoughtful handmade gift.
Choosing the Right Yarn and Needles
When it comes to knitting a cable knit hat, choosing the right yarn and needles is crucial. The right yarn can make all the difference in the final look and feel of the hat, while the right needles can make the knitting process smooth and enjoyable.
Yarn: One of the first things to consider when choosing yarn for your cable knit hat is the fiber content. Wool is a popular choice for cable knitting as it provides excellent stitch definition and warmth. Merino wool is particularly soft and luxurious, making it a great option for hats. Other natural fibers like alpaca and cashmere can also add a touch of luxury to your hat. If you prefer a more budget-friendly option, acrylic or acrylic blend yarns can work well too, providing both softness and durability.
Another important factor to consider is the weight or thickness of the yarn. Thicker yarns will create a chunkier and warmer hat, while thinner yarns will result in a more delicate and lightweight hat. Worsted weight yarn is a popular choice for cable knitting as it creates a balanced and versatile hat.
Needles: The right needles can make knitting a cable knit hat a breeze. For cable knitting, it’s best to use circular needles rather than straight needles. Circular needles allow you to knit in the round, making it easier to create the seamless and continuous cable pattern. The length of the circular needles should be chosen based on the circumference of the hat you want to make. Typically, a 16-inch circular needle works well for most cable knit hats.
In terms of needle material, it’s a matter of personal preference. Metal needles can be slick and fast, making them great for more experienced knitters. Wooden or bamboo needles have a more natural feel and can be gentler on the hands, making them an excellent choice for beginners or those with sensitive hands.
Overall, when choosing yarn and needles for your cable knit hat, consider the fiber content, weight, and needle type that will best suit your knitting style and desired outcome. With the right materials, you’ll be well on your way to creating a cozy and stylish cable knit hat.
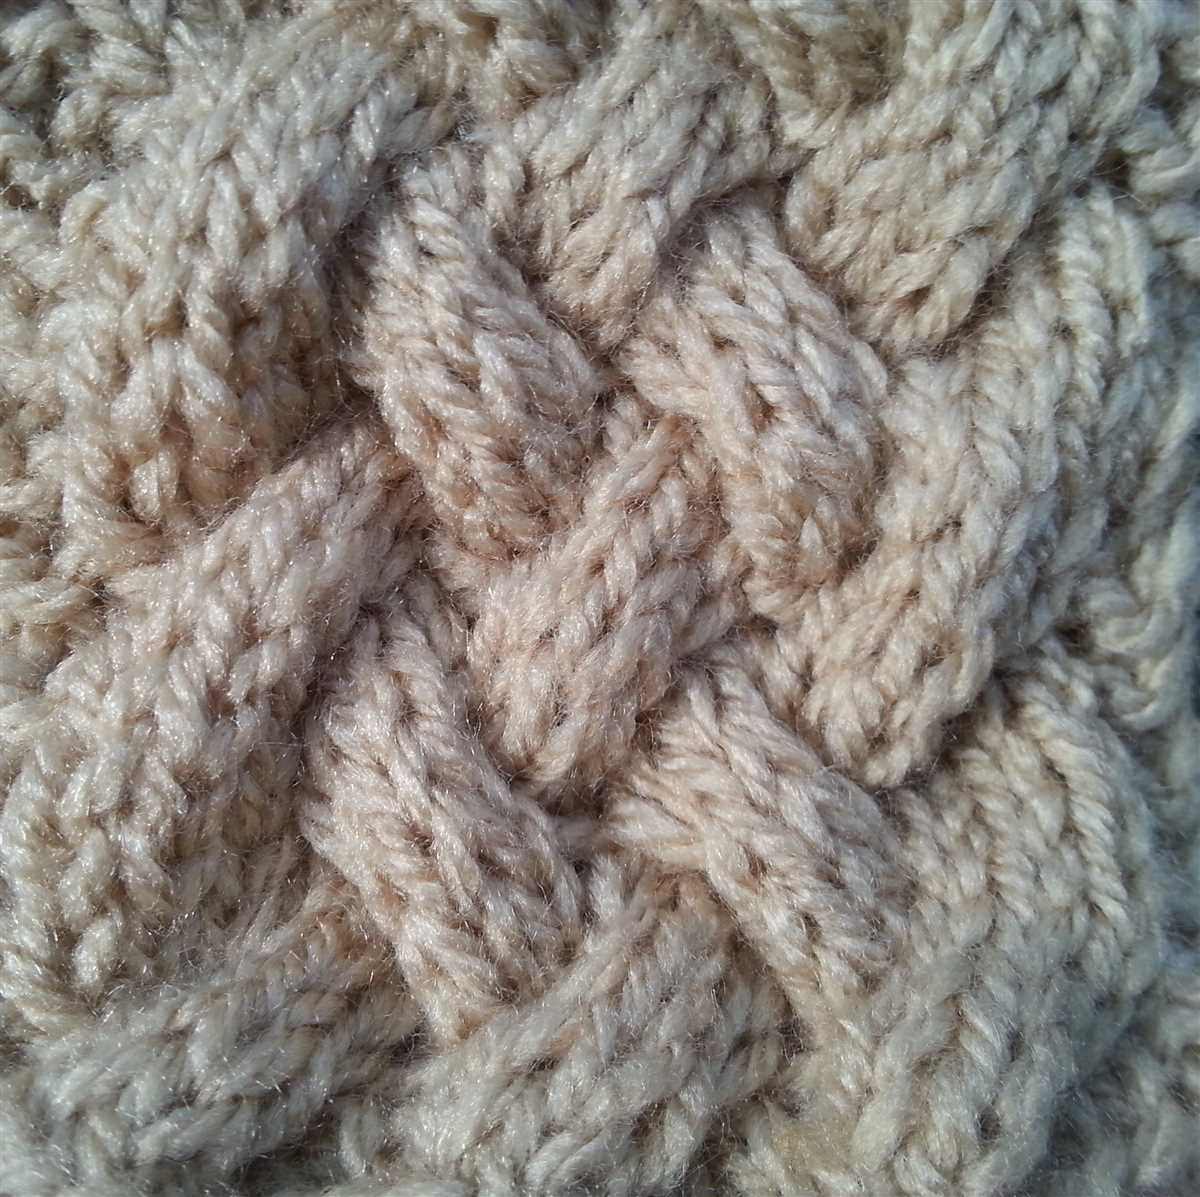
Understanding the Cable Knit Stitch
The cable knit stitch is a popular pattern in knitting, known for its beautiful intertwining design. It creates a textured fabric that adds depth and interest to any project, including hats, scarves, and sweaters. Understanding how to create this stitch is essential for any knitter looking to expand their skills and create stunning pieces.
To create the cable knit stitch, you will need a cable needle, which is a short and straight knitting needle with a small knob at one end. This needle is used to hold stitches while you work on other stitches. It helps create the twisted effect that gives the cable knit stitch its distinctive look.
The cable knit stitch is achieved by rearranging the order in which you work the stitches. You will typically work the cable stitch over a specific number of rows, known as the cable repeat. This repeat may be as short as two rows or can be more complex, depending on the desired pattern.
When working the cable knit stitch, you will often come across abbreviations such as C4F (cable four front) and C4B (cable four back). These abbreviations indicate the order and direction in which you should manipulate the stitches. For example, C4F means you will hold the first two stitches on the cable needle in front of your work, knit the next two stitches, and then knit the two stitches from the cable needle.
To create a basic cable knit hat, you can follow a simple pattern that combines the cable stitch with other basic knitting techniques. This pattern typically includes instructions for casting on, knitting the ribbing, creating the cable pattern, and finishing off the hat. With practice and patience, you will soon master the cable knit stitch and be able to create stunning projects that showcase this beautiful design.
Getting Started with the Hat Pattern
Are you ready to knit your own cozy cable knit hat? This easy pattern is perfect for beginners and will keep you warm all winter long. Before we dive into the knitting instructions, let’s go over a few things you’ll need to get started.
First, gather your materials. You will need a set of double-pointed knitting needles in the appropriate size for your chosen yarn. This pattern recommends using a bulky weight yarn to create a thick and warm hat. You’ll also need a cable needle, stitch markers, and a tapestry needle for finishing.
Once you have your materials ready, it’s time to choose your yarn and needles. Look for a soft and warm yarn that you love in a color that fits your style. Make sure to check the recommended gauge for the pattern to ensure your hat turns out the correct size. If you’re unsure, you can always do a quick gauge swatch before starting.
Now that you have your yarn and needles, it’s time to cast on! Follow the pattern instructions for casting on the appropriate number of stitches. This pattern uses a ribbed brim for a snug fit, so make sure to cast on the correct number of stitches to achieve the desired size.
Once your stitches are cast on, it’s time to start knitting! Follow the pattern instructions step-by-step, making sure to keep track of any stitch markers or cable patterns. Don’t worry if you’re new to cables – this pattern walks you through it and they are easier than they look!
Continue knitting until you reach the desired length for your hat. Once you’re finished, it’s time to bind off and sew up any remaining seams. Follow the pattern instructions for finishing, and don’t be afraid to ask for help if you need it.
Now that you know what materials you need and how to get started, it’s time to grab your yarn and needles and get knitting! Before you know it, you’ll have a beautiful cable knit hat to keep you warm and stylish all winter long.
Cast On and Ribbing Section

Before starting the cable knit hat, you will need to cast on stitches. The number of stitches you cast on will depend on the size of the hat you want to make and the thickness of your yarn. It’s always a good idea to do a swatch to ensure that your gauge is correct and adjust your cast on accordingly.
Once you have cast on the desired number of stitches, you will start the ribbing section. The ribbing creates the stretchy band that sits at the base of the hat and helps it stay in place. Most cable knit hat patterns use a 2×2 ribbing, which means you will alternate between knit and purl stitches.
To start the ribbing section, you will work two knit stitches, followed by two purl stitches. Repeat this pattern across the row until you reach the end. When you start the next row, you will knit the knit stitches and purl the purl stitches. This creates the ribbing texture.
For the ribbing section, it’s important to maintain a consistent tension in your knitting. If your ribbing is too loose, the hat might not fit snugly on your head. On the other hand, if your ribbing is too tight, it can cause the fabric to bunch up and be uncomfortable to wear.
Continue working the ribbing section for the specified number of rows or until it reaches the desired length. Once the ribbing is complete, you will be ready to start the cable pattern.
Here is an example of the cast on and ribbing section for an easy cable knit hat pattern:
Cast on: 80 stitches (or desired number)
Ribbing section:
Row 1: K2, P2, repeat to the end of the row
Row 2: P2, K2, repeat to the end of the row
Repeat Rows 1 and 2 until the ribbing measures 2 inches (5 cm).
Remember to follow the specific instructions and pattern for the cable knit hat you are making, as the cast on and ribbing section may vary depending on the design.
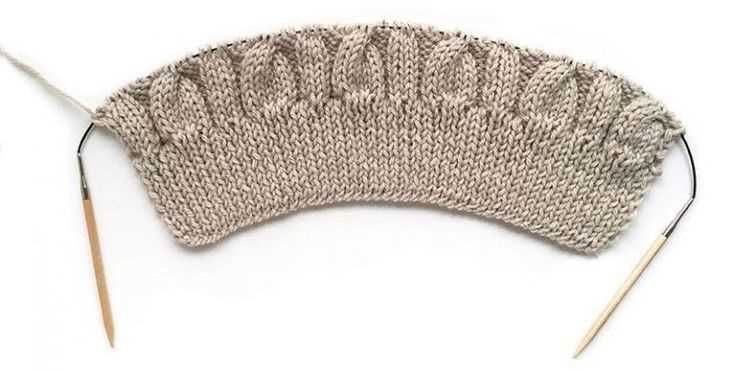
Starting the Cable Pattern
To begin the cable pattern for your cable knit hat, you will first need to cast on the appropriate number of stitches for your chosen size. Make sure to use a cable cast on method to create a sturdy and stretchy foundation for your hat.
Once your stitches are cast on, the first row of the cable pattern will begin. This row will typically consist of a few knit stitches followed by the cable crosses. The cable crosses are created by holding a certain number of stitches to the front or back of the work, knitting a few stitches, and then knitting the held stitches. This creates the twisting effect that gives the cable pattern its signature look.
In order to create a cable cross, you will need to use a cable needle or a double-pointed needle. Slip the desired number of stitches onto the cable needle and hold it in the front or back of your work, depending on the specific cable stitch pattern. Then, knit the next few stitches on your left-hand needle before knitting the stitches from the cable needle. This completes the cable cross and creates the twist.
Continue working the cable pattern rows, following the specified instructions for each cable cross, until the desired length of the hat is achieved. Be sure to consult the pattern you are following for any specific variations or instructions for your chosen cable knit hat design.
Continuing the Cable Pattern
Once you have completed the cable section of your hat, you can continue the pattern to create a cozy and stylish accessory. The cable pattern creates a beautiful texture and adds warmth to your hat.
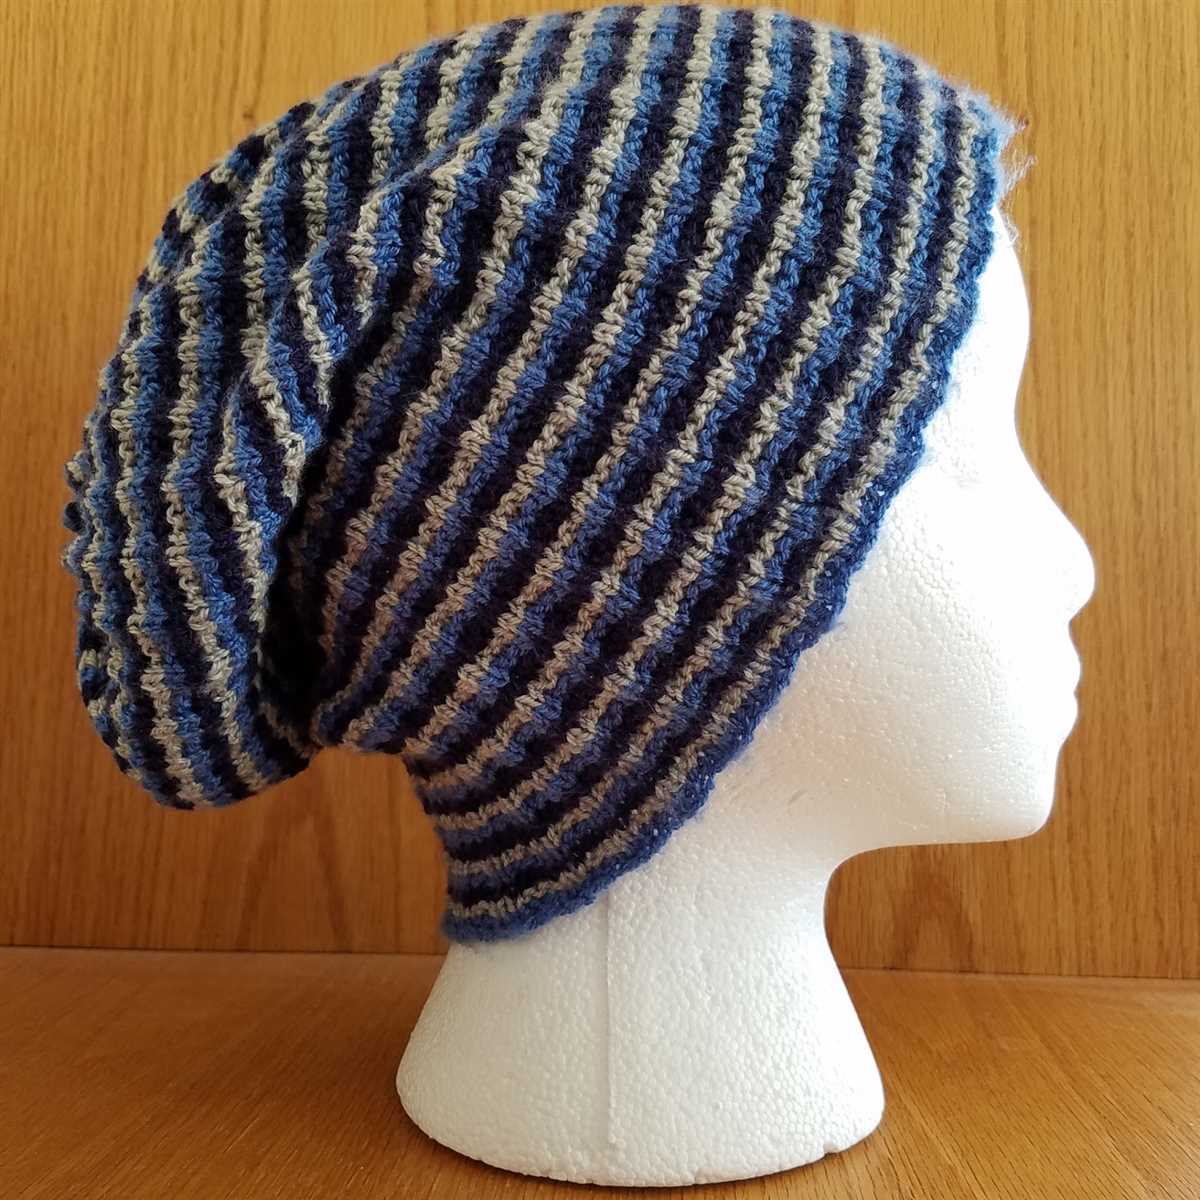
To continue the cable pattern, simply repeat the cable stitch rows for the desired length. For example, if you want to make a slouchy hat, you can continue knitting in the cable pattern for a few more inches before shaping the crown. If you prefer a beanie style hat, you can continue knitting in the cable pattern until you reach the desired length.
It is important to keep track of the cable pattern as you continue knitting. You can use stitch markers to mark the beginning and end of each cable section, making it easier to count the stitches and ensure that the cables are aligned correctly. As you work each row, make sure to follow the cable chart or written instructions to maintain the pattern.
When you reach the shaping section of the hat, you may need to adjust the cable pattern slightly to accommodate the decrease stitches. You can refer to the original cable pattern instructions or consult a cable knitting resource to learn how to modify the pattern for shaping.
As you continue knitting the cable pattern, you will see the hat take shape and the intricate cables come to life. The final result will be a beautiful and cozy cable knit hat that you can wear with pride and confidence.
Shaping the Crown of the Hat
Once you have completed the main portion of the hat and have reached the desired length, it is time to shape the crown. This is the part of the hat that sits on top of your head and gives it its rounded shape. Shaping the crown involves decreasing the number of stitches in a systematic way to create a tapered effect.
To begin shaping the crown, you will first need to determine the number of stitches to decrease. You can refer to the pattern instructions or use a general rule of thumb, such as decreasing by 10-20% of the total stitches. For example, if your hat has 100 stitches, you may decrease by 10-20 stitches.
There are various methods to decrease stitches, but one common method is the knit two together (k2tog) decrease. To perform a k2tog decrease, simply insert your needle into the next two stitches as if to knit, and then knit them together as one stitch. Repeat this decrease throughout the row or round as instructed in the pattern.
Another popular decrease method is the slip, slip, knit (ssk) decrease. To perform an ssk decrease, slip the next two stitches one at a time, knitwise, onto the right needle. Then insert the left needle into the fronts of these two slipped stitches and knit them together through the back loops. This creates a left-leaning decrease.
Continue decreasing stitches in the crown until you have reached the desired number of stitches. Once all the decreases have been made, you can either transfer the remaining stitches onto double-pointed needles or use the magic loop method to finish off the crown of the hat.
Finishing the Hat
Once you have completed knitting the cable knit hat pattern, it’s time to finish it off and make it ready to wear. Here are the steps to follow:
Weaving in the ends: Begin by weaving in all the loose ends of yarn from the cast on and bind off edges, as well as any other ends from joining new balls of yarn. Use a tapestry needle to thread the yarn through the stitches on the wrong side of the hat, making sure to secure the ends tightly. Trim any excess yarn.
Blocking: Next, you may choose to block your hat to give it a more polished and professional finish. To do this, fill a basin with lukewarm water and add a small amount of mild soap or wool wash. Gently submerge the hat in the water and let it soak for about 10 minutes. Carefully remove the hat from the water and gently squeeze out the excess moisture, being careful not to wring or twist the hat. Lay the hat flat on a clean towel and shape it to your desired size and shape. Allow the hat to air dry completely before wearing.
Adding a pom pom (optional): If you want to add a fun and playful touch to your cable knit hat, you can attach a pom pom to the top. There are many ways to make pom poms, but one simple method is to use a pom pom maker. Simply wrap yarn around the two arms of the pom pom maker until it is full, then cut the yarn and tie it tightly in the center. Remove the pom pom maker and trim any uneven strands. Finally, attach the pom pom securely to the top of the hat using a tapestry needle and the same yarn you used for the hat.
Final touches: Once your hat is dry and any additional decorations have been added, give it one final inspection. Check for any loose stitches or areas that may need reinforcing. Use a crochet hook or tapestry needle to fix any issues, ensuring that your hat is sturdy and ready to keep you warm throughout the winter season.
Congratulations! You have successfully finished your cable knit hat and it’s ready to be worn with pride. Whether you choose to keep it for yourself or gift it to someone special, this hat is sure to be a cozy and stylish addition to any winter wardrobe.
Blocking and Care Instructions

Once you have completed knitting your cable knit hat, it is important to block it to help it maintain its shape. Blocking involves wetting the hat and then gently reshaping it to its desired size. This process allows the stitches to relax and settle into their final position, resulting in a more polished and professional-looking finished product.
To block your cable knit hat, follow these steps:
- Fill a sink or basin with lukewarm water and a small amount of gentle detergent.
- Place the hat in the water and gently press it down to fully submerge it.
- Allow the hat to soak for about 10 minutes.
- Remove the hat from the water and gently squeeze out the excess moisture. Do not wring or twist the hat as this could cause it to lose its shape.
- Lay the hat on a clean towel and gently roll it up to remove more moisture.
- Unroll the hat and place it on a blocking mat or a clean, dry towel.
- Shape the hat to its desired size and gently stretch the cables to enhance their definition.
- Allow the hat to dry completely before removing it from the blocking mat or towel.
It is important to properly care for your cable knit hat to ensure its longevity. Follow these care instructions:
- Hand wash your hat using lukewarm water and a mild detergent. Avoid using harsh chemicals or bleach.
- Gently squeeze out excess water and lay the hat flat to dry.
- Avoid wringing or twisting the hat as this can cause it to lose its shape.
- Store your hat in a cool, dry place to prevent mold and mildew.
- Avoid storing your hat in direct sunlight as this can cause fading.
By following these blocking and care instructions, you can ensure that your cable knit hat stays looking beautiful for years to come.