
Knitting is a beloved craft that has been enjoyed for centuries, and one of the most popular items to knit is a hat. A hat is not only a functional accessory to keep you warm in cold weather, but it is also a great opportunity to showcase your knitting skills and creativity. If you are looking for a unique and stylish hat pattern, look no further than the Icelandic hat knitting pattern.
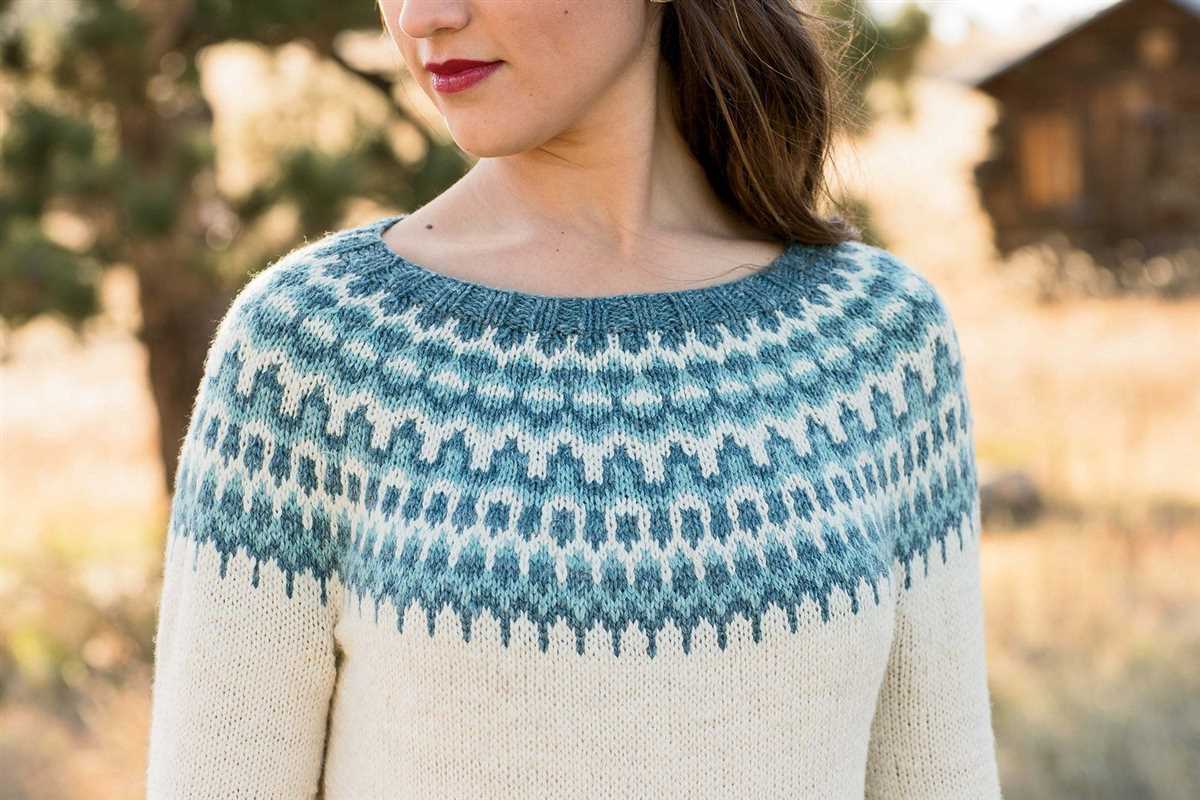
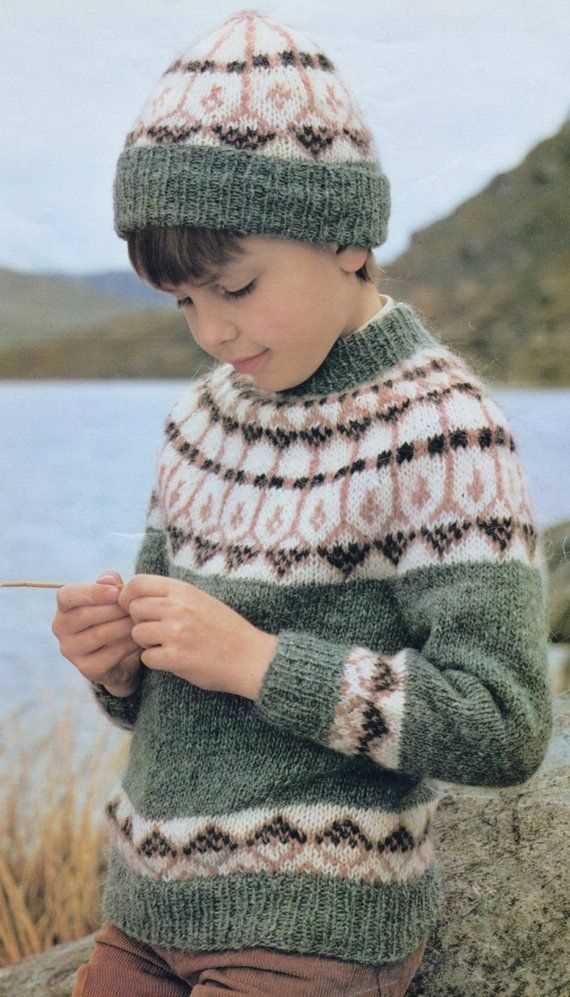
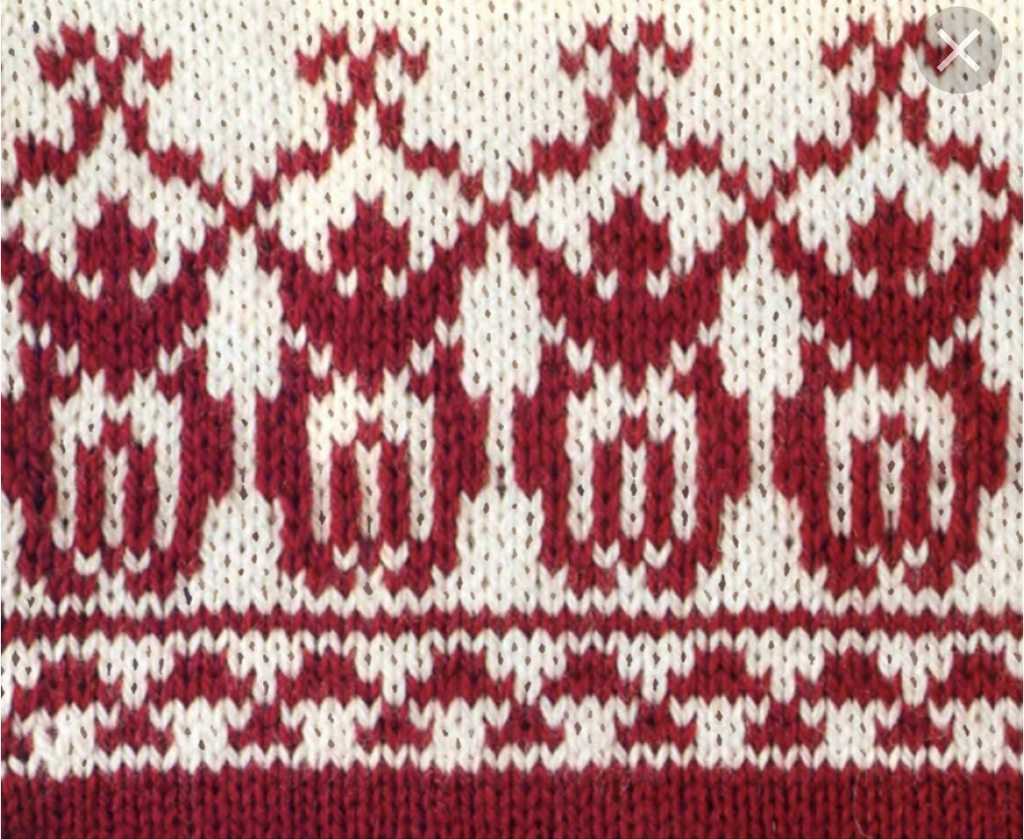
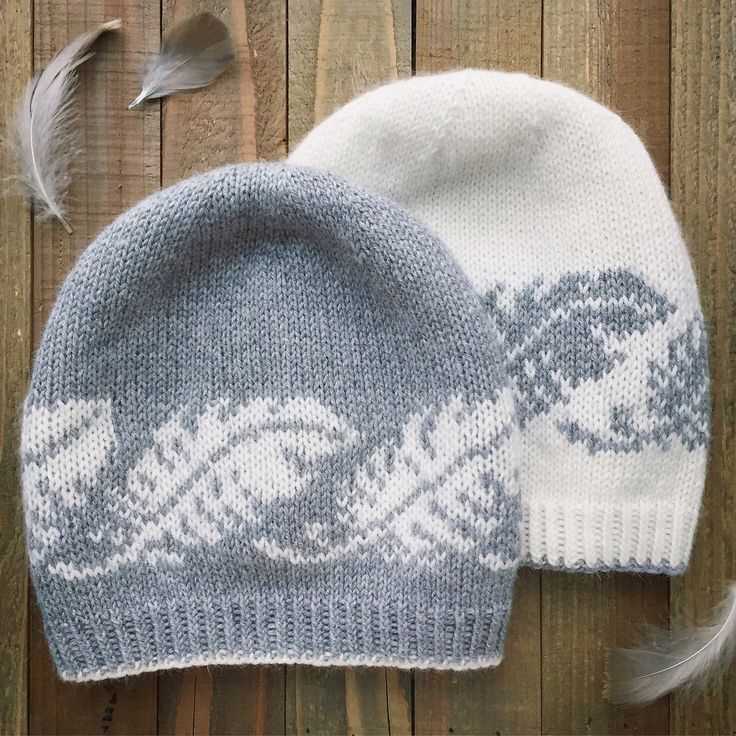
The Icelandic hat knitting pattern is inspired by the rich knitting traditions of Iceland. Icelandic knitting is known for its intricate colorwork and unique motifs, making it a favorite among knitters around the world. The patterns often feature geometric designs and nature-inspired motifs, such as leaves, flowers, and animals.
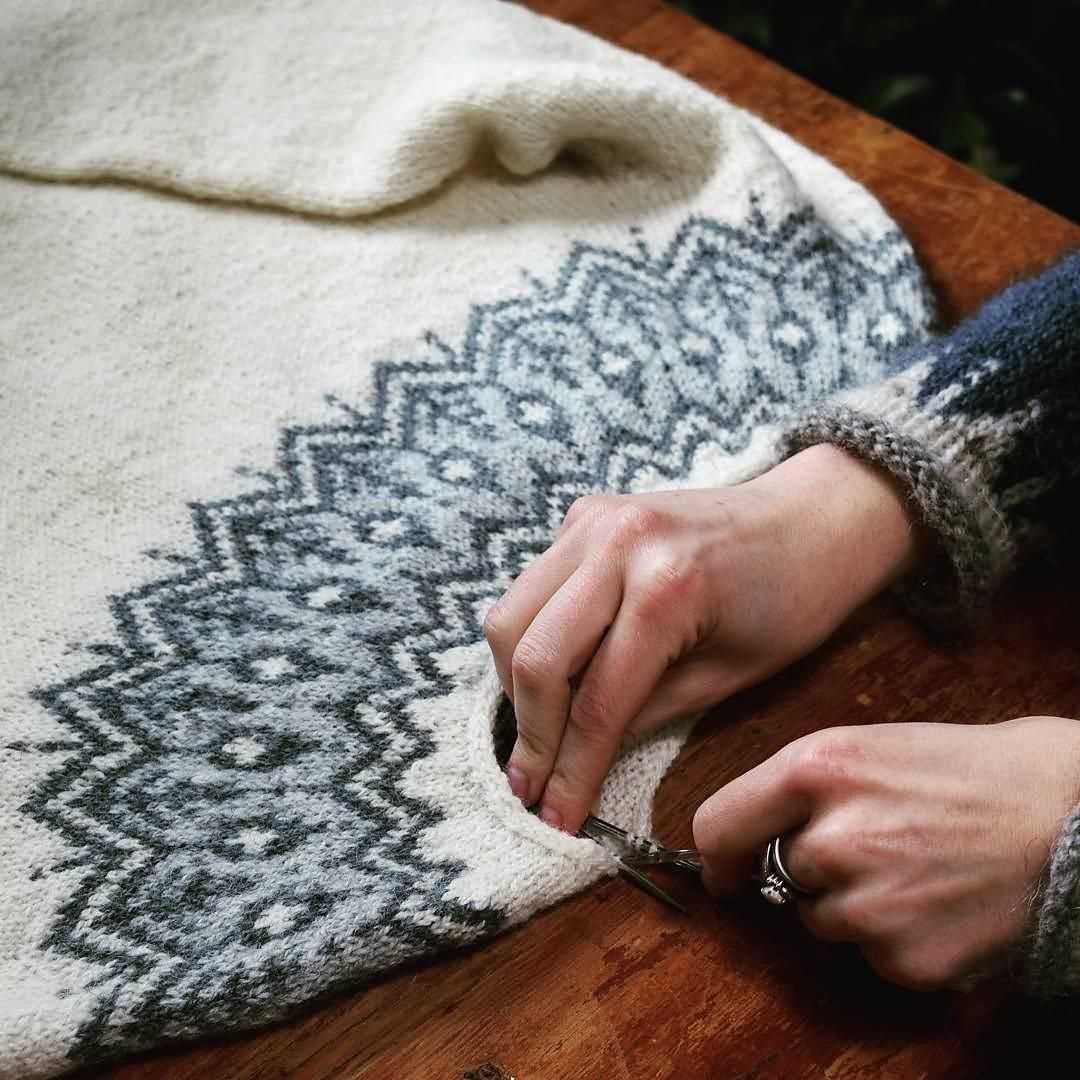
What sets the Icelandic hat knitting pattern apart from other hat patterns is its use of traditional Icelandic yarn and knitting techniques. Icelandic wool, also known as Lopi, is renowned for its warmth and durability. It has natural water-repellent properties, making it perfect for staying cozy in cold and wet weather. The Icelandic knitting techniques used in the pattern, such as the stranded colorwork and the Icelandic steeking method, create a hat that is not only beautiful but also functional and warm.
Icelandic Hat Knitting Pattern
Knitting patterns are a popular way to create unique and personalized accessories, and the Icelandic hat pattern is no exception. These hats are known for their intricate colorwork and cozy warmth, making them perfect for chilly Icelandic winters.
To start knitting an Icelandic hat, you’ll need the following materials:
- Worsted weight yarn in three different colors
- Size 7 (4.5mm) circular needles
- Set of size 7 (4.5mm) double-pointed needles
- Tapestry needle for weaving in ends
The pattern begins with a ribbed brim, which is worked in a contrasting color to create visual interest. After completing the brim, the colorwork section begins, featuring traditional Icelandic motifs such as snowflakes, diamonds, or stars. This part requires following a chart or written instructions to create the intricate patterns.
Once the colorwork section is complete, the hat is shaped using decreases. This creates a snug fit and allows the top of the hat to gather together. Finally, the remaining stitches are gathered and secured, and the hat is ready to be worn.
Keep in mind that Icelandic hat knitting patterns can vary in complexity, so it’s essential to choose a pattern that matches your skill level. If you’re new to colorwork, starting with a simpler pattern may be a good idea to familiarize yourself with the technique before attempting more intricate designs.
| Materials | Instructions |
|---|---|
| Worsted weight yarn | 1. Cast on stitches for the ribbed brim using the contrasting color. |
| Size 7 circular needles | 2. Work the ribbed brim in a k2, p2 ribbing pattern for desired length. |
| Set of size 7 double-pointed needles | 3. Switch to main color and begin the colorwork section following the chart or written instructions. |
| Tapestry needle | 4. Complete the colorwork section and switch back to circular needles. |
| 5. Shape the top of the hat using decreases. | |
| 6. Gather remaining stitches and secure. |
With the right materials and pattern, knitting an Icelandic hat can be a rewarding and enjoyable project. Whether you’re keeping warm during the winter or looking to add a unique accessory to your wardrobe, this hat is sure to impress.
Getting Started
If you’re interested in knitting an Icelandic hat, you’ve come to the right place! This traditional style of hat is not only fashionable but also a fun and rewarding project to undertake. Whether you’re an experienced knitter or a beginner looking for a challenge, this knitting pattern offers step-by-step instructions on how to create your very own Icelandic hat.
Materials Needed: Before you begin, gather the necessary materials for your Icelandic hat project. You’ll need a pair of knitting needles, preferably in size 5mm, as well as a ball of Icelandic wool yarn in your desired color. It’s also helpful to have a yarn needle and a set of double-pointed needles to complete the pattern’s intricate details.
Step 1: Casting on
Start by casting on the required number of stitches onto your knitting needle. The number will vary depending on the size of the hat you wish to make. Consult the pattern’s instructions to determine the correct number of stitches to cast on and create a foundation row of stitches.
Step 2: Knitting the Body
Once you’ve cast on, it’s time to start knitting the body of the hat. This involves following the pattern’s stitch instructions row by row, creating the main section of the hat. Pay attention to any pattern repeats or color changes indicated in the instructions, as these will add variety and visual interest to your hat.
Step 3: Decreasing and Shaping
As you near the top of the hat, the pattern will instruct you to begin decreasing the number of stitches. This creates the tapered shape that is characteristic of Icelandic hats. Follow the decreasing instructions carefully, making sure to maintain the pattern’s stitch sequence.
Step 4: Finishing and Embellishments
Once you’ve completed the body of the hat and shaped the top, it’s time to finish off your project. Carefully bind off the remaining stitches and weave in any loose ends using a yarn needle. If desired, you can add embellishments like a pom-pom or a decorative accent using the double-pointed needles.
Tips: As you work through your Icelandic hat knitting project, here are a few tips to keep in mind. Make sure to check your gauge before starting to ensure your finished hat will fit properly. Additionally, take breaks to stretch your hands and wrists if needed and don’t be afraid to ask for help or consult online tutorials if you encounter any difficulties. Finally, enjoy the process and take pride in creating your very own Icelandic hat!
Choosing the Right Yarn
When it comes to knitting an Icelandic hat, choosing the right yarn is essential to creating a high-quality and comfortable finished product. The right yarn will not only determine the look and feel of the hat, but also its durability and ability to keep the wearer warm in cold weather. Here are some factors to consider when selecting yarn for your Icelandic hat knitting project:
Type of Yarn:
There are several types of yarn that can be used for knitting an Icelandic hat, including wool, alpaca, and blends. Wool is a popular choice due to its warmth, durability, and natural moisture-wicking properties. Alpaca yarn is known for its softness and warmth, making it a great option for those who are sensitive to wool. Blends, which combine different fibers, can provide the benefits of multiple yarn types, such as warmth and softness.
Weight and Gauge:
The weight of the yarn refers to its thickness and can range from lace weight to super bulky. The weight will affect the drape of the hat and the size of the stitches. It is important to choose a yarn weight that matches the recommended gauge for the pattern you are using. This ensures that the hat will have the correct measurements and fit properly. Be sure to check the yarn label for the recommended gauge and needle size.
Color and Pattern:
The color of the yarn is a personal preference and can greatly impact the overall look of the hat. Bold, vibrant colors can create a statement piece, while neutral tones offer versatility and a timeless appearance. Additionally, consider the pattern you will be knitting and how the color of the yarn will interact with it. Some patterns may require solid or subtle variegated yarn to showcase the intricate stitchwork.
Care Instructions:
Before purchasing yarn, it is important to check the care instructions. Some yarns may require special care, such as hand washing or dry cleaning, while others can be machine-washed. Consider the practicality of the care instructions and choose a yarn that aligns with your lifestyle and preferences. This will ensure that your hat remains in good condition for years to come.
By considering these factors when choosing yarn for your Icelandic hat knitting project, you can create a hat that not only looks beautiful but also provides warmth and comfort to the wearer. Whether you opt for wool, alpaca, or a blend, the right yarn will make all the difference in the final result.
Selecting the Right Needles
When it comes to knitting the perfect Icelandic hat, selecting the right needles is crucial. The type and size of needles you choose will greatly impact the finished product and the ease of knitting. Here are some important considerations to keep in mind when selecting your needles:
Type of Needles

There are two main types of knitting needles: straight needles and circular needles. Straight needles are the traditional choice and are great for knitting flat pieces such as scarves and blankets. Circular needles, on the other hand, are a versatile choice for knitting in the round, which is ideal for making hats. They also provide more flexibility and minimize strain on your wrists and hands. For Icelandic hat knitting, circular needles are recommended.
Size of Needles
The size of your needles will determine the gauge and tension of your knitting. In Icelandic hat knitting, it is important to achieve a tight gauge to ensure warmth and protection from the cold weather. Therefore, it is recommended to use smaller needle sizes, such as US size 7 (4.5mm) or smaller. However, the exact needle size will depend on your personal tension and the yarn you’re using. It is always a good idea to make a gauge swatch before starting your hat to ensure you’re using the right size needles.
Material of Needles
Knitting needles can be made from various materials, including bamboo, metal, and plastic. Each material has its own advantages and disadvantages. Bamboo needles are lightweight, flexible, and provide good grip, but they can be prone to breakage. Metal needles are durable, slide easily through stitches, and are great for speedy knitting, but they can be slippery. Plastic needles are affordable, lightweight, and offer a good grip, but they may not be as durable as other materials. Consider your personal preference and the characteristics of the yarn you’re using when selecting the material of your needles.
Understanding the Pattern Abbreviations
When starting a new knitting project, it’s important to familiarize yourself with the pattern abbreviations. These abbreviations are used throughout the pattern instructions to provide a concise way of indicating specific knitting techniques or stitches. By understanding these abbreviations, you will be able to easily follow the pattern and create a beautiful Icelandic hat.
One common abbreviation you may come across is “k,” which stands for knitting. This means that you should insert the needle into the stitch on the left-hand needle, bring the yarn forward, and pull it through the stitch to create a new stitch on the right-hand needle. Another common abbreviation is “p,” which stands for purling. This is similar to knitting, but instead of bringing the yarn forward, you bring it to the back of the work and pull it through the stitch to create a new stitch.
Another important abbreviation to be aware of is “yo,” which stands for yarn over. This means that you should bring the yarn forward between the needles and then over the top of the right-hand needle. This creates an extra stitch and an eyelet in the fabric. The “sl” abbreviation stands for slip, which means that you should insert the right-hand needle into the stitch on the left-hand needle as if to knit, but instead of knitting it, just slide it off the left-hand needle.
Other common abbreviations you may encounter in the pattern include “k2tog” (knit two stitches together), “ssk” (slip, slip, knit), “sssk” (slip, slip, slip, knit), and “tbl” (through the back loop). It’s important to refer to the pattern instructions or a knitting abbreviation guide for a complete list of all the abbreviations used in the Icelandic hat knitting pattern you are following. By understanding these abbreviations, you will be able to confidently knit the hat and achieve the desired results.
Casting On
When starting your Icelandic hat knitting project, the first step is to cast on. This is the process of creating the first stitches on your knitting needle. There are several methods to choose from, but the long-tail cast-on method is commonly used for hats.
To begin the long-tail cast-on, you will first need to estimate the amount of yarn you will need. Leave a tail that is approximately three times the width of your project. Then, make a slipknot by creating a loop with the yarn and pulling the tail through. Place the slipknot onto your knitting needle and tighten it.
Next, hold the knitting needle with the slipknot in your right hand and the working yarn (the yarn attached to the ball) in your left hand. With your right thumb and forefinger, hold the yarn tail and bring it between the needle and your left thumb, creating a triangle shape. The working yarn should be behind the needle.
Hold both strands of yarn in your left hand so that the yarn tail is wrapped around your thumb and the working yarn is wrapped around your index finger. Insert the knitting needle into the triangle shape from front to back, going under the yarn that is wrapped around your thumb. Bring the needle back to the front of the triangle shape, going over the yarn that is wrapped around your index finger.
Moving the needle downwards, bring the loop of yarn through the triangle shape, creating a new loop on the needle. This loop will be your first stitch. Continue this process, creating a new loop for each stitch, until you have cast on the required number of stitches for your hat pattern.
Once you have finished casting on, you can start knitting your Icelandic hat following the pattern instructions.
Knitting the Ribbing
When knitting a hat, the ribbing is the section at the brim of the hat that provides elasticity and helps keep it snugly in place. It is typically knitted using a smaller needle size than the main body of the hat, creating a tighter fabric. In the case of the Icelandic hat knitting pattern, the ribbing is an important element that adds texture to the design and ensures a comfortable fit.
To begin knitting the ribbing, you will need to cast on the required number of stitches using the smaller needle size specified in the pattern. Make sure to use a stretchy cast-on method, such as the long-tail cast-on, to ensure that the ribbing has enough give. You can also choose to use a different color yarn for the ribbing to create a contrasting effect.
The ribbing is typically worked in a rib stitch pattern, which alternates between knit and purl stitches. In the Icelandic hat knitting pattern, the ribbing is often worked in a 2×2 rib stitch, which means you knit two stitches and purl two stitches in a repeating pattern. This creates a stretchy, reversible fabric that lays flat and provides a neat edge.
As you knit the ribbing, make sure to maintain an even tension and check your gauge regularly to ensure that the ribbing is not too tight or too loose. It should comfortably stretch to fit around the head without being too constricting. Once the desired length for the ribbing is reached, you can then switch to the larger needle size and continue knitting the main body of the hat according to the pattern instructions.
Knitting the Body
When it comes to knitting the body of an Icelandic hat, there are a few key techniques and considerations to keep in mind. One of the most important aspects is the choice of yarn and needle size. Icelanders are known for their warm and durable wool, which is typically knit using larger needles to create a looser gauge. This helps to create an insulating layer of air within the fabric, making the hat extra warm and cozy.
Once you have chosen your yarn and needles, it’s time to cast on. The number of stitches you cast on will depend on the size of the hat and the desired circumference. A common technique in Icelandic hat knitting is to start with a ribbed brim. This adds elasticity and ensures a snug fit around the head. A popular choice is knitting a two-by-two rib, alternating knit and purl stitches. This creates a stretchy and visually appealing texture.
After the ribbed brim is complete, it’s time to move on to the body of the hat. This is where you can get creative with different stitch patterns and motifs. Traditional Icelandic hats often feature intricate colorwork designs, such as stranded knitting or Fair Isle patterns. These patterns can be achieved by using multiple colors of yarn and working with a chart that indicates which color to use for each stitch.
It’s important to maintain an even tension while knitting the body of the hat to ensure a consistent fabric. This can be achieved by paying attention to your knitting technique and making sure your yarn is neither too loose nor too tight. Blocking the hat after it is finished can also help to even out any inconsistencies and give the hat a polished look.
Once the body of the hat is complete, it’s time to decrease for the crown. This is done by gradually reducing the number of stitches in each round until only a few remain. This creates a tapered shape that fits snugly on top of the head. Finally, the remaining stitches are gathered and secured, and the hat is ready to be worn or given as a beautiful handmade gift.
Decreasing and Shaping the Crown
The crown of a hat is the top portion that fits over the head. When knitting a hat, it is important to shape the crown properly for a comfortable and stylish fit. Decreasing is the technique used to taper the crown and create its shape. There are several different methods for decreasing, and the one you choose will depend on the look you want to achieve.
One common method of decreasing is to knit two stitches together. This is called a knit two together (k2tog) decrease. To do this, simply insert your right needle into the next two stitches on the left needle as if to knit, and then knit them together as one stitch. This will decrease the stitch count by one. Repeat this decrease every few rounds until you have reached the desired number of stitches.
Another method of decreasing is the slip, slip, knit (ssk) decrease. This decrease creates a left-slanting decrease, which can be used to create a decorative effect in the crown of the hat. To do an ssk decrease, slip the next two stitches individually, one at a time, from the left needle to the right needle as if to knit. Then insert the left needle into the front loops of these two slipped stitches, and knit them together through the back loops.
It is important to carefully follow your chosen knitting pattern for the crown shaping and decreasing instructions. The pattern will specify the number of stitches to decrease and the frequency at which they should be decreased. By following the pattern, you can ensure that your hat will have a properly shaped and comfortable crown.
When shaping the crown, always keep in mind the size and fit of the hat. If you want a more snug fit, decrease more often and/or decrease more stitches at a time. If you want a looser fit, decrease less often and/or decrease fewer stitches at a time. Experiment with different techniques and patterns to find the crown shaping method that works best for the type of hat you are knitting.
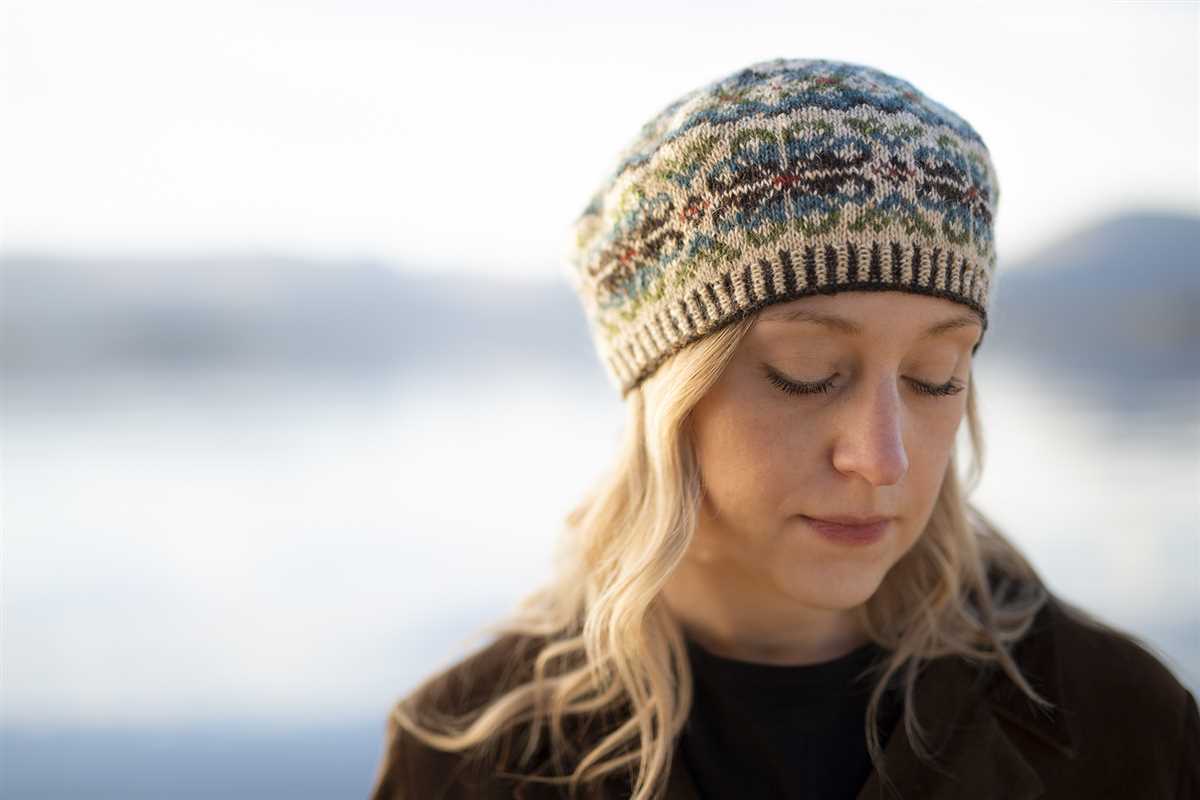
Incorporating Traditional Icelandic Patterns
Icelandic knitting patterns have a long history and are an important part of the country’s cultural heritage. These patterns originated from the traditional knitting techniques used by Icelandic women for centuries. Incorporating these traditional patterns into your own hat designs adds a beautiful and authentic touch to your knitted creations.
One popular Icelandic pattern is the “lópa” pattern, also known as the “lice” pattern. This pattern is characterized by small, repeated motifs that resemble lice (hence the name). The lópa pattern is often used to create intricate and striking designs on hats, sweaters, and other knitted items. By incorporating this pattern into your hat, you can create a unique and eye-catching design that pays homage to Icelandic knitting tradition.
Another traditional Icelandic pattern that can be incorporated into hat designs is the “honeycomb” pattern. This pattern is characterized by its geometric shapes and textured appearance, resembling the cells of a honeycomb. Knitting a hat with the honeycomb pattern adds depth and visual interest to the design, making it a popular choice for those looking to create a statement piece.
Incorporating Icelandic Patterns:
- Select a traditional Icelandic knitting pattern that suits your hat design.
- Choose high-quality Icelandic yarn to ensure authenticity and durability.
- Follow the pattern instructions carefully, paying attention to the unique stitch combinations and color changes.
- Experiment with different color combinations to make your hat design truly unique.
- Showcase your finished hat and share it with others who appreciate the beauty of Icelandic knitting patterns.
Finishing and Blocking
Once you have completed knitting your Icelandic hat, it is important to properly finish and block it to ensure that it retains its shape and fits correctly.
First, weave in any loose ends of yarn from the hat, making sure to secure them tightly. This will prevent any unraveling or fraying of the stitches.
Next, wet the hat by immersing it in lukewarm water or by spraying it with water until it is thoroughly saturated. Avoid using hot water as it can cause the fibers to shrink or lose their shape.
After wetting the hat, gently press out the excess water by wrapping it in a clean towel and squeezing lightly. Do not twist or wring the hat as this can cause it to stretch or warp.
Once the hat is damp, you can proceed to blocking it. Place the damp hat on a flat surface, such as a blocking mat or towel, and gently reshape it to the desired size and shape. Use your fingers to smooth out any wrinkles or bumps in the stitches.
You can also use blocking pins to secure the hat in place and help it maintain its shape while drying. Pin along the edges of the hat, being careful not to stretch or distort the stitches.
Leave the hat to dry completely in a well-ventilated area, away from direct sunlight or heat sources. It may take a day or two for the hat to dry completely, depending on the thickness of the yarn and the humidity of the environment.
Once the hat is dry, remove the blocking pins and gently shake or fluff the hat to loosen any stiffness. Your Icelandic hat is now finished and ready to be worn with pride!
Tips and Troubleshooting
Knitting a traditional Icelandic hat can be a fun and rewarding project. However, like any knitting project, it can come with its challenges. Here are some tips and troubleshooting advice to help you along the way:
Tips
- Use the correct yarn weight and needle size recommended in the pattern for best results. This will ensure that your hat turns out the right size and has the desired drape.
- When choosing colors for your Icelandic hat, consider using traditional Icelandic color schemes or experiment with your own combinations. Mixing different colors can add depth and interest to your hat.
- Blocking your hat after you finish knitting it can help shape it and even out any uneven stitches. Follow the blocking instructions provided in the pattern or use a method that works best for you.
- If you’re new to knitting with circular needles, practice your technique before starting the hat. It can be helpful to watch video tutorials or take a class to familiarize yourself with the process.
Troubleshooting
- If your hat turns out too small, try using larger needles or switching to a bulkier yarn. You can also add extra stitches to the pattern to increase the circumference.
- If your hat turns out too large, try using smaller needles or switching to a lighter weight yarn. You can also decrease the number of stitches in the pattern to reduce the circumference.
- If you’re struggling with stranded colorwork, practice your tension and try not to pull the strands too tight. Keeping an even tension will ensure that your colorwork motifs are clear and defined.
- If you make a mistake in the colorwork pattern, don’t panic! You can either rip back to the mistake and fix it, or use duplicate stitch to correct the error after you’ve finished knitting.
With these tips and troubleshooting advice, you’ll be well-equipped to knit your own beautiful Icelandic hat. Happy knitting!