
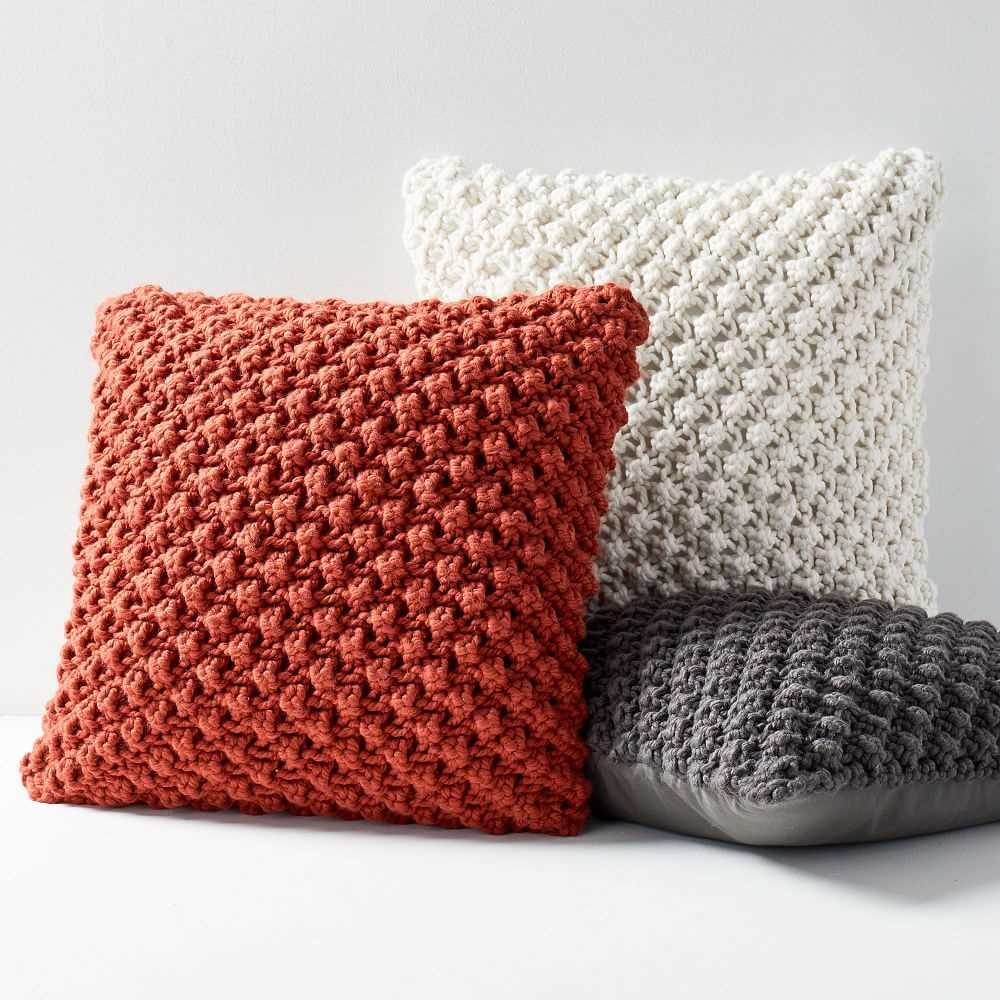
Looking for a fun and creative way to add a cozy touch to your home decor? Why not try knitting your own cushion cover? This knitted envelope cushion cover pattern is the perfect project for both beginner and experienced knitters alike.
The envelope design of this cushion cover makes it easy to slip on and off, allowing you to change up your home decor whenever you please. Plus, the soft and plush texture of the knitted fabric will add an extra level of comfort to your living space.
This pattern requires just a few basic knitting stitches, making it a great project for beginners who are looking to expand their knitting skills. However, experienced knitters will also enjoy the simplicity and versatility of this pattern, as it can be easily customized to fit any size of cushion.
How to knit a cozy cushion cover with an envelope design
Creating a cozy and stylish cushion cover for your home can add warmth and comfort to any space. One popular design is the envelope cushion cover, which features a unique closure that allows for easy removal and washing of the cover. Knitting your own cushion cover is a rewarding project that allows you to customize the design, colors, and texture to match your personal style.
Materials needed:
- Knitting needles (size may vary depending on desired gauge)
- Yarn in your preferred color and texture
- Tapestry needle
- Scissors
Instructions:
- Begin by selecting your desired yarn and knitting needles. Consider the color and texture you want for your cushion cover and the size of the needles that will produce the desired gauge.
- Start by casting on the desired number of stitches, taking into account the dimensions of your cushion insert.
- Knit the base of your cushion cover in your chosen stitch pattern until it reaches the desired length.
- Next, create the envelope closure by knitting two separate pieces that will overlap. These pieces should be approximately half the width of your cushion cover.
- Continue knitting the envelope closure pieces until they are the desired length, ensuring that they will overlap enough to create a secure closure.
- Once you have completed both envelope closure pieces, attach them to the sides of the main cushion cover by using a tapestry needle and yarn to sew them in place.
- Once the envelope closure is secured, continue knitting the remainder of the cushion cover until it reaches the desired length.
- To finish off your cushion cover, bind off the stitches and weave in any loose ends with a tapestry needle.
- Slide your completed cushion cover onto your cushion insert, making sure the envelope closure is positioned correctly for easy removal and washing.
By following these simple instructions, you can create a cozy and stylish cushion cover with an envelope design. Experiment with different yarns, stitch patterns, and colors to make your cushion cover truly unique and personalized to your home decor.
Materials you’ll need for the knitted envelope cushion cover
Creating a knitted envelope cushion cover requires a few essential materials to ensure a successful and beautiful end result. Here are the key items you will need:
- Yarn: Choose a soft and durable yarn in the color and texture of your preference. Consider the size of your cushion cover and the knitting pattern you will be using when selecting your yarn.
- Knitting needles: Use knitting needles that are appropriate for the thickness of your chosen yarn. Check the label or pattern instructions for the recommended needle size.
- Scissors: A pair of sharp scissors will be necessary for cutting the yarn and tidying up any loose ends.
- Tapestry needle: A tapestry needle with a large eye is essential for sewing up the seams of your cushion cover and weaving in any loose yarn.
- Measuring tape: A measuring tape will help you ensure that your cushion cover is the correct size and that your knitting is even and consistent.
- Stitch markers: Stitch markers are useful for keeping track of specific stitches or pattern sections, especially if you are working with more complex knitting patterns.
- Buttons or Velcro: Depending on the design of your knitted envelope cushion cover, you may need buttons or Velcro strips for securing the opening of the cover.
By having these essential materials ready before you begin knitting, you can ensure a smooth and enjoyable crafting experience, resulting in a beautiful knitted envelope cushion cover for your home.
Choosing the right yarn
When it comes to choosing yarn for your knitted envelope cushion cover, there are several factors to consider. The right yarn can make all the difference in the final look and feel of your project.
Weight and thickness
One of the first things to consider is the weight and thickness of the yarn. The pattern for a knitted envelope cushion cover may specify a certain weight of yarn, such as worsted or bulky. It’s important to choose a yarn that matches the recommended weight for the pattern in order to achieve the desired finished size and texture.
Fiber content
The fiber content of the yarn can also impact the look and feel of your cushion cover. Some common yarn fibers include wool, cotton, acrylic, and blends. Each type of fiber has its own characteristics and properties. For example, wool can provide warmth and durability, while cotton is lightweight and breathable. Consider the purpose and style of your cushion cover when choosing the fiber content.
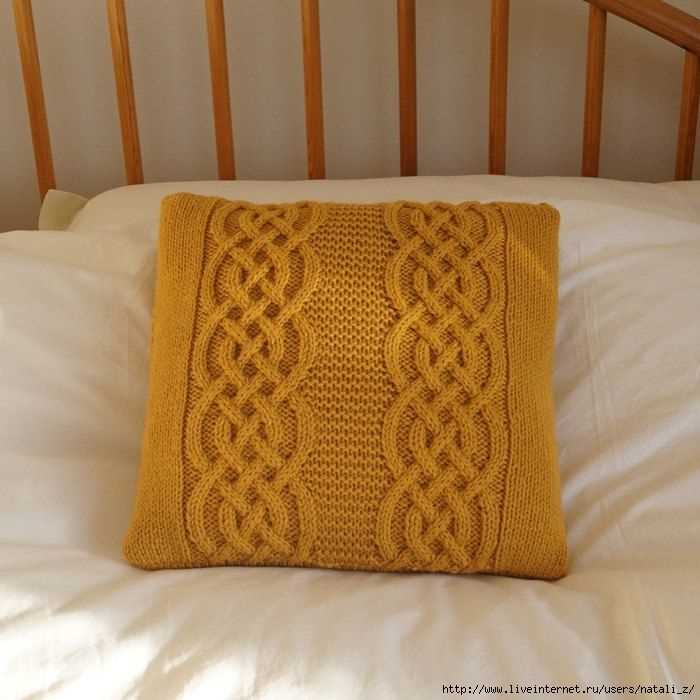
Color and texture
Color and texture are important aesthetic considerations when choosing yarn for your cushion cover. Think about the overall color scheme and style of your space. Do you want a bold and vibrant pop of color, or a more neutral and subdued palette? Additionally, consider the texture of the yarn. Some yarns have a smooth and sleek finish, while others have a more textured or fuzzy appearance. The texture of the yarn can add depth and visual interest to your cushion cover.
Budget
Finally, it’s important to consider your budget when choosing yarn. Yarn prices can vary widely depending on factors such as fiber content and brand. Decide on a budget that you’re comfortable with and look for yarns that fit within that range. Remember, you don’t have to break the bank to find a quality yarn that will work well for your project.
- Consider the weight and thickness of the yarn
- Think about the fiber content of the yarn
- Consider the color and texture of the yarn
- Factor in your budget
What size needles to use
When it comes to knitting a cushion cover, the size of the needles you use will determine the overall look and feel of the finished product. For this particular knitted envelope cushion cover pattern, it is recommended to use size 8 (5mm) knitting needles.
The size 8 knitting needles are ideal for creating a medium to large-sized cushion cover. They provide a good balance between stitch definition and fabric drape, ensuring that the cover will be both sturdy and comfortable. These needles are also versatile enough to accommodate a wide range of yarn weights, from medium to bulky.
However, it’s important to note that the size of the needles can be adjusted based on your personal preference and the desired outcome. If you prefer a tighter knit, you can opt for smaller needles, such as size 7 (4.5mm), while if you prefer a looser knit, you can choose larger needles, such as size 9 (5.5mm).
Ultimately, the choice of needle size will depend on the yarn you’re using, the stitch pattern you want to achieve, and your own knitting style. It’s always a good idea to make a gauge swatch before starting the project to ensure that you’re getting the desired results.
Step-by-Step Instructions for Knitting the Envelope Cushion Cover
Knitting your own cushion covers can be a fun and rewarding project. With this step-by-step guide, you’ll be able to create a cozy and stylish envelope cushion cover in no time. Here’s what you’ll need and how to get started:
Materials:
- 2 skeins of yarn in your desired color
- Knitting needles in the appropriate size for your yarn
- Scissors
- Tapestry needle
- Cushion insert
Instructions:
- Begin by casting on the desired number of stitches for your cushion cover. It will depend on the size of your cushion insert, but a good starting point is to cast on enough stitches to cover the width of the cushion plus a few extra for seam allowance.
- Knit in your chosen stitch pattern until the cover measures approximately one inch shorter than the height of your cushion insert. This will allow for a snug fit.
- Next, it’s time to create the envelope opening. To do this, you’ll need to divide your stitches into three sections: the back, the overlap, and the front. The back section should be about two-thirds of the total width, and the overlap and front sections should be about one-third of the total width combined.
- Knit the back section to the desired length, making sure to keep track of your stitch pattern.
- For the overlap section, continue knitting in your chosen stitch pattern until it reaches the same length as the back section.
- For the front section, knit in your chosen stitch pattern until it matches the length of the back section.
- With all sections complete, it’s time to bind off. Start by knitting the back section to the last two stitches, then knit those two stitches together. This will create a neat edge. Bind off the remaining stitches in pattern.
- Weave in any loose ends with a tapestry needle.
- To assemble the cushion cover, lay the back section flat, then fold the overlap and front sections over it to create the envelope opening. The overlap should be on top and should cover about one-third of the back section.
- Use a tapestry needle and yarn to sew the sides of the overlap and front sections to the back section. Make sure to sew through both layers for a secure hold.
- Once the sides are sewn, turn the cover right side out and insert your cushion. Adjust the cover as necessary to ensure a snug fit.
And there you have it! You’ve successfully knitted an envelope cushion cover. Feel free to experiment with different yarn colors and stitch patterns to create a custom look that matches your home decor. Happy knitting!
Casting on and creating the base
The first step in creating a knitted envelope cushion cover is to cast on your desired number of stitches using the long-tail cast-on method. You will need to calculate the number of stitches based on the size of your cushion and the gauge of your yarn. Make sure to leave a long tail of yarn for seaming later on.
Once you have cast on your stitches, you will begin working in the round to create the base of the cushion cover. This can be done using circular knitting needles or double-pointed needles, depending on your preference. The base is usually worked in a simple stitch pattern such as stockinette or garter stitch.
Step-by-step instructions for casting on and creating the base:
- Choose your yarn and needles based on your desired cushion size.
- Calculate the number of stitches needed based on your gauge and cushion dimensions.
- Hold the yarn in your dominant hand and make a slipknot.
- Place the slipknot on one of the needles and tighten it slightly.
- Begin the long-tail cast-on by putting your thumb and index finger between the two strands of yarn.
- Pass the needle under your thumb and over the strand of yarn on your index finger.
- Bring the needle up and under the strand of yarn on your thumb.
- Take the loop of yarn off your thumb and tighten it onto the needle.
- Repeat steps 6-8 until you have cast on the desired number of stitches.
- Join the round by knitting the first stitch of the cast-on row with the last stitch.
Once you have completed the cast-on and joined the round, you will continue knitting in the round to create the base of the cushion cover. Work in your chosen stitch pattern until the base is the desired size. This will typically be the width of the cushion plus a bit of extra ease for the cover to fit snugly. Once the base is complete, you can move on to knitting the sides and finishing the cushion cover.
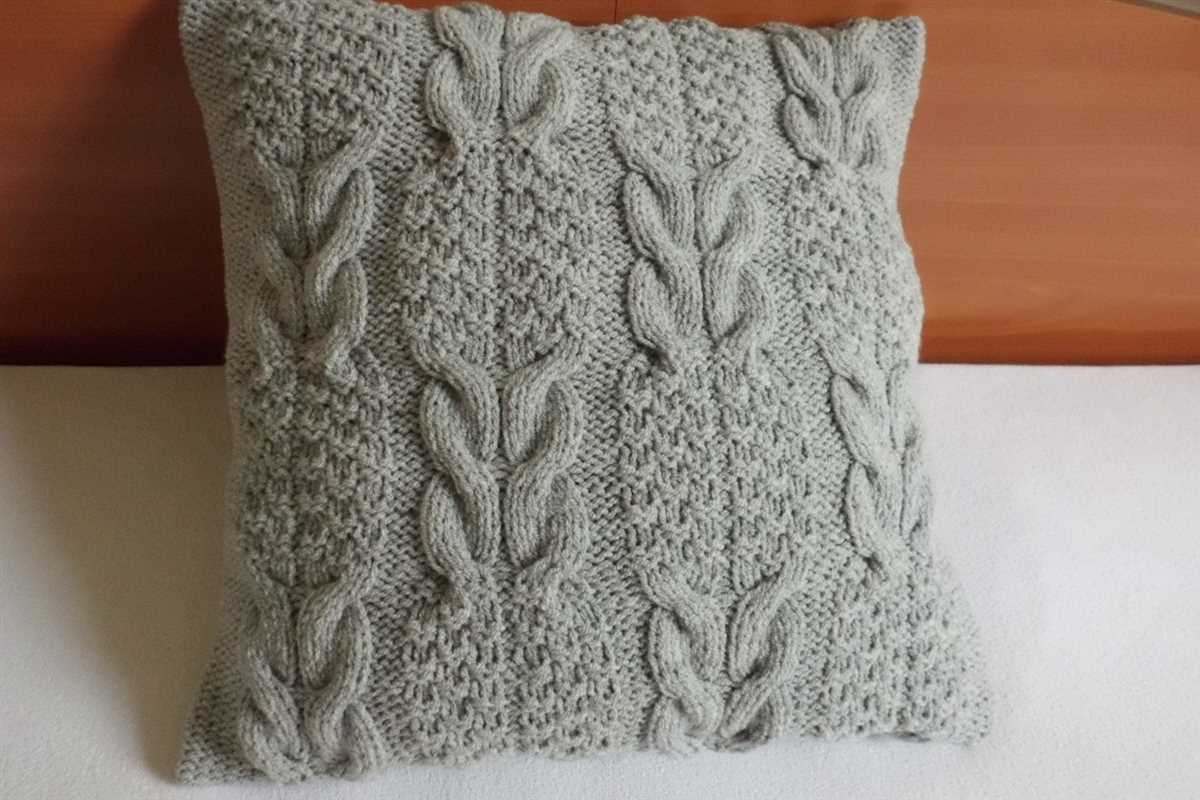
Working the pattern stitch
Once you have successfully cast on the required number of stitches and completed the ribbing section, you are ready to start working the pattern stitch. The pattern stitch consists of a combination of knits and purls that create a textured and visually appealing design.
To work the pattern stitch, you will need to follow the pattern instructions row by row. The pattern will specify how many stitches to knit and how many stitches to purl in each row. Pay close attention to these instructions to ensure you create the correct stitch pattern.
The pattern may also include additional instructions, such as increases or decreases, to create shaping or decorative elements in the cushion cover. These instructions should be followed carefully to achieve the desired result.
As you work each row of the pattern stitch, it is important to maintain an even tension and keep your stitches neat and consistent. Take care to avoid dropping stitches or creating accidental yarn overs, as this can disrupt the pattern and affect the overall appearance of the cushion cover.
As you become more familiar with the pattern stitch, you may find that you can work more quickly and confidently. Pay attention to any pattern repeats or pattern changes, as these can help you establish a rhythm and make the knitting process more efficient.
Shaping the cover and creating the envelope design
When knitting a cushion cover with an envelope design, it’s important to consider the shaping of the cover to ensure a proper fit. This pattern typically includes instructions for shaping the cover to match the dimensions of the cushion insert. By following these instructions, you can create a cover that fits snugly over the cushion, without being too loose or too tight.
One common way to shape the cover is by knitting it in separate pieces and then sewing them together. The front panel of the cover is usually knit in a single piece, while the back panel is knit with an overlapping section that creates the envelope opening. This overlapping section is often created by binding off a few stitches in the middle of the row, and then continuing to knit the remaining stitches.
Once the front and back panels of the cover are complete, you can sew them together at the sides, leaving an opening for inserting the cushion. This opening is typically located at the back of the cover, where the envelope design allows for easy insertion and removal of the cushion. To secure the cover in place, you can add buttons, snaps, or ties to the overlapping section.
Key phrases: shaping the cover, creating the envelope design, proper fit, cushion insert, knitting in separate pieces, front panel, back panel, overlapping section, binding off stitches, sewing together, opening for inserting cushion, buttons, snaps, ties
Finishing touches for your knitted cushion cover
Once you have completed knitting your cushion cover, there are a few finishing touches you can add to enhance its appearance and durability.
1. Blocking
Before assembling your cushion cover, it is important to block your knitted pieces. Blocking involves wetting the pieces and then reshaping them to their desired dimensions. This helps to even out the stitches and ensure that the pieces will fit together properly. After blocking, allow the pieces to dry completely before moving on to the next step.
2. Seaming
Next, you will need to seam the knitted pieces together to create the envelope design. Use a yarn needle and matching yarn to seam the sides and bottom of the cover. Be sure to seam with a neat and durable stitch, such as the mattress stitch, to ensure the cover holds together well over time.
3. Finishing edges
To give your cushion cover a polished look, consider adding a decorative border or finishing edge. You could crochet a single crochet border around the opening of the envelope or add a picot edging for a delicate touch. Alternatively, you could use a decorative stitch pattern along the edges to create a unique and eye-catching design.
4. Sewing in ends
Once you have completed the seaming and finishing edges, don’t forget to sew in any loose ends. Use a yarn needle to weave the ends into the stitches of the cover, ensuring that they are securely fastened. This will prevent the ends from coming loose and unraveling the cover over time.
By following these finishing touches, you can take your knitted cushion cover from a simple project to a beautifully finished piece that will add style and comfort to your home.
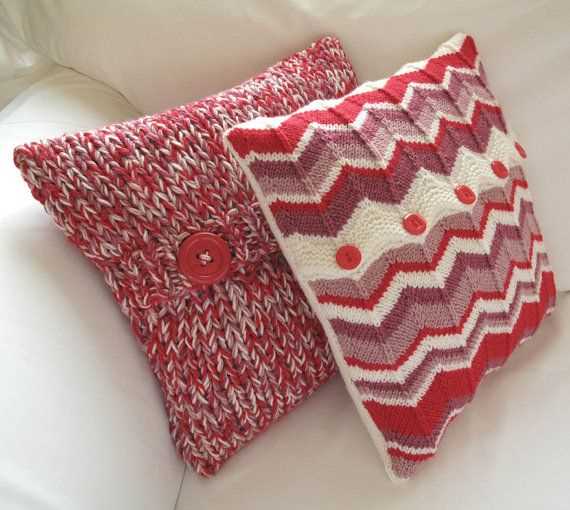
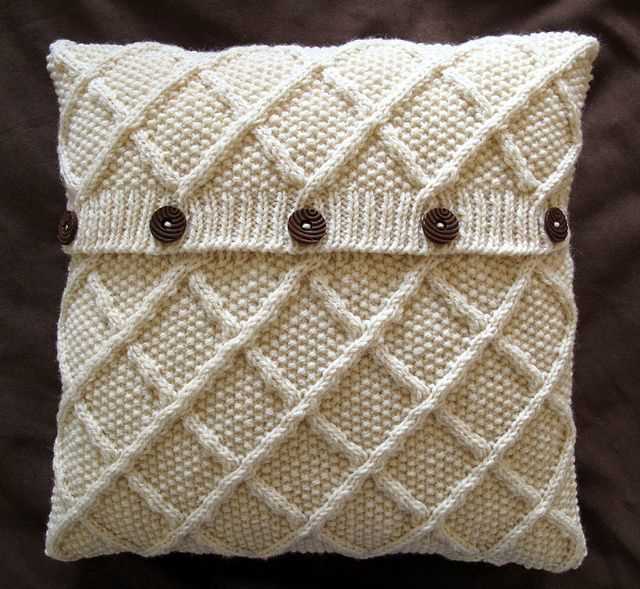
Adding buttons or other closures
When it comes to finishing your knitted envelope cushion cover, adding buttons or other closures can be a great way to secure the cover in place. This not only adds a decorative element, but also ensures that the cushion insert stays in place.
If you choose to add buttons, you can sew them onto one side of the envelope opening and create corresponding buttonholes on the other side. This allows you to easily open and close the cushion cover as needed. Make sure to choose buttons that complement the yarn and overall design of your cover.
Alternatively, you can also use other closures such as snaps or toggles. Snaps can be sewn onto the inside of the envelope opening, providing a discreet closure option. Toggles, on the other hand, can add a unique touch to your cushion cover, giving it a rustic or bohemian vibe.
Here are some steps to follow when adding buttons or other closures:
- Measure and mark where you want to place the closure on the cover.
- If using buttons, sew them onto one side of the opening and create corresponding buttonholes on the other side.
- If using snaps, sew one part of the snap onto the inside of the opening and the other part onto the corresponding spot.
- If using toggles, sew them onto the cover where you want the closure to be located.
- Double-check that the closure is secure and functional before using the cushion cover.
Adding buttons or other closures to your knitted envelope cushion cover can elevate its design and functionality. Explore different closure options and get creative with your choices to make your cushion cover truly unique.
Blocking and assembling the cover
Once you have completed knitting the cover, it is important to block it to ensure that the finished piece has the desired shape and size. Blocking can help to smooth out any uneven stitches and give the cover a more polished look. To block the cover, you will need to wet it and lay it flat on a blocking mat or towel. Gently shape the cover, making sure to pin it down to the desired dimensions.
After blocking, it is time to assemble the cover. Start by folding the cover in half, with the wrong sides facing each other. Using a tapestry needle, sew up the two sides of the cover using a mattress stitch. This stitch creates an invisible seam and ensures that the cover looks seamless and professional.
Next, it is time to attach the button closures to the cover. Sew the buttons onto the front flap of the cover, making sure they align with the corresponding buttonholes on the back flap. This will ensure that the cover stays securely closed and gives it a neat and finished look.
Finally, give the cover one last steam blocking to set the seams and create a crisp finish. Use a steamer or an iron with a steam setting to gently steam the cover, taking care not to stretch the stitches or overheat the yarn. Allow the cover to dry completely before placing it on your cushion.
Tips and Tricks for Knitting a Perfect Cushion Cover
Knitting a cushion cover can be a fun and rewarding project. Whether you are a beginner or an experienced knitter, here are some tips and tricks to help you create a perfect cushion cover:
1. Choose the Right Yarn
When selecting yarn for your cushion cover, consider the texture, weight, and durability. Opt for a soft and durable yarn that is easy to wash. Be sure to check the yarn label for specific care instructions and choose a yarn that matches your desired color and texture.
2. Gauge Swatch
Before starting your cushion cover, make a gauge swatch to determine your knitting tension. This will help ensure that your final project matches the desired size and shape. If your gauge is too tight or too loose, adjust your needle size accordingly.
3. Blocking
Blocking is an essential step in creating a professional-looking cushion cover. After knitting, wet your project, gently squeeze out excess water, and lay it flat to dry. Use blocking tools like blocking mats and pins to shape your cushion cover and even out stitches.
4. Seaming and Finishing
Take your time to seam your cushion cover neatly. Use a mattress stitch or the appropriate seaming technique to join the front and back panels together. Pay attention to maintaining straight edges and matching pattern repeats. Finish off any loose ends by weaving them in securely.
5. Embellishments
Add a personal touch to your cushion cover with decorative embellishments. Consider adding buttons, pom-poms, or tassels to enhance the overall look. Just make sure these embellishments are securely attached and won’t cause discomfort when using the cushion.
6. Care Instructions
Include care instructions with your finished cushion cover to ensure its longevity. Provide information on washing, drying, and storing the cover. This will help the recipient maintain its appearance and prevent any damage while cleaning.
By following these tips and tricks, you can create a beautiful and professional-looking cushion cover that will add warmth and style to any space. Happy knitting!