
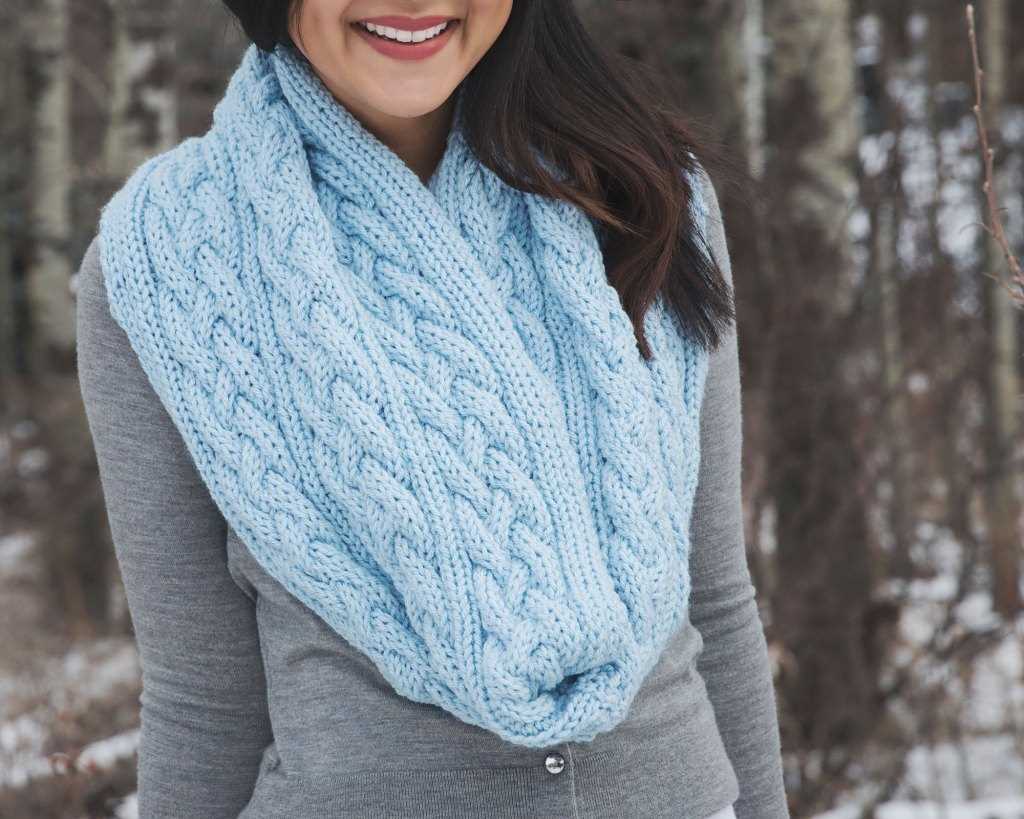
Knitting is a craft that has been around for centuries, and it continues to be a popular hobby today. One of the reasons knitting is so beloved is because of the endless possibilities it offers for creating beautiful and practical items. One such item is the infinity scarf, a versatile accessory that can be worn in a variety of ways to keep you warm and stylish.
The beauty of the infinity scarf is that it is knit in the round, meaning there is no need to sew or stitch the ends together. This makes it not only a quick and easy project to complete, but also eliminates any unsightly seams. The infinity scarf pattern we will be exploring in this article is perfect for knitters of all skill levels, from beginners to advanced.
To get started, you will need a few supplies including a set of circular knitting needles, a yarn of your choice, and a stitch marker. The choice of yarn will determine the thickness and warmth of your infinity scarf, so be sure to select one that suits your needs and personal style. Once you have your supplies ready, it’s time to cast on and begin knitting!
How to Knit an Infinity Scarf in the Round: A Step-by-Step Pattern

If you are looking for a cozy accessory to add to your winter wardrobe, knitting an infinity scarf in the round is a great project to take on. Whether you are a beginner or an experienced knitter, this step-by-step pattern will guide you through the process of creating a beautiful and stylish scarf.
Materials Needed:

- Size 8 or 9 circular knitting needles
- Approximately 200-300 yards of medium weight yarn
- A stitch marker
- A tapestry needle
Instructions:
- Start by casting on the desired number of stitches onto your circular knitting needles. For a relatively loose infinity scarf, you can cast on around 120 stitches. Adjust the number of stitches based on the width and length you prefer.
- Once you have cast on, join the round by knitting the first stitch of the cast on row and placing a stitch marker to mark the beginning of the round. This will help you keep track of your progress as you knit in the round.
- Knit every stitch in the round until you reach the desired length for your scarf. Keep in mind that the length will be doubled once the scarf is folded and sewn together, so aim for a length that is approximately half of what you want the finished scarf to be.
- When you have reached the desired length, bind off your stitches using a stretchy bind off method to ensure that the edge of the scarf is not too tight or uncomfortable to wear. Cut the yarn, leaving a long tail for sewing.
- To create the infinity shape, fold the scarf in half lengthwise, aligning the cast on edge with the bound off edge. Use the long tail of yarn and a tapestry needle to sew the two edges together, ensuring that the seam is not visible on the right side of the scarf.
- Weave in any loose ends and your infinity scarf is complete!
With this simple pattern, you can create a versatile and stylish accessory that can be worn in various ways. Whether you choose a vibrant color or a neutral tone, your knitted infinity scarf will add warmth and elegance to any winter outfit.
Materials Needed for Knitting an Infinity Scarf in the Round

When it comes to knitting an infinity scarf in the round, having the right materials is essential to ensure a successful and enjoyable knitting experience. Below is a list of the materials you will need to complete this project:
- Yarn: Choose a yarn that is suitable for the desired thickness of your scarf. Worsted weight yarn is a popular choice for infinity scarves as it provides a good balance between warmth and drape. The amount of yarn needed will depend on the length and width of the scarf you wish to knit.
- Knitting Needles: Select circular knitting needles in a size suitable for your chosen yarn. The length of the needles should be determined by the width of your scarf, with longer needles being necessary for larger projects.
- Stitch Markers: These are essential for keeping track of the beginning and end of each round. They can be either removable or fixed, depending on your preference.
- Tapestry Needle: This needle is used for weaving in loose ends at the end of your project.
- Scissors: A pair of sharp scissors is necessary for cutting the yarn when needed.
- Measuring Tape: This will come in handy for measuring and ensuring the correct dimensions of your scarf.
Having these materials ready before you begin will save you time and frustration, allowing you to concentrate on the joy of knitting your infinity scarf in the round.
Choosing the Right Yarn and Needle Size for an Infinity Scarf
When it comes to knitting an infinity scarf in the round, choosing the right yarn and needle size is essential to achieve the desired results. The yarn and needle size you choose will determine the drape, texture, and overall look of your finished scarf.
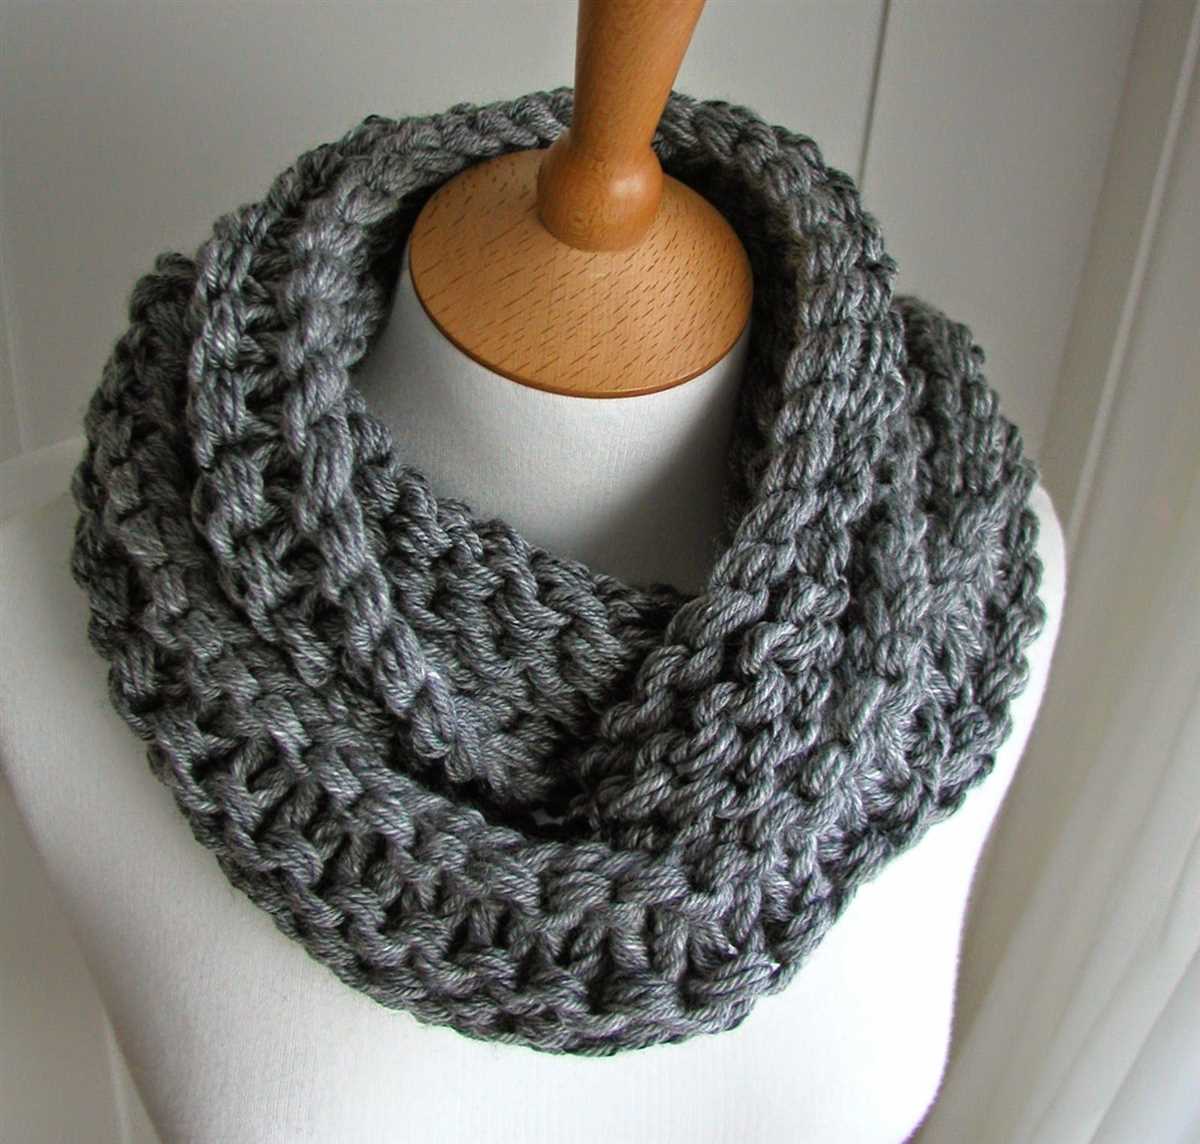
Yarn: When selecting the yarn for your infinity scarf, consider the season and climate you plan to wear it in. For a cozy winter scarf, opt for bulky or chunky weight yarns that will provide warmth and a plush texture. If you’re making a scarf for spring or fall, a lighter weight yarn such as a DK or worsted weight would be more suitable. Consider the fiber content as well, as different fibers will have different characteristics. Wool, alpaca, and acrylic blends are popular choices for scarves due to their softness, warmth, and durability.
Needle Size: The needle size you choose will affect the overall stitch definition and fabric density of your scarf. If you want a looser, drapier fabric, go for larger needles. On the other hand, if you prefer a tighter, denser fabric, choose smaller needles. Check the yarn label for recommended needle sizes, as it will give you a good starting point. However, keep in mind that everyone’s knitting tension is different, so you may need to adjust the needle size to achieve the desired gauge. Swatching is always a good idea to test the fabric and see if you’re happy with the result.
Overall, the right yarn and needle size will allow you to create an infinity scarf that not only looks beautiful but also meets your comfort and style preferences. Don’t be afraid to experiment and swap out different yarns and needle sizes to find the perfect combination that brings your vision to life.
When starting to knit an infinity scarf in the round, the first step is to cast on the desired number of stitches. The cast on is the foundation of the project, and it’s important to do it correctly to ensure that the scarf turns out the way you want it to.
Casting On
To cast on stitches for an infinity scarf in the round, you can use any method you prefer. One popular method is the long-tail cast on.
- Measure a tail of yarn that is approximately three times the width of your finished scarf.
- Make a slip knot at the end of the tail and place it on the left-hand needle. This will be your first stitch.
- Hold the needle with the slip knot in your right hand and the other needle in your left hand.
- Insert the right-hand needle into the slip knot from left to right, under the left-hand needle.
- Use your right hand to wrap the working yarn around the right-hand needle, from back to front.
- Bring the right-hand needle up and through the slip knot, pulling the yarn to create a loop on the right-hand needle.
- Transfer the loop onto the left-hand needle, pulling it snug to create your second stitch.
- Repeat steps 4-7 until you have cast on the desired number of stitches for your infinity scarf.
Once you have cast on all the stitches, you are ready to begin knitting your infinity scarf in the round. Follow the pattern instructions for the stitch pattern and continue knitting until the scarf is the desired length.
Knitting the Body of the Infinity Scarf
Once you have cast on the desired number of stitches and joined them in the round, you are ready to start knitting the body of the infinity scarf. This is where the bulk of the work happens and you will be able to see the pattern emerge as you progress.
Row 1: Begin by knitting all stitches in the round. This will create the first row of the body and serve as the foundation for the rest of the pattern.
Repeat Rows 2-4: The next three rows of the pattern will create the main stitch pattern for the body of the infinity scarf. Follow the instructions for each row, which may include a combination of knit stitches, purl stitches, and yarn overs. Repeat these three rows until the body of the scarf reaches your desired length.
Finishing: Once you have reached your desired length, it is time to finish off the infinity scarf. This can be done by binding off all stitches in the round. Remember to leave a long tail for weaving in the ends later on.
With the body of the infinity scarf complete, you can now move on to any additional finishing touches, such as adding fringe or blocking the scarf to achieve the desired shape and drape. Your finished infinity scarf will be cozy, stylish, and perfect for adding a touch of warmth to any outfit.
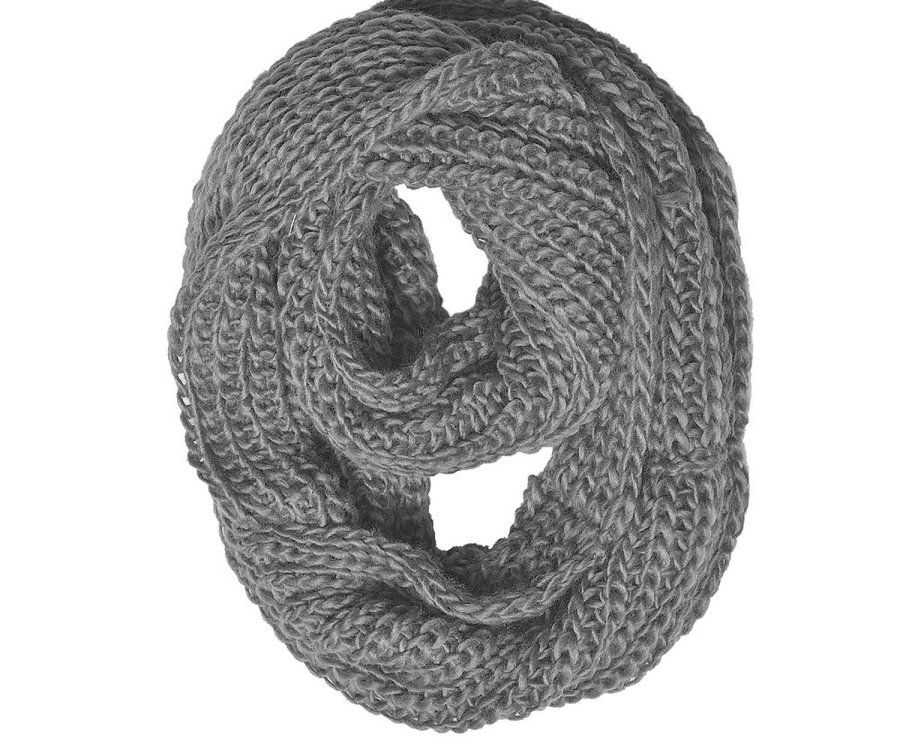
Creating a Ribbed Pattern for the Infinity Scarf

When knitting an infinity scarf in the round, one popular pattern choice is a ribbed pattern. Ribbing creates a textured fabric that is stretchy and visually appealing. It is also an excellent choice for beginners as it involves alternating between knit and purl stitches, which are the basic building blocks of knitting.
To create a ribbed pattern for an infinity scarf, you can start by casting on an even number of stitches. This is because the ribbing pattern consists of alternating columns of knit and purl stitches. For example, you can cast on 120 stitches for a wide, cozy scarf.
Once you have cast on the desired number of stitches, you can begin the ribbing pattern. The most common ribbing pattern is a 1×1 rib, which alternates between one knit stitch and one purl stitch in each row. This creates a fabric with an attractive vertical ribbed effect. You can continue working in this 1×1 rib pattern until you reach the desired length for your scarf.
If you prefer a wider ribbed pattern, you can try a 2×2 rib or even larger. To create a 2×2 rib, you would knit two stitches and purl two stitches in each row. This pattern creates a more pronounced ribbed texture. You can experiment with different ribbing patterns to achieve the desired effect for your infinity scarf.
Remember to always knit the knits and purl the purls as you work on your ribbed pattern. This will help maintain the consistent ribbed texture. Ribbing is also stretchy, which makes it a great choice for an infinity scarf that needs to wrap around your neck comfortably.
In conclusion, a ribbed pattern is an excellent choice for creating a visually appealing and stretchy infinity scarf. By alternating between knit and purl stitches, you can achieve different ribbing patterns such as the 1×1 or 2×2 rib. Experiment with different stitch combinations and enjoy the process of creating a unique and cozy scarf.
Adding Texture to the Infinity Scarf with Knit-Purl Stitches
The knit-purl stitch pattern is a versatile technique that can be used to add texture and visual interest to an infinity scarf. By combining knit stitches and purl stitches in different patterns, you can create a variety of effects, from simple ribbing to more intricate designs.
One popular way to incorporate knit-purl stitches into an infinity scarf is by creating a basketweave pattern. This pattern alternates blocks of knit stitches with blocks of purl stitches, creating a woven texture that resembles an actual basket. The result is a visually appealing and cozy scarf that can add a touch of style to any outfit.
To achieve this basketweave pattern, you can start with a multiple of 4 stitches. In each row, you will knit the first two stitches, then purl the next two stitches. Repeat this pattern until the end of the row. On the next row, you will purl the first two stitches, then knit the next two stitches. Continue alternating between knit and purl stitches in each row until you reach your desired length.
Another way to add texture is by incorporating different knit-purl stitch patterns, such as seed stitch or moss stitch, into your infinity scarf. The seed stitch is created by alternating knit and purl stitches in a 1×1 pattern, while the moss stitch is created by alternating knit and purl stitches in a 2×2 pattern. These stitch patterns create a bumpy texture that adds depth to the scarf, making it visually interesting and unique.
When working with knit-purl stitch patterns, it’s important to pay attention to your tension to ensure an even and consistent result. Additionally, using a quality yarn can enhance the texture of the scarf and make it more luxurious to wear. Experiment with different stitch patterns and yarns to create the perfect knit-purl infinity scarf that matches your personal style and keeps you warm and cozy during the colder months.
Continuing the Knitting Pattern for the Infinity Scarf
In order to continue the knitting pattern for the infinity scarf, you will need to follow the instructions for the specific stitch pattern that you have chosen. Whether you are using a basic ribbed pattern or a more intricate lace design, it is important to keep track of your stitches as you go along. This will ensure that your scarf has a consistent look and feel.
If you are using a basic rib stitch pattern, you will continue to alternate between knitting and purling stitches in each row. This will create the classic ribbed texture that is often seen in infinity scarves. As you work, be sure to keep an eye on your tension and make any necessary adjustments to ensure that the stitches are the same size and shape throughout the scarf.
- If you have chosen a lace pattern for your infinity scarf, you will need to continue following the chart or written instructions for the specific design. Pay close attention to any yarn overs or decreases that may be required as you work each row. This will create the delicate and intricate lace pattern on your scarf.
- Maintaining the integrity of the pattern is crucial, so be sure to count your stitches regularly and make any necessary adjustments to correct any mistakes that may have been made.
- Additionally, it is important to keep track of the number of rows you have completed in order to ensure that the length of your scarf is consistent. You can use stitch markers or simply make a note on a piece of paper to help you keep track.
By following the instructions for your chosen knitting pattern and paying attention to detail, you will be able to continue knitting your infinity scarf with confidence. Remember to take your time and enjoy the process, as knitting can be a relaxing and satisfying hobby. With each stitch, you are creating a beautiful and functional accessory that will keep you warm and stylish during the colder months.
Creating a Colorful Infinity Scarf with Multiple Yarns
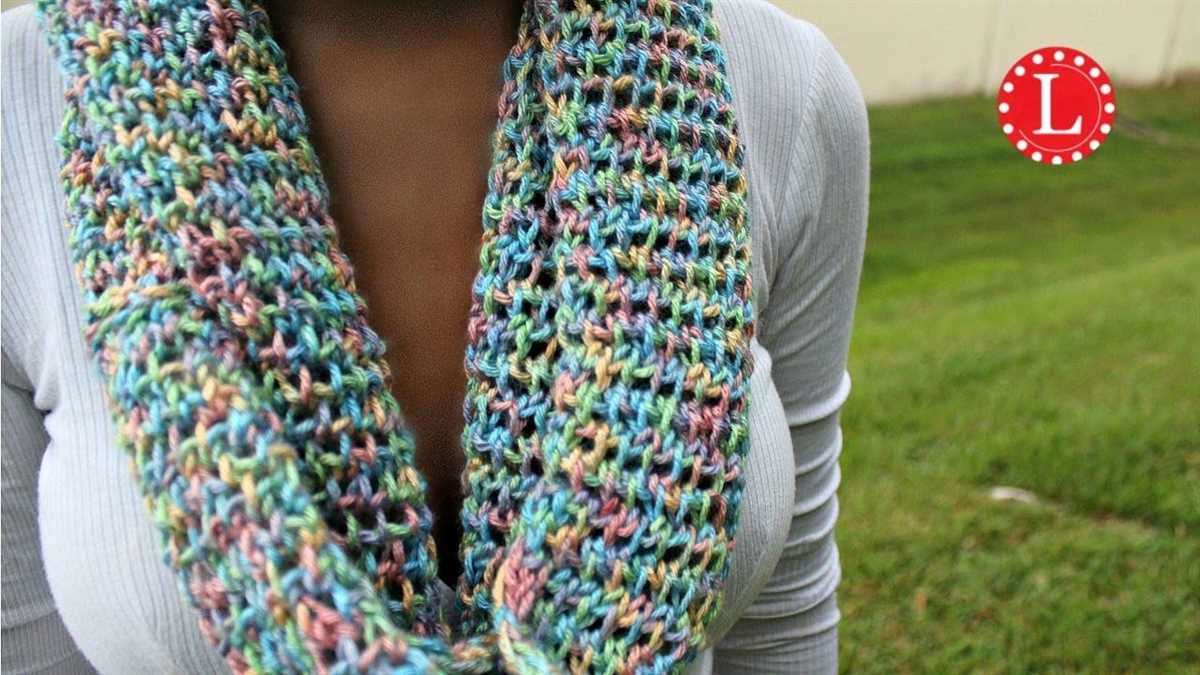
Knitting an infinity scarf is a great way to stay warm and stylish in the colder months. To add a burst of color and texture to your scarf, consider using multiple yarns in your project. This allows you to create a unique and eye-catching accessory that will surely make a statement.
Choosing the Yarns: When selecting the yarns for your scarf, consider using a combination of different colors, weights, and textures. This will add visual interest and dimension to your project. Look for yarns that complement each other and create a harmonious color palette. You can also experiment with different fiber blends, such as wool, acrylic, or silk, to achieve the desired effect.
Striped or Blended Technique: There are two main techniques to incorporate multiple yarns into your infinity scarf: striped or blended. In the striped technique, you can alternate different colors of yarn every few rows to create bold and defined stripes. This technique works well for a geometric or linear look. Alternatively, you can use the blended technique, where you hold multiple strands of yarn together and knit them as one. This creates a marled effect that blends the colors together for a more subtle and gradient look.
Pattern Selection: If you’re new to knitting or prefer a simple pattern, you can choose a basic stitch pattern, such as garter stitch or stockinette stitch, to showcase the different yarns. These stitches highlight the texture and colors of the yarns without overwhelming the design. If you’re feeling more adventurous, you can try a more intricate stitch pattern, such as cables or lace, to showcase the yarns’ unique qualities.
Finishing Touches: Once you have completed knitting your scarf, make sure to block it to even out the stitches and give it a professional finish. You can also consider adding fringe or tassels to the ends of your scarf using the leftover yarns. This will add another layer of texture and visual interest to your accessory. Finally, don’t forget to weave in any loose ends and give your scarf a good steam or gentle wash to ensure that it is ready to be worn and enjoyed.
By combining different yarns in your knitting project, you can create a colorful and unique infinity scarf that reflects your personal style. Whether you choose to go bold with vibrant hues or opt for a more subdued and blended look, there are endless possibilities to explore. Have fun experimenting with different yarns and techniques to craft a one-of-a-kind accessory that will keep you cozy and fashionable.
How to Join a New Ball of Yarn in the Round
When knitting in the round, it is important to know how to join a new ball of yarn seamlessly to avoid any noticeable breaks or knots in your project. Follow these steps to join a new ball of yarn in the round:
Step 1: Before you run out of yarn from your current ball, leave a long enough tail to weave in later. This will ensure that the new ball of yarn can be securely joined without any loose ends.
Step 2: Take your new ball of yarn and tie a secure knot at the end of the tail, leaving a short tail that can be woven in later. Make sure the knot is tight but not too tight that it distorts the stitches.
Step 3: Hold both the tail of the old yarn and the tail of the new yarn together, and continue knitting with the new ball of yarn. This will secure the two ends together and allow you to seamlessly transition to the new yarn.
Step 4: As you continue knitting, make sure to keep tension on both strands of yarn to prevent any gaps or loose stitches. The knotted tails should be positioned on the inside of the work.
Step 5: Once you have knit a few stitches with the new ball of yarn, you can trim the excess tails, leaving enough length to weave in later. It is recommended to weave in the tails using a tapestry needle to ensure they are securely hidden within the stitches.
By following these steps, you can easily join a new ball of yarn in the round without disrupting the continuity of your knitting project. Happy knitting!
Finishing the Knitting for the Infinity Scarf
Once you have finished knitting all the rounds for the infinity scarf, it’s time to complete the final steps to finish off your project. This includes binding off your stitches, weaving in any loose ends, and blocking the scarf for a polished look.
To bind off, you can use a basic bind off method or choose a more decorative option, depending on the overall design of your scarf. A basic bind off involves knitting two stitches, then passing the first stitch over the second stitch and off the needle, repeating this process until all stitches have been bound off.
If there are any loose ends from joining new yarn or changing colors, it’s important to weave them in before considering your project complete. This can be done by threading the loose end onto a tapestry needle and neatly weaving it into the back of the work, running it through several stitches to secure it in place. This will ensure that the ends are not visible and won’t unravel over time.
Finally, blocking your infinity scarf can give it a more finished and professional look. To block your scarf, you will need to dampen it with water or a blocking spray, then lay it out flat on a blocking mat or a clean towel. Gently stretch and shape the scarf to the desired dimensions, making sure to maintain the stitch pattern. Allow it to air dry completely before wearing or storing.
By following these steps to finish your knitting project, you will have a beautifully completed infinity scarf that is ready to be worn or gifted to someone special. Take the time to pay attention to the finishing details, as they can really elevate the overall look and feel of your work.
Weaving in Loose Ends and Blocking the Infinity Scarf
Once you have finished knitting your infinity scarf in the round, it is important to weave in any loose ends to ensure a neat and tidy finish. To do this, thread the loose end onto a yarn needle and carefully weave it in and out of the stitches on the wrong side of the scarf. Be sure to do this securely so that the end does not unravel over time.
In addition to weaving in loose ends, blocking your infinity scarf can help to improve its overall appearance and drape. Blocking involves wetting the scarf and reshaping it to its desired dimensions. To block the scarf, fill a sink or basin with lukewarm water and submerge the scarf, gently squeezing the water through the fibers. After a few minutes, remove the scarf from the water and gently squeeze out any excess moisture.
Next, you can lay the scarf flat on a clean towel and use your hands to gently shape it. You can adjust the width and length of the scarf as desired. If you prefer a more structured look, you can use blocking pins to secure the scarf in place until it dries. Leave the scarf to dry completely, which may take several hours or overnight.
Once the scarf is dry, it should be beautifully blocked and ready to wear or gift. The blocking process helps the stitches to even out, resulting in a more polished and professional-looking finish. Whether you are a beginner or an experienced knitter, weaving in loose ends and blocking your infinity scarf can make a significant difference in the final product.
Styling and Wearing Your Hand-Knit Infinity Scarf

Once you have completed knitting your beautiful infinity scarf, it’s time to style it and show it off! Here are some tips and ideas for wearing your hand-knit creation:
First, consider the length and bulkiness of your scarf. Depending on the yarn and stitch pattern you chose, your scarf may be a light and airy accessory or a thick and cozy neckwarmer. Adjust the styling accordingly to showcase its unique qualities.
1. Basic Loop: The simplest way to wear your infinity scarf is by looping it around your neck once. This creates a classic and effortless look, perfect for everyday wear.
2. Double Loop: For a more snug and layered look, loop your scarf around your neck twice. This adds extra warmth and texture to your outfit.
3. Draped Effect: Instead of looping the scarf tightly, let it drape loosely around your neck. This creates an elegant and relaxed look, perfect for dressing up a casual outfit.
4. Hooded Style: If your scarf is long enough, you can also wear it as a hood. Fold the scarf in half and pull the ends through the loop, then place the looped section over your head. This creates a cozy and stylish hooded look.
Experiment with different styling options to find the one that suits your personal style and outfit. Remember, the beauty of an infinity scarf is its versatility, so don’t be afraid to get creative!
Lastly, don’t forget to take care of your hand-knit scarf. Hand wash it gently with a mild detergent and lay it flat to dry. Avoid hanging or wringing out the scarf to prevent stretching or misshaping.
With these tips in mind, you’re all set to confidently wear and enjoy your hand-knit infinity scarf. Whether you’re attending a special event or going for a casual stroll, your scarf will be a stylish and cozy accessory that adds a touch of handmade charm to any outfit!