
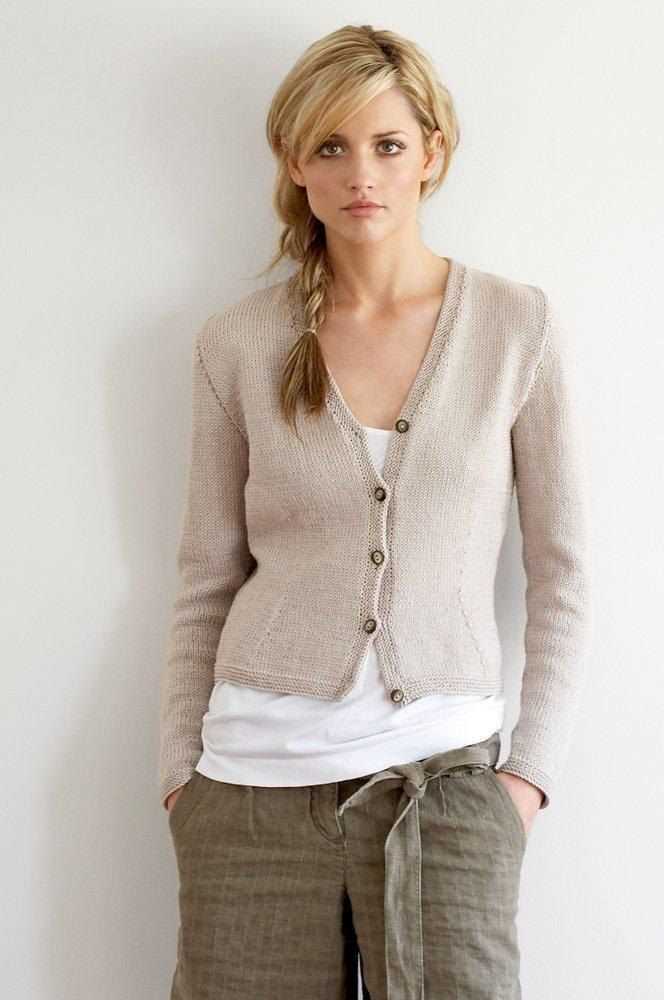
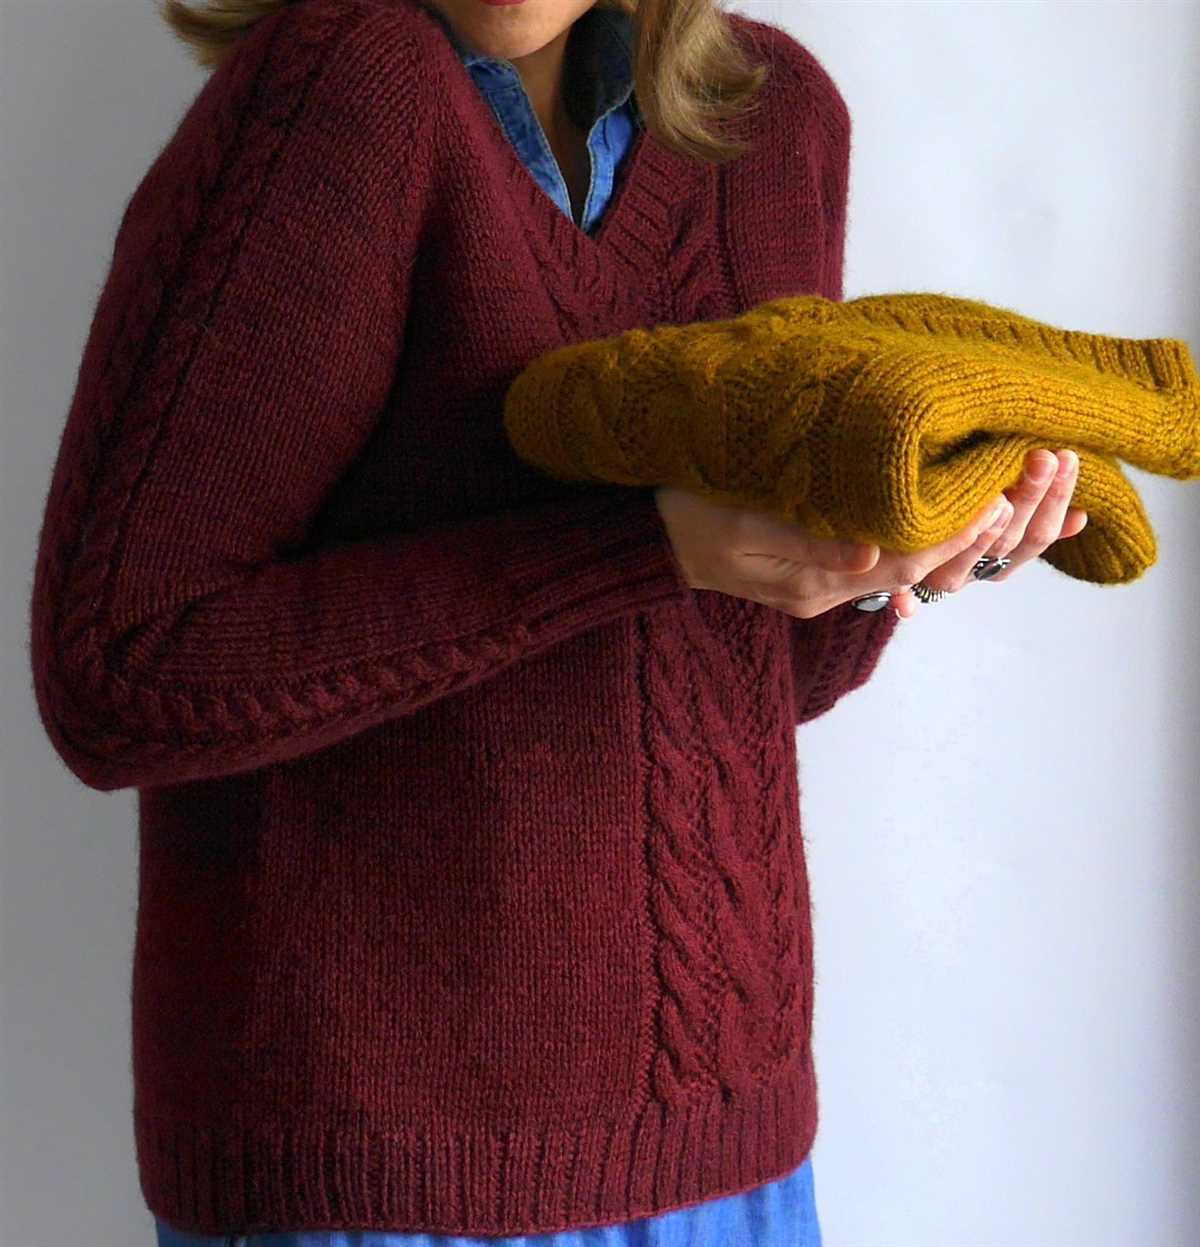
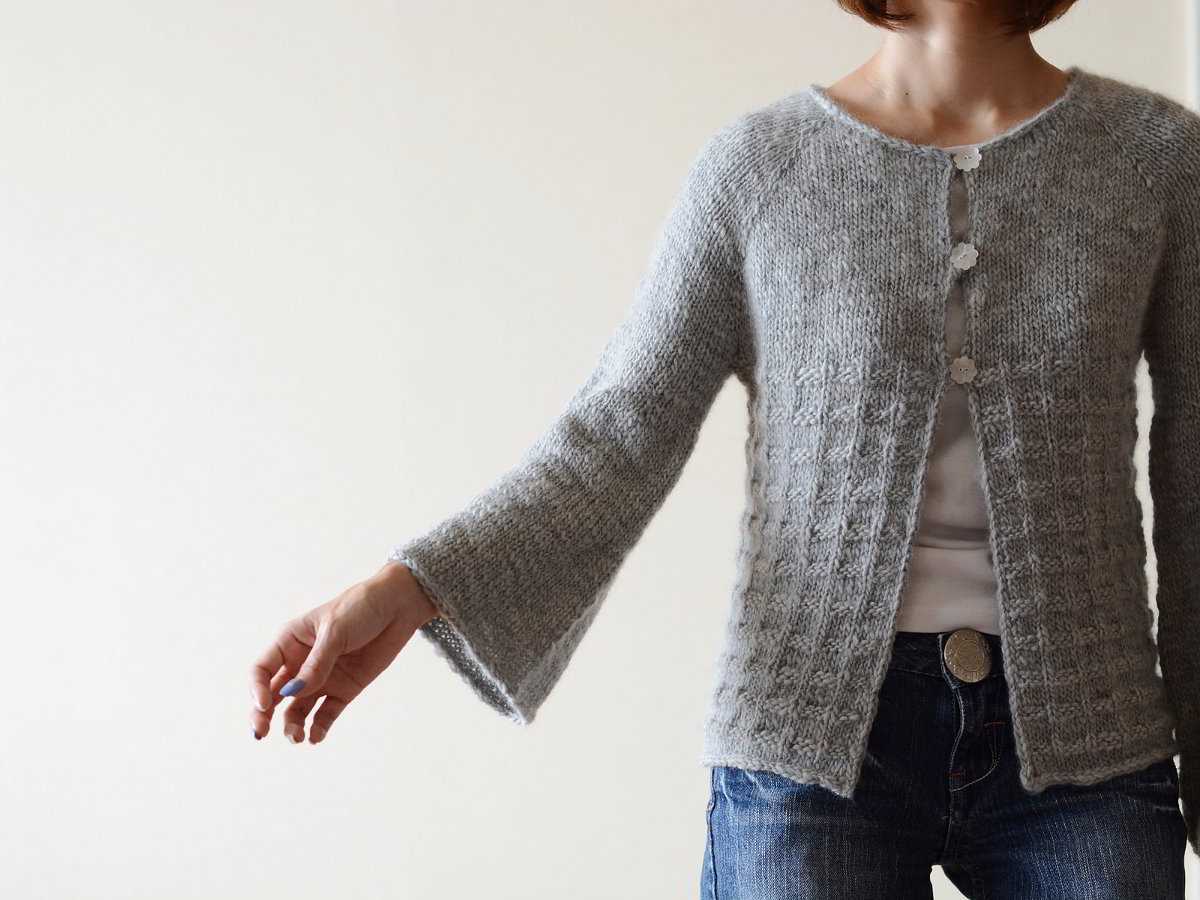
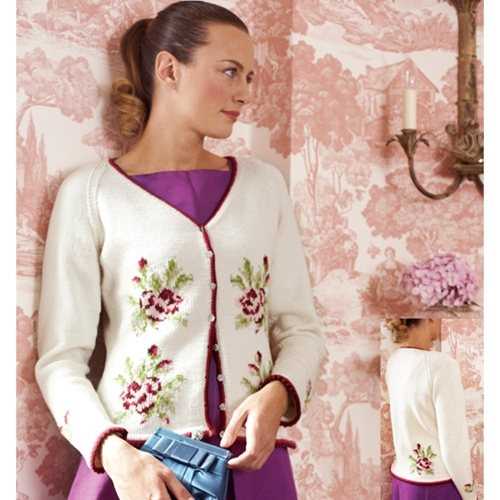
If you’re a knitting enthusiast looking for a new project, why not try your hand at knitting a V neck cardigan? This classic garment is not only stylish, but also versatile, making it a great addition to any wardrobe. Whether you’re a beginner or an experienced knitter, this knitting pattern is perfect for all skill levels.
One of the great things about knitting your own cardigan is the ability to customize it to your own liking. You can choose your favorite yarn, color, and pattern to create a one-of-a-kind piece that reflects your personal style. Not only will you have a beautiful cardigan to wear, but you’ll also have the satisfaction of knowing that you made it yourself.
This V neck cardigan knitting pattern provides detailed instructions and tips to help you create a professional-looking garment. From measuring and selecting the right yarn, to casting on, knitting, and finishing, everything you need to know is included. The pattern also offers variations and suggestions for adding your own personal touch, such as different stitch patterns or embellishments.
So grab your knitting needles, choose your favorite yarn, and get started on knitting your own V neck cardigan. With this pattern, you’ll have a stylish and cozy addition to your wardrobe in no time!
Choosing the Right Yarn for a V Neck Cardigan
When knitting a V neck cardigan, it is important to choose the right yarn that will not only enhance the look of the finished garment but also provide the desired level of warmth and comfort. Here are some key factors to consider when selecting the yarn for your V neck cardigan:
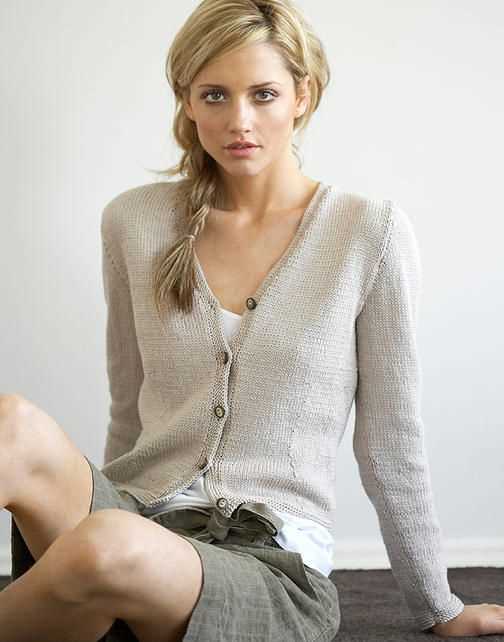
- Fiber Content: Different fibers have different properties, so it is important to choose a yarn that will drape nicely for the V neck style. Natural fibers like wool, alpaca, and silk can provide warmth and softness, while synthetic fibers like acrylic or nylon can add durability and shape retention.
- Weight: The weight of yarn affects the overall look and feel of the cardigan. For a V neck cardigan, a medium weight yarn, such as DK (double knitting) or worsted weight, is often recommended as it strikes a balance between warmth and drape.
- Color: The choice of color for your V neck cardigan can greatly influence its appearance. Dark or neutral shades can create a classic and versatile look, while bright or pastel colors can add a pop of color and make a statement.
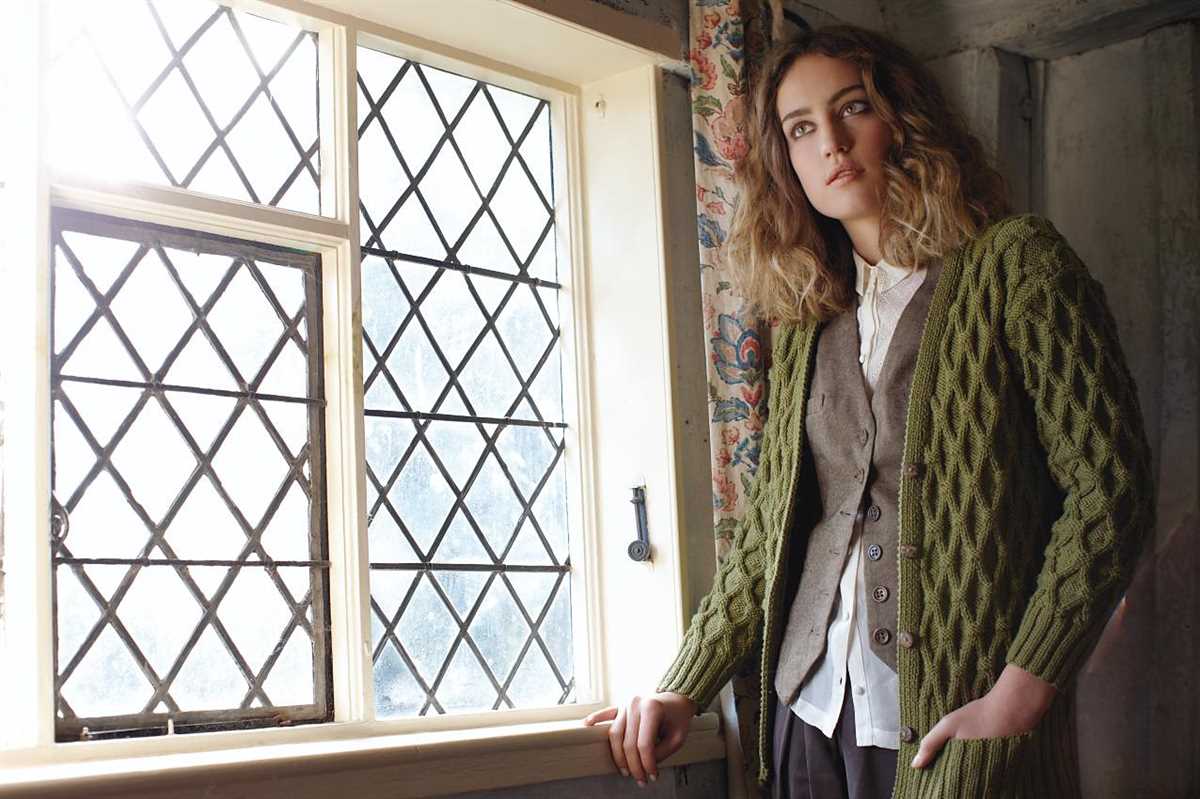
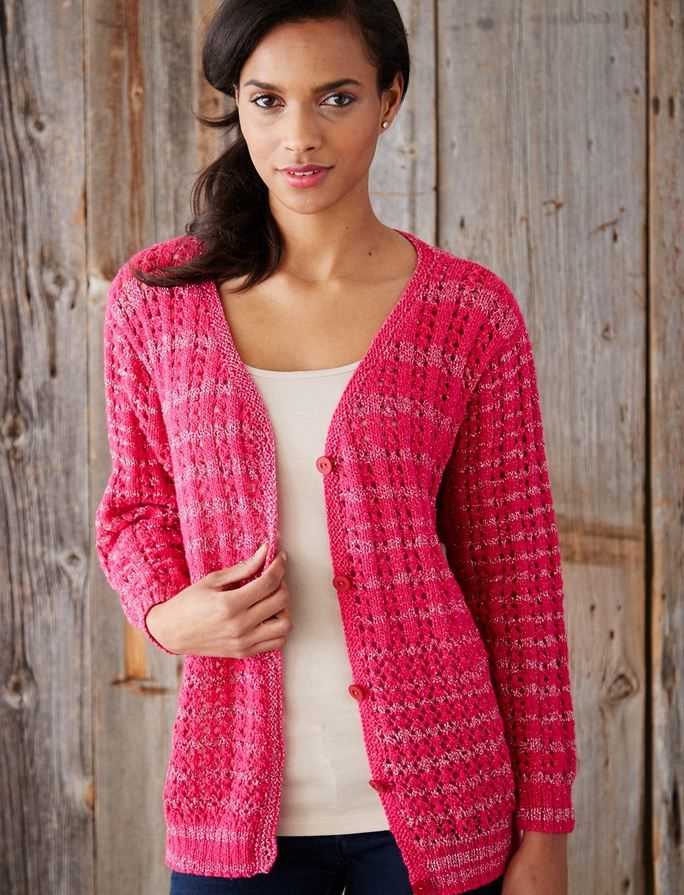
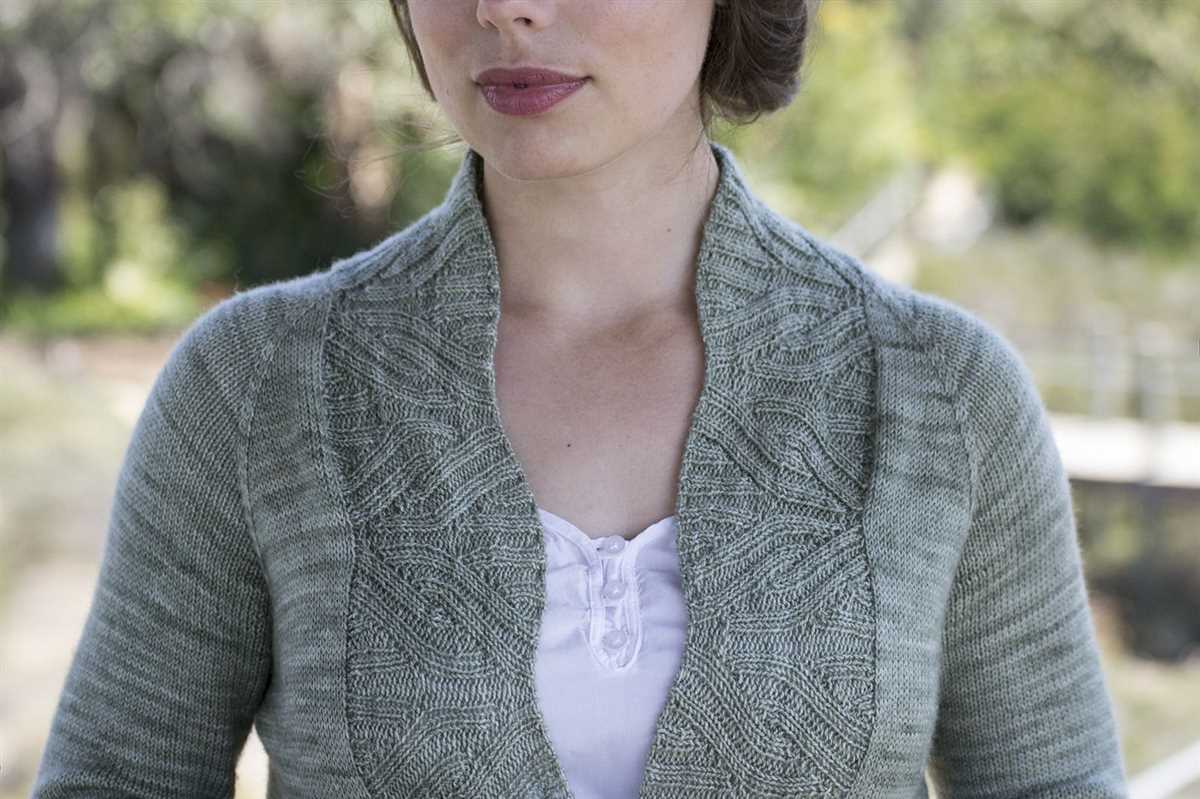
- Texture: Consider the texture of the yarn as it can add visual interest to your V neck cardigan. Yarns with different stitch patterns or multi-colored variations can create a unique and eye-catching design.
Ultimately, the choice of yarn for a V neck cardigan comes down to personal preference and the desired look and feel of the finished garment. Take the time to explore different yarn options, swatch, and experiment to find the perfect yarn that will make your V neck cardigan a cherished wardrobe staple.
Understanding the basic knitting techniques for a V neck cardigan

Knitting a V neck cardigan requires a good understanding of basic knitting techniques. These techniques include casting on, knitting and purling stitches, shaping, and joining pieces together.
Casting on: To start your V neck cardigan, you will need to cast on the required number of stitches. There are various methods for casting on, such as the long-tail cast on or the cable cast on. Choose the method you are comfortable with and cast on the necessary number of stitches for your size.
Knitting and purling: Knitting stitches are created by inserting the right-hand needle into the front of the stitch on the left-hand needle and pulling the working yarn through. Purling stitches are the reverse, where the right-hand needle is inserted into the back of the stitch on the left-hand needle. These two basic stitches are the foundation of knitting and will be used to create the fabric for your V neck cardigan.
Shaping: Shaping is an essential technique when making a V neck cardigan. It involves increasing and decreasing stitches to create the desired shape and fit. To shape the V neck, you will typically decrease stitches on each side of the center front stitches, creating a triangular opening. This can be achieved by working decreases, such as knit two together or slip, slip, knit, at regular intervals.
Joining pieces together: Once you have completed all the individual pieces of your V neck cardigan, you will need to join them together. This can be done using the mattress stitch, which creates an invisible seam. Start by aligning the pieces with right sides facing each other and use a tapestry needle to sew the seams together, following the stitch pattern to maintain continuity and ensure a professional finish.
By understanding these basic knitting techniques and following a V neck cardigan knitting pattern, you will be able to create your own stylish and cozy cardigan.
How to Cast On Stitches for a V Neck Cardigan
When starting to knit a V neck cardigan, it is important to cast on the correct number of stitches to ensure that the garment fits properly and has the desired shape. Here are the steps to cast on stitches for a V neck cardigan:
1. Determine your gauge
Before casting on stitches, it is essential to determine your gauge. This can be done by knitting a gauge swatch with the chosen yarn and needles. The gauge swatch should be washed and blocked to ensure accurate measurements. Measure the number of stitches and rows per inch, as it will help you calculate the number of stitches needed for the V neck cardigan.
2. Calculate the number of stitches needed

Using your gauge measurements, you can calculate the number of stitches needed for the V neck cardigan. Start by measuring the circumference of your bust and multiply it by the number of inches per stitch. Subtract the desired ease (if any) from the calculated number to ensure a comfortable fit. Divide the remaining number by two, as the V neck cardigan will have a symmetrical front and back.
For example, if your bust circumference is 36 inches and your gauge is 5 stitches per inch, you will need 72 stitches for the V neck cardigan. However, if you prefer a slightly looser fit with 2 inches of ease, you could cast on 76 stitches.
3. Cast on the stitches

Once you have calculated the number of stitches needed, it is time to cast them on. There are various methods for casting on stitches, such as the long-tail cast-on or the cable cast-on. Choose the method that you are most comfortable with and cast on the determined number of stitches using your preferred method.
Ensure that the stitches are evenly distributed on the needles to avoid any gaps or unevenness in the V neck cardigan. You can use stitch markers to mark the center front of the cardigan and the v-neck shaping if needed.
By following these steps, you will be able to cast on the correct number of stitches for a V neck cardigan. Once the stitches are cast on, you can proceed with the pattern and start creating your beautiful V neck cardigan.
Knitting the body of the V neck cardigan
Once you have completed the ribbing for the neckline and shoulders of your V neck cardigan, it’s time to start knitting the body of the garment. This is where you will create the main section of the cardigan, which will cover the front and back of the body.
To begin, you will need to continue working in the pattern stitch that you have chosen for your cardigan. This could be a simple stockinette stitch, a textured pattern, or even a cable design. Make sure to follow the instructions provided in your knitting pattern to achieve the desired stitch pattern.
As you work your way up, be sure to keep track of any shaping instructions that may be included in the pattern. For example, you may need to decrease or increase stitches to create a more fitted or flared shape. These shaping instructions are typically given at regular intervals, such as every few rows or on specific rows.
If your pattern includes any additional design elements, such as pockets or buttons, you will also need to incorporate these into the body of your cardigan. The instructions for adding these elements may be provided separately or integrated into the overall pattern. Make sure to read and follow these instructions carefully to ensure that your cardigan turns out as intended.
Once you have completed knitting the body of the V neck cardigan, you will move on to knitting the sleeves. This will involve following a similar process of creating the desired stitch pattern and shaping, as well as incorporating any design elements specified in the pattern. After completing the sleeves, you can seamlessly join them to the body of the cardigan to create a finished garment.
Creating the V neck shaping

When knitting a V neck cardigan, one of the key steps is creating the V neck shaping. This is where the front pieces of the cardigan are worked with a gradual decrease to form the V shape. To begin, you will need to follow the pattern instructions for the specific stitch count and gauge.
To create the V neck shaping, you will start by working the cardigan’s front pieces separately. This is typically done after completing the back piece and joining the shoulders. With the right side facing, you will begin by knitting or purling a certain number of stitches according to the pattern, which will form the center of the V shape.
The next step is to decrease stitches on each side of the center stitches to create the slanting sides of the V neck. This is usually done by working paired decreases, such as knit two stitches together (k2tog) or purl two stitches together (p2tog), on the specified rows. The frequency and placement of these decreases will vary depending on the pattern.
Once the desired V neck depth is reached, you will continue working the front pieces without any further shaping until they match the length indicated in the pattern. At this point, you can bind off the stitches and move on to the next section of the cardigan, whether it’s the sleeves or the button bands.
It’s important to carefully follow the pattern instructions for creating the V neck shaping to ensure that the cardigan has a balanced and symmetrical neckline. Adjustments to the shape or depth of the V neck can be made by modifying the decrease frequency or by adding additional rows before binding off. Keeping a consistent tension while knitting the front pieces is also crucial for a professional finish.
Knitting the sleeves for a V neck cardigan
When knitting a V neck cardigan, one of the important steps is knitting the sleeves. The sleeves are an essential part of the cardigan and add to its overall design and functionality. Here are some tips and instructions on how to knit the sleeves for a V neck cardigan.
Choosing the yarn and needles
Before you start knitting the sleeves, it’s important to choose the right yarn and needles for the project. The yarn should be of a similar weight and fiber content as the main body of the cardigan to ensure a cohesive look. The needles should be the appropriate size for the chosen yarn to achieve the desired gauge and fit.
Knitting the sleeve cuff
Start by casting on the required number of stitches for the sleeve cuff. This will typically be a smaller number than for the body of the cardigan. Use a ribbing stitch pattern, such as K2, P2, to create a stretchy and snug cuff. Knit the cuff for the desired length, usually a few inches, before transitioning to the main sleeve pattern.
Knitting the sleeve body can be done in a variety of stitch patterns, depending on the desired look and level of difficulty. Keep in mind the shaping of the sleeve, such as increases or decreases, to achieve the proper fit and taper. Follow the pattern instructions for the specific V neck cardigan, or experiment with your own stitch patterns to create a unique design.
Shaping the sleeve cap
Once the desired length of the sleeve body is reached, it’s time to shape the sleeve cap. This is done by working a series of decreases to create the curve that will fit around the shoulder. The pattern instructions will indicate the number of stitches to decrease and how often to decrease.
After shaping the sleeve cap, bind off the remaining stitches and repeat the process for the second sleeve. Remember to knit the sleeves to the same measurements to ensure symmetry. Once both sleeves are completed, they can be attached to the body of the V neck cardigan by sewing or picking up stitches along the armholes, depending on the pattern instructions.
Joining the sleeves to the body of the cardigan

Once you have completed knitting the sleeves for your V neck cardigan, the next step is to join them to the body of the cardigan. This is an important step to create a seamless and cohesive garment.
To begin, lay out the body of the cardigan flat on a surface, with the right side facing up. Then, take one of the sleeves and line up the top of the sleeve with the shoulder seam of the body. Make sure that the right sides of the fabric are facing each other.
One method of joining the sleeves to the body is the mattress stitch. This technique creates an invisible seam and gives a professional finish to your cardigan. To use the mattress stitch, align the edges of the sleeve and body fabric, inserting the needle through both layers. Then, skip a row or two and insert the needle back into the fabric, creating a stitch that is attached to both pieces.
Another method is to use the three-needle bind off technique. This technique involves using a third needle to bind off the stitches from the sleeve and body at the same time. To use this technique, hold the two pieces of fabric with right sides facing each other. Insert a third needle into the first stitch of the front piece and the first stitch of the back piece, then knit them together as if doing a regular bind off.
Whichever method you choose, take your time and make sure that the sleeves are joined securely to the body. Once the sleeves are attached, you can continue knitting the rest of the cardigan following the pattern instructions.
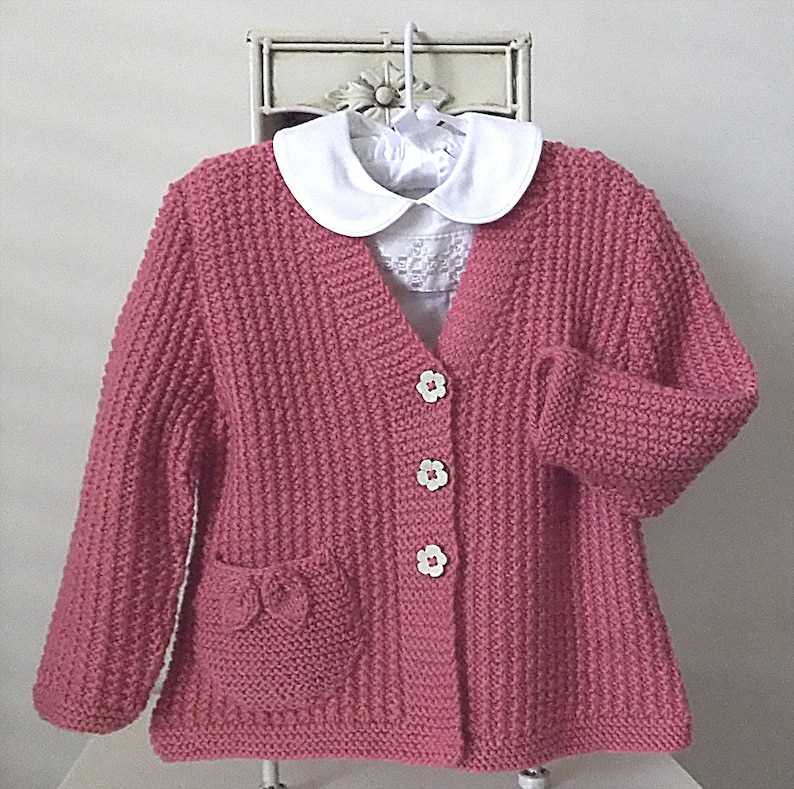
Adding buttons and buttonholes to a V neck cardigan
Once you have finished knitting the V neck cardigan, the next step is to add buttons and buttonholes to complete the closure of the garment. This will not only add functionality to the cardigan, but also enhance its overall aesthetic appeal.
Step 1: To add buttons and buttonholes, you will need a tapestry needle and buttons that complement the color and style of your cardigan. It is recommended to choose buttons that are approximately ¾ inch in diameter for a V neck cardigan.
Step 2: Start by determining the placement of the buttons on the button band of the cardigan. Typically, buttons are evenly spaced along the center front of the cardigan, with the first button placed just below the V neck. Use a tape measure to ensure that the buttons are evenly distributed.
Step 3: Thread the tapestry needle with a piece of matching yarn, and secure it to the wrong side of the cardigan at the desired button placement. Bring the needle through to the right side of the cardigan, and thread it through one of the buttonholes on the button. Then, bring the needle back through to the wrong side of the cardigan and secure it in place with a knot.
Step 4: Repeat this process for each button, making sure that they are all securely attached to the cardigan. Take your time and double-check the placement and alignment of the buttons as you work.
Step 5: Once all the buttons are attached, it’s time to create the buttonholes. Starting at the top of the cardigan, use the tapestry needle to make a small vertical slit in the button band, slightly wider than the diameter of the buttons. Be careful not to make the buttonhole too tight, as it may be difficult to fasten and unfasten the buttons.
Step 6: After creating the first buttonhole, try inserting the button into the hole to see if it fits comfortably. If necessary, adjust the size of the buttonhole accordingly. Repeat this process for each buttonhole, ensuring that they are all the same size and evenly spaced.
Step 7: Once all the buttonholes are made, gently stretch and shape them to ensure that they lie flat and allow the buttons to slide through easily. Use a steam iron or a blocking technique if needed to help achieve this.
By following these steps, you can successfully add buttons and buttonholes to your V neck cardigan, providing a functional and polished finish to your knitted garment.
Blocking and finishing your V neck cardigan
Blocking is an essential step in finishing your knitted v neck cardigan. It helps to even out the stitches and sizes of your garment, giving it a more professional and polished look. To block your cardigan, you will need a flat surface like a blocking mat or a clean towel and some rustproof pins.
Start by soaking your knitted cardigan in lukewarm water with a mild detergent for about 15-20 minutes. Gently squeeze out the excess water and lay the cardigan flat on your blocking surface. Use rustproof pins to secure the edges of the cardigan, making sure it is stretched to the desired shape and size.
Next, leave your cardigan to dry completely. This can take anywhere from a few hours to a day or two, depending on the thickness of your yarn. Once it is dry, remove the pins and admire your beautifully blocked v neck cardigan.
If you want to add some finishing touches to your cardigan, you can sew on buttons or add a decorative trim along the v neck opening. This will give your cardigan a personalized touch and make it unique to your style. You can also weave in any loose ends of yarn and give your cardigan a final press with a warm iron to smooth out any wrinkles.
Remember to always follow the care instructions for your specific yarn when blocking and finishing your v neck cardigan. Some yarns may require different methods or temperatures for blocking, so it’s important to read the labels or consult the manufacturer’s recommendations. With proper blocking and finishing, your v neck cardigan will be ready to wear and showcase your knitting skills with pride.
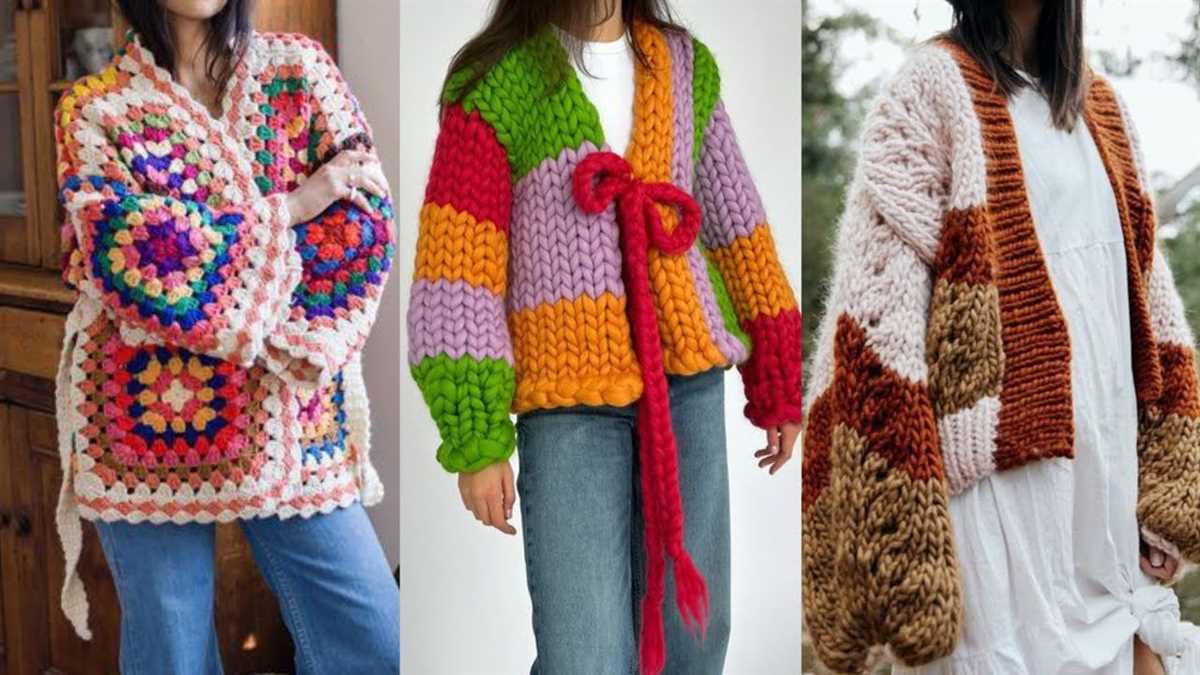
Tips and Tricks for Customizing Your V Neck Cardigan
Now that you have a basic understanding of the V neck cardigan knitting pattern, it’s time to explore some tips and tricks for customizing your cardigan to make it truly unique and perfect for you.
Here are some ideas to get you started:
- Experiment with different colors: Change up the color of your cardigan to fit your personal style. Try bold, vibrant hues for a statement piece or opt for subtle, neutral tones for a timeless look.
- Add some texture: Incorporate different stitch patterns to add texture and interest to your cardigan. You can try cables, lace, or even colorwork to make your cardigan stand out.
- Adjust the length: Customize the length of your cardigan to your preference. You can make it cropped for a trendy look or lengthen it for extra warmth and coziness.
- Play with sleeve length: Modify the sleeve length to suit your needs. If you prefer shorter sleeves, opt for a cap sleeve or three-quarter length. For colder climates, longer sleeves are a great option.
- Personalize with buttons: Select buttons that complement your cardigan and add a personal touch. You can choose classic buttons for a polished look or fun, quirky buttons to make a statement.
Remember, the joy of knitting is the ability to customize and make each piece your own. Don’t be afraid to experiment and try new things. Your V neck cardigan can be a reflection of your individual style and personality.
So go ahead, grab your needles and yarn, and let your creativity soar!