
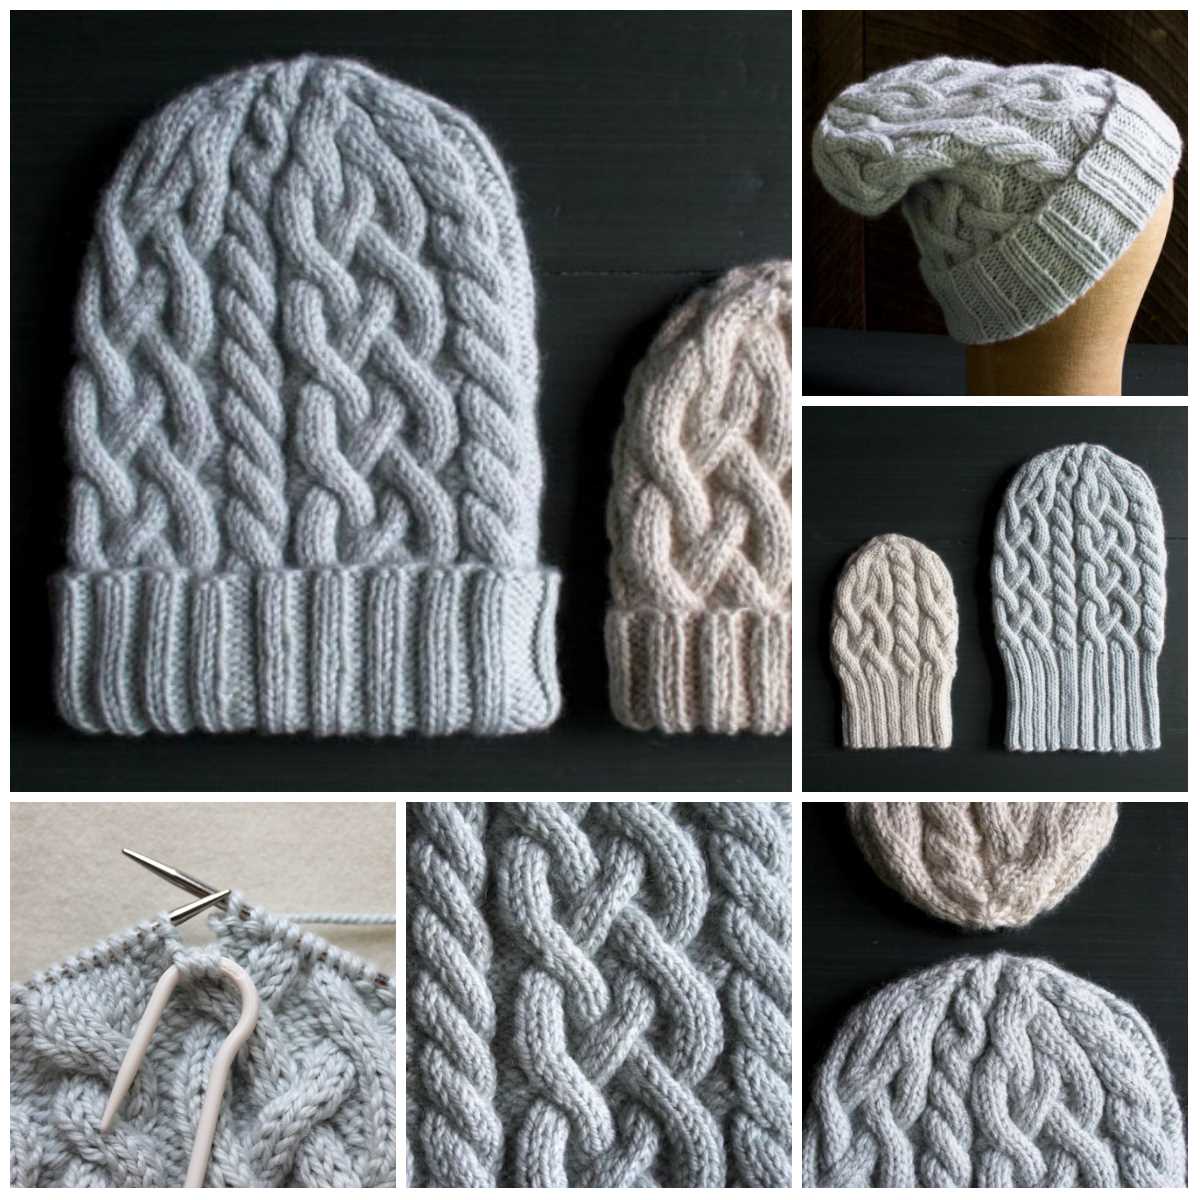
A cozy and stylish hat is an essential accessory for chilly weather. It not only keeps you warm, but also adds a touch of elegance to your outfit. If you’re a fan of knitting, you’ll love the horizontal cable knit hat pattern. This pattern creates a unique texture that looks sophisticated and intricate.
Knitting a cable pattern may seem intimidating at first, but it’s actually easier than it looks. With a bit of practice, you’ll be able to create beautiful cable designs with ease. The horizontal cable knit hat pattern is a great project for both beginner and experienced knitters. It’s a great way to challenge yourself and expand your knitting skills.
To knit the horizontal cable knit hat, you’ll need a few supplies. You’ll need a set of knitting needles, a cable needle, and a skein of yarn in your desired color. The pattern uses basic knitting stitches like knit and purl, as well as simple cable techniques. If you’re new to knitting cables, there are plenty of online tutorials and videos that can guide you through the process.
Horizontal Cable Knit Hat Pattern
This horizontal cable knit hat pattern is perfect for those chilly winter days when you want to stay warm and stylish. The pattern features a unique cable design that runs horizontally along the hat, giving it a modern and trendy look.
To start knitting this hat, you will need the following materials:
- 4 skeins of worsted weight yarn
- Size 8 knitting needles
- Cable needle
- Tapestry needle
Once you have gathered all your materials, you can begin the knitting process. Start by casting on the desired number of stitches using the long-tail cast-on method. Then, knit the first round in a knit 2, purl 2 ribbing pattern to create the brim of the hat.
Next, you will start working the cable pattern. The cable pattern consists of a repeating sequence of stitches that create the horizontal cables. Follow the pattern instructions carefully, using the cable needle to hold the stitches while you work the twists.
Continue working the cable pattern until the hat reaches the desired height. Once you have reached this point, you can start decreasing to shape the crown of the hat. Follow the pattern instructions for the decreasing rounds, which will gradually decrease the number of stitches until only a few remain.
Finally, cut the yarn, leaving a long tail, and use the tapestry needle to thread the tail through the remaining stitches. Pull tight to close the top of the hat. Weave in any loose ends and your horizontal cable knit hat is complete!
This hat pattern is great for knitters of all skill levels and makes a perfect gift for friends and family. Stay warm and stylish with this trendy horizontal cable knit hat pattern!
Materials required
In order to make a horizontal cable knit hat, you will need the following materials:
- Yarn: Choose a medium-weight yarn in the color of your choice. Make sure to select a yarn that is suitable for knitting and has a good stitch definition.
- Knitting needles: You will need a set of circular knitting needles in the appropriate size for your yarn. The length of the circular needles should be long enough to accommodate the number of stitches required for the hat.
- Cable needle: A cable needle is a short, double-pointed needle that is used to hold stitches temporarily while you are working the cable pattern.
- Tapestry needle: This needle will be used for weaving in ends and sewing any necessary seams.
- Stitch markers: Stitch markers are small, plastic or metal rings that can be slipped onto the knitting needles to mark specific stitches or locations in the pattern.
- Measuring tape: A measuring tape is essential for checking the gauge of your knitting and ensuring that your hat will fit properly.
- Scissors: You will need a pair of scissors for cutting yarn and trimming any excess threads.
Make sure to gather all of these materials before you begin knitting your hat. Having everything ready and organized will make the knitting process much smoother and more enjoyable.
Casting on Stitches
When starting a knitting project, the first step is to cast on stitches onto your knitting needle. Casting on is the process of creating the foundation row of stitches, and it sets the number of stitches you will work with throughout your project. There are several methods of casting on, but for the horizontal cable knit hat pattern, we will be using the long tail cast on method.
The long tail cast on is a versatile and popular method that creates a neat and flexible edge. To begin, you will need to estimate the amount of yarn required for your cast on. This can be done by making a slip knot at the end of your yarn and leaving a tail that is approximately three times the width of your desired knitting project. The tail will be used to create the initial stitches, while the working yarn will be used throughout the rest of the project.
To cast on using the long tail method, hold the slip knot between your thumb and forefinger, with the tail end in front and the working yarn wrapped around your other fingers. Insert the needle between the two strands of the slip knot, and use the needle to catch the working yarn and pull it through the slip knot. This creates your first stitch. Repeat this process for the desired number of stitches, making sure to keep an even tension on the yarn.
Once all the stitches are cast on, you can begin knitting the next row according to the pattern instructions. The cast on edge will serve as the starting point for your horizontal cable knit hat, and it will provide a sturdy foundation for your project.
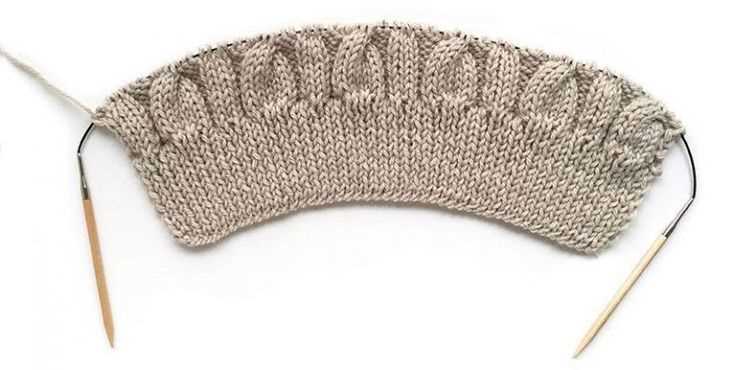
Creating the Ribbed Brim
Before starting on the ribbed brim of the horizontal cable knit hat, gather your materials: a set of double-pointed needles and your chosen yarn. For the brim, you will need to cast on the desired number of stitches, usually around 88-100, depending on your head size and the desired fit of the hat.
Begin by casting on the stitches using the long-tail cast-on method. This will create a neat and flexible edge for the brim. Make sure to leave a long tail of yarn for later use in finishing the hat. Once you have cast on the required number of stitches, divide them evenly onto three double-pointed needles, with approximately one-third of the stitches on each needle.
To create the ribbed brim, you will be alternating between knitted and purled stitches. The most commonly used ribbing pattern for hats is the 1×1 ribbing, where one stitch is knitted, followed by one stitch being purled. This creates a stretchy and snug brim that will comfortably fit around your head.
Keep up the 1×1 ribbing pattern for the desired length of the brim, usually around 1-2 inches. This can be adjusted according to your preference. Knit the knitted stitches and purl the purled stitches as you go along. Once you have reached the desired length, you are ready to move on to the cable pattern for the main body of the hat.
Note: It’s important to keep track of your stitch count and be consistent with your knitting and purling to maintain the ribbing pattern. You can use stitch markers to mark the beginning of each round and help keep track of your progress.
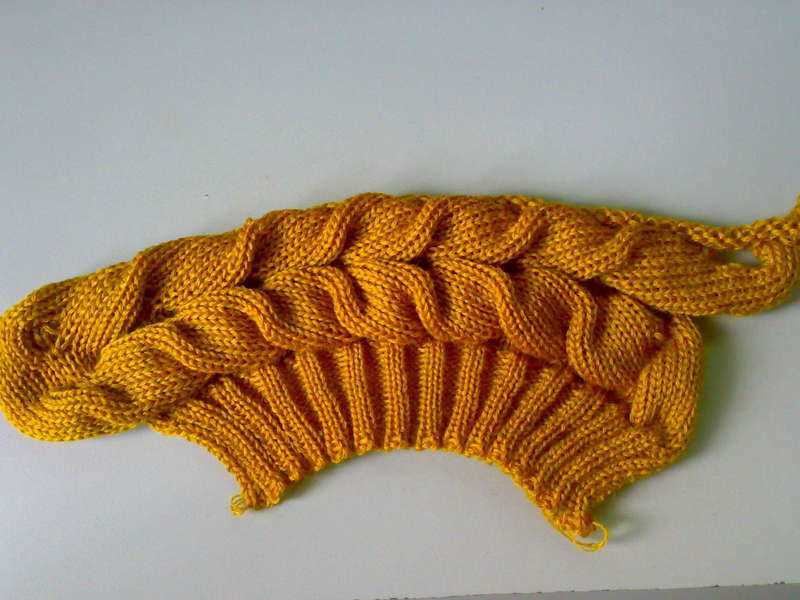
Knitting the body of the hat
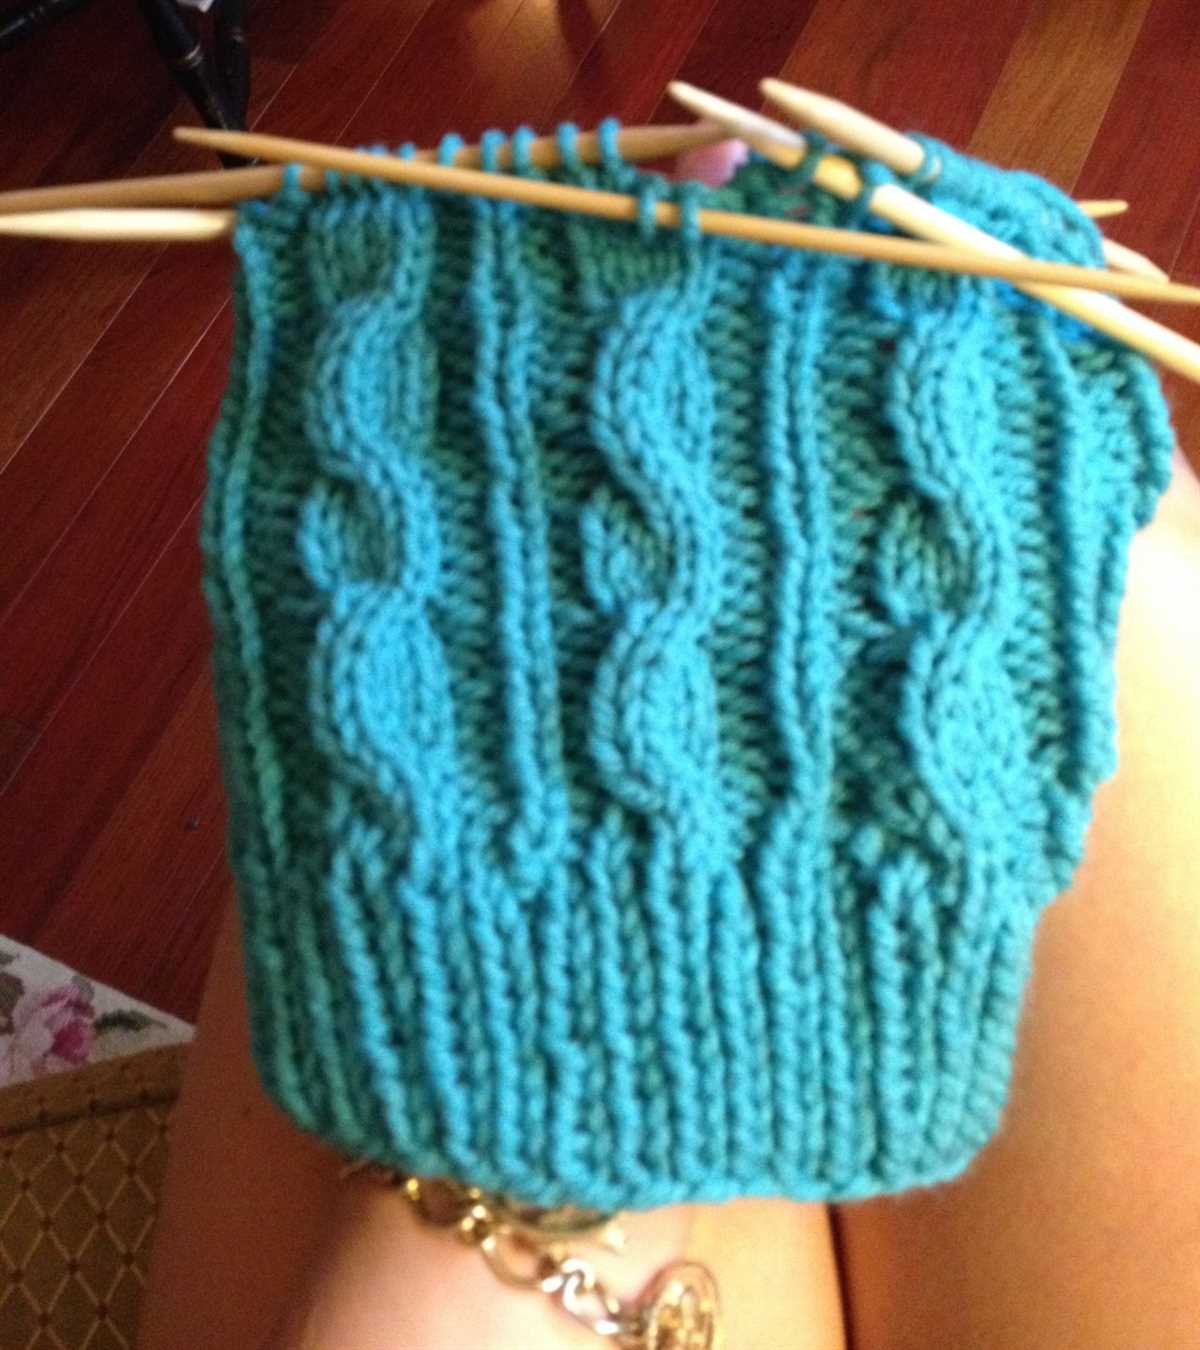
Once you have cast on the desired number of stitches for your hat, it’s time to start knitting the body. The body of the hat will be worked in a cable knit pattern, creating a beautiful textured design. To begin, make sure that your first row is a right side row.
To start the cable knit pattern, you will need to follow a specific sequence of stitches. Begin by knitting the first stitch, then bring the working yarn to the front of the work and purl the next stitch. This creates a crossover effect that will become the base of the cable design. Continue this sequence of knitting and purling stitches until you reach the end of the row.
Once you have completed the first row of the cable knit pattern, you will continue to follow the same sequence of stitches for the subsequent rows. This will create a horizontal cable design that runs the length of the hat. Make sure to keep track of your row count, as it is easy to lose track in the intricate pattern.
If you are new to cable knitting, don’t worry! With a bit of practice, you will soon become comfortable with the technique. It may take some time to get used to the rhythm of the stitches, but the end result will be well worth the effort. Keep knitting the body of the hat until it reaches your desired length, then you can move on to shaping the crown.
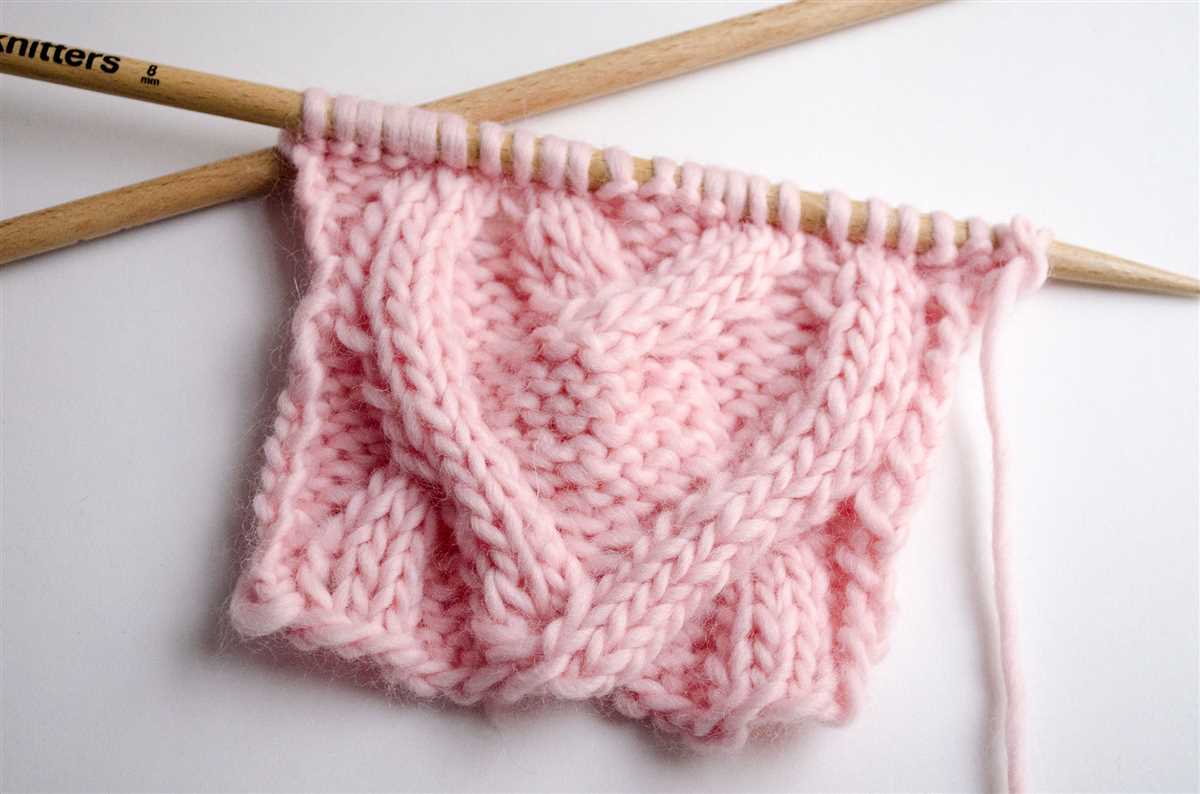
Starting the cable pattern
Once you have cast on the desired number of stitches and completed the ribbing, it is time to start the cable pattern. This is where the hat really starts to come together, adding depth and texture to the design.
To begin the cable pattern, you will need a cable needle or a double-pointed needle. The cable needle is used to hold stitches while you work the cable cross. It is important to keep the cable needle handy, as you will be using it frequently throughout the pattern.
Step 1: Place the first set of stitches onto the cable needle, holding it in front of your work.
Step 2: Knit the next set of stitches on your main needle.
Step 3: Place the stitches from the cable needle back onto the main needle.
Step 4: Knit the remaining stitches on your main needle.
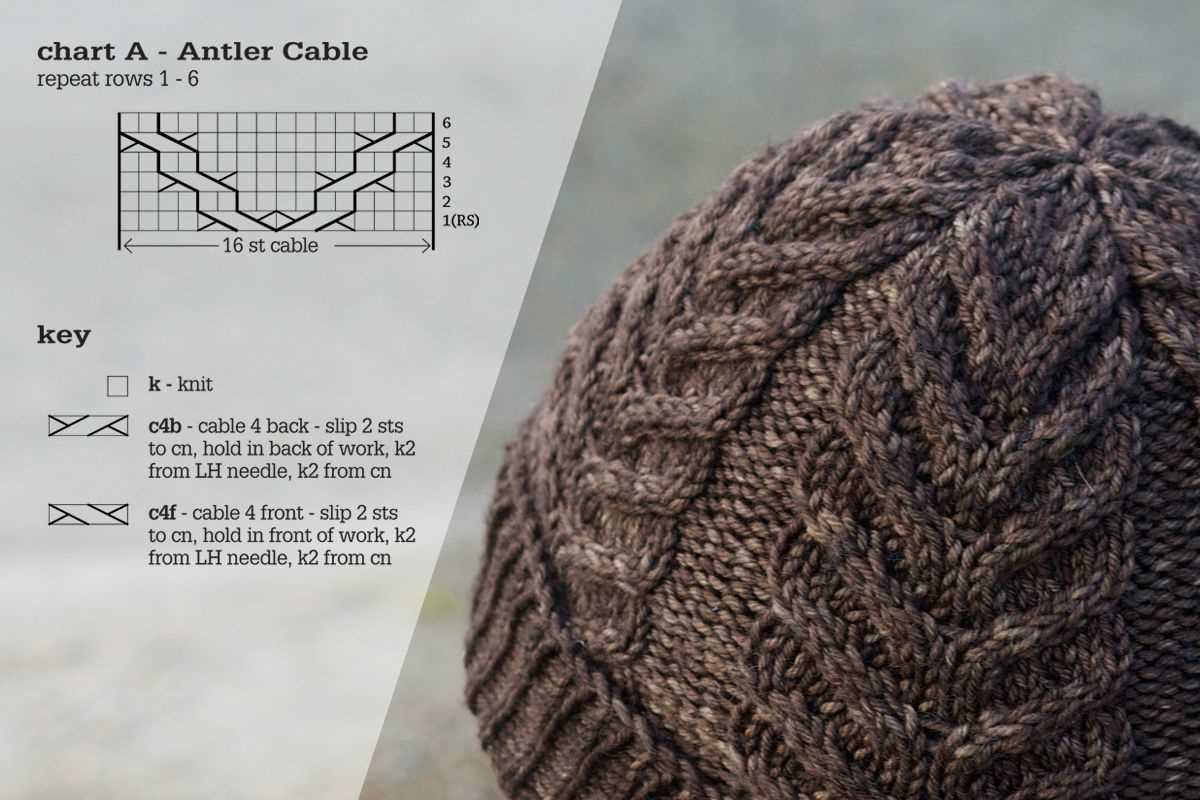
Repeat these steps for each cable cross in the pattern. The specific cable pattern may vary depending on the design you are following, but the general technique remains the same.
By following these steps and paying attention to the cable pattern chart or instructions, you will be able to create a beautiful and intricate cable design on your hat.
Continuing with the cable pattern
In order to continue with the cable pattern, you will need to follow the instructions for each row carefully. The cable pattern typically consists of a series of knit and purl stitches that are crossed over each other to create a twisting effect. This pattern adds depth and texture to the hat, making it visually appealing.
To start each row, make sure to determine the number of stitches required for the cable pattern. This can be found in the instructions, and it will dictate how many stitches you should knit or purl before starting the cable. Once you have the correct number of stitches, you can begin working the cable pattern.
To create the cable effect, you will need to work certain stitches out of order. This is done by slipping stitches onto a cable needle and holding it in the front or back of your work, depending on the specific instructions. As you become more comfortable with the cable pattern, you may find that you can work the cables without using a cable needle, but it is recommended to use one when starting out.
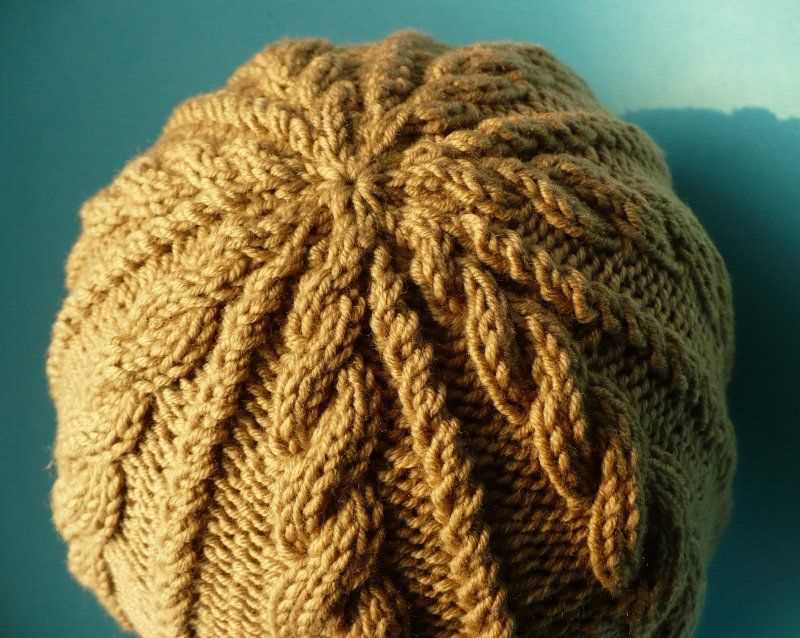
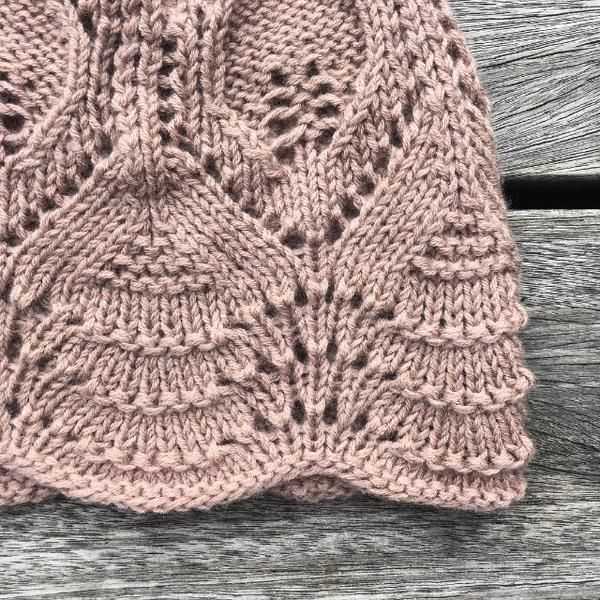
Shaping the crown of the hat
After completing the ribbing and the main body of the hat in the horizontal cable knit pattern, it’s time to shape the crown. This is the part of the hat that sits on top of the head and gives it its distinctive shape.
Decreasing stitches

To shape the crown, you will need to decrease stitches gradually to create a narrower opening. The most common way to decrease stitches is to knit two stitches together, which is abbreviated as “k2tog”. To distribute the decreases evenly, you can divide the stitches into sections, such as knitting two stitches together at regular intervals.
For example, you can start by knitting the first two stitches together, then knit a few stitches without decreasing, and then knit the next two stitches together. Repeat this process until you have decreased enough stitches to achieve the desired crown width. Keep in mind that the number of decreases needed will depend on the size of the hat and the desired fit.
Finishing off
Once you have completed the decreases and have the desired number of stitches remaining, you can finish off the crown of the hat. This can be done by cutting the yarn, leaving a tail for sewing or weaving in later. Then, thread the tail through the remaining stitches and pull tight to close the top of the hat.
Finally, secure the yarn and weave in any loose ends to ensure a clean finish. With the crown shaped and the hat completed, you can now enjoy your cozy and stylish accessory during the colder months.
Finishing the hat
After you have completed all the rows of the cable knit pattern, it’s time to finish the hat. Start by cutting the yarn, leaving a long tail for sewing. Thread the tail onto a yarn needle.
To close the top of the hat, gather the remaining stitches on the circular needles together. Insert the needle through each stitch, moving from left to right. Once all the stitches have been removed from the needles, pull the yarn tight to close the top of the hat.
Next, use the yarn needle to sew the seam of the hat. Line up the edges of the hat and begin sewing at the cast on edge, using a whipstitch or mattress stitch. Continue sewing all the way up to the top of the hat.
Finally, weave in any loose ends by threading the yarn through the stitches on the inside of the hat. Trim any excess yarn.
Your horizontal cable knit hat is now finished and ready to wear! Enjoy the warmth and style of your handmade creation.
Blocking the Hat
Blocking is an important step in finishing your cable knit hat. It helps to shape the hat and give it a polished look. To block your hat, you will need a blocking mat or towel, rust-proof pins, and a spray bottle filled with water.
Before blocking your hat, make sure it is clean and free of any loose ends or stitches. Gently wash it and let it dry completely. Once your hat is dry, lay it out on the blocking mat or towel. Start by pinning the edges of the hat to the desired shape and size. Use rust-proof pins to secure the hat in place.
You can also use the spray bottle filled with water to lightly mist the hat. This will help to relax the fibers and make them easier to reshape. Be careful not to oversaturate the hat, as this can cause it to stretch or lose its shape.
Leave the hat to dry completely before removing the pins. This usually takes 24-48 hours, depending on the thickness of the hat and the humidity in your area. Once the hat is dry, gently remove the pins and admire your beautifully blocked cable knit hat!
Tips for blocking your hat:
- Make sure your hat is completely dry before blocking.
- Don’t be afraid to experiment with different shapes and sizes while pinning.
- Use rust-proof pins to avoid any discoloration or damage to your hat.
- Be patient and allow enough time for your hat to dry completely.
- If you want to speed up the drying process, you can use a fan or a blow dryer on a low and cool setting.
Creating a pom-pom (optional)
If you want to add a playful touch to your horizontal cable knit hat, you can create a pom-pom to attach on top. Making a pom-pom is a fun and easy process that will add a finishing touch to your hat.
To create a pom-pom, you will need some yarn in the same color as your hat, a pom-pom maker or cardboard, scissors, and a yarn needle.
Instructions:

- Start by wrapping the yarn around the pom-pom maker or a piece of cardboard. The more wraps you make, the fuller your pom-pom will be.
- Once you have enough wraps, carefully remove the yarn from the pom-pom maker or cardboard.
- Secure the wraps by tying a separate piece of yarn tightly around the middle of the wraps. Make sure to leave long tails on each side of the knot.
- Use scissors to cut through the loops on both sides of the knot. This will create the fluffiness of the pom-pom.
- Trim the pom-pom to your desired size and shape. You can make it round and even, or leave it a bit wild with uneven edges.
- Thread one of the yarn tails through a yarn needle and use it to attach the pom-pom to the top of your hat. Make sure to securely sew it in place.
And there you have it! Your horizontal cable knit hat is complete with a playful and cozy pom-pom on top. Enjoy wearing your handmade creation and staying warm during the colder months!
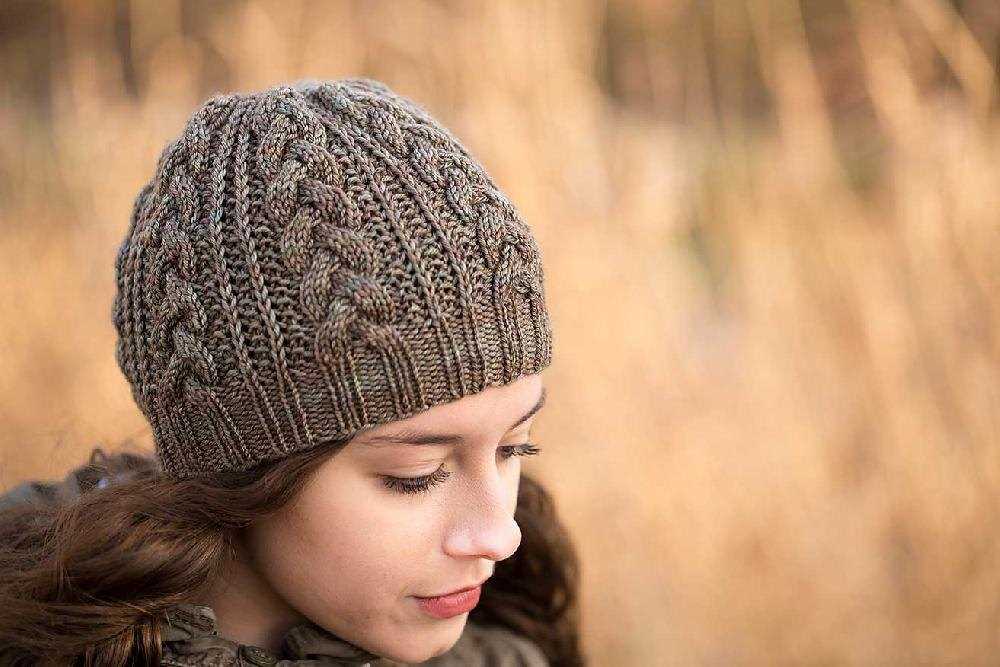
Final thoughts on the project
Creating a horizontal cable knit hat can be a fun and rewarding project for knitters of all skill levels. This pattern allows you to showcase your knitting skills while also creating a stylish and functional accessory.
The horizontal cable pattern adds a unique texture to the hat, making it stand out from traditional knit patterns. The pattern is also versatile, as you can customize it by using different colors or adding extra embellishments, such as pom-poms or buttons.
Pros of the project:
- Engaging and enjoyable knitting process
- The horizontal cable pattern adds visual interest
- Customizable to suit individual preferences
- Creates a warm and cozy hat
- Makes a great gift or personal accessory
Cons of the project:
- Requires intermediate knitting skills
- Takes some time and effort to complete
- May need to learn new techniques, such as cabling or working with a cable needle
In conclusion, the horizontal cable knit hat pattern is a fantastic choice for knitters looking for a new challenge or wanting to expand their knitting repertoire. With a little practice and patience, you can create a beautiful and cozy hat that will keep you warm and stylish during the colder months.