
Looking to add a cozy and decorative touch to your home? Why not try knitting your own throw pillow? Not only is knitting a fun and relaxing hobby, but it also allows you to create unique and personalized home decor pieces. In this article, we will walk you through a simple and beginner-friendly knit throw pillow pattern that you can easily follow and customize to fit your own style and preferences.
Materials Needed: To get started on your knit throw pillow, you will need the following materials:
- Yarn of your choice (We recommend a chunky or bulky weight yarn for a thicker and cozier pillow)
- Knitting needles (Size will depend on the weight of your yarn, but typically a US size 10 or 11 will work well)
- Pillow form or stuffing
- Tapestry needle for sewing up the seams
Pattern Instructions: To begin knitting your throw pillow, follow these simple instructions:
- Cast on 50 stitches.
- Knit every row (garter stitch) until the piece measures approximately 18 inches in length.
- Bind off all stitches.
- Using a tapestry needle, sew up three of the sides together, leaving one side open for inserting the pillow form or stuffing.
- Insert the pillow form or stuffing into the pillow cover.
- Sew up the remaining side.
And there you have it – your very own knit throw pillow! Feel free to experiment with different yarn colors, stitch patterns, or even add embellishments like buttons or pom-poms to make your pillow truly unique. Happy knitting!
Why knit throw pillows are a great addition to your home decor
When it comes to decorating your home, every detail counts. Knit throw pillows can be the perfect addition to your home decor, adding both style and comfort to any space. With their soft texture and intricate designs, these pillows create a cozy and inviting atmosphere in any room.
One of the main benefits of knit throw pillows is their versatility. They come in a wide range of colors, patterns, and sizes, allowing you to find the perfect match for your existing decor. Whether you prefer a bold and vibrant design or a more subtle and neutral tone, there is a knit throw pillow out there for everyone.
Not only do knit throw pillows add visual interest to your home, but they also provide practical benefits. The softness of the knit fabric makes these pillows comfortable to lean on while watching TV or reading a book. They also provide extra support when used as backrests on sofas or chairs.
Another advantage of knit throw pillows is their durability. Knitted fabrics are known for their strength and resilience, making these pillows long-lasting and able to withstand everyday use. Plus, they are usually easy to clean, as most knit materials can be machine washed or spot cleaned.
Furthermore, knit throw pillows can be a great DIY project for those who enjoy knitting or crocheting. Creating your own personalized pillow allows you to showcase your creativity and add a unique touch to your home decor. It can also be a meaningful gift for a loved one, as handmade items often have a special sentimental value.
In conclusion, knit throw pillows are a versatile and practical addition to any home decor. With their soft texture, wide range of designs, and durability, these pillows can enhance the comfort and style of any room. Consider adding a few knit throw pillows to your home to create a cozy and inviting atmosphere.
Choosing the right yarn for your knit throw pillow
When it comes to knitting a throw pillow, one of the most important decisions you’ll need to make is choosing the right yarn. The yarn you select can greatly impact the overall look and feel of your finished pillow, so it’s important to choose wisely. Here are some factors to consider when selecting yarn for your knit throw pillow.
Weight and texture
The weight and texture of the yarn will determine the overall drape and feel of your knit throw pillow. If you want a lightweight and soft pillow, consider choosing a yarn that is categorized as “fingering” or “sport” weight. These yarns are typically light and have a smooth texture. On the other hand, if you prefer a more chunky and textured pillow, you may want to go for a “worsted” or “bulky” weight yarn, which will give your pillow a cozy and plush look.
Fiber content
The fiber content of the yarn is another important aspect to consider. Different fibers can provide various qualities to your knit throw pillow, so it’s important to think about the specific characteristics you want. For example, if you’re looking for warmth and softness, a wool or alpaca yarn would be a good choice. If you prefer a more lightweight and breathable option, a cotton or bamboo yarn may be more suitable. Consider the aesthetic and practical qualities you desire in your pillow, and choose a yarn that aligns with those preferences.
Color and pattern
Finally, consider the color and pattern of the yarn. The color can greatly influence the overall appearance of your knit throw pillow, so think about the color scheme of the room where the pillow will be placed and choose a yarn that complements it well. Additionally, if you’re planning to incorporate any patterns or textures into your knitting, consider how the yarn’s color and texture will enhance or detract from those elements. It’s important to select a yarn that will showcase your desired design elements and create a visually appealing finished product.
Ultimately, choosing the right yarn for your knit throw pillow is a personal decision that depends on your preferences and the intended use of the pillow. By considering the weight, texture, fiber content, and color of the yarn, you’ll be able to find the perfect yarn to create a beautiful and comfortable knit throw pillow.
Essential knitting techniques for creating a throw pillow
Knitting a throw pillow can be a fun and rewarding project for knitters of all skill levels. To create a beautiful and cozy pillow, there are a few essential knitting techniques to master. These techniques will ensure that your pillow turns out just right and that you are able to create the texture and design you desire.
1. Casting on: The first step in any knitting project is casting on. This is the process of creating the first row of stitches on your knitting needle. For a throw pillow, you may want to consider using a long-tail cast on method, as this creates a sturdy and even edge.
2. Knit and purl stitches: The knit and purl stitches are the building blocks of knitting. By combining these two basic stitches, you can create a wide range of textures and patterns for your throw pillow. Experiment with different combinations of knit and purl stitches to achieve the desired look.
3. Colorwork: If you want to add color to your throw pillow, you will need to learn the technique of colorwork. This involves knitting with multiple colors in a single row or round to create a pattern or design. Fair Isle and Intarsia are two common colorwork techniques that can be used to create stunning effects.
4. Decreases and increases: To shape your throw pillow or create interesting patterns, you will need to learn how to decrease and increase stitches. Decreases involve eliminating stitches, while increases involve adding stitches. There are several different methods for doing both, including knit two together (k2tog) and yarn over (yo).
5. Finishing techniques: Once you have finished knitting your throw pillow, you will need to complete a few finishing touches. This may include weaving in loose ends, blocking your pillow to shape it, and sewing or zippering up the edges. Taking the time to properly finish your pillow will give it a polished and professional appearance.
6. Embellishments: If you want to add some extra flair to your throw pillow, consider adding embellishments such as buttons, ribbons, or pom-poms. These can be easily added by sewing them onto the finished pillow or using techniques such as duplicate stitch.
By mastering these essential knitting techniques, you will be well-equipped to create a beautiful and personalized throw pillow. Whether you are a beginner or an experienced knitter, these techniques will help you bring your knitting project to life.
How to Cast On and Make a Base for Your Knit Throw Pillow
Knitting your own throw pillow is a fun and creative way to add a personal touch to your home decor. In this tutorial, we will guide you through the steps of casting on and making a base for your knit throw pillow.
Materials You Will Need:
- Knitting needles
- Yarn of your choice
- Tape measure
- Scissors
- Yarn needle
Step 1: Selecting the Right Yarn and Needles
Begin by choosing the yarn and needles that you will use for your knit throw pillow. Consider the color and texture that will complement your home decor. Select needles that are appropriate for the weight of your chosen yarn.
Step 2: Casting On
To start, you will need to cast on the desired number of stitches. This will depend on the size of your pillow and the gauge of your yarn. Refer to the pattern instructions or use a cast on method of your choice. Make sure to leave a long tail for later sewing.
Step 3: Knitting the Base
With your stitches cast on, you can now begin knitting the base of your throw pillow. Use a knit stitch for each row until you reach the desired width of your pillow. Keep in mind that the number of rows will determine the height of your pillow.
Step 4: Blocking and Finishing
Once you have completed knitting the base, it is important to block your work to ensure even stitches and a neater appearance. Wet blocking or steam blocking can help to shape and relax the knitted fabric. After blocking, allow your work to dry completely.
Once your knitted base is dry, you can fold it in half and sew up the sides using the long tail left from casting on. Be sure to leave a small opening for inserting the pillow form. Finally, weave in any loose ends and your knit throw pillow is complete!
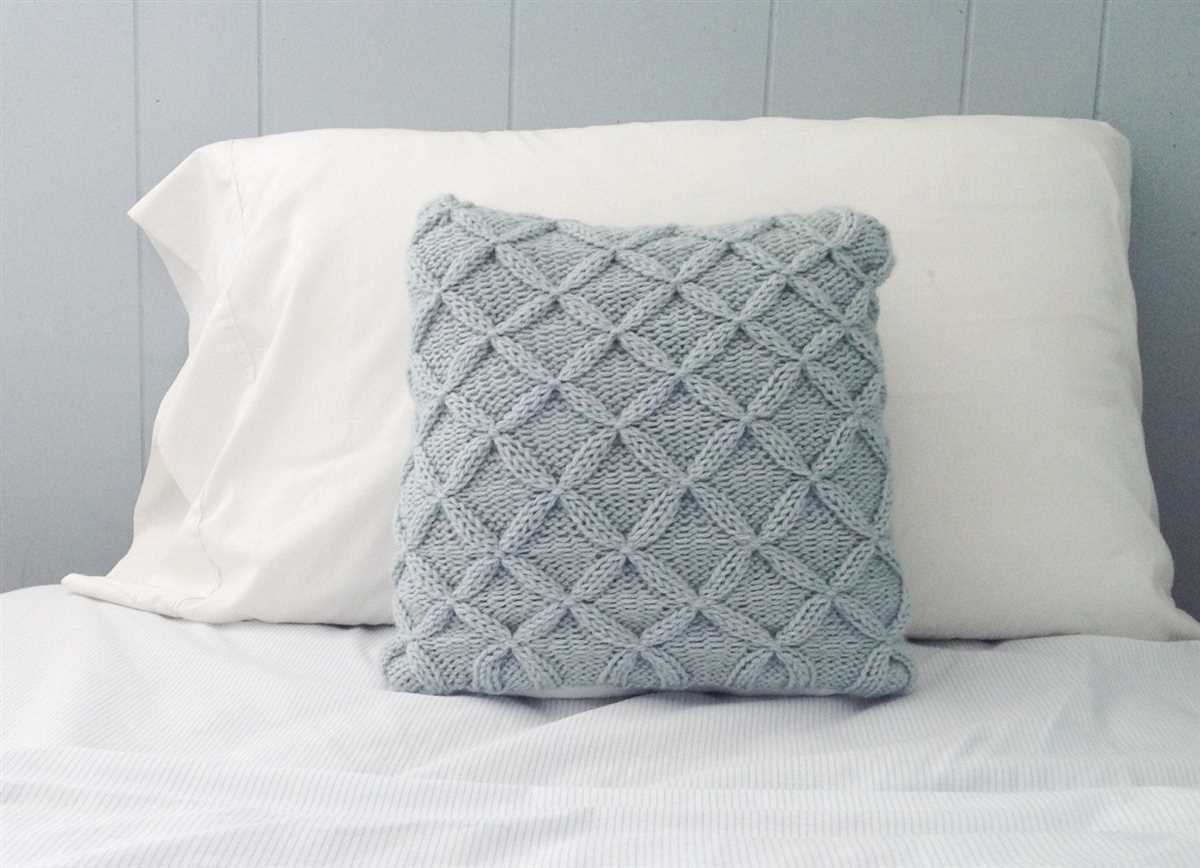
Creating Decorative Patterns with Knit Stitches
Knitting is not only a relaxing and practical hobby, but it also allows for endless creativity and the opportunity to create beautiful decorative patterns. By using different knit stitches, you can add texture and visual interest to your projects, whether it’s a cozy blanket, a sweater, or even a throw pillow.
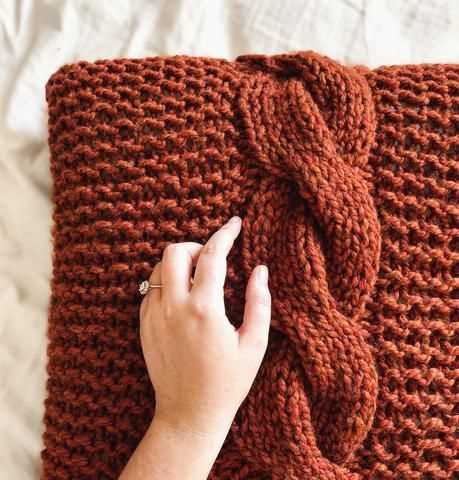
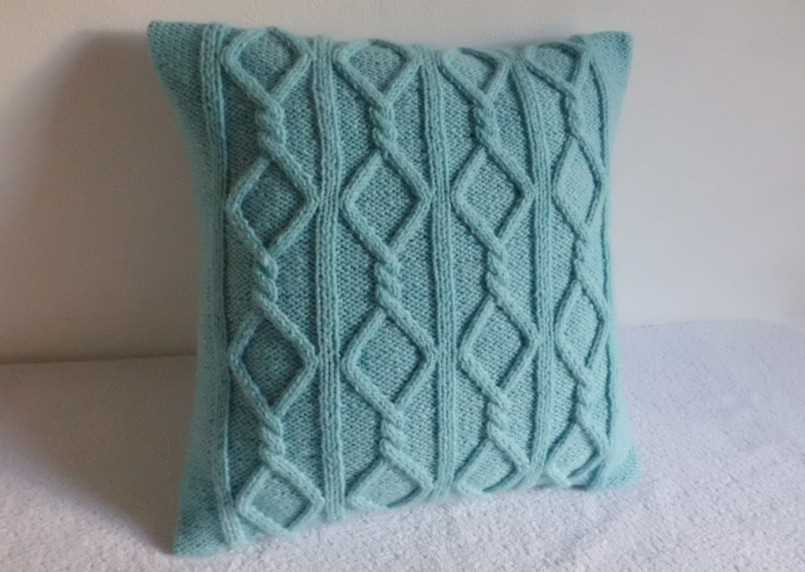
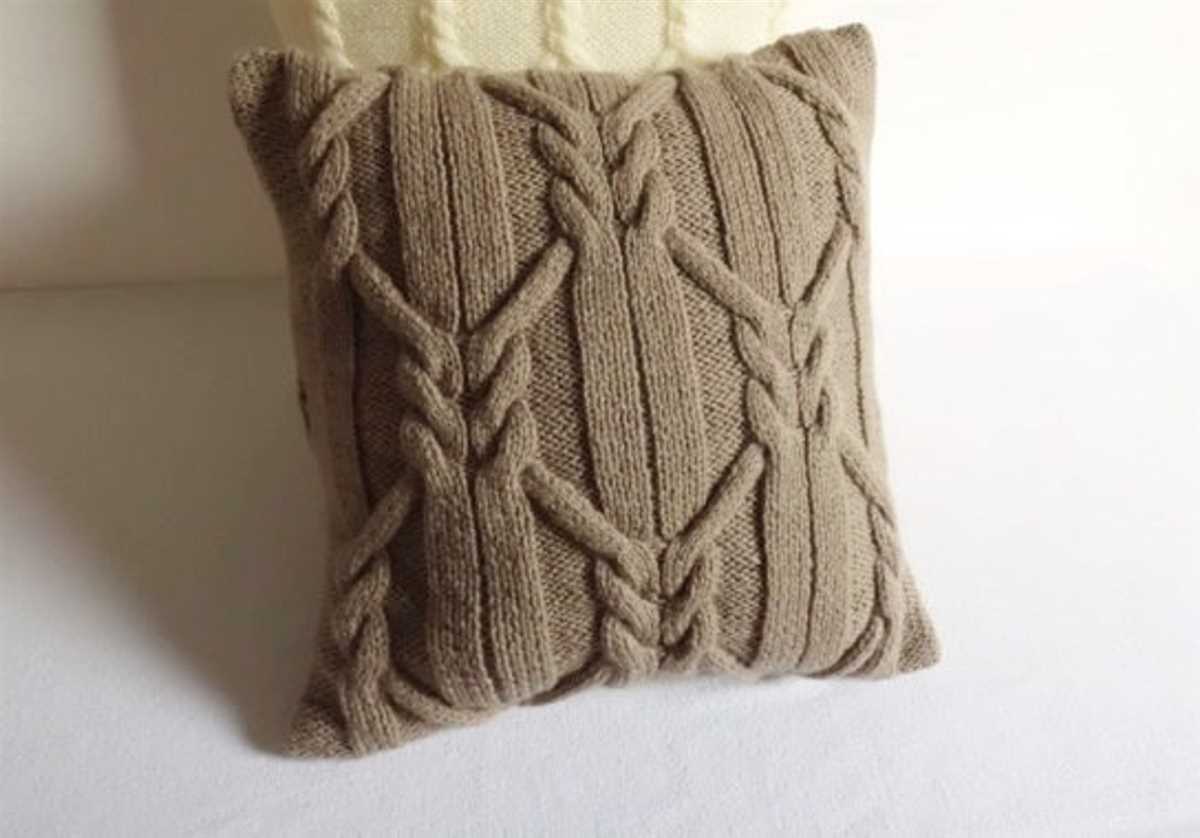
One popular stitch pattern for creating decorative designs is the cable stitch. This stitch involves crossing stitches over each other, creating a twisted cable-like effect. By arranging the cables in different ways, you can create intricate patterns that resemble braids, diamonds, or even leaves. The cable stitch adds a sophisticated and elegant touch to any knitting project, making it perfect for creating decorative pillows that will instantly elevate your home decor.
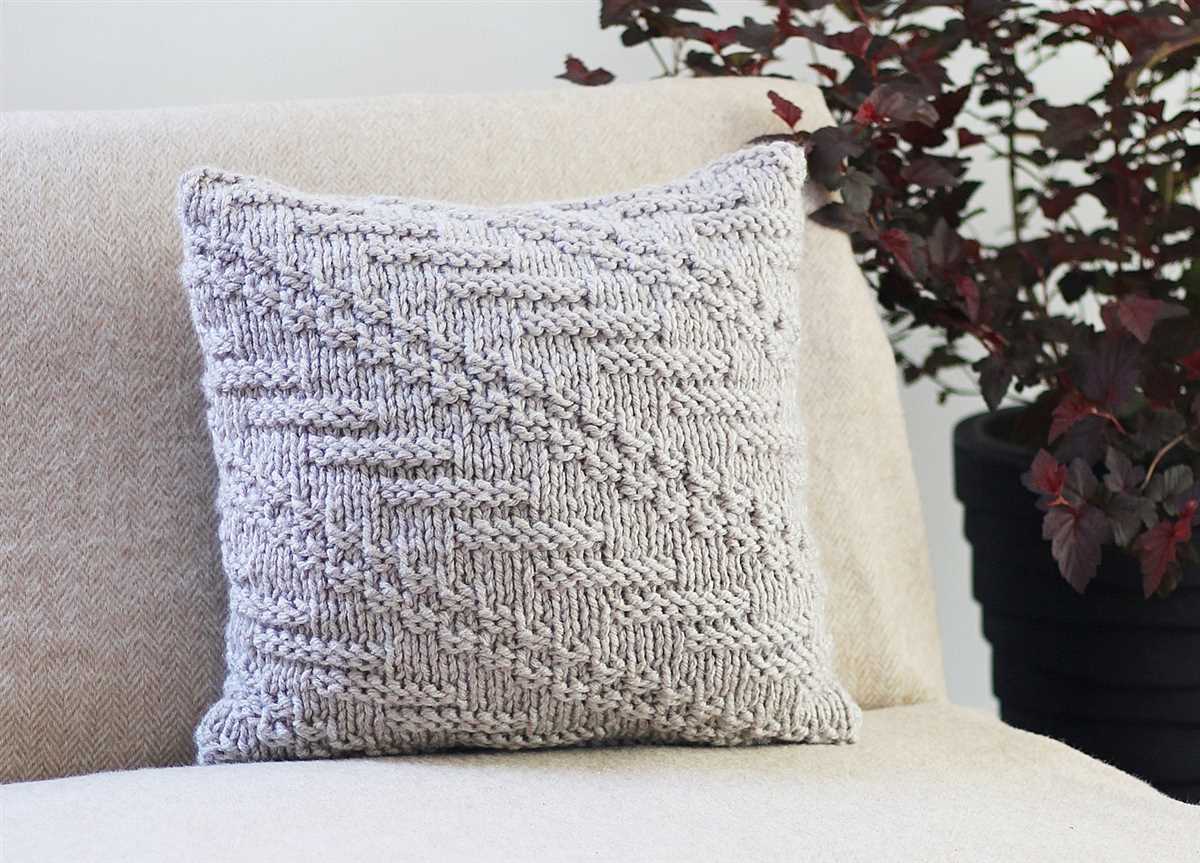
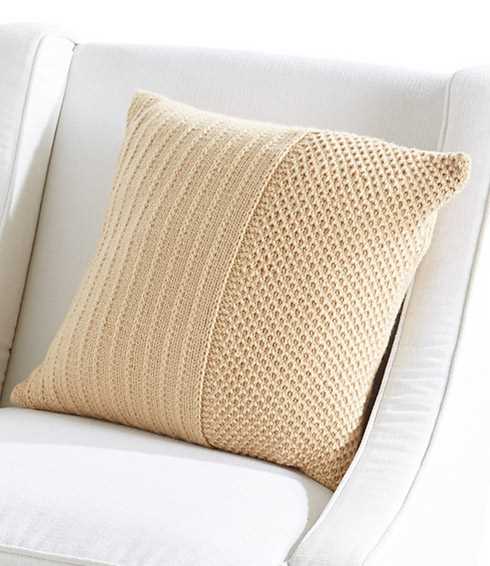
Another versatile stitch pattern is the seed stitch. This stitch consists of alternating knit and purl stitches, creating a textured fabric that resembles a field of scattered seeds. The seed stitch is simple yet visually appealing, adding depth and dimension to your knitting. By combining different colors or using variegated yarn, you can create even more interesting patterns and create stunning throw pillows that will enhance the cozy ambiance of your living space.
For those looking for a more delicate and intricate pattern, the lace stitch is an excellent choice. Lace stitches typically involve yarn overs and decreases, creating an openwork fabric that resembles lace. The delicate and airy nature of lace stitches make them perfect for creating decorative patterns on throw pillows. Whether it’s a floral motif or an intricate geometric design, lace stitches add a touch of elegance and femininity to your knitting projects, making them a beautiful addition to any home decor.
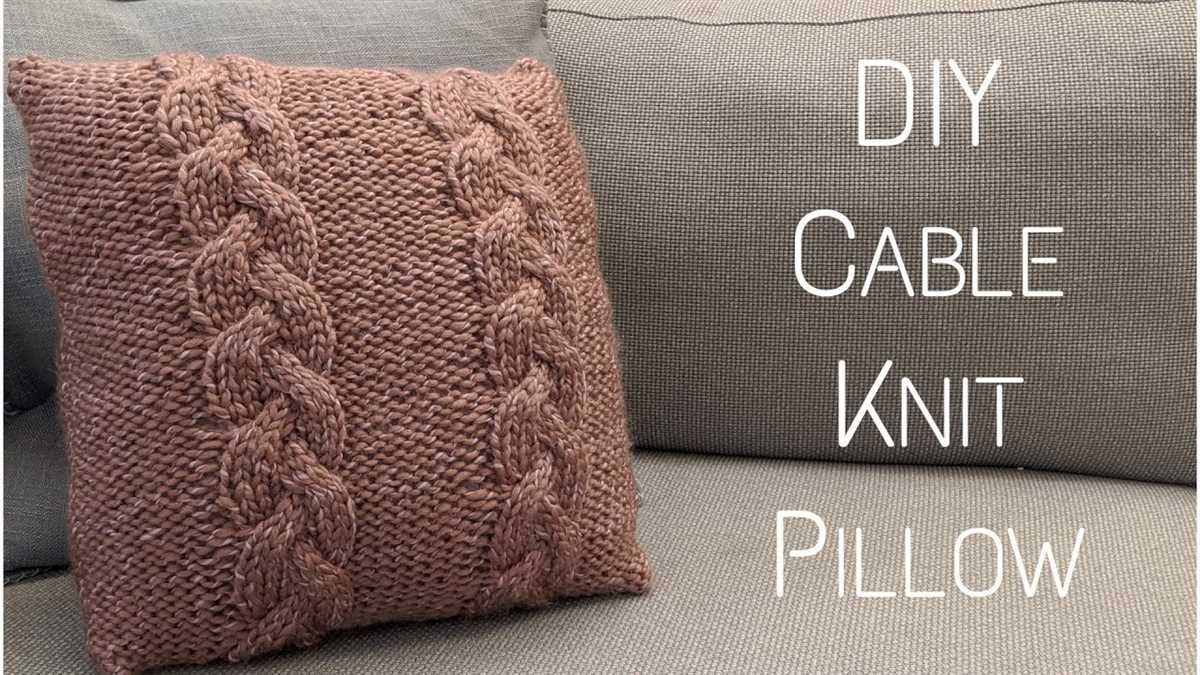
Adding Texture to Your Knit Throw Pillow with Cable Knitting
Knitting a throw pillow with cable stitches is a great way to add texture and visual interest to your home decor. Cable knitting involves crossing stitches over each other to create intricate patterns that can give your pillow a unique and sophisticated look.
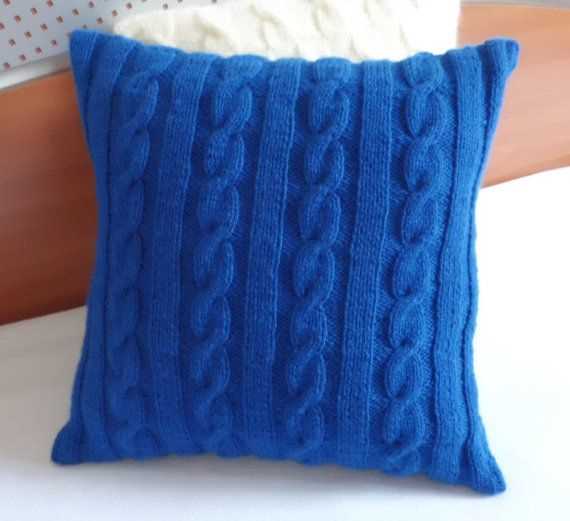
When selecting a cable knitting pattern for your throw pillow, consider the overall style and theme of your space. For a modern or minimalist aesthetic, opt for clean and simple cable patterns that create sleek lines and geometric shapes. On the other hand, if you prefer a more traditional or cozy feel, choose cable patterns that feature intricate twists and braids.
- Create a sense of depth by combining different cable patterns on your pillow. For example, you could have a central panel with a large cable design surrounded by smaller cables or textured stitches. This layering effect adds dimension and makes your pillow even more visually appealing.
- Experiment with different yarn weights and textures to further enhance the texture of your cable knit throw pillow. Thicker yarns will create chunkier and more pronounced cables, while finer yarns will produce more delicate and intricate cables.
- Consider incorporating other knitting techniques, such as ribbing or seed stitch, into your cable knitting pattern. This can help break up the cables and add even more texture to your pillow.
- Don’t be afraid to get creative with your cable knitting! Play around with different cable patterns and experiment with adding additional elements, such as bobbles or lace, to make your throw pillow truly unique.
In conclusion, cable knitting is a fantastic way to add texture and visual interest to your knit throw pillow. By selecting the right cable patterns, combining different stitches, and experimenting with yarn weights and textures, you can create a pillow that is not only cozy but also a stunning decorative piece for your home.
Using colorwork to enhance the design of your throw pillow
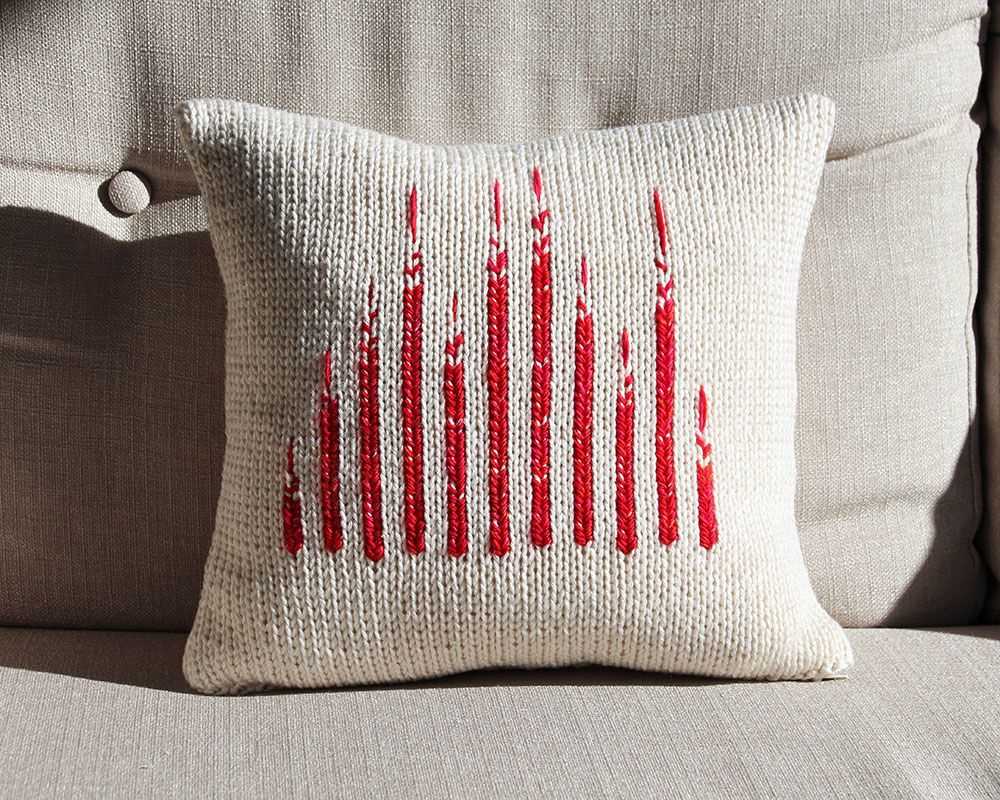
When it comes to creating a stunning throw pillow, colorwork can be an excellent technique to enhance the design and add visual interest. By incorporating multiple colors into your knitting pattern, you can create intricate patterns and motifs that will make your throw pillow truly unique.
One way to use colorwork in your throw pillow design is by incorporating stripes. Stripes can be simple yet effective, allowing you to play with different color combinations and create a visually appealing pattern. You can choose to alternate colors every few rows or incorporate thicker stripes for a bolder look.
Another popular colorwork technique is stranded knitting, also known as Fair Isle knitting. This technique involves working with two or more colors in the same row, creating a beautiful and intricate pattern. You can use stranded knitting to create geometric shapes, floral motifs, or even depict animals or scenes on your throw pillow.
For those looking for a more modern and abstract design, color blocking can be a great option. Color blocking involves using contrasting colors to create bold and graphic patterns. You can choose to create large color blocks or experiment with different shapes and sizes to add visual interest to your throw pillow.
- Experimenting with different colorwork techniques can add depth and dimension to your throw pillow, making it a statement piece in your home.
- When choosing colors for your colorwork design, consider the overall color scheme of the room where the throw pillow will be used. Harmonizing the colors with the existing decor can create a cohesive and polished look.
- Remember to choose yarns with different textures and weights to further enhance the visual impact of your colorwork design. Combining different textures, such as smooth and fluffy yarns, can create a tactile experience and make your throw pillow even more inviting.
Using colorwork in your throw pillow design allows you to unleash your creativity and make a truly one-of-a-kind piece. Whether you prefer traditional patterns or more contemporary designs, there are countless possibilities to explore when it comes to incorporating colorwork into your knitting projects.
Creating shape and structure with increasing and decreasing stitches
When knitting a throw pillow, creating shape and structure is an important aspect of the design. This can be achieved by using increasing and decreasing stitches strategically throughout the pattern.
Increasing stitches are used to add width or height to the knitting. Commonly used increasing stitches include knit front and back (kfb), make one left (M1L), make one right (M1R), and yarn over (YO). These stitches are inserted into specific stitches or between stitches to add new stitches to the knitting. By strategically placing these increases, you can create curves and angles in the fabric, giving the pillow a more defined shape.
Decreasing stitches are used to reduce the width or height of the knitting. Commonly used decreasing stitches include knit two together (k2tog), slip slip knit (ssk), and slip slip knit pass (sskp). These stitches are used to combine two or more stitches into one, thereby reducing the number of stitches on the needles. Decreases are typically used to shape the fabric, such as creating a tapered corner or narrowing the width of the pillow.
By carefully planning and executing these increasing and decreasing stitches, you can achieve the desired shape and structure for your knit throw pillow. Whether you want a round, square, or uniquely shaped pillow, these techniques allow you to create a custom design that fits your style and preferences.
Finishing touches: adding a border to your knit throw pillow
Once you have completed knitting the main body of your throw pillow, it’s time to add a border to give it a polished and finished look. Adding a border not only adds visual interest but also helps to frame the pillow and make it stand out.
Step 1: Choose your border design
There are many different border designs you can choose from to complement your knit throw pillow. Some popular options include a simple garter stitch, a ribbed border, or a lace pattern. Consider the overall style and texture of your pillow when choosing a border design.
Step 2: Measure and calculate the border size
Before starting the border, measure the dimensions of your pillow and calculate the size of the border you want to add. You can choose to make the border the same width on all sides or vary the width for a more dynamic look. Once you have determined the measurements, cast on the required number of stitches.
Step 3: Knit the border
Follow the pattern or stitch instructions for your chosen border design to knit the desired width. You may need to adjust your needle size or tension to achieve the desired result. Take your time and ensure that the border is knit evenly and without any dropped stitches.
Step 4: Finishing touches
After completing the border, bind off all stitches and weave in any loose ends. Give your pillow a gentle blocking to even out the stitches and ensure that the border lies flat. Depending on the design, you may also want to consider blocking the entire pillow to give it a professional finish.
Adding a border to your knit throw pillow is the perfect way to elevate its appearance and make it a standout piece in your home decor. With a little time and effort, you can create a beautiful and unique pillow that adds warmth and style to any space.
Blocking and Seaming Your Knit Throw Pillow
After completing the knitting part of your throw pillow, it’s essential to block it before proceeding with the seaming process. Blocking helps to shape and even out the stitches, giving your pillow a more polished and professional look.
To block your knit throw pillow, start by gently wetting it with water. Avoid using hot water or harsh chemicals, as these can damage the fibers. Once the pillow is damp, lay it on a clean, dry towel and shape it into the desired dimensions. Pin the edges of the pillow to the towel to hold it in place. Allow the pillow to dry completely before removing the pins.
Once your knit throw pillow is blocked and dry, it’s time to seam the edges together. This step will create a neat and seamless finish, ensuring that the filling stays securely inside the pillow.
Start by placing the right sides of the pillow together, making sure that the edges are aligned. Use a tapestry needle and matching yarn to stitch the sides of the pillow together, using either a whip stitch or mattress stitch. Be sure to secure the ends of the yarn properly to prevent any unraveling.
When the sides are fully seamed, turn the pillow right side out and gently stuff it with the desired filling. Make sure to evenly distribute the filling to achieve a well-rounded shape. Finally, seam the remaining edge closed using the same stitching technique.
To add an extra touch of embellishment, you can also consider adding decorative buttons or a contrasting color trim around the edges of your knit throw pillow. These little details can enhance the overall aesthetic and make your pillow truly unique.
Choosing the Right Insert for Your Knit Throw Pillow
When it comes to creating a knit throw pillow, choosing the right insert is just as important as the design and yarn you use. The insert you select will determine the overall look and feel of your pillow, as well as its comfort and durability. Here are some factors to consider when choosing the right insert for your knit throw pillow:
1. Size
The size of the insert should match the size of your pillow cover. If you have a 16×16 inch pillow cover, for example, then you will need a 16×16 inch insert. Using the correct size insert will ensure that your knit throw pillow looks full and plump, without any sagging or loose fabric.
2. Material
The material of the insert can greatly affect the comfort and durability of your knit throw pillow. Down-filled inserts are known for their softness and fluffiness, providing a luxurious feel. Polyester-filled inserts, on the other hand, are often less expensive and more hypoallergenic. Consider your personal preference and budget when selecting the material for your insert.
3. Firmness
The firmness of the insert will determine how supportive your knit throw pillow feels. If you prefer a softer pillow that you can sink into, choose an insert with a lower fill power or density. If you prefer a firmer pillow that provides more support, opt for an insert with a higher fill power or density.
4. Care Instructions
Check the care instructions for the insert before making your final decision. Some inserts can be machine washed and dried, while others may need to be dry cleaned or spot cleaned. Consider your lifestyle and how often you plan on washing your knit throw pillow when selecting an insert that is easy to care for.
By carefully considering these factors, you can choose the right insert for your knit throw pillow that will enhance its appearance, comfort, and longevity.
How to Take Care of Your Knit Throw Pillow
Proper care is essential to maintain the beauty and functionality of your knit throw pillow. Follow these guidelines to ensure its longevity:
- Regular cleaning: Vacuum or gently shake the pillow to remove any loose dirt or debris. Use a lint roller or fabric brush to remove surface dust and pet hair. Avoid using harsh chemicals or abrasive cleaning methods that may damage the knit fabric.
- Spot cleaning: If there are any spills or stains on your knit throw pillow, treat them promptly. Blot the affected area with a clean, damp cloth or sponge. Use a mild detergent or stain remover specifically designed for delicate fabrics. Test the cleaning solution on a small, inconspicuous area first to ensure it doesn’t cause any discoloration or damage.
- Hand washing: If your knit throw pillow is made from a washable material, it’s best to hand wash it. Fill a basin or sink with lukewarm water and a gentle detergent. Submerge the pillow and gently agitate the water to remove dirt and grime. Rinse the pillow thoroughly with clean water and squeeze out excess moisture without wringing or twisting. Lay it flat to dry on a clean, dry towel.
- Mild machine washing: Some knit throw pillows may be machine washable. Always check the care instructions before attempting to wash it in a machine. Use a delicate or hand wash cycle with cold water and a mild detergent. Place the pillow in a pillowcase or laundry bag to protect it during the wash. After washing, squeeze out excess water and reshape the pillow if necessary. Lay it flat to dry on a clean, dry towel or use a dryer on a low heat setting with caution.
- Storage: When not in use, store your knit throw pillow in a clean, dry place away from direct sunlight and moisture. Avoid placing heavy objects on top of it to prevent distortion or stretching. Consider using a breathable storage bag or pillowcase to protect it from dust and potential damage.
Conclusion:
Taking care of your knit throw pillow through regular cleaning and proper maintenance will help extend its lifespan and keep it looking beautiful. By following these guidelines, you can ensure that your knit throw pillow remains a cozy and stylish addition to your home for years to come.
Q&A:
What is a knit throw pillow pattern?
A knit throw pillow pattern is a set of instructions and directions that guide you through the process of knitting a throw pillow cover. It includes information on the type and size of yarn to use, the stitches and techniques required, and the step-by-step instructions to complete the project.
Where can I find a knit throw pillow pattern?
You can find knit throw pillow patterns in various places. Some popular sources include knitting magazines, knitting books, online knitting pattern websites, and social media platforms where knitters share their patterns and projects.
Is knitting a throw pillow cover difficult?
The difficulty level of knitting a throw pillow cover can vary depending on the pattern and your knitting skills. If you are an experienced knitter, you may find it relatively easy. However, if you are a beginner, it may be a bit more challenging. Starting with a simpler pattern and practicing the required stitches beforehand can help make the process easier.
Do I need any special knitting skills to make a throw pillow cover?
Basic knitting skills such as casting on, knitting, purling, and binding off are usually sufficient to make a throw pillow cover. However, some patterns may require additional techniques such as cable knitting or colorwork. Reading and understanding the pattern instructions beforehand will help you determine if any special skills are needed.