
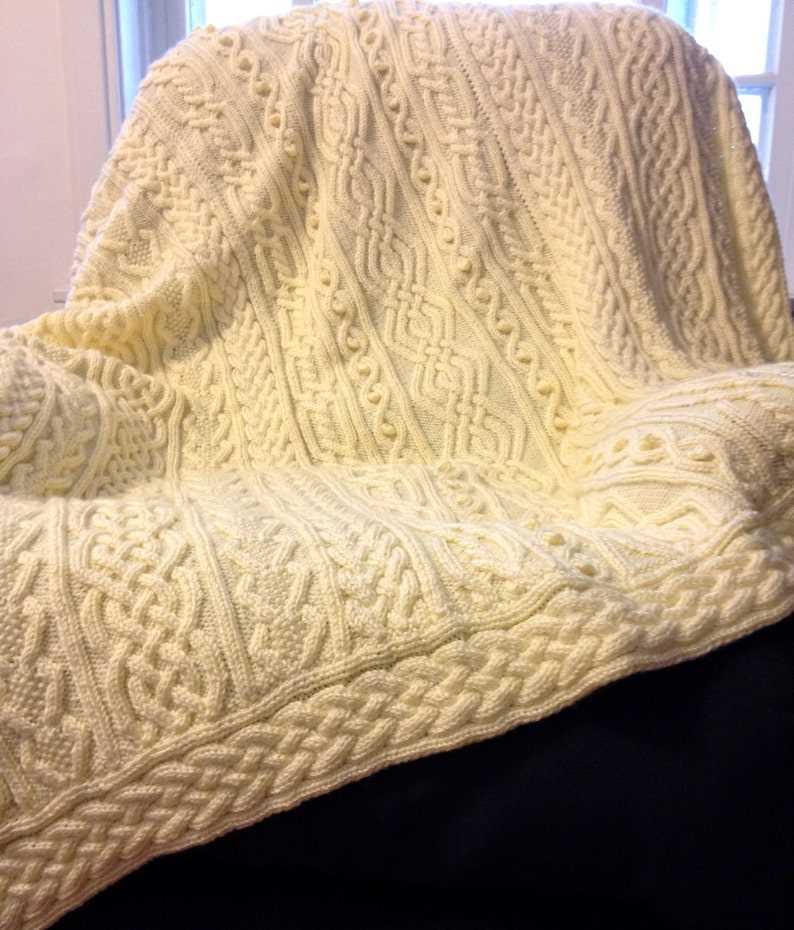
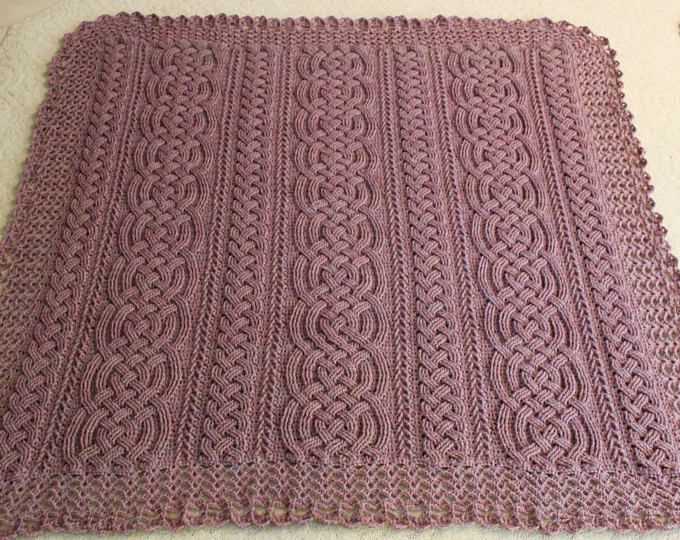
If you are looking for a knitting project that is as cozy as it is beautiful, look no further than the Aran blanket. Aran knitting is a traditional style of knitting that originated in the Aran Islands of Ireland. It is characterized by its intricate cable patterns and textured stitches, making it a perfect choice for creating a warm and luxurious blanket.
The Aran blanket knitting pattern offers a delightful challenge to knitters of all skill levels. Whether you are a beginner looking to expand your knitting repertoire or an advanced knitter looking for a new project, the Aran blanket will keep you engaged and inspired.
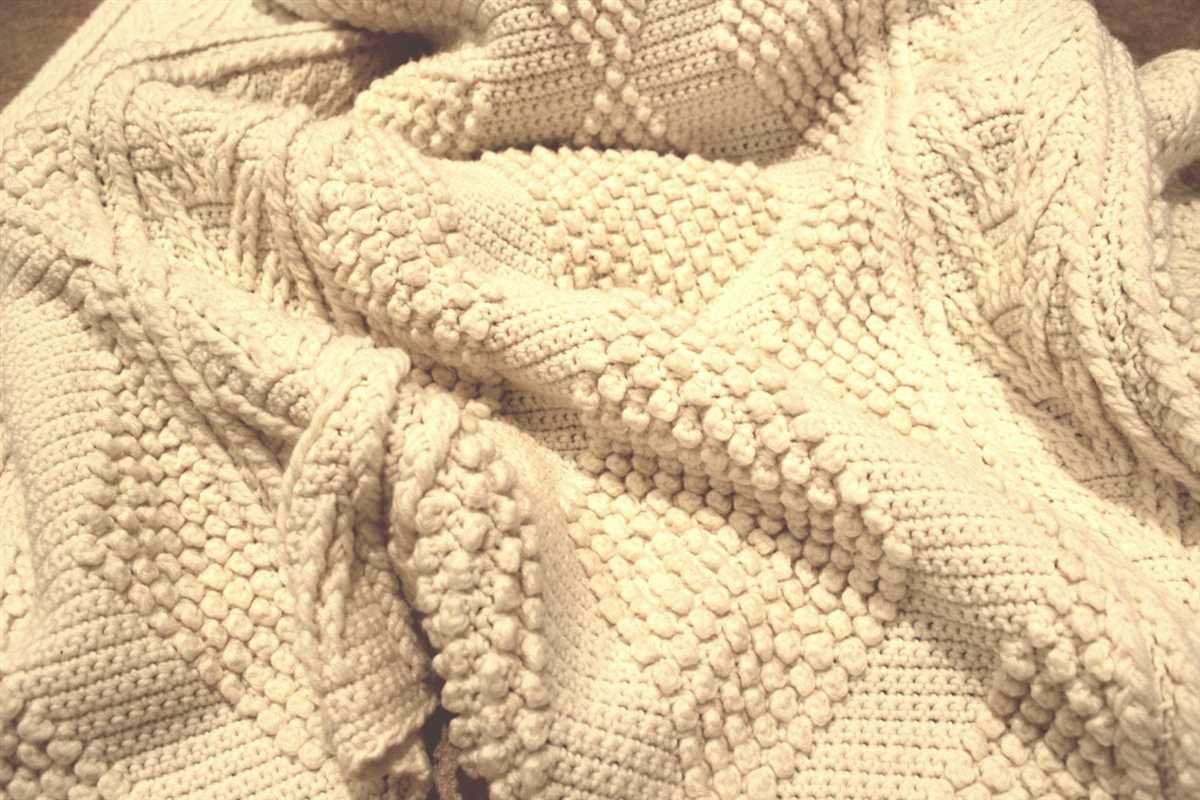
One of the unique features of the Aran blanket is the rich symbolism behind its patterns. Each cable and stitch has a meaning that reflects the history and culture of the Aran Islands. For example, a honeycomb stitch represents hard work and the rewards it brings, while a cable stitch symbolizes the ropes of fishermen and their hope for a good catch. These meaningful patterns not only add beauty to the blanket but also make it a special heirloom piece.
Choosing the right yarn
When knitting an Aran blanket, it is important to choose the right yarn that will not only provide warmth and comfort, but also showcase the beautiful texture and intricate patterns of this traditional style knitting. One of the key factors to consider when selecting yarn for an Aran blanket is the fiber content.
Wool: Wool is a popular choice for Aran blankets due to its natural warmth and ability to hold its shape. It has excellent insulating properties, making it perfect for keeping cozy on chilly nights. Additionally, wool yarns are durable and can withstand regular use, making them ideal for blankets.
Cotton: For those who prefer a lighter option, cotton yarn can be a great choice for an Aran blanket. Cotton is breathable and hypoallergenic, making it suitable for those with sensitive skin or allergies. It also has a soft and smooth texture, which adds a luxurious feel to the blanket.
Acrylic: Acrylic yarn is an affordable and easy-care option for an Aran blanket. It is lightweight and soft, making it perfect for blankets that will be used frequently. Acrylic yarns are also available in a wide range of colors, allowing you to create vibrant and eye-catching designs.
Another important consideration when choosing yarn for an Aran blanket is the weight or thickness of the yarn. Aran weight yarn, which is medium to heavy weight, is typically used for these blankets to achieve the desired thickness and drape. However, you can also experiment with different weights, such as worsted or bulky, to achieve different results.
In conclusion, when selecting yarn for an Aran blanket, it is important to consider factors such as fiber content, weight, and drape. Whether you prefer the warmth of wool, the breathability of cotton, or the affordability of acrylic, there is a yarn available that will suit your needs and allow you to create a stunning and cozy Aran blanket.
Selecting the appropriate needles
When it comes to knitting an Aran blanket, selecting the appropriate needles is essential for creating the desired outcome. The size and material of the needles can greatly affect the tension, stitch definition, and overall look of the finished blanket. Therefore, it is important to consider a few factors when choosing the needles for your project.
- Needle size: The needle size will determine the gauge and the size of the stitches. For an Aran blanket, it is typically recommended to use larger needles to create a looser fabric and a more drapey finished piece.
- Material: The material of the needles can influence the ease of knitting and the overall feel of the blanket. Metal needles, such as aluminum or stainless steel, are known for their smoothness and durability. Wooden or bamboo needles, on the other hand, provide a warmer and softer touch.
- Cable length: The cable length of the needles is important for accommodating the width of the blanket. Longer cables are ideal for larger blanket projects, as they can hold more stitches and provide greater flexibility when working with a large number of stitches.
It is recommended to swatch with different needle sizes and materials before starting your Aran blanket to determine the fabric’s texture and drape. Additionally, always refer to the pattern instructions for any specific needle size or material recommendations. Choosing the appropriate needles will not only enhance your knitting experience but also ensure the final result is exactly what you envisioned.
Understanding the Aran stitch pattern
The Aran stitch pattern is a traditional Irish knitting technique that has been passed down through generations. It is known for its intricate designs and textured appearance, making it a popular choice for knitting blankets, sweaters, and accessories.
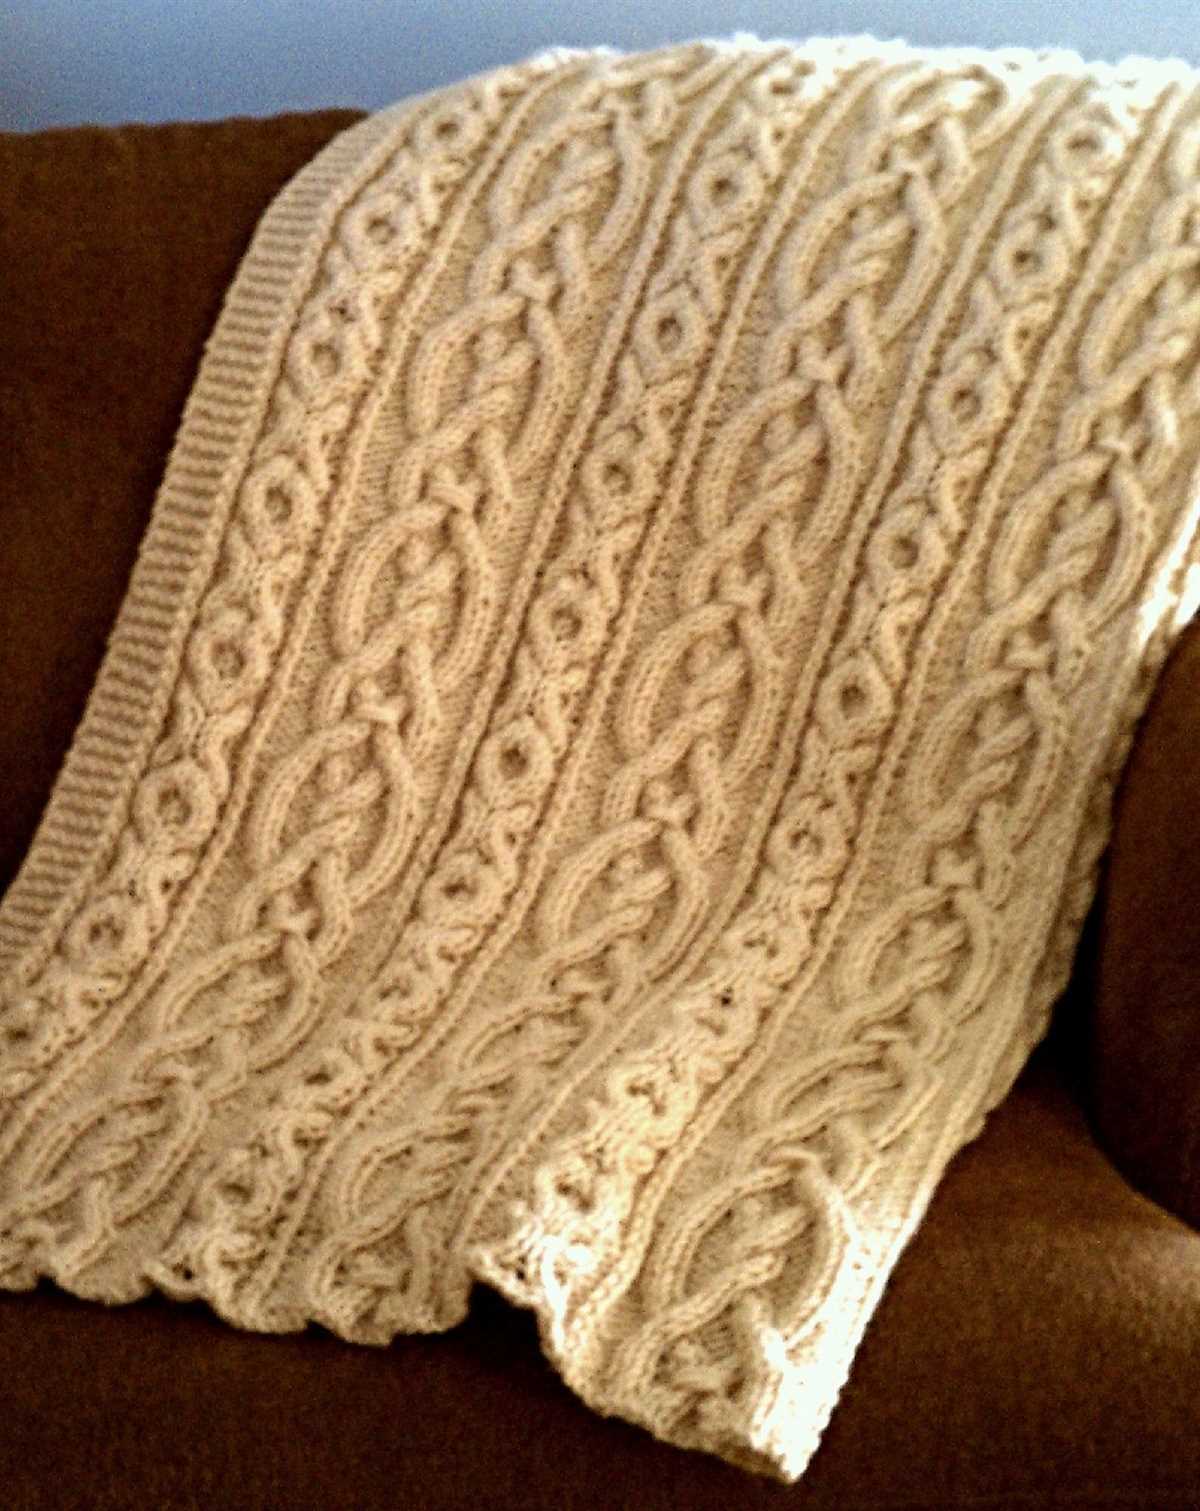
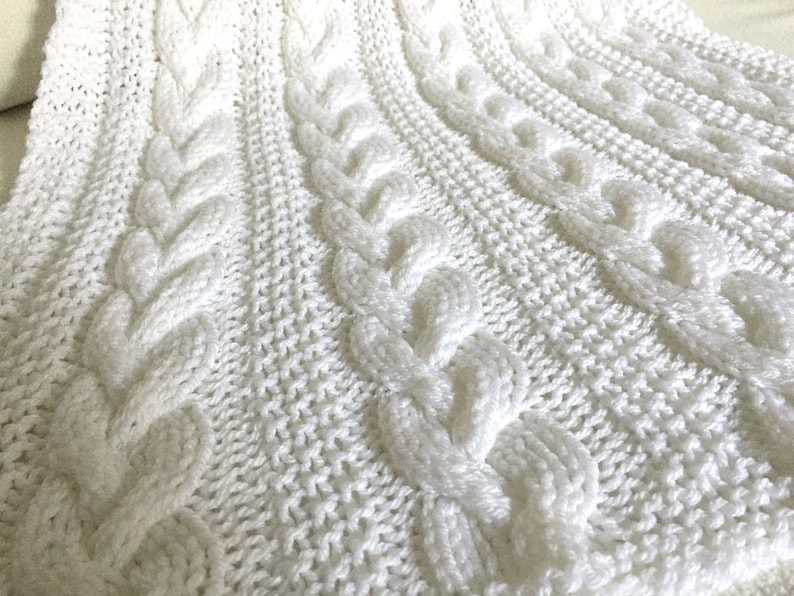
At its core, the Aran stitch pattern is made up of a combination of different stitches, including cables, bobbles, and twists. These stitches are often worked in a specific order and repeat, creating a unique and visually appealing design.
Cables: Cables are one of the most distinctive features of the Aran stitch pattern. They are created by crossing stitches over each other, either to the left or to the right. This creates a twisted effect that adds depth and dimension to the knitted fabric.
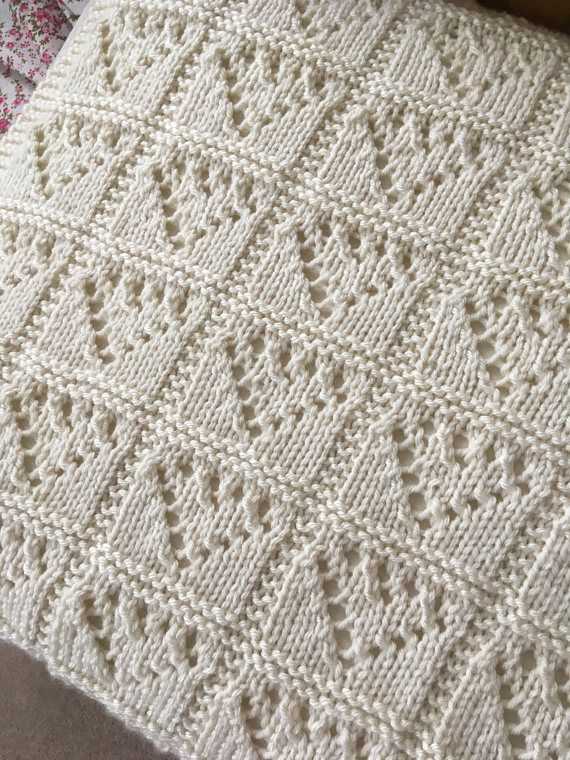
Bobbles: Bobbles are another common element in Aran knitting. They are small, raised bumps that are created by knitting multiple stitches into the same stitch and then knitting them together on the next row. Bobbles add texture and interest to the design.
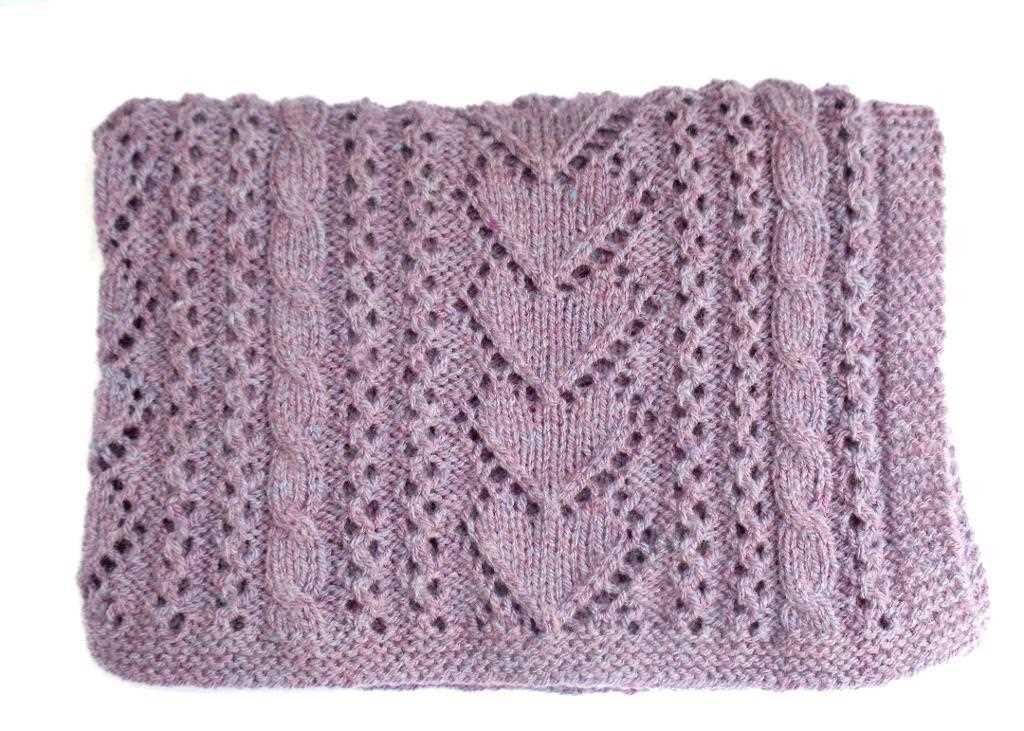
Twists: Twists are used to create diagonal lines in the Aran stitch pattern. They involve crossing stitches over each other in a specific way to create a slanted effect. Twists can be done to the left or to the right, and they add a dynamic element to the overall design.
In addition to these specific stitches, the Aran stitch pattern may also include elements such as seed stitch, moss stitch, or ribbing. These stitches can be used to create borders, panels, or other decorative elements within the overall design.
Overall, the Aran stitch pattern is a complex and beautiful technique that requires skill and patience to master. It is a true reflection of the rich knitting traditions of Ireland and continues to be admired and cherished by knitters around the world. Whether you’re knitting an Aran blanket or a cozy sweater, the Aran stitch pattern is sure to create a timeless and stunning finished piece.
Casting on your stitches
When starting the Aran blanket knitting pattern, the first step is to cast on your stitches. The number of stitches you cast on will depend on the size of your desired blanket. It’s important to refer to the pattern instructions for the recommended stitch count.
To cast on, you can use any preferred method such as the long-tail cast on or the knitted cast on. The long-tail cast on is a commonly used method that creates a neat and stretchy edge. It involves estimating the length of yarn needed for the cast on, and then using the tail end of the yarn to create the stitches.
When casting on your stitches, make sure to maintain an even tension to ensure consistent stitch size throughout your blanket. It may be helpful to use stitch markers or a row counter to keep track of your progress and ensure you cast on the correct number of stitches.
Pro tip: If you’re new to knitting or find it challenging to cast on a large number of stitches, you can divide the cast on into smaller sections and then join them together using the mattress stitch or another suitable seaming method.
Knitting the body of the blanket
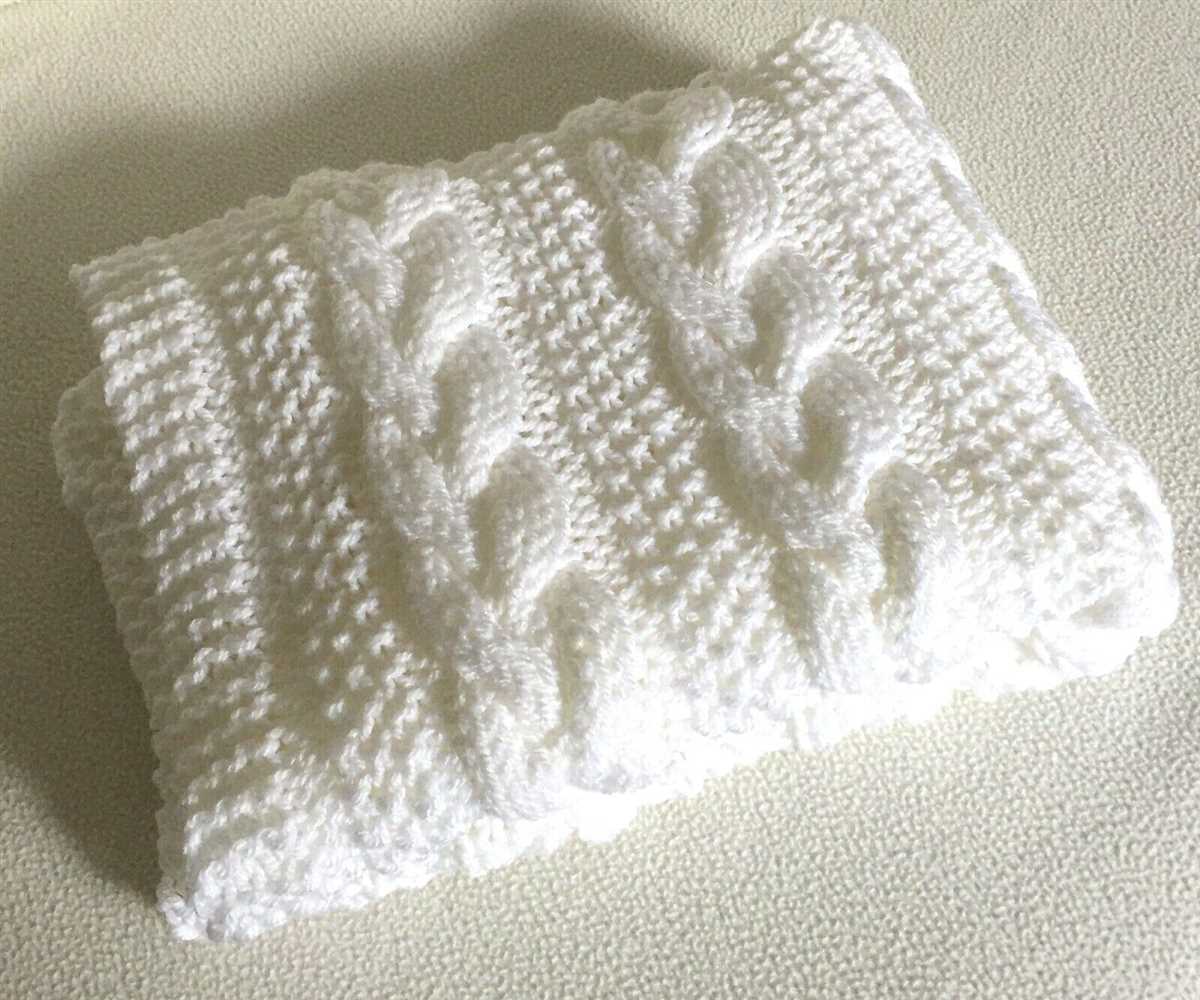
Once you have completed the border of the Aran blanket, it’s time to start knitting the body of the blanket. This is where you will create the main pattern and texture of the blanket. The body of the blanket is typically worked in a combination of knit and purl stitches to create a beautiful textured design.
To begin, you will need to cast on the required number of stitches for the blanket. This number will depend on the size of the blanket you are making and the desired width. You can refer to the knitting pattern for the specific instructions. Once you have cast on, you will start working in the main pattern stitch.
The main pattern stitch for the Aran blanket is usually a combination of cables, twists, and textured stitches. The pattern will typically specify the order and placement of these stitches. You will need to follow the instructions carefully to create the desired pattern.
- Start by knitting the first few rows in the main pattern stitch. This will establish the foundation of the pattern.
- As you progress, you will continue to work the main pattern stitch, following the instructions for each row.
- Pay close attention to any special stitches or techniques specified in the pattern, such as increases or decreases, to ensure that your blanket turns out as intended.
- Continue knitting in the main pattern stitch until you have reached the desired length for your blanket. You can refer to the pattern for guidance on when to stop.
Once you have completed the body of the blanket, you can move on to the finishing steps, such as binding off and blocking. These steps will help to give your blanket a polished and professional look. Follow the instructions in the knitting pattern to complete these final steps.
Adding cables to the design
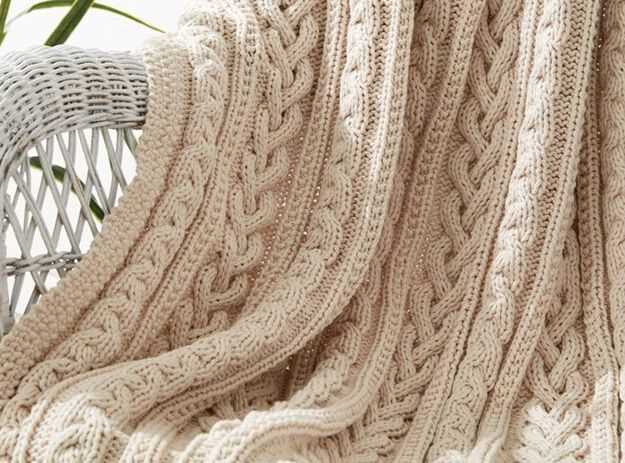
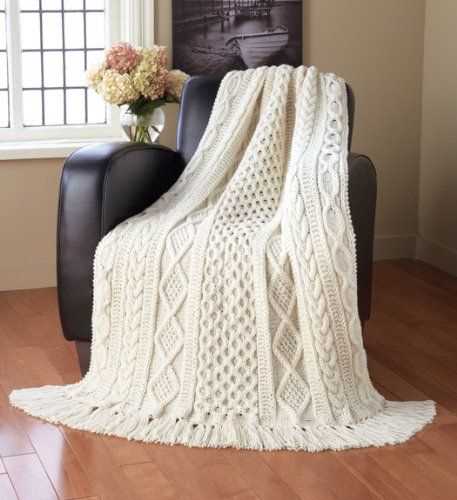
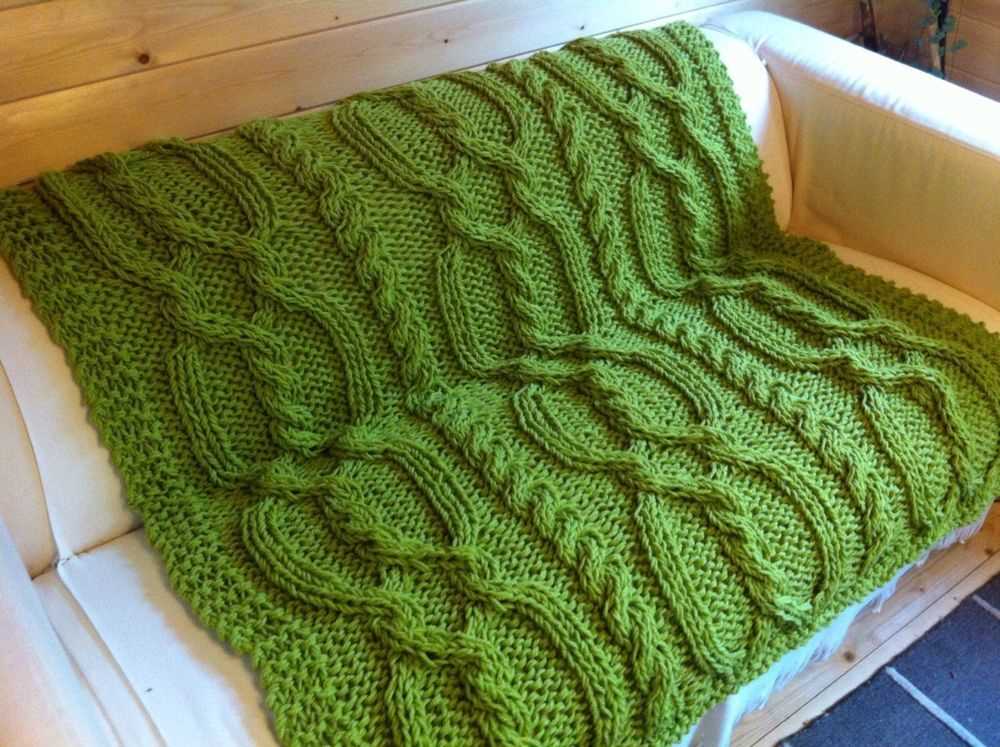
The Aran blanket knitting pattern can be enhanced by incorporating cables into the design. Cables are twisted stitches that create a raised texture, adding depth and visual interest to the blanket. By strategically placing cables throughout the pattern, you can create intricate and unique designs that showcase your knitting skills.
Types of cables: There are various types of cables that you can include in your Aran blanket knitting pattern. Some common cable patterns include simple cable twists, rope cables, and braided cables. Each cable pattern creates a different effect and can be used to highlight different sections of the blanket.
Integrating cables: To add cables to your Aran blanket knitting pattern, you will need to follow a cable chart or instructions. Cables are typically worked over a set number of stitches, with the surrounding stitches worked in a different stitch pattern, such as stockinette or seed stitch. By alternating cable panels with other stitch patterns, you can create a balanced and visually appealing design.
Showcasing cables: When knitting with cables, it’s important to ensure that the cables are clearly visible in the finished blanket. This can be achieved by using a lighter yarn color or by selecting a cable pattern that has a high contrast with the surrounding stitches. Adding a border or edging to the blanket can also help frame the cables and make them stand out.
Tips for knitting cables: Knitting cables can be challenging for beginners, but with practice, it becomes easier. Here are a few tips to help you get started:
- Use a cable needle or stitch holder to hold stitches while you work the cable.
- Read and follow the cable chart or instructions carefully, as each cable pattern has its own unique twists and turns.
- Keep track of your row count and stitch count to ensure that your cables line up correctly.
- Take your time and work at a comfortable pace to avoid mistakes.
By incorporating cables into your Aran blanket knitting pattern, you can create a stunning and cozy blanket that showcases your knitting skills. Whether you choose a simple cable twist or a more intricate braided cable, the addition of cables will add a touch of elegance and sophistication to your finished piece.
Creating the border
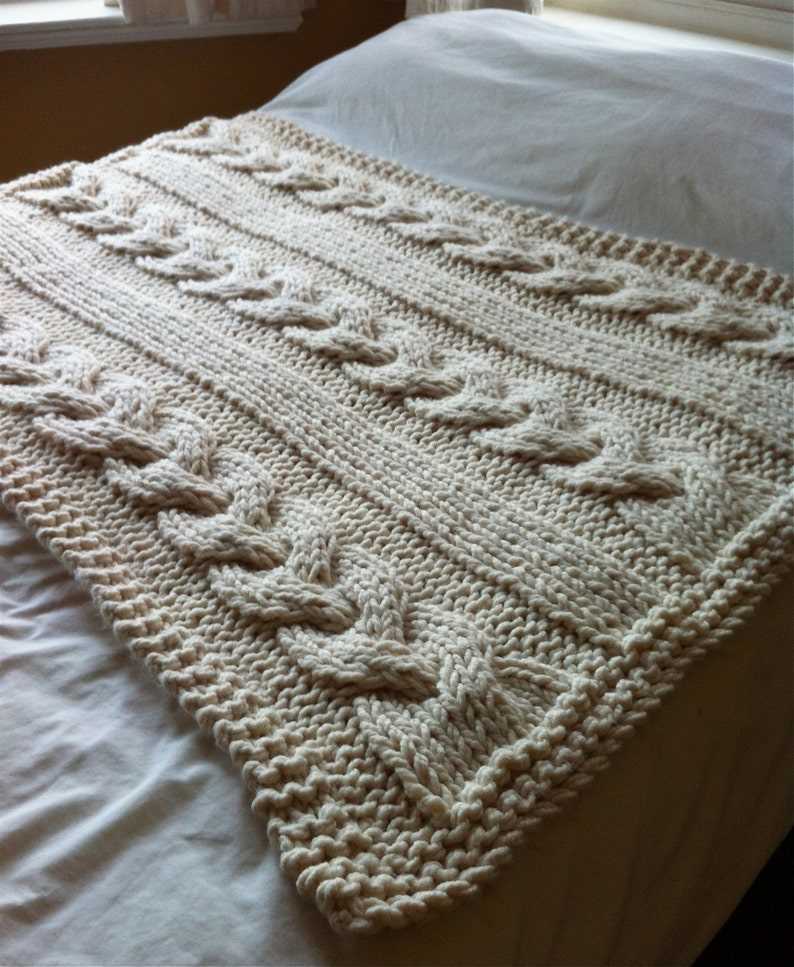
Adding a border to your Aran blanket is a great way to give it a finished look and add some extra detail to your knitting. There are many different border options you can choose from, so you can customize your blanket to fit your style and preferences.
One popular border pattern for an Aran blanket is the cable border. To create this border, you will knit a series of cables along the edges of your blanket. The cables can be simple or more complex, depending on your skill level and desired look. You can also add additional stitches between the cables to create a wider border.
- Start by casting on the desired number of stitches for your border.
- Knit the first row of your border in your chosen cable pattern.
- Continue knitting rows in the cable pattern until your border is the desired width.
- Once your border is the desired width, bind off the stitches.
Another option for a border is a ribbed border. This is a simple but classic option that adds a nice texture to your blanket. To create a ribbed border, you will alternate between knitting and purling stitches along the edges of your blanket.
- Start by casting on the desired number of stitches for your border.
- Knit the first row of your border in a knit one, purl one ribbing pattern.
- Continue knitting rows in the ribbing pattern until your border is the desired width.
- Once your border is the desired width, bind off the stitches.
These are just two examples of border patterns you can use for your Aran blanket. Feel free to experiment with different patterns and stitches to create a border that is unique to your blanket. Remember to consider the overall style and look of your blanket when choosing a border pattern, and don’t be afraid to try something new!
Changing colors
When it comes to knitting an Aran blanket, one of the most exciting aspects is the opportunity to play with different colors. The pattern often incorporates multiple shades to create rich, vibrant designs. Choosing the right colors can make a significant difference in the final result.
Color palette: Before starting your Aran blanket, it’s essential to decide on a color palette. You can opt for a monochromatic look, using various shades of the same color, which creates a subtle and elegant effect. Alternatively, you can go for a bold and contrasting palette by combining different colors that complement each other. Experiment with different combinations to find the perfect blend.
Transitioning colors: Changing colors in your Aran blanket pattern can be done in various ways. You can create smooth transitions by fading one color into another, using subtle gradient techniques. Alternatively, you can opt for block color changes, where each section of the blanket features a distinct shade. This choice can create a striking visual impact and highlight different stitch patterns.
Choosing complementary colors: When working with different colors, it’s crucial to consider their compatibility. Choosing complementary colors that are opposite each other on the color wheel can create a visually pleasing contrast. For example, combining shades of blue with orange or yellow with purple can produce a striking effect. Don’t be afraid to experiment and mix different hues to achieve the desired look.
Creating patterns: Changing colors in your Aran blanket pattern opens up numerous possibilities for creating unique designs. You can incorporate intricate stitch patterns or experiment with colorwork techniques, such as fair isle or intarsia. These techniques allow you to incorporate different colors within a single row or section, adding depth and dimension to your blanket.
Final considerations: When working with multiple colors, it’s crucial to ensure that your tension remains consistent throughout the project. Uneven tension can disrupt the overall appearance of the blanket and lead to inconsistencies in stitch size. Take your time to practice and familiarize yourself with knitting techniques specific to color changes to achieve a professional and polished result.
Blocking Your Finished Blanket
Blocking is an essential step in the process of finishing your Aran blanket. It involves wetting the blanket, reshaping it, and allowing it to dry flat to achieve the desired size and appearance. It can make a significant difference in the overall look and feel of your finished project.
To start the blocking process, you will need a clean surface that is large enough to lay out your blanket. You can use a blocking board, a clean bed, or even a carpeted floor covered with an old sheet. Make sure the surface is free of dirt or debris that could transfer onto your blanket.
Materials:
- Aran blanket
- Clean water
- Large basin or bathtub
- Towels
- Pins or blocking wires
- Tape measure
Step 1: Fill a basin or bathtub with lukewarm water. Submerge your blanket in the water, making sure it is fully saturated. Gently squeeze out the excess water, but do not wring or twist it.
Step 2: Lay a clean towel on your blocking surface and place the wet blanket on top. Smooth out any wrinkles or unevenness, gently stretching it to the desired dimensions. Use a tape measure to ensure the blanket is evenly sized.
Step 3: Secure the blanket in place by pinning it to the blocking surface. You can use stainless steel pins or blocking wires to hold the edges in place. Make sure the blanket is taut but not overly stretched.
Step 4: Allow the blanket to dry completely. Depending on the climate and humidity level, this can take anywhere from a few hours to a couple of days. Avoid moving or disturbing the blanket while it’s drying to maintain its shape.
Step 5: Once the blanket is completely dry, remove the pins or blocking wires. Your Aran blanket is now beautifully blocked and ready to be enjoyed or gifted!
Adding Finishing Touches
After completing the main body of your Aran blanket, there are a few final touches you can add to make it truly special.
1. Blocking
Block your blanket to give it a neat and even finish. To do this, gently soak the blanket in lukewarm water and a mild detergent. Gently squeeze out the excess water, being careful not to wring or twist the fabric. Lay the blanket flat on a clean towel, shaping it to the desired size and form. Pin the edges to hold them in place and let the blanket dry completely.
2. Border
Add a border to your blanket to give it a polished look. You can choose a simple garter stitch border or a more intricate pattern, such as a lace or cable border. Knit the border separately and sew it onto the edges of the blanket using a whip stitch or mattress stitch.
3. Tassels or Fringe
Consider adding tassels or fringe to the corners of your blanket for an extra touch of elegance. You can make tassels by cutting multiple strands of yarn and attaching them to the corners using a crochet hook or needle. For fringe, cut long strands of yarn and attach them to the edges using a crochet hook or by weaving them through the stitches.
By following these steps, you can add those finishing touches to your Aran blanket and turn it into a cherished heirloom or a beautiful gift.
Happy knitting!