
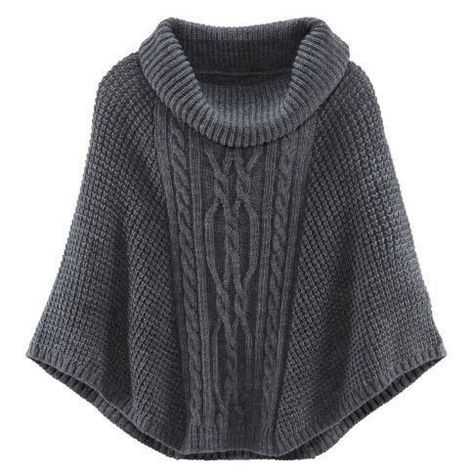
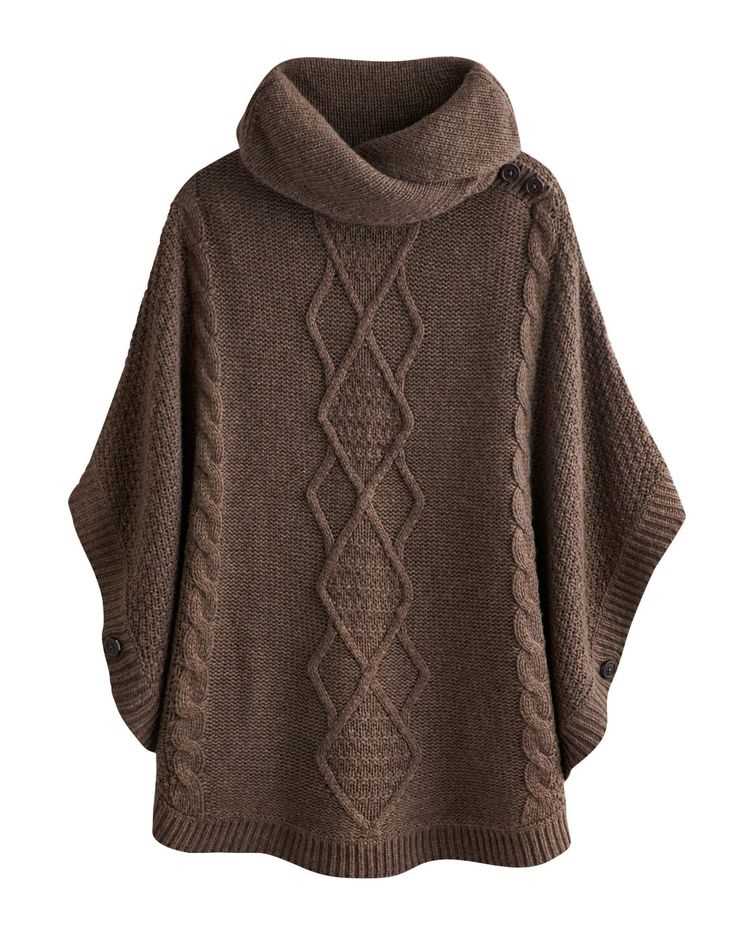
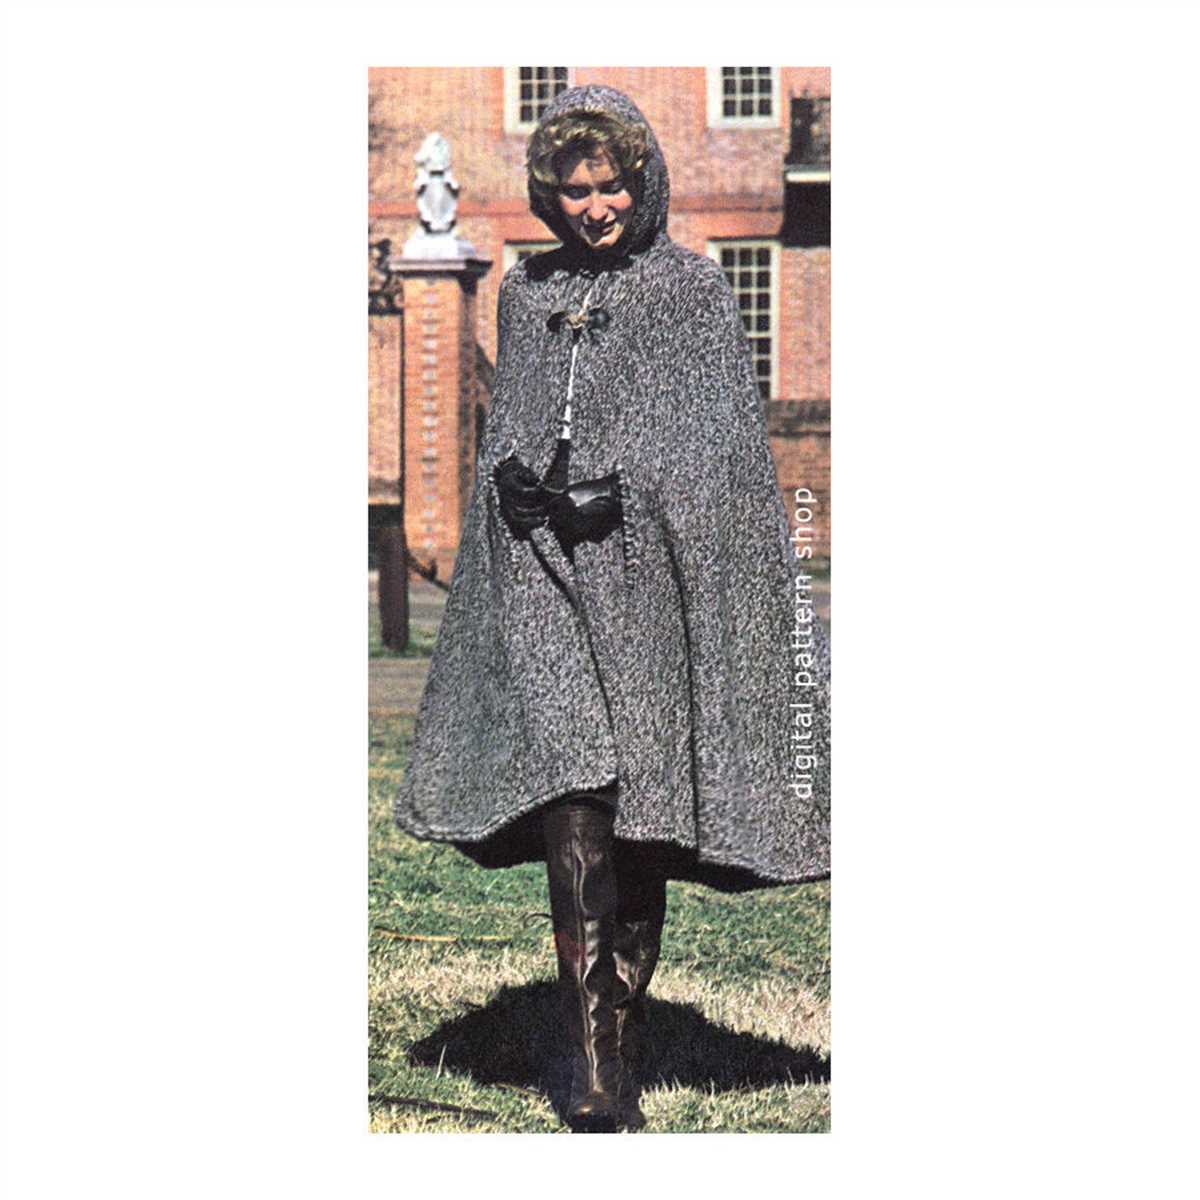
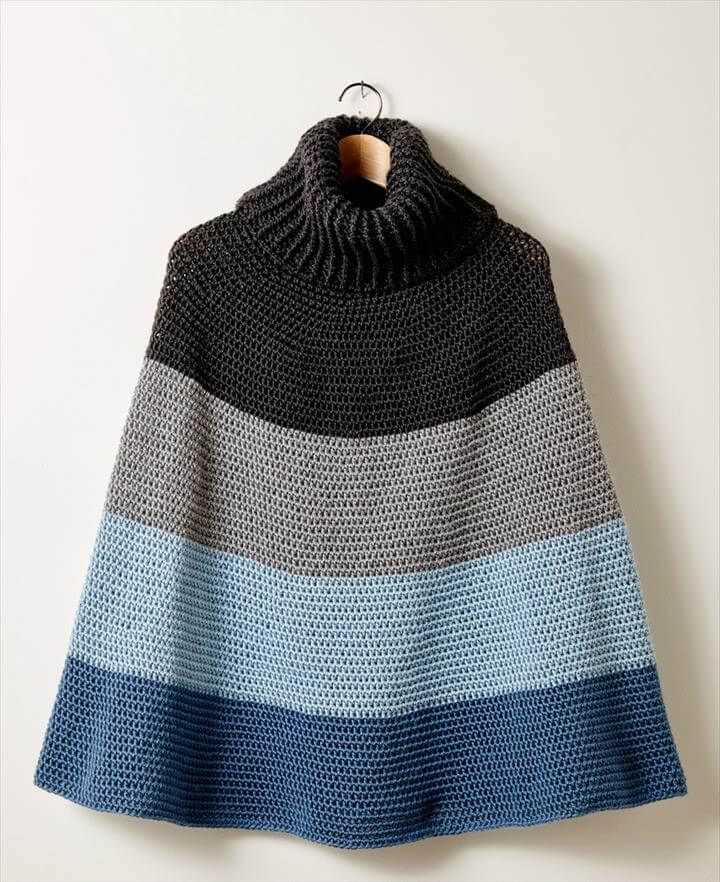
Knitting is a relaxing and rewarding hobby that allows you to create beautiful and functional items. If you’re looking for a new project to work on, why not try knitting a cape? Capes are a versatile accessory that can be worn in any season and can add a touch of elegance to any outfit. Plus, they’re incredibly easy to knit, making them a perfect project for beginners.
This easy knit cape pattern is a great way to get started on your knitting journey. It requires basic knitting skills such as casting on, knitting, purling, and binding off. The pattern features a simple stitch pattern that creates a delicate texture, and it can be customized to fit your own personal style.
To get started on your own easy knit cape, all you’ll need is some yarn and a pair of knitting needles. Worsted weight yarn is recommended for this pattern, but you can use any type of yarn you prefer. The needles should be a size that corresponds with the recommended gauge for the yarn you choose.
How to Knit an Easy Cape: A Step-by-Step Guide
Are you looking to add a stylish and cozy cape to your wardrobe? Knitting your own cape can be a rewarding project that allows you to customize the design and fit to your liking. In this step-by-step guide, we will walk you through the process of knitting an easy cape.
Materials You Will Need
Before you get started, gather the following materials:
- Yarn of your choice: Choose a bulky or super bulky weight yarn for a warm and chunky cape.
- Knitting needles: Use a size that suits your yarn choice, usually around US 10-15.
- Scissors: You’ll need these to cut the yarn at the end of your project.
- Tapestry needle: This will be useful for weaving in loose ends.
Step 1: Cast On and Begin the Cape
- Start by casting on the desired number of stitches. The number will depend on the size of the cape you want and the yarn you are using.
- Knit the first row using your chosen stitch pattern. This creates the foundation of the cape.
- Continue knitting rows until you reach the desired length for your cape.
Step 2: Shape the Cape
- To shape the cape, you will need to decrease stitches gradually. This can be done by knitting two stitches together at the beginning or end of each row, or by following a specific decrease pattern.
- Continue shaping the cape until you reach the desired width at the top.
Step 3: Finish the Cape
- Once you’ve reached the desired width, it’s time to finish off your cape. Knit a few more rows in your chosen stitch pattern to create a neat edge.
- Bind off the stitches to secure them in place.
- Weave in any loose ends using a tapestry needle.
With the final touches completed, your easy knit cape is ready to be worn and enjoyed. Whether you choose to keep the design simple or add extra embellishments, this versatile accessory is sure to keep you warm and stylish during the colder months.
Choosing the Right Yarn and Needles
When it comes to knitting, choosing the right yarn and needles is crucial for the success of your project. The type of yarn and needles you choose will affect the final outcome of your knitted cape. In this article, we will discuss some factors to consider when selecting yarn and needles for your easy knit cape pattern.
Yarn:
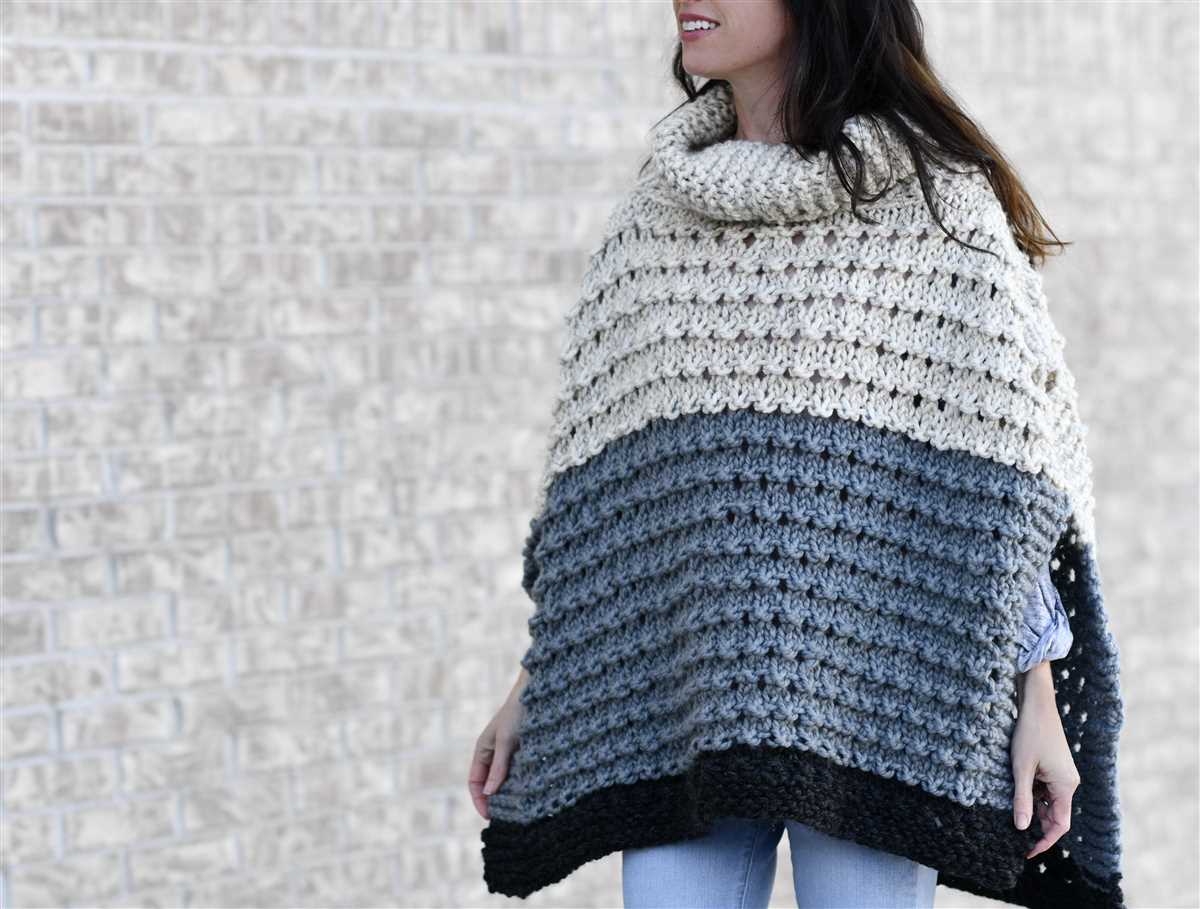
- Weight: The weight of the yarn will determine the thickness and drape of your cape. For an easy knit cape, you may want to choose a medium or bulky weight yarn that will provide warmth and coziness.
- Fiber: The fiber content of the yarn can also impact the feel and look of your cape. Wool yarns are known for their warmth and durability, while acrylic yarns are affordable and easy to care for. Consider your desired level of warmth, texture, and care requirements when selecting the fiber content.
- Color: The color of the yarn is also an important consideration. Think about the overall style and look you want to achieve with your cape. Neutral tones can provide a timeless and versatile option, while bold and vibrant colors can make a statement.
Needles:
- Size: The size of your needles will determine the gauge of your project. For an easy knit cape, you may want to choose larger-sized needles to create a looser and more drapey fabric. However, make sure to check the recommended needle size indicated in your pattern.
- Material: Needles can be made of different materials, such as metal, wood, or plastic. Each material has its own characteristics in terms of weight, grip, and flexibility. Choose needles that feel comfortable in your hands and facilitate even and smooth knitting.
- Type: There are various types of knitting needles, including straight needles, circular needles, and double-pointed needles. The type of needles you choose will depend on your personal preference and the techniques required for your cape pattern.
By carefully considering these factors and selecting the right yarn and needles, you can ensure that your easy knit cape turns out just the way you envision it. Experiment with different yarns and needles to find the perfect combination for your project.
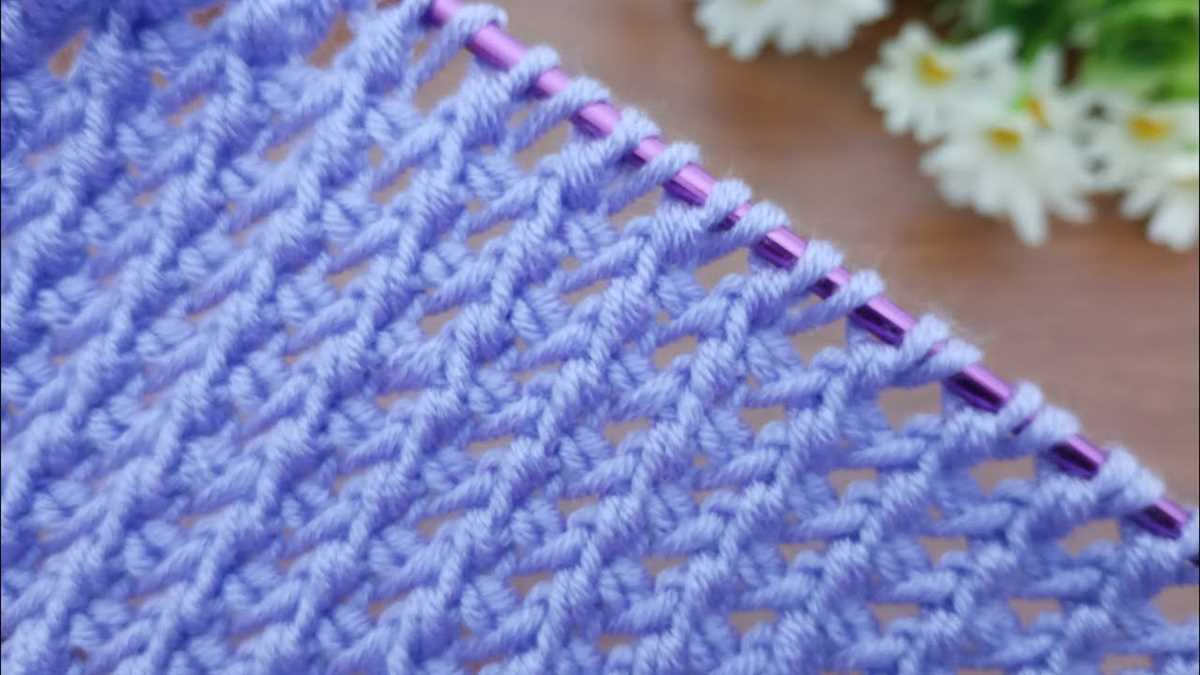
Casting on Stitches
Casting on stitches is the first step in starting any knitting project. It is the process of creating loops on the knitting needle which will later be used to create the fabric. There are several methods of casting on stitches, including the long-tail cast on, the knit cast on, and the cable cast on.
The long-tail cast on is one of the most common methods and is often the preferred method for beginners. To perform this cast on, you will need to estimate the amount of yarn you will need for the number of stitches you are casting on, and leave a long tail of yarn. Then, make a slipknot and place it on the needle. Hold the needle in your right hand, with the slipknot on the leftmost end, and the long tail of yarn coming from the ball of yarn on your left. Insert the needle into the slipknot from left to right, and place the slipknot onto the needle.
Next, with your left hand, bring the yarn under and over the needle, creating a loop. Then, with your right hand, bring the needle over and through the loop, pulling the loop snugly onto the needle. Repeat this process for the desired number of stitches, making sure to keep the stitches evenly spaced along the needle. Once all the stitches have been cast on, you are ready to begin knitting!
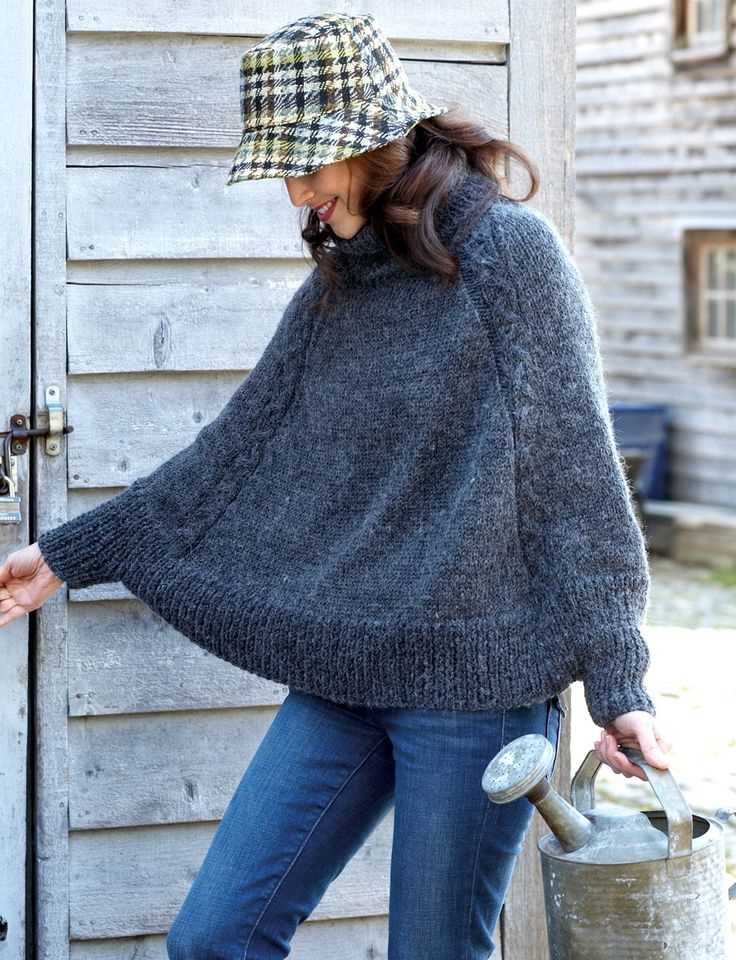
Knitting the Body of the Cape
Once you have completed the ribbing section of the cape, you can move on to knitting the body. This is where the cape really starts to take shape and you can see your progress.
To begin, you will continue knitting in stockinette stitch, alternating between knit and purl rows. This will create a smooth, flat fabric with a nice drape. Remember to keep track of your rows using a stitch marker or a row counter, as this will help you stay on track and ensure that your cape is the correct length.
As you continue knitting, you will gradually increase the number of stitches in each row to create a widening shape. This will allow the cape to comfortably fit over your shoulders and provide a loose, flowing silhouette. You can choose to increase evenly on each row or use a specific pattern to create a decorative effect.
Once you have reached the desired length for your cape, you will move on to the next section, which will involve shaping the neckline and armholes. This will give the cape a more tailored look and make it easier to wear. Follow the pattern instructions carefully for shaping these areas, as they may involve decreasing or binding off stitches.
Continue knitting the body of the cape until you have completed all shaping sections and reached the desired overall length. At this point, you can bind off your stitches and weave in any loose ends. Congratulations, you have now completed the main body of your cape! Now all that’s left is to add any finishing touches, such as buttons or decorative edging, to make it truly unique.
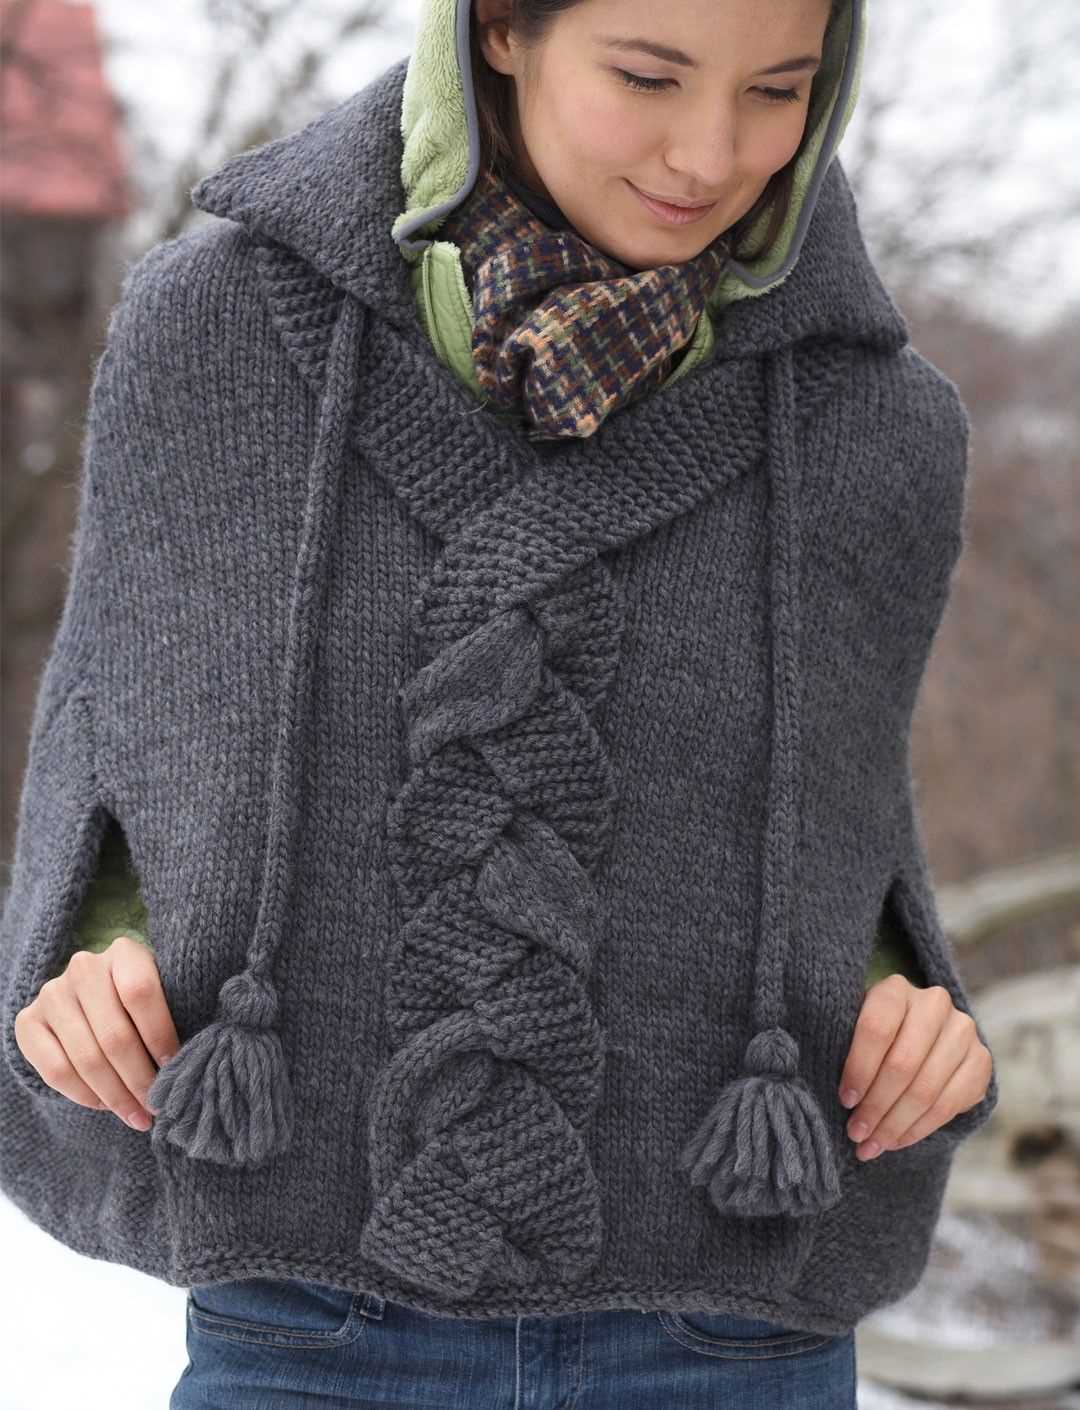
Creating the Neckline
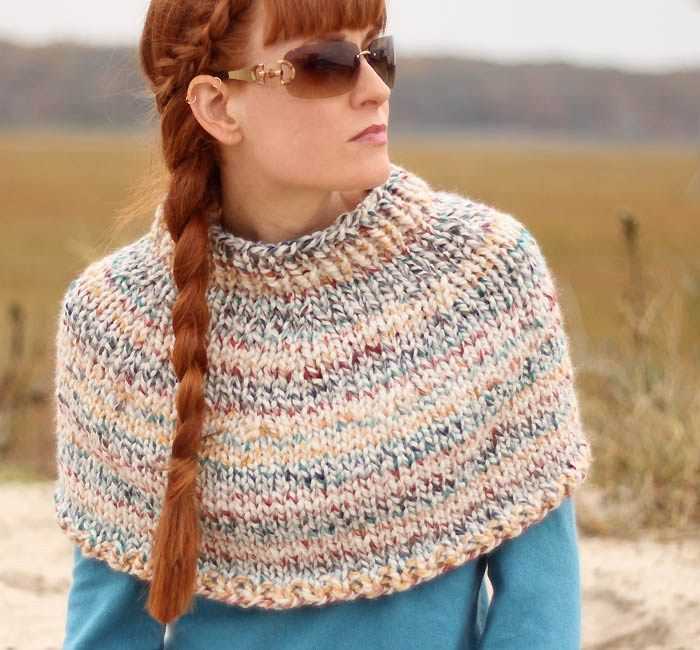
When it comes to creating the neckline for a knitted cape, there are several options to consider. One popular choice is to use a ribbing technique, such as 1×1 or 2×2 ribbing, to create a stretchy and comfortable neckline. This type of ribbing is created by alternating knit and purl stitches, which creates a textured and flexible edge. Ribbing is a great option for a neckline because it helps the cape to lay flat and provides a nice finished look.
Another option for creating the neckline is to use a garter stitch border. Garter stitch is created by knitting every row, which results in a ridged texture. This type of neckline can be created by knitting a few rows in garter stitch at the beginning and end of the cape, or by picking up stitches along the edge and knitting in garter stitch.
For a more decorative neckline, you can also consider using a lace pattern. Lace patterns can be created by using yarn overs and decreases to create an open and intricate design. This type of neckline can add a feminine and delicate touch to your knitted cape.
Regardless of the type of neckline you choose, it’s important to carefully follow the pattern instructions and pay attention to the stitch counts and measurements provided. This will ensure that your neckline turns out well and fits properly. Additionally, blocking your finished cape can help to shape and smooth the neckline for a professional-looking finish.
Knitting the Sleeves
In the process of knitting a cape, one of the important steps is knitting the sleeves. The sleeves play a crucial role in providing comfort and warmth to the wearer, and they add a stylish element to the overall design of the cape. Here are some tips and techniques to help you knit the sleeves of your cape with ease.
Choosing the Right Yarn
Before you start knitting the sleeves, it is important to choose the right yarn that matches the overall design and feel of the cape. Consider the weight, fiber content, and color of the yarn to ensure that it complements the rest of the cape. You may also want to consider using a yarn that is soft and comfortable against the skin, as the sleeves are in direct contact with the arms.
Calculating Sleeve Length

To determine the length of the sleeves, it is essential to take proper measurements. Measure the length from the shoulder to the desired point on the arm, whether it’s the wrist or just below the elbow. Keep in mind that the sleeves should be slightly longer than the desired length, as they tend to shorten and shrink slightly when worn. Consider the style and fit of the cape to decide on the ideal sleeve length.
Knitting Techniques
When it comes to knitting the sleeves, you have several techniques to choose from. You can opt for straight sleeves, which are knitted separately and then sewn onto the cape. Alternatively, you can choose to knit the sleeves in the round using circular needles or double-pointed needles. This eliminates the need for seams and provides a seamless look to the finished cape. Whichever technique you choose, make sure to follow the pattern instructions and adjust the stitches as necessary to achieve the desired size and shape of the sleeves.
- Try using stitch markers to keep track of the increases or decreases in the sleeves.
- Consider adding ribbing or other decorative elements to the cuffs of the sleeves for added style.
- Don’t forget to block the sleeves after knitting to ensure they have a polished and professional finish.
Adding Ribbing to the Cuffs
Adding ribbing to the cuffs of your knit cape is a great way to give it a polished and finished look. Ribbing not only adds a decorative element, but it also helps to keep the cuffs snug and in place. Here’s how you can add ribbing to the cuffs of your easy knit cape:
1. Choose your ribbing pattern
There are different types of ribbing patterns you can choose from, such as 1×1 ribbing (alternating knit and purl stitches) or 2×2 ribbing (two knit stitches followed by two purl stitches). Consider the overall design of your cape and choose a ribbing pattern that complements it. Measure the circumference of your cuffs and determine how many stitches you will need for the ribbing.
2. Pick up stitches
With the right side facing, insert your knitting needle into the first stitch along the cuff edge. Wrap the working yarn around the needle and pull it through to create a new stitch. Repeat this process along the entire cuff edge, picking up the desired number of stitches. Make sure to distribute the stitches evenly and maintain the ribbing pattern.
3. Work the ribbing pattern
Once you have picked up the stitches, begin working the ribbing pattern. For 1×1 ribbing, alternate between knitting and purling each stitch. For 2×2 ribbing, knit the knit stitches and purl the purl stitches. Continue working the ribbing pattern for the desired length, usually around 1-2 inches, or until the cuffs reach your desired length.
4. Bind off
When you have reached the desired length, bind off your stitches using a stretchy bind-off method to ensure the cuffs will stretch comfortably when worn. Cut the yarn, leaving a tail for weaving in later.
By adding ribbing to the cuffs of your knit cape, you can elevate its overall look and create a more polished and professional finish. Don’t be afraid to experiment with different ribbing patterns and colors to personalize your cape and make it truly unique!
Joining the Shoulder Seams
Once you have completed knitting the front and back pieces of your cape, the next step is to join the shoulder seams. This is an important step that will bring the two pieces together and give your cape its shape and structure.
To join the shoulder seams, lay the front and back pieces flat on a working surface with the right sides facing each other. Make sure that the shoulders are aligned properly.
Using a tapestry needle and the same yarn that you used for knitting the cape, start at one end of the shoulder and insert the needle through the first stitch of the front piece. Then, bring the needle through the first stitch of the back piece, working from right to left.
Continue stitching in this way, going back and forth between the front and back pieces, until you reach the other end of the shoulder. Make sure to keep your stitches neat and even.
After you have finished stitching the shoulder seam, weave in any loose ends to ensure that they are secure and won’t come undone.
Once the shoulder seams are joined, you can move on to the next step of finishing your cape, such as adding the collar or any other details.
Blocking the Cape
Blocking is an important step in finishing any knitted garment, and the cape is no exception. It helps to shape and smooth out the fabric, ensuring a more polished and professional-looking finished product. Before blocking, it’s important to consider the fiber content of your cape, as different fibers require different blocking methods.
Wet blocking is a common method for blocking wool or other animal fiber capes. To wet block, fill a sink or basin with cool water and add a small amount of wool wash or mild detergent. Gently submerge the cape in the water, making sure it is fully saturated. Allow it to soak for 15-20 minutes, then carefully remove it from the water, taking care not to wring or twist it. Roll the cape in a dry towel to remove excess water, then lay it flat on a clean, dry surface. Use blocking pins to shape the cape to the desired dimensions, being careful not to stretch it too much. Leave it to dry completely before removing the pins.
Steam blocking is another option for blocking the cape, particularly if it is made from a synthetic or plant-based fiber. To steam block, set your iron to the appropriate temperature for your fiber and place a damp cloth or towel over the cape. Press the iron down onto the cloth, applying steam and heat to the fabric. Move the iron slowly and evenly across the cape, being careful not to leave it in one spot for too long. Once you’ve steamed the entire cape, remove the cloth and allow it to dry completely.
Blocking can make a world of difference in the finished look and fit of your knitted cape. Whether you choose wet blocking or steam blocking, the process helps to even out any inconsistencies in the fabric and create a more professional finish. So don’t skip this important step, and enjoy the beautiful results of your knitting efforts!
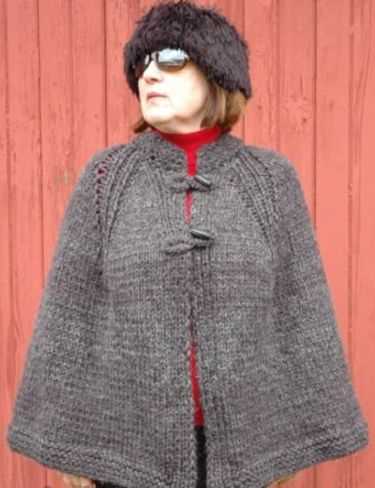
Adding Buttons or Other Closures
If you want to add buttons or other closures to your easy knit cape, there are a few options to consider. One option is to sew buttons onto the front of the cape and create buttonholes on the opposite side. This allows you to easily fasten the cape closed. Another option is to use a toggle closure, which consists of a button or loop that can be looped through to secure the cape. This adds a stylish touch and provides a secure closure.
When choosing buttons or closures for your cape, keep in mind the overall style and design. You can opt for simple, understated buttons for a classic look, or choose decorative buttons to add a pop of color or texture. Consider the weight of the buttons or closures and make sure they are sturdy enough to hold the cape closed without pulling or stretching the fabric.
- Sewing Buttons: To sew buttons onto your cape, first mark the placement of the buttons on one side of the front opening. Then, sew each button securely using a strong thread and knotting it tightly. On the opposite side, create buttonholes that correspond to the placement of the buttons. Test the buttonholes by inserting the buttons to ensure a proper fit.
- Toggle Closure: To add a toggle closure, attach one part of the toggle to one side of the front opening, and the other part of the toggle to the opposite side. Make sure the toggle is securely sewn onto the fabric so it doesn’t come loose when the cape is worn.
Overall, adding buttons or other closures to your easy knit cape can enhance its functionality and aesthetic appeal. Whether you choose buttons or toggles, take your time to ensure they are added securely and complement the overall design of the cape. With the right closures, you can enjoy wearing your knit cape with confidence and style.
Finishing Touches: Weaving in Ends
Once you have finished knitting your cape, there are a few final steps to complete before your project is fully finished. One of these steps is weaving in the ends of your yarn. Weaving in ends is a technique used to secure and hide the loose ends of yarn that are left after changing colors or adding new balls of yarn.
This process involves threading the loose yarn ends onto a yarn needle and then carefully weaving them into the stitches of your project. By doing this, you can ensure that the ends are securely fastened and will not unravel over time.
To weave in ends:
- Thread the loose end onto a yarn needle.
- Insert the needle under the stitches on the wrong side of your project.
- Weave the needle in and out of the stitches, following the direction of the yarn.
- Continue weaving for about an inch or so, making sure the yarn is securely fastened.
- Trim any excess yarn close to the project.
It is important to weave in the ends as neatly as possible to ensure a polished finish. Take your time and be careful not to pull too tightly, as this can distort the stitches. It may be helpful to refer to the pattern instructions or watch tutorial videos for additional guidance on this technique.
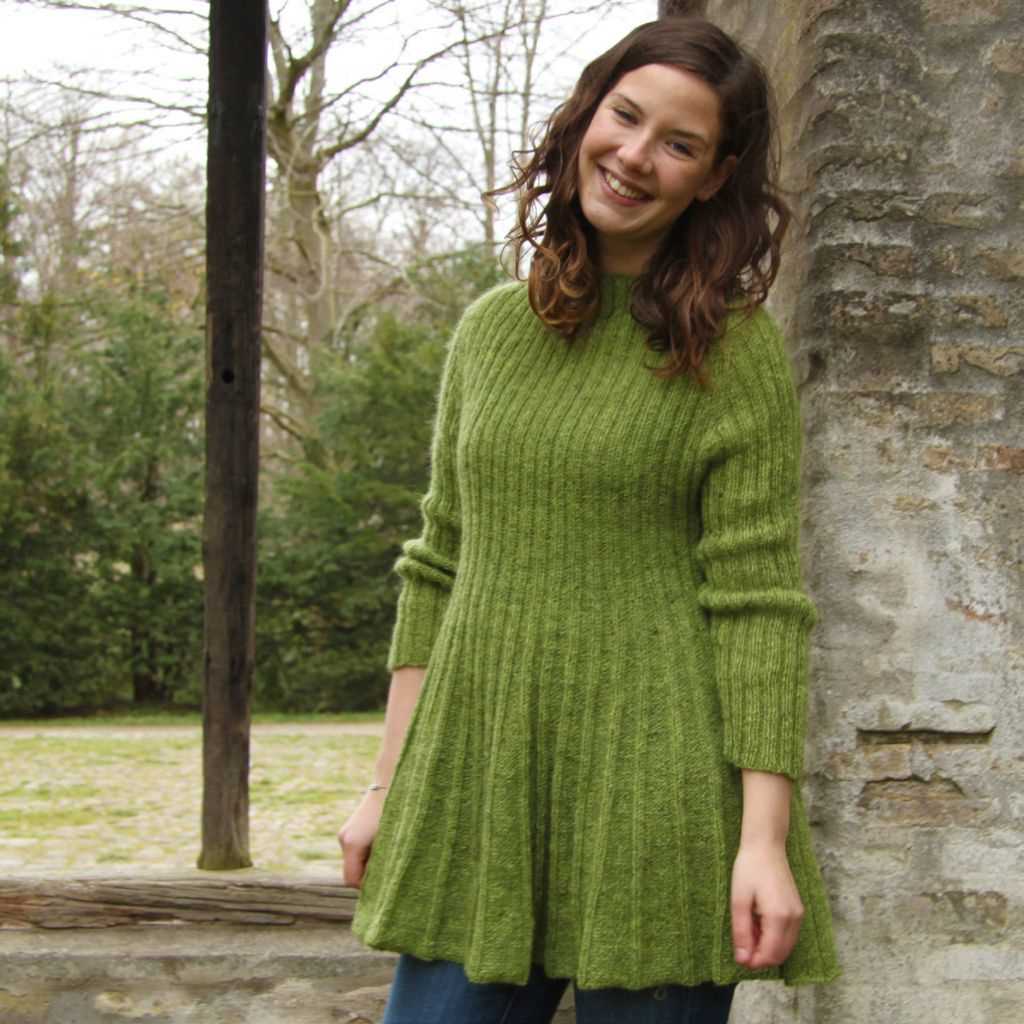
Styling and Wearing Your Knit Cape
Once you have completed knitting your cape using the easy knit cape pattern, it’s time to style and wear it! The versatility of a knit cape allows you to experiment with different outfits and looks. Here are some tips on how to style and wear your knit cape:
1. Pair with Skinny Jeans or Leggings
For a casual and comfortable look, pair your knit cape with skinny jeans or leggings. This combination allows the cape to take center stage, while still keeping your lower half streamlined. Add a pair of ankle boots or flats to complete the look.
2. Belt It
If you want to add some definition to your silhouette, try belting your knit cape. This helps to create a more fitted and flattering look. Choose a wide belt to cinch in the waist, or opt for a skinny belt to accentuate your figure.
3. Layer It Over a Dress
Transform your knit cape into a stylish outer layer by wearing it over a dress. This adds a cozy and chic element to your outfit, perfect for a night out or a special occasion. Play with different lengths and textures to create a visually interesting look.
4. Accessorize with Scarves and Hats
Add extra warmth and style to your knit cape by accessorizing with scarves and hats. Choose a coordinating or contrasting color to complement your cape. A chunky knit scarf and a cozy beanie can instantly elevate your winter ensemble.
5. Experiment with Different Draping Techniques
Have fun with the versatility of your knit cape by experimenting with different draping techniques. You can drape it over your shoulders for a classic look, or create a more asymmetrical or off-the-shoulder style. Play around and see what works best for you.
Conclusion
The easy knit cape pattern allows you to create a stylish and versatile accessory that can be dressed up or down. With the right styling and pairing, your knit cape can become a go-to piece in your wardrobe. Have fun experimenting with different outfits and enjoy the warmth and comfort of your handmade cape.
Q&A:
Where can I find an easy knit cape pattern?
You can find an easy knit cape pattern on various knitting websites, such as Ravelry, LoveKnitting, and Knitty. You can also try searching on Pinterest, as many crafters and bloggers share their patterns there too.
What materials do I need to knit a cape?
The materials you’ll need to knit a cape will depend on the specific pattern you choose. Generally, you’ll need yarn in your desired color and weight, knitting needles in the recommended size for the pattern, and any additional notions or accessories specified in the pattern, such as buttons or a closure. It’s also a good idea to have basic knitting tools like scissors, a tapestry needle, and stitch markers.
Are there any knitting techniques I need to know to knit a cape?
The specific knitting techniques you’ll need to know will depend on the pattern you choose. However, some common knitting techniques used in cape patterns include casting on, knitting and purling stitches, increasing and decreasing stitches, and basic finishing techniques like binding off and seaming. If the pattern requires more advanced techniques, such as cables or lace, it may be indicated in the pattern or you can research tutorials or classes to learn those techniques.
How long does it typically take to knit a cape?
The time it takes to knit a cape will vary depending on factors such as your knitting speed, the complexity of the pattern, and the amount of time you can dedicate to knitting each day. A simple, beginner-friendly cape pattern may take a few weeks to complete with consistent knitting. However, more intricate patterns or larger capes may take longer, potentially several months. It’s important to enjoy the process of knitting and not rush yourself, as knitting is a relaxing and creative hobby.
Can I modify the pattern to fit my size?
Yes, you can modify a knit cape pattern to fit your size. Knitting patterns often provide a range of sizes, but if the pattern doesn’t match your measurements exactly, you can adjust it. To modify a pattern, you would typically need to understand how to measure your body, make gauge swatches to determine your stitch and row gauge, and calculate the necessary stitch and row counts to fit your size. This may involve adding or subtracting stitches, changing the length or width, or adjusting the shaping. It’s always a good idea to make a practice swatch and consult a knitting guide or seek advice from experienced knitters if you’re unsure about modifying a pattern.
Where can I find an easy knit cape pattern?
You can find an easy knit cape pattern on various websites and knitting platforms, such as Ravelry, LoveCrafts, and Pinterest. Additionally, many knitting magazines and books also include patterns for capes. You can also consider searching for video tutorials on YouTube.
What are some recommended materials for knitting a cape?
For knitting a cape, you can choose from a variety of materials based on your preference and the desired result. Some popular options include acrylic yarn for its affordability and ease of care, wool for its warmth and natural fibers, and alpaca yarn for its softness and luxurious feel. Ultimately, it depends on the desired texture, drape, and warmth of the finished cape.