
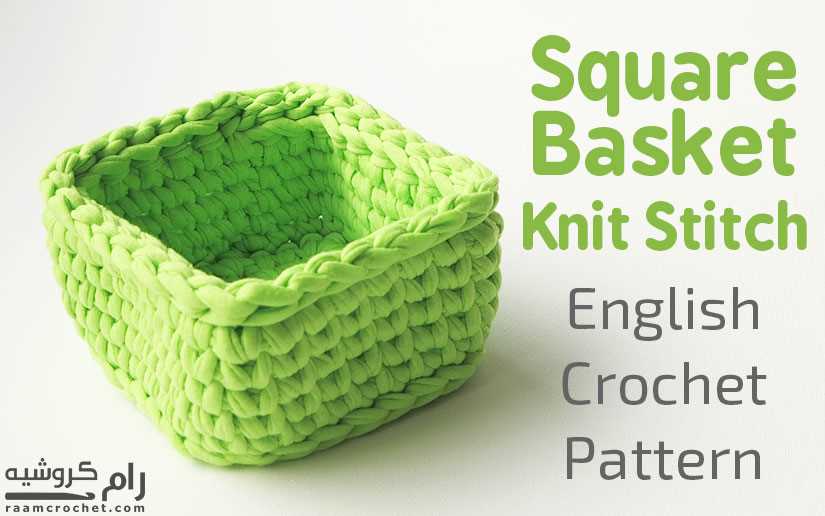
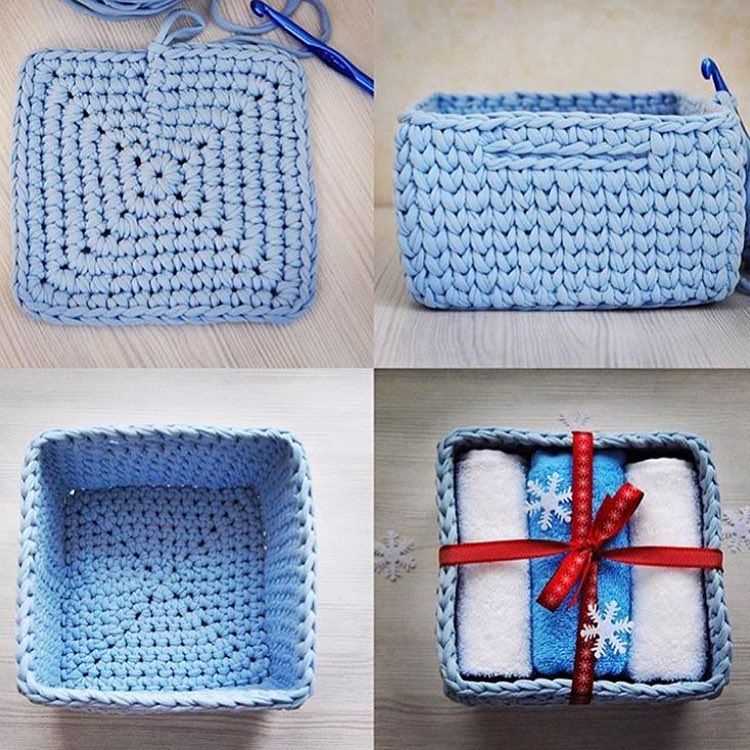
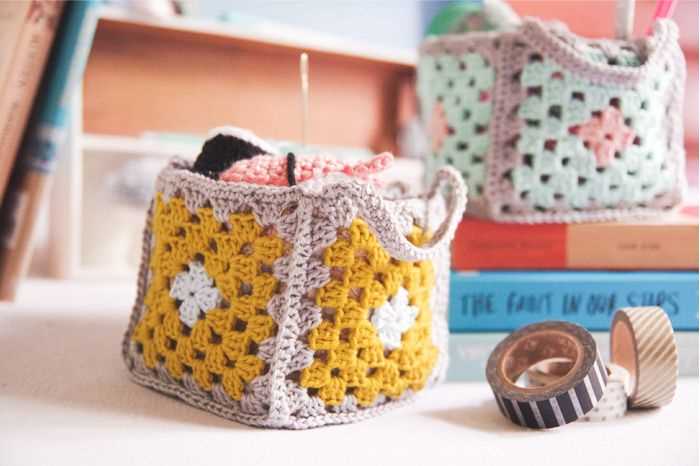
If you’re looking for a fun and practical knitting project, look no further than the knit square basket pattern. These baskets are not only stylish and versatile, but they are also a great way to practice your knitting skills and use up any leftover yarn you may have lying around. Whether you’re a beginner knitter or an experienced crafter, this pattern is sure to keep you entertained and satisfied.
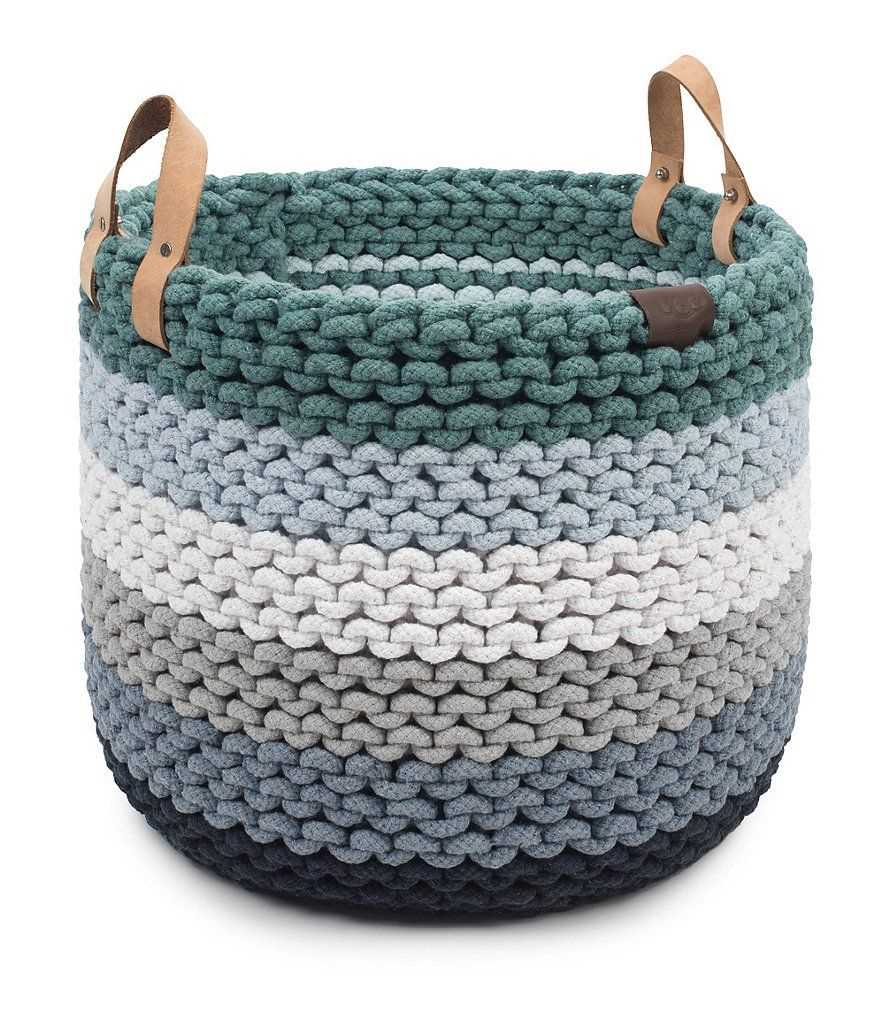
With this pattern, you’ll be able to create a square-shaped basket that’s perfect for holding small items such as keys, jewelry, or even your favorite knitting notions. You can choose to use a single color of yarn for a classic look, or get creative and mix and match different colors to create a vibrant and eye-catching basket. The possibilities are endless!
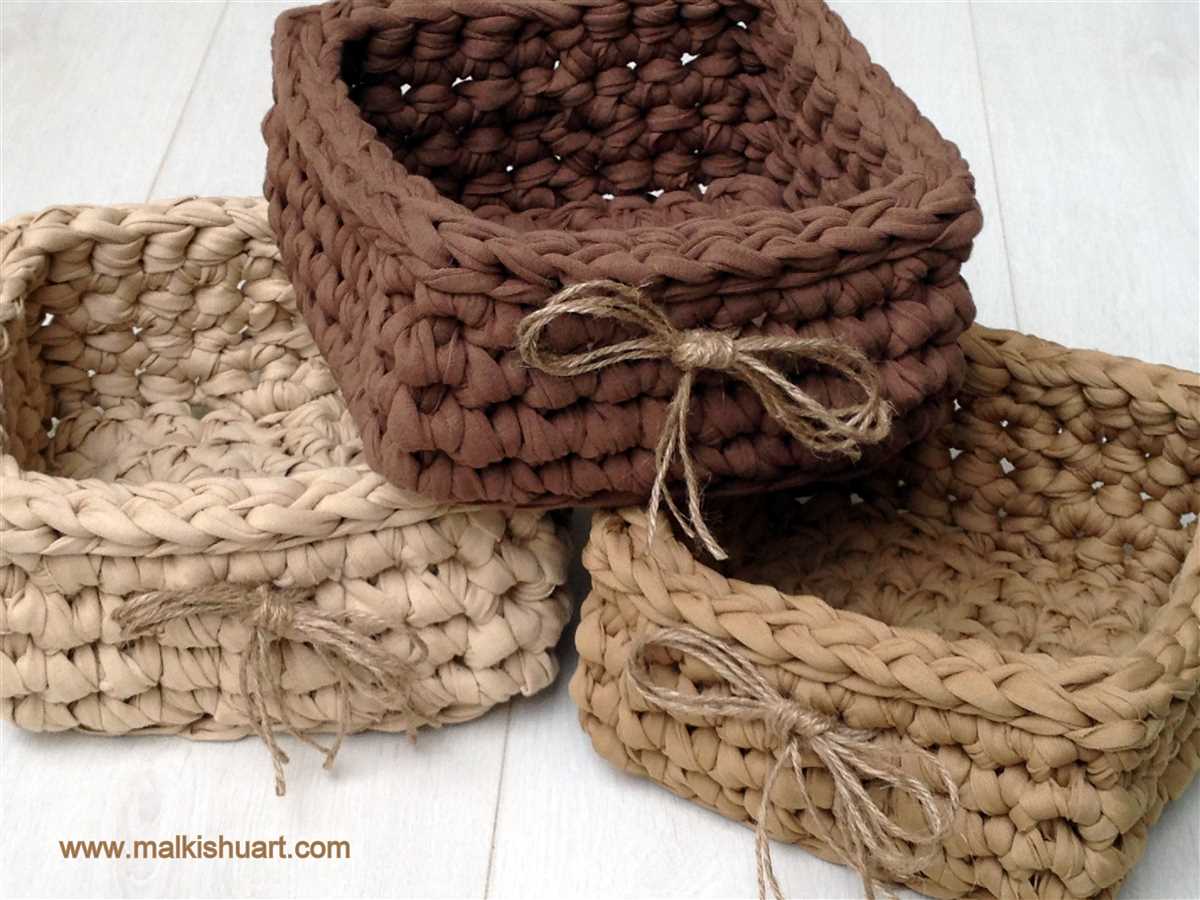
Not only are these knit square baskets functional, but they also make great gifts for family and friends. You can customize the size and color to match the recipient’s style and preferences. Plus, since they are handmade with love, they are sure to be appreciated and cherished for years to come.
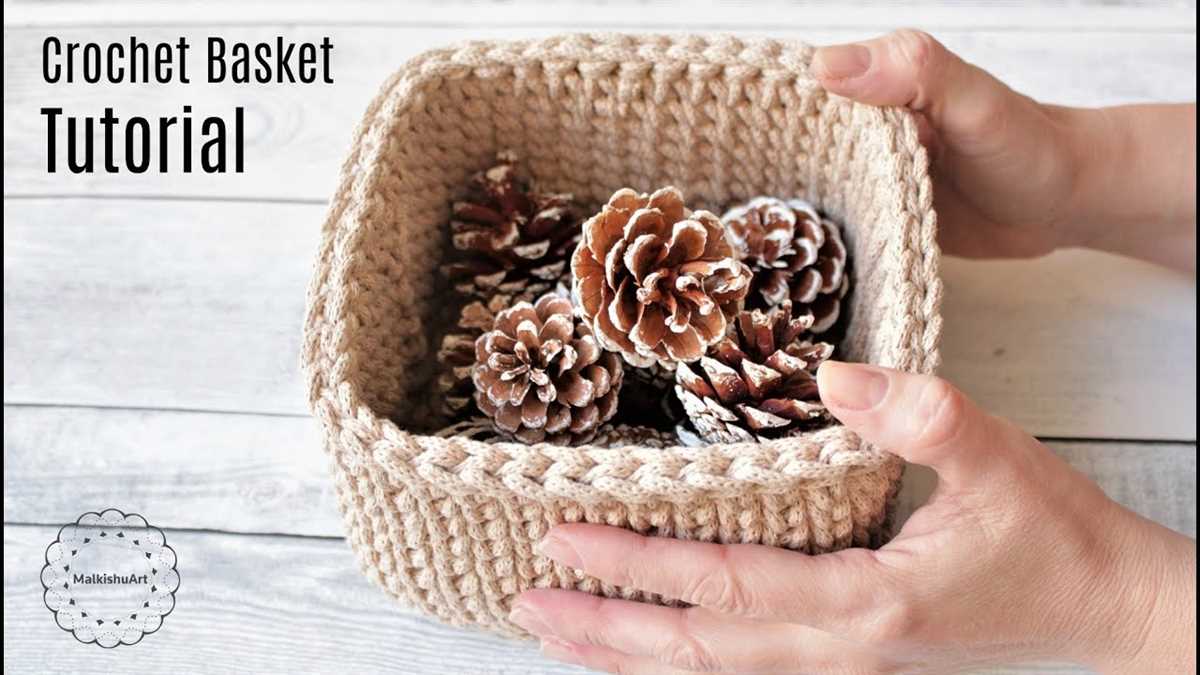
Step-by-Step Guide to Knitting a Square Basket Pattern
Knitting a square basket pattern can be a fun and rewarding project. Whether you’re looking to organize small items or add a touch of handmade charm to your home decor, this guide will walk you through the process of creating your own square basket.
Materials Needed:
- Worsted weight yarn in your choice of color
- Size 8 (5mm) knitting needles
- Tapestry needle
- Scissors
Step 1: Cast On
Begin by casting on a multiple of 4 stitches. The exact number will depend on how large you want your basket to be. You can experiment with different stitch counts to achieve the desired size.
Step 2: Knit the Base
For the base of the basket, work in stocking stitch (knit on right side, purl on wrong side) for a few rows. This will create a smooth and sturdy foundation for your basket.
Step 3: Start the Pattern
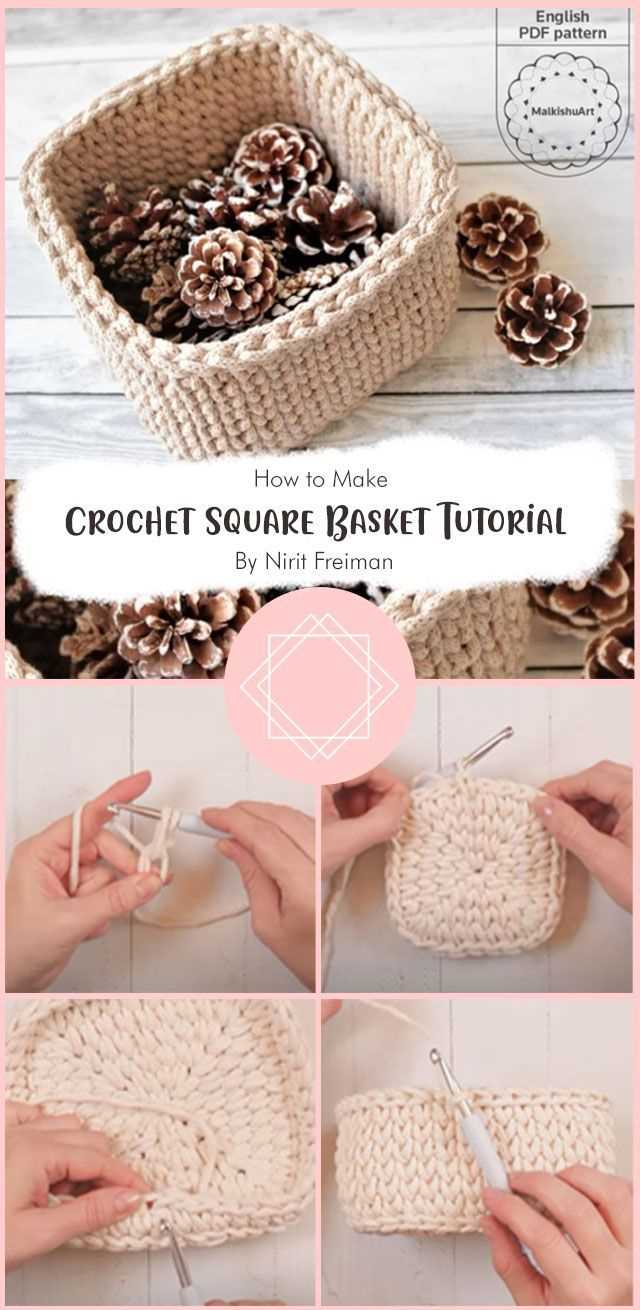
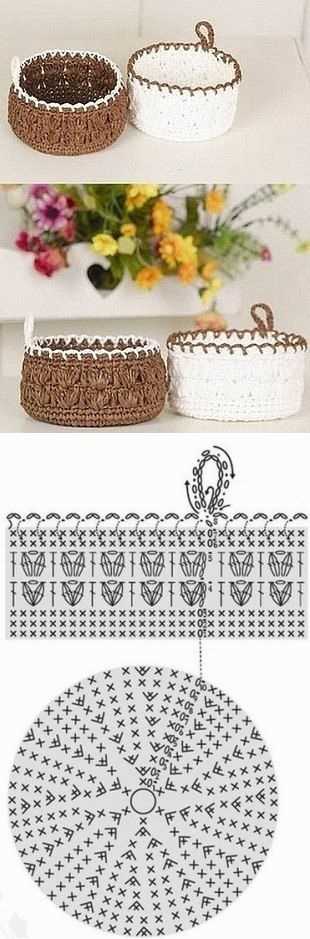
Once the base is complete, it’s time to start the square basket pattern. You can choose from a variety of stitch patterns such as basketweave, seed stitch, or even cables. Follow the pattern for the desired number of rows, making sure to keep track of any stitch pattern repeats.
Step 4: Shape the Sides
To shape the sides of the basket, start by decreasing stitches evenly across each row. This will create a straight and even edge. Continue decreasing until you reach the desired height for your basket.
Step 5: Bind Off
When you have reached the desired height, bind off all stitches. Cut the yarn, leaving a long tail for sewing the sides of the basket together.
You now have a knitted square basket ready to be assembled! Use the tapestry needle to sew the sides of the basket together using the long tail of yarn. Make sure to secure the ends and weave in any loose ends for a clean finish. Enjoy your new handmade square basket!
Materials and tools needed for knitting a square basket
Knitting a square basket can be a fun and rewarding project that allows you to create a stylish and functional storage solution. To get started, you will need a few key materials and tools. Here is a list of what you will need:
- Yarn: Choose a sturdy and durable yarn that is suitable for basket-making. Cotton or jute yarn is often a good choice as they hold their shape well.
- Knitting needles: You will need a pair of knitting needles in the appropriate size for your chosen yarn. Circular needles may also be useful for working in the round.
- Tape measure: A tape measure will come in handy for ensuring that your basket is the desired size.
- Stitch markers: Stitch markers are useful for keeping track of your stitches, especially if you are working with a large number of stitches or in the round.
- Tapestry needle: A tapestry needle is essential for weaving in ends and sewing up any seams.
- Scissors: A pair of scissors will be needed for cutting yarn and trimming any excess.
With these materials and tools in hand, you are ready to embark on your knitting journey and create a beautiful square basket. Remember to choose colors and textures that complement your home decor and have fun experimenting with different stitch patterns to add interest and texture to your basket.
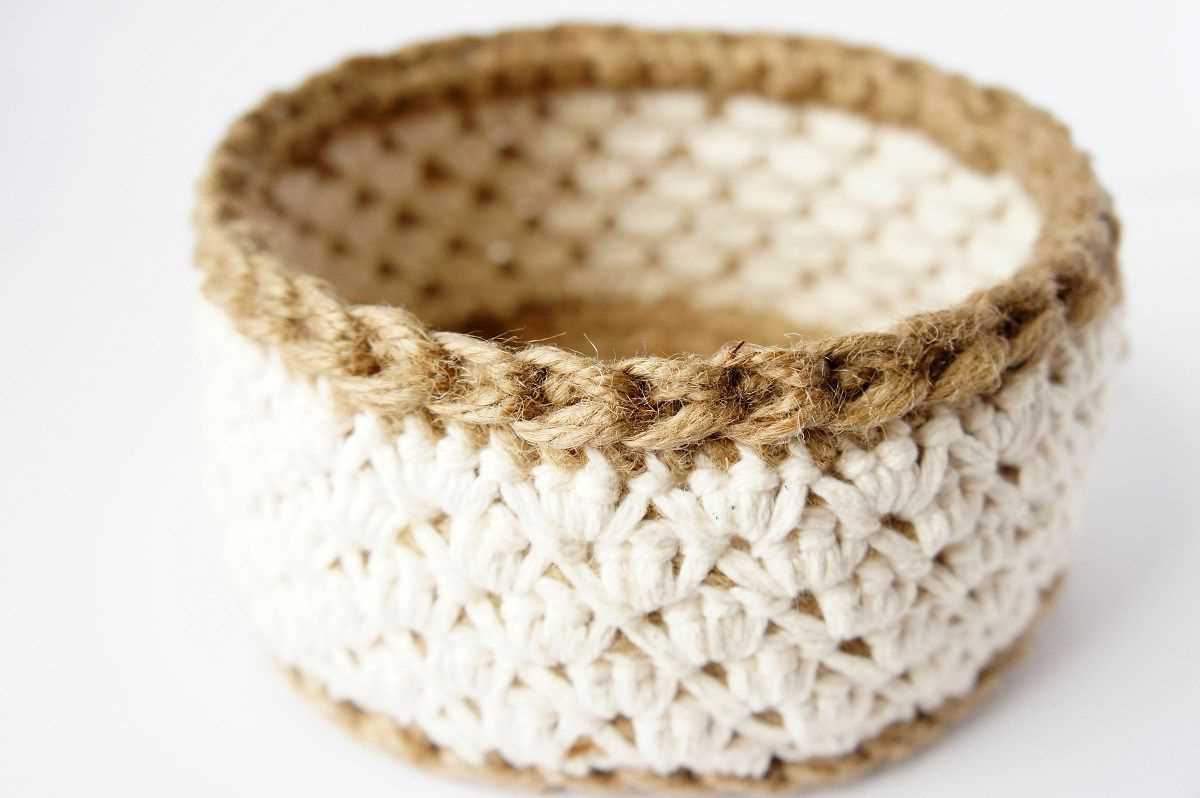
Choosing the right yarn for your square basket project
When it comes to knitting a square basket, the choice of yarn is an important factor to consider. The right yarn can make a significant difference in the final look and feel of the basket, as well as its durability and functionality. Here are some key points to consider when choosing the yarn for your square basket project.
1. Weight and thickness
The weight and thickness of the yarn will determine the size and structure of your square basket. If you want a sturdy and tightly knit basket, opt for a bulky or super bulky weight yarn. On the other hand, if you prefer a lighter and more flexible basket, a worsted or sport weight yarn would be more suitable. Consider the purpose of the basket and the items you plan to store in it when deciding on the weight and thickness of the yarn.
2. Fiber content
The fiber content of the yarn will affect the overall look, feel, and durability of the basket. Natural fibers such as cotton or linen are great choices for a soft and breathable basket that can withstand regular use. If you prefer a more textured or luxurious look, yarns with silk or wool blends can add a touch of elegance to your square basket. Consider the care instructions for the yarn as well, as some fibers may require special handling.
3. Color and texture
The color and texture of the yarn will depend on your personal preference and the aesthetic you want to achieve. Solid or neutral colors can create a timeless and versatile basket, while variegated or multi-colored yarns can add a pop of personality and visual interest. Additionally, consider the texture of the yarn and how it will complement the stitch pattern of your square basket. Smooth and even yarns can highlight the stitch definition, while textured yarns can add depth and dimension.
In summary, when choosing the right yarn for your square basket project, consider the weight and thickness, fiber content, color, and texture. By taking these factors into account, you can ensure that your finished basket not only meets your functional needs but also reflects your personal style and preferences.
Understanding the basic knitting stitches used in the square basket pattern
In order to successfully knit the square basket pattern, it is important to have a clear understanding of the basic knitting stitches that are used. These stitches form the foundation of the pattern and knowing how to execute them correctly will ensure that the finished project looks professional and visually appealing.
The square basket pattern primarily utilizes the knit stitch and the purl stitch. The knit stitch creates a smooth, raised fabric, while the purl stitch adds texture and variation to the design. By combining these two stitches in different ways, you can create the intricate basket pattern.
The pattern may also include decreases and increases, which are essential for shaping the basket. Decreases are achieved by knitting or purling two stitches together, while increases involve making new stitches by knitting into the front and back of a single stitch. These techniques help create the square shape and allow for the basket to expand and hold its structure.
To successfully knit the square basket pattern, it is crucial to maintain a consistent tension throughout your work. This will ensure that the stitches are even and uniform, resulting in a finished product that looks polished and professional. Regularly checking your tension as you knit can help prevent any inconsistencies.
- Knit stitch: Insert the right needle into the front of the next stitch on the left needle, wrap the yarn around the right needle from back to front, and pull the right needle through the stitch, slipping it off the left needle.
- Purl stitch: Insert the right needle from right to left into the front of the next stitch on the left needle, wrap the yarn around the right needle from back to front, and pull the right needle through the stitch, slipping it off the left needle.
- Decrease: Knit or purl two stitches together by inserting the right needle into the front of the next two stitches on the left needle and following the same steps as for a regular knit or purl stitch.
- Increase: Knit into the front and back of a single stitch by knitting into the front of the stitch as usual, but instead of slipping it off the left needle, bring the right needle around to the back of the stitch and knit into it again. Then, slip the stitch off the left needle.
By mastering these basic knitting stitches and techniques, you will be well-equipped to knit the square basket pattern with confidence and achieve a beautiful finished result.
Casting on and starting your square basket
When starting your knitting project for a square basket, the first step is to cast on the required number of stitches. The exact number will depend on the size of the basket you want to make and the thickness of the yarn you are using. Typically, you would use a chunky or bulky weight yarn for this project, as it will create a sturdy and durable basket.
To cast on:
- Hold the end of the yarn in your right hand, leaving a tail of about 6 inches.
- Make a slipknot by creating a loop with the yarn, then pulling the end through the loop. Tighten the loop, but not too tightly.
- Insert the needle through the slipknot and hold it in your right hand.
- With your left hand, hold the yarn coming from the ball and wrap it around your left thumb and forefinger.
- Take the needle in your right hand and go under the yarn on your left thumb, then over the yarn on your left forefinger.
- Insert the needle under the loop on your left thumb, then use your thumb to pull the loop through the stitch on your needle.
- Repeat steps 5 and 6 until you have cast on the desired number of stitches.
Note: It’s important to cast on loosely so that your basket doesn’t curl or pucker at the edges. If your cast-on stitches are too tight, you can use a larger needle size to cast on and then switch to the recommended needle size for the rest of the pattern.
Once you have successfully cast on the stitches, you can begin working the pattern for your square basket. This may involve a combination of knit and purl stitches, as well as increasing or decreasing stitches to create the desired shape and size. Follow the pattern instructions carefully, and don’t hesitate to reach out for help if you encounter any difficulties.
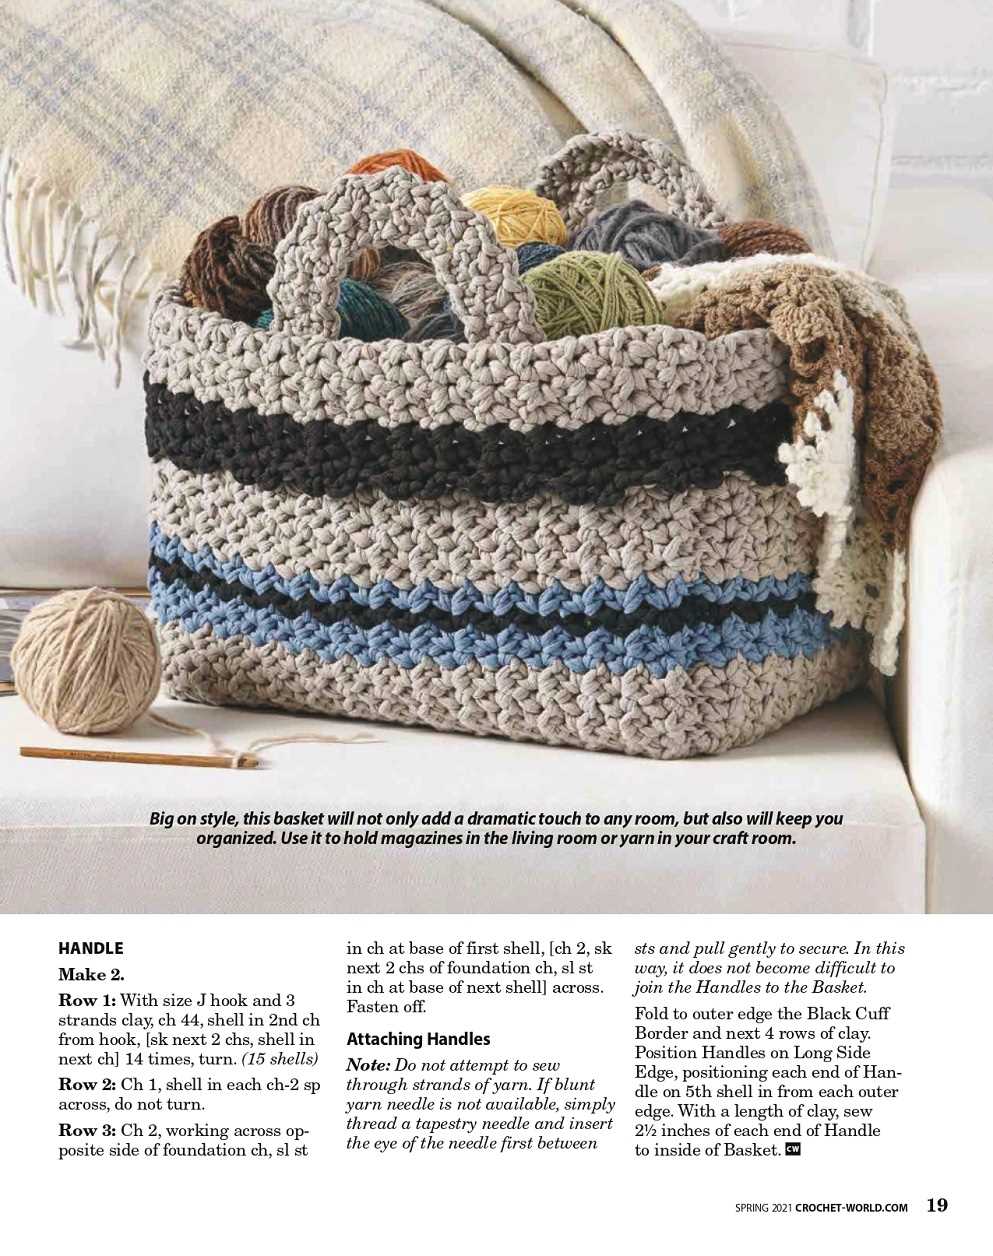
Knitting the Sides of the Square Basket
After completing the base of the square basket, it’s time to move on to knitting the sides. This is where the basket starts to take shape and you can see it coming together. It’s an exciting stage in the knitting process!
To begin, you will need to pick up stitches along the edges of the base. This is done by inserting the needle through the loops at the edge of the base and pulling the yarn through, creating new stitches. Be sure to evenly distribute the stitches along each side of the base to maintain the square shape.
Once you have picked up all the stitches, you will continue knitting in the round. This means that you will join the ends of the row together to create a continuous loop. Make sure to place a stitch marker at the beginning of the round to keep track of your progress.
As you knit the sides of the basket, you can experiment with different stitch patterns to add texture and interest. You could try a simple garter stitch for a classic look, or explore more complex patterns like cables or lace. Just remember to adjust the stitch count accordingly to maintain the square shape.
Continue knitting the sides of the basket until you reach the desired height. You can customize the size of the basket by adding or reducing the number of rows. Once you are satisfied with the height, it’s time to bind off the stitches and finish off your knitted square basket.
By following these instructions and adding your own creative touches, you’ll have a beautiful and functional square basket that you can use for organizing and storing items in your home. Happy knitting!
Adding texture or pattern to your square basket
When it comes to knitting a square basket, there are many ways to add texture or pattern to make it more interesting and unique. One option is to incorporate different stitch patterns, such as cables, lace, or bobbles. These stitches can create beautiful textures and designs that will make your basket stand out.
Cables: Adding cable stitches to your square basket can give it a lovely woven look. You can choose a simple cable pattern or opt for more intricate designs. Cables can be used as a border or as a central panel to create a focal point.
Lace: Lace patterns can add an elegant and delicate touch to your square basket. You can choose a lacy border or intricate lace panels that will allow light to shine through, creating a beautiful effect when the basket is filled with items.
Bobbles: Adding bobbles to your square basket can give it a playful and textured look. Bobbles are small raised bumps that can be scattered throughout the basket or used in a specific pattern. They can add a fun and unique element to your knitting project.
It’s important to consider the size of your basket and the intended use when choosing a texture or pattern. For larger baskets, you may want to opt for more intricate stitch patterns, while smaller baskets may benefit from simpler designs. Regardless of the pattern you choose, adding texture or pattern to your square basket will elevate its appearance and make it a beautiful and functional piece.
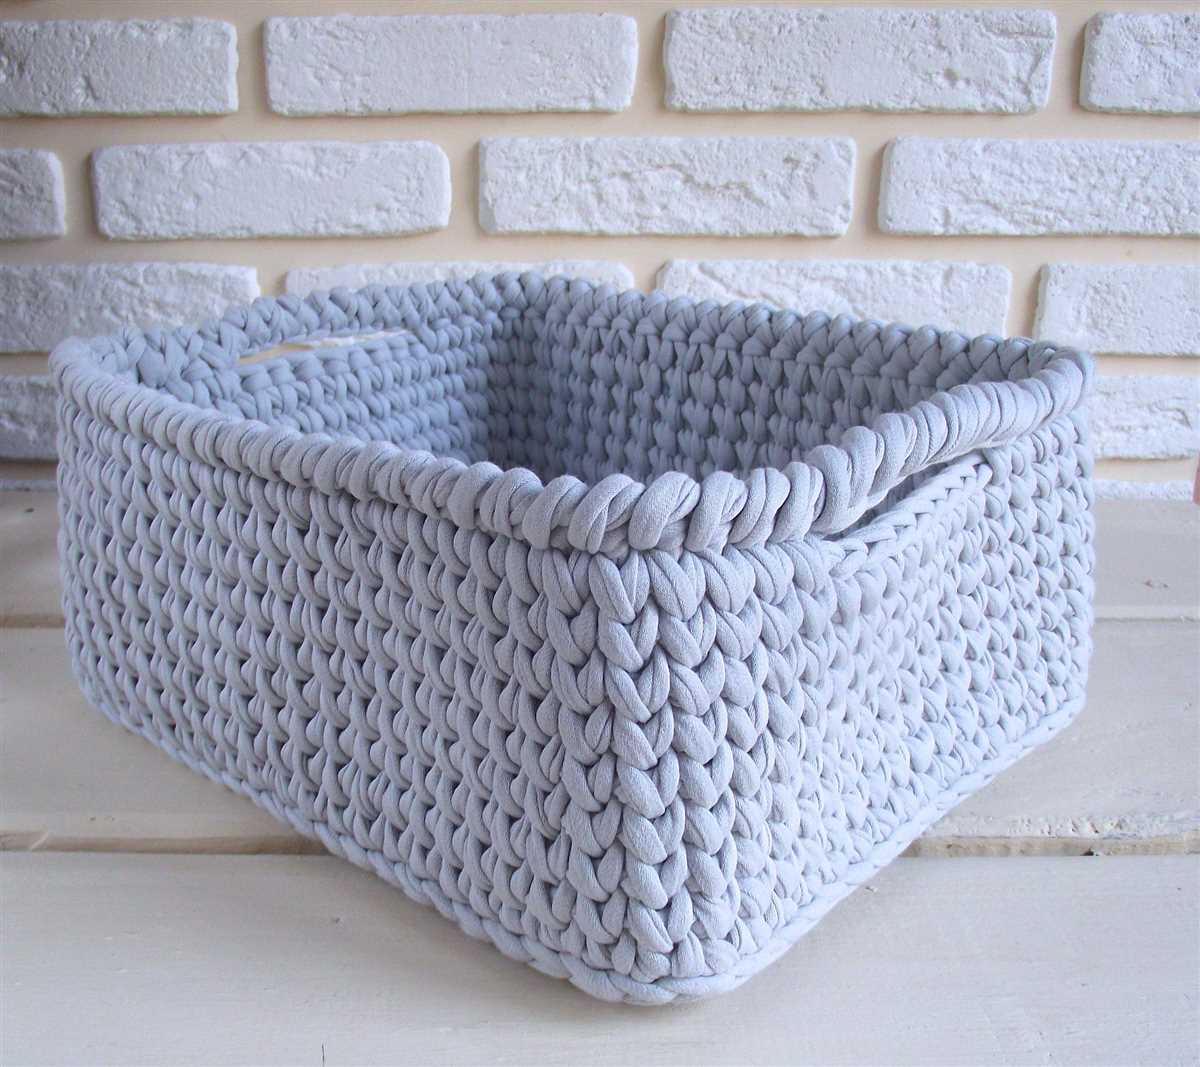
Shaping the corners of your square basket
When knitting a square basket, shaping the corners is an important step to achieve a neat and professional-looking finish. It involves decreasing stitches in a specific manner to create sharp, defined corners. Let’s explore some techniques for shaping the corners of your square basket.
1. Decreasing at the beginning and end of the row:
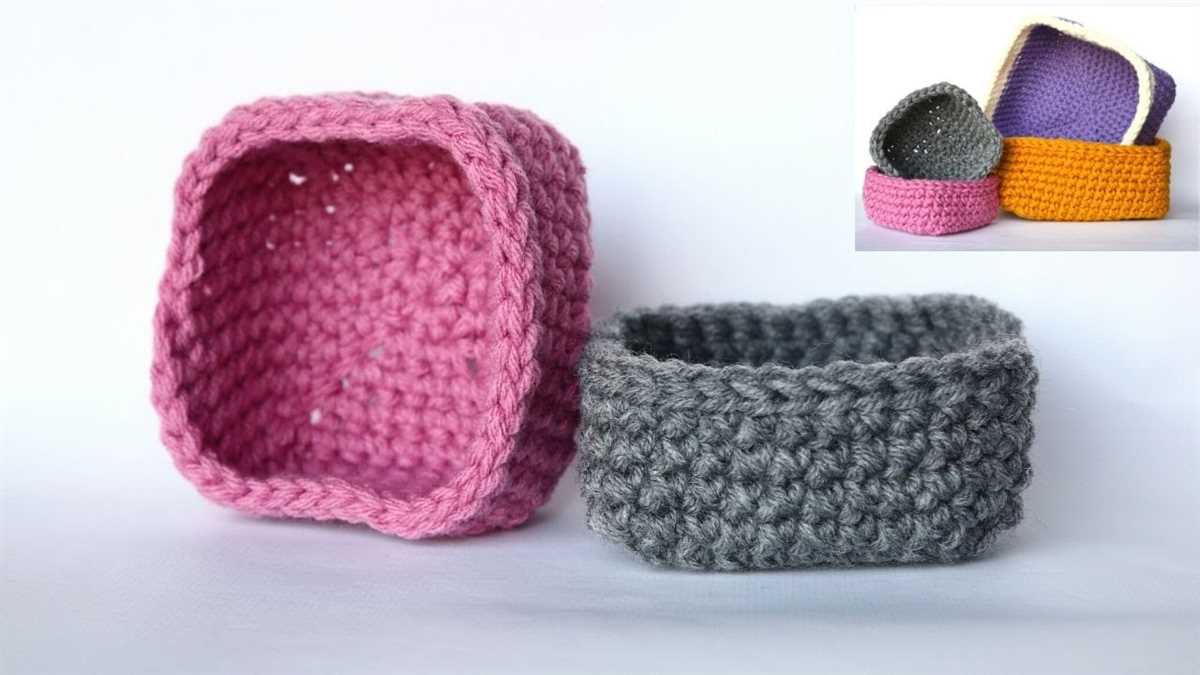
To create a square shape, you will need to decrease stitches at the beginning and end of each row. One common way to do this is by knitting two stitches together at the beginning of the row and slipping, knitting, and passing the slipped stitch over at the end of the row. This will gradually reduce the number of stitches and create triangular corners.
2. Shaping the corners with short rows:
Another technique to shape the corners is by using short rows. This involves knitting or purling across a certain number of stitches and then turning the work before reaching the end of the row. By repeating this process multiple times on each side of the corner, you can create a more pronounced and defined shape.
3. Adding garter stitch borders:
To further accentuate the corners of your square basket, you can add garter stitch borders. This involves knitting every row of a certain number of stitches at each side of the corner. The contrast between the garter stitch and the main stitch pattern will make the corners stand out more.
By utilizing these techniques, you can shape the corners of your square basket and achieve a polished and well-defined look. Experiment with different methods and find the one that works best for your desired outcome. Happy knitting!
Finishing touches: binding off and weaving in ends
Once you have completed knitting your square basket, it’s time to add the finishing touches to make it look polished and professional. This involves binding off your work and weaving in any loose ends to create a neat and tidy finished product.
To bind off, start by knitting two stitches as usual. Then, insert the left needle into the first stitch on the right needle and lift it up and over the second stitch, allowing it to slip off the needle. You will now have one stitch remaining on the right needle. Knit one more stitch, and then repeat the process of lifting the first stitch up and over the second stitch until you reach the end of the row.
After binding off, you may notice that you have several loose ends of yarn hanging from your work. These ends need to be woven in to secure them and prevent them from unraveling. To weave in the ends, thread a tapestry needle with one of the loose ends and carefully sew it into the back of the knitted fabric, following the path of the stitches. Repeat this process with each loose end, ensuring that the ends are securely woven in and not visible from the front of the basket.
In addition to binding off and weaving in ends, you may also want to consider blocking your square basket to give it a more even and professional appearance. Blocking involves wetting your knitted piece, gently stretching it to the desired shape and size, and then allowing it to air dry. This can help to even out any uneven stitches or edges and give your basket a more polished look.
Summary
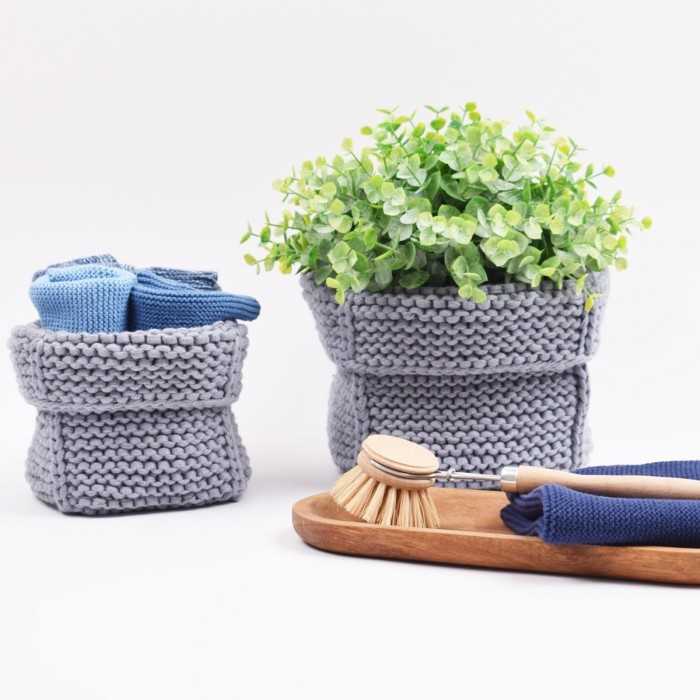
Knitted square baskets are not only useful for storage, but they can also be versatile and eye-catching decorative pieces. With their unique texture and handmade charm, these baskets can add a touch of warmth and creativity to any space. Here are some creative ways to use and display your knitted square basket:
1. Plant Holder
Add some greenery to your home by using your knitted square basket as a stylish plant holder. Place a potted plant inside the basket and let the textured design highlight the beauty of your green friends. Whether you hang it from the ceiling, place it on a tabletop, or display it on a windowsill, a knitted square basket can add a touch of nature and elegance to any room.
2. Knitting Project Organizer
If you’re an avid knitter, you know how quickly projects can accumulate. Use your knitted square basket to store and organize your knitting supplies, such as needles, yarn, and patterns. The sturdy construction of the basket will keep everything in one place, making it easier for you to find and access your knitting essentials. Plus, having a beautiful hand-knitted basket to store your supplies adds a touch of personalization to your crafting area.
3. Toy Storage

Children’s toys have a way of taking over every room in the house. Use your knitted square basket as a stylish and functional toy storage solution. The soft texture of the knitted basket is gentle on little hands, and its generous size can hold a variety of toys and stuffed animals. Place the basket in a playroom, nursery, or living room for easy access to toys while keeping the space tidy and clutter-free.
4. Bathroom Organizer
In a room where every inch of counter space is precious, a knitted square basket can serve as a handy bathroom organizer. Use it to store towels, toiletries, or even as a laundry hamper. The basket’s unique texture will add a cozy touch to the bathroom while providing a practical solution for keeping things organized and within reach.
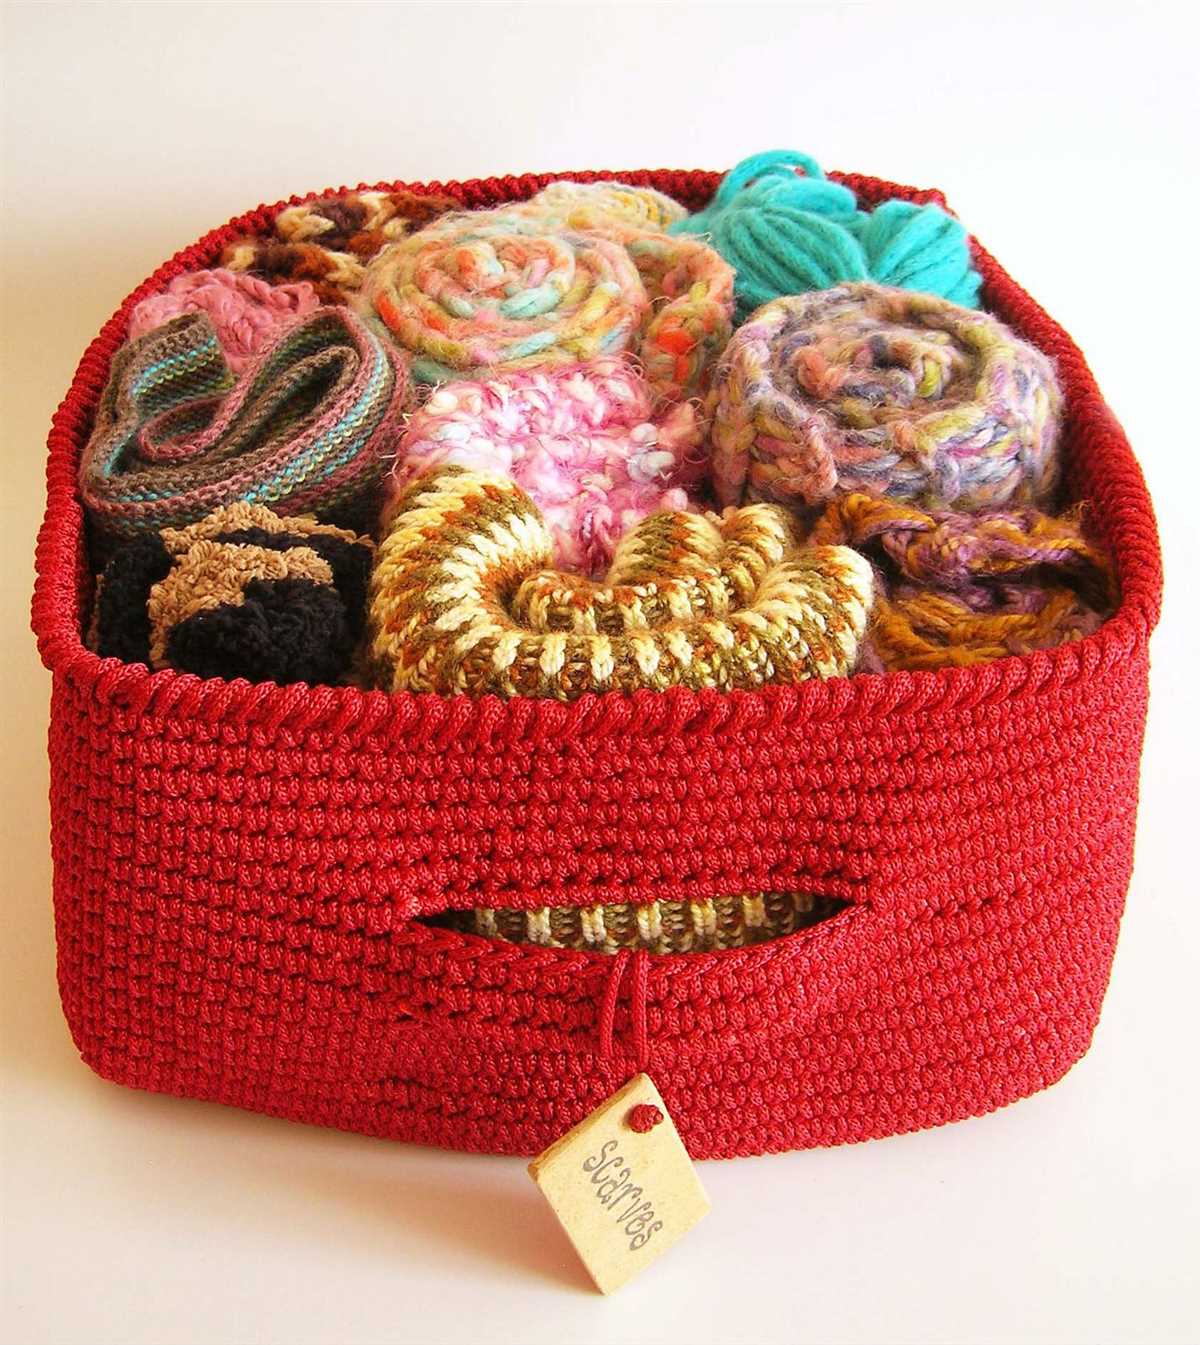
5. Gift Basket
Take your gift-giving to the next level by using a knitted square basket as a unique and reusable gift container. Fill it with goodies, such as homemade treats, small gifts, or crafting supplies, and present it to your loved ones. Not only will they appreciate the thoughtful contents of the basket, but they can also use the beautiful knitted basket for storage or display in their own homes.
These are just a few creative ways to use and display your knitted square basket. Feel free to experiment and explore different possibilities to make the most out of this versatile and charming handmade item.
Q&A:
What materials do I need to knit a square basket?
To knit a square basket, you will need knitting needles, yarn (preferably a bulky weight yarn), a tapestry needle for sewing up the sides, scissors, and stitch markers.
How do I cast on stitches for a square basket?
To cast on stitches for a square basket, start by making a slip knot and placing it on one of your knitting needles. Then, insert the other needle into the slip knot and wrap the yarn around it from back to front, creating a loop. Pull this loop through the slip knot, creating a new stitch. Repeat this process until you have the desired number of stitches on your needle.
What stitch pattern should I use for a square basket?
There are many stitch patterns you can use for a square basket, but a simple garter stitch or seed stitch would work well. Garter stitch is created by knitting every row, while seed stitch is created by alternating knit and purl stitches in each row. You can also experiment with other stitch patterns, such as ribbing or cables, to add texture to your square basket.
How do I shape the sides of the square basket?
To shape the sides of the square basket, you can use decreases to create a tapered effect. For example, you can knit 2 stitches together at the beginning and end of each row to decrease the number of stitches. This will create a diagonal or angled shape. You can also experiment with other decrease techniques, such as slipping stitches or knitting through the back loop, to create different shaping effects.
How do I finish and secure the edges of the square basket?
To finish and secure the edges of the square basket, you can use a tapestry needle to sew up the sides. Thread the yarn through the tapestry needle, and then insert the needle into the edge stitches along one side of the basket. Pull the yarn through, and then repeat this process along the other sides. Once you have sewn up all sides, weave in any loose ends to secure them. You can also add additional embellishments, such as buttons or ribbons, to further secure and decorate the edges of your square basket.