
If you enjoy knitting and are looking for a fun project, why not try making a cute fox toy? This free knitting pattern is perfect for both beginners and experienced knitters alike. Whether you want to create a unique gift for a child or simply add a touch of charm to your own home, this adorable fox toy will surely capture your heart.
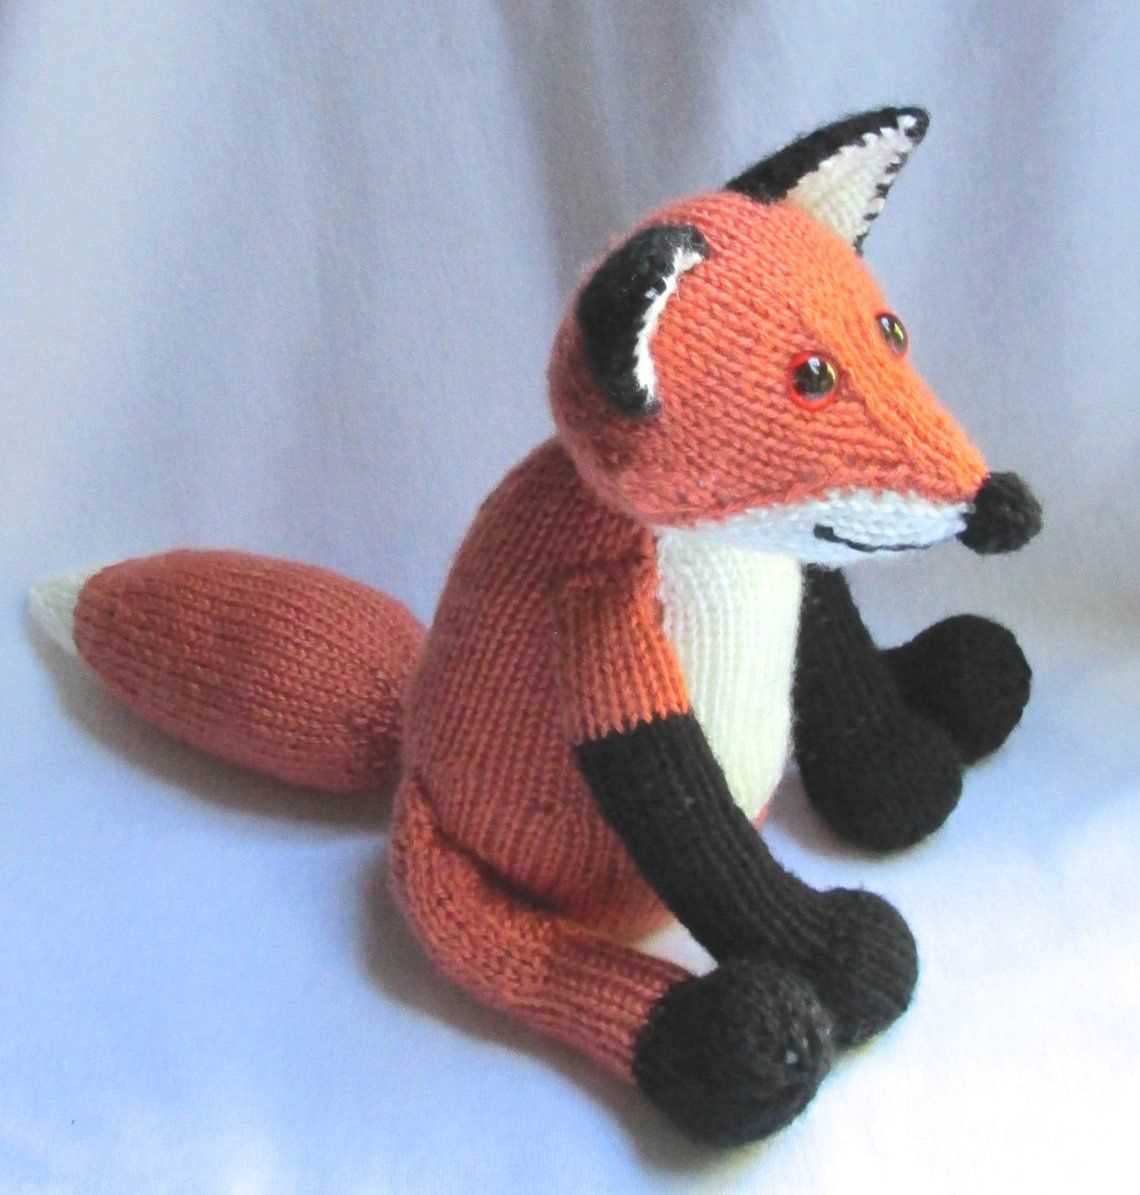
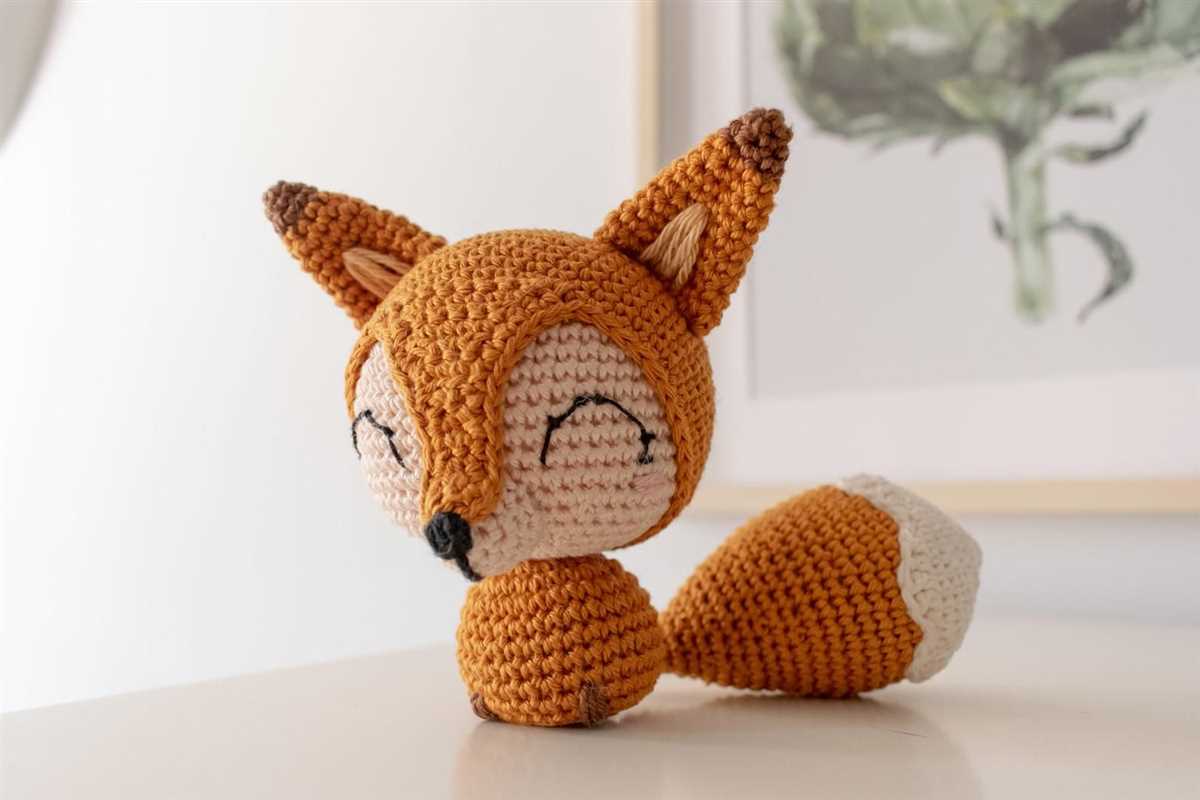
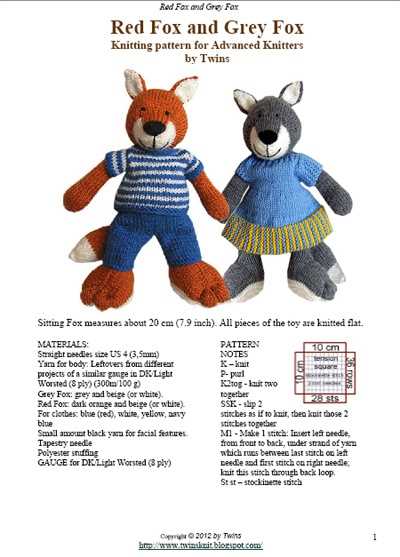
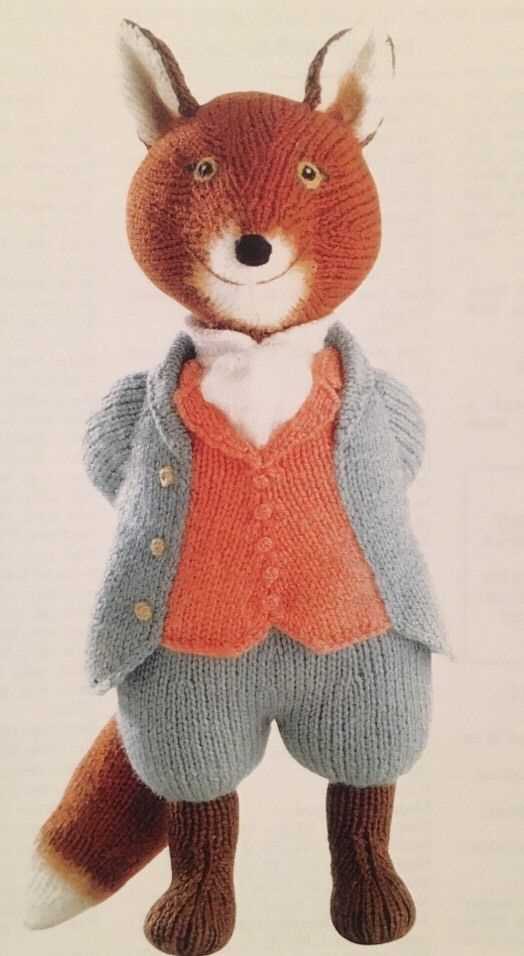
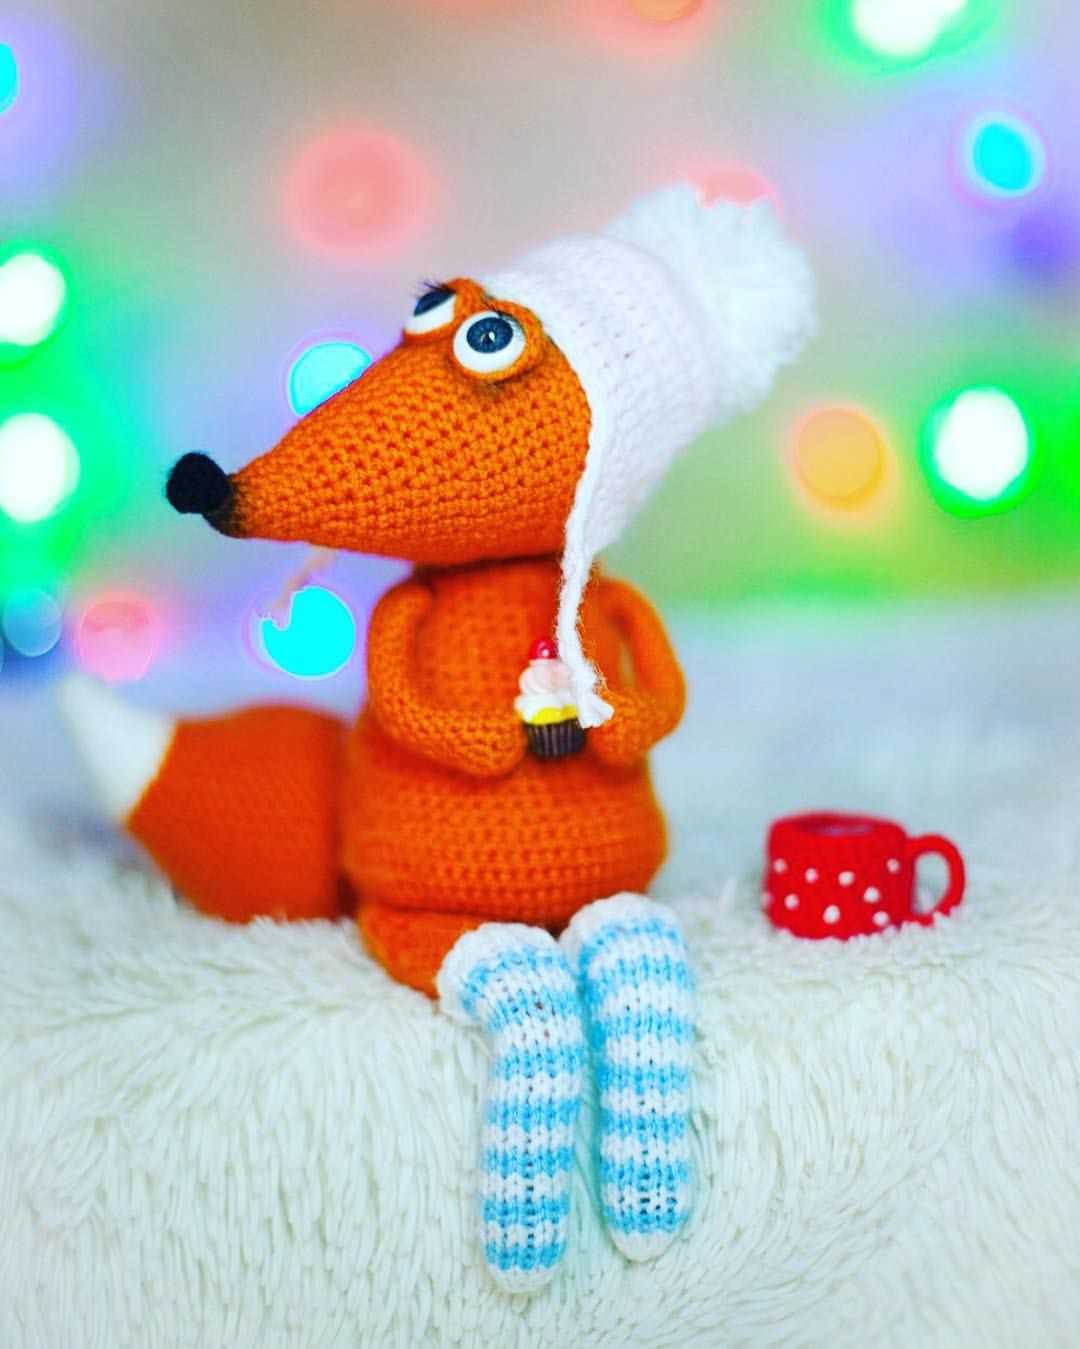
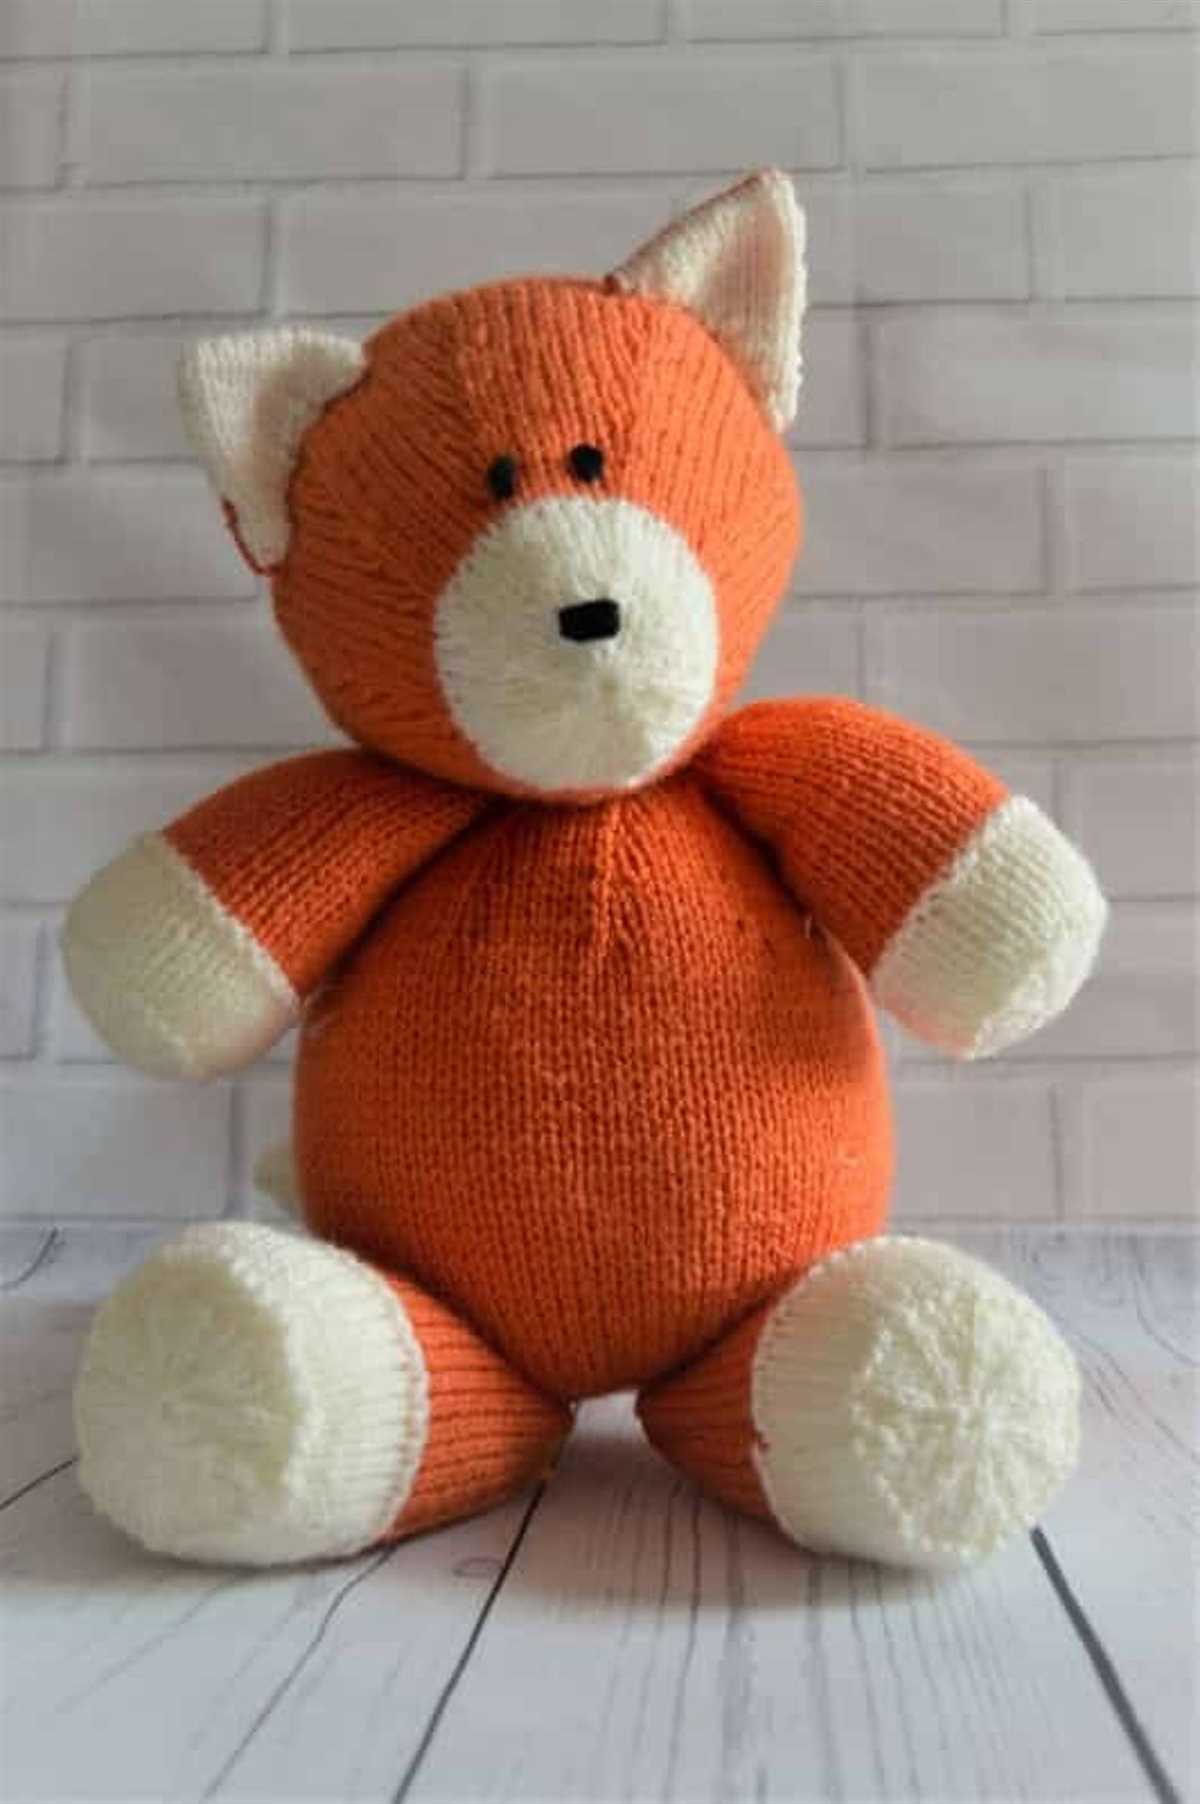
With this knitting pattern, you can create a fox toy that is approximately 10 inches tall. The pattern includes step-by-step instructions and helpful tips to guide you through the process. From the charming orange body to the cute little snout and tail, every detail of the fox toy is carefully explained, making it easy for you to follow along and create a beautiful finished product.
Knitting your own toys allows you to personalize the design and choose your own colors and materials. You can mix and match different shades of yarn to create a unique fox toy that matches your style and preferences. Additionally, knitting can be a relaxing and therapeutic activity that helps reduce stress and improve focus. So why not give it a try and create your very own fox toy?
How to Knit a Free Fox Toy
Knitting is a great way to create cute and cuddly toys for children, and a fox toy is a popular choice. With this free fox toy knitting pattern, you can easily make your own adorable fox toy.
The first step in knitting a free fox toy is gathering your materials. You will need yarn in orange and white (or any colors you prefer for your fox), knitting needles (size will depend on the yarn you choose), stuffing, a darning needle, and safety eyes or buttons for the toy’s eyes. Once you have your materials ready, you can begin knitting the fox toy.
Step 1: Knitting the Body
- Start by casting on stitches to create the body of the fox toy.
- Follow the knitting pattern to knit rows of stitches, increasing and decreasing as needed to shape the body.
- Continue knitting until you reach the desired length for the body of the toy.
- Bind off the stitches to finish the body.
Step 2: Knitting the Head and Tail
- Next, you will knit the head and tail of the fox toy separately.
- Use the knitting pattern to create the shape of the head and tail, increasing and decreasing stitches as instructed.
- Once you have finished knitting the head and tail, bind off the stitches.
Step 3: Finishing the Toy
- Use a darning needle to sew the head and tail onto the body of the fox toy, making sure they are securely attached.
- Fill the body of the toy with stuffing, making it as firm or as soft as you like.
- Attach safety eyes or sew buttons for the toy’s eyes.
- Finally, add any additional details you would like, such as a nose or embroidered features, using matching yarn.
Once you have finished all the steps, you will have a lovely handmade fox toy that can be enjoyed by children of all ages. The free fox toy knitting pattern provides a fun and creative way to make a unique and personalized toy for a loved one. Happy knitting!
Knitting Supplies for Your Fox Toy
When you decide to start knitting your own fox toy, it’s important to gather all the necessary supplies beforehand. Here is a list of essential knitting supplies you will need to create your cuddly fox companion.
Yarn:
Choose a soft and durable yarn in the color of your choice. It’s recommended to use a medium weight yarn, such as worsted or aran, to give your fox toy a nice texture and structure.
Knitting Needles:
You will need a pair of knitting needles suitable for your chosen yarn. The size of the needles will depend on your desired gauge and the thickness of yarn you are using, so make sure to check the recommended needle size on your yarn label.
Stuffing:
To give your fox toy a plush and huggable feel, you will need stuffing material. You can use polyester fiberfill or any other suitable toy stuffing that is safe and hypoallergenic.
Tapestry Needle:
A tapestry needle with a large eye will be useful for sewing the different parts of your fox toy together and weaving in loose ends.
Stitch Markers:
Using stitch markers will help you keep track of important points in your knitting, such as the beginning of a round or the placement of certain stitches. You can use removable stitch markers or even safety pins.
Scissors:
A good pair of scissors is essential for cutting yarn and trimming excess ends. Make sure to use sharp and precise scissors to achieve neat and clean cuts.
Optional Extras:
If you want to add some extra details to your fox toy, you can consider using buttons for eyes, embroidery floss for small details, or even a small bell for a playful touch.
With these knitting supplies at hand, you are ready to create your very own fox toy. Enjoy the process of knitting and see how your furry friend comes to life stitch by stitch!
Step-by-Step Guide to Knitting a Fox Toy
Knitting toys can be a rewarding and fun way to spend your time, and with this step-by-step guide, you can create your very own fox toy. Whether you’re an experienced knitter or just starting out, this pattern is suitable for all skill levels.
To begin, gather your materials. You will need:
- Double-pointed knitting needles
- Yarn in orange, white, and black
- Sewing needle
- Stuffing material
- Scissors
Once you have your materials ready, it’s time to start knitting. Use the orange yarn to cast on 20 stitches and join in the round. Knit the first row, then purl the second row. Repeat these two rows until you have knitted a total of 10 rows.
Next, switch to the white yarn. Knit the next 4 rows with white yarn. Then, switch back to the orange yarn and knit 2 rows. Repeat this pattern of alternating white and orange for a total of 5 times, ending with the orange yarn.
Now it’s time to shape the fox’s head. Knit 2 stitches together at the beginning and end of each row for the next 3 rows. This will gradually decrease the number of stitches, shaping the head. When you have 8 stitches remaining, cut the yarn, leaving a tail for sewing. Thread the tail through the remaining stitches and pull tight to close the head.
For the fox’s ears, cast on 8 stitches with orange yarn and knit in garter stitch for 6 rows. Then, decrease 1 stitch at the beginning and end of each row for the next 3 rows. Cut the yarn, leaving a tail for sewing. Repeat this process for the second ear.
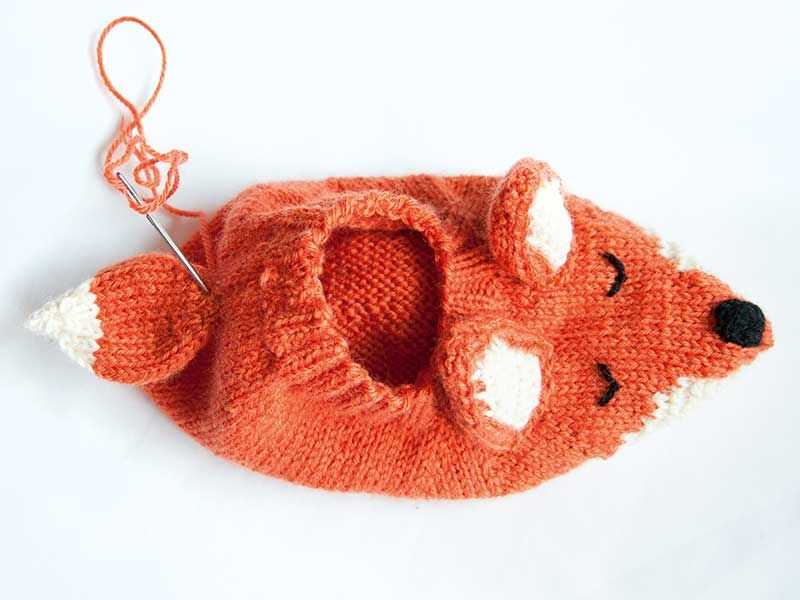
Now it’s time for assembly. Sew the ears onto the top corners of the head, leaving a small space between them. Use the black yarn to embroider the eyes and nose onto the face. Finally, stuff the head and body of the fox toy with the stuffing material, then sew the body onto the head.
With these simple steps, you can create your very own adorable fox toy. Whether you gift it to a child or keep it for yourself, this knitted toy is sure to bring joy and charm to anyone who sees it. Happy knitting!
Choosing the Right Yarn and Needles
Choosing the right yarn and needles is crucial when knitting a fox toy. The yarn you choose will determine the overall look and feel of the toy, while the needles will affect the gauge and size of the finished project.
Yarn
When selecting yarn for your fox toy, it’s important to consider the desired texture and appearance. A soft, fluffy yarn with a high wool content can create a realistic fur effect, while a smooth, acrylic yarn can give the toy a sleek and polished look.
It’s also important to consider the weight or thickness of the yarn. Thicker yarns will produce a larger and more chunky toy, while thinner yarns will create a more delicate and lightweight toy. In the case of the fox toy, a worsted weight yarn is a good choice as it strikes a balance between size and detail.
Needles
The size of the needles you use will affect the gauge of your knitting. For the fox toy, it’s recommended to use a pair of size 4mm (US 6) knitting needles. This size will produce stitches that are neither too tight nor too loose, resulting in a well-proportioned and solid toy.
In addition to the size, consider the material of your needles. Metal needles are durable and slide easily through the stitches, making them a popular choice for many knitters. However, some knitters prefer the feel and warmth of wooden or bamboo needles. Ultimately, the choice of material is a personal preference.
Remember to always check your tension gauge before starting the project to ensure that you are using the correct yarn and needle combination. This will help you achieve the desired size and proportions for your fox toy. Happy knitting!
Starting with the Fox’s Body
When knitting the fox toy, it’s best to start with the body. The body is knitted in rounds using the magic loop technique, so you’ll need a long circular needle or double-pointed needles. The pattern calls for a worsted weight yarn and appropriate needle size to achieve the desired gauge.
To begin, cast on the required number of stitches and join in the round. This will be the base of the fox’s body. For the first few rounds, knit all stitches in the round to create a smooth and even foundation. Then, you can start working the pattern stitches.
The pattern will generally instruct you to work a certain number of rounds in stockinette stitch, which means knitting one round and purling the next round. This creates the characteristic smooth texture of the fox’s body. The pattern may also include special stitches or details, such as increases or decreases, to shape the body and give it a more realistic look.
As you work on the body, make sure to regularly check your gauge to ensure that you’re on track. If your gauge is too tight, your fox may turn out smaller than intended, while a loose gauge may result in a larger toy. Adjust your tension and needle size accordingly to achieve the correct gauge.
Once you’ve completed the required number of rounds for the body, you can finish off by binding off the stitches. Cut the yarn, leaving a tail for sewing up any remaining openings or attaching additional parts, such as the head and legs. With the body complete, you can move on to knitting the other parts of the fox toy and assembling them to bring your creation to life.
Creating the Fox’s Head and Ears
One of the most important parts of creating a knitted fox toy is crafting the head and ears. These details give the toy its characteristic fox-like appearance and are essential for bringing the fox to life.
To begin, start by knitting the fox’s head using the prescribed pattern. The pattern will typically specify the number of stitches and rows needed, as well as any special stitch patterns or techniques required. Following the pattern carefully will ensure that the proportions and shaping of the fox’s head are accurate.
Once the head is complete, it’s time to move on to the ears. The pattern may provide instructions for knitting the ears separately and then attaching them to the head, or it may require knitting the ears directly onto the head. Whichever method is used, pay attention to the size and shape of the ears to ensure they resemble those of a fox.
When attaching the ears to the fox’s head, take care to position them correctly. Usually, the ears are placed on the top corners of the head, giving the fox a cute and alert expression. Sew the ears securely in place using a yarn needle and the same yarn used for knitting the head.
Remember to stuff the head firmly before attaching the ears to give it a three-dimensional shape. This can be done using polyester fiberfill or another suitable stuffing material. Take care not to overstuff the head, as it may distort the shape or make it difficult to sew on the ears.
Adding Details to the Fox’s Face
When knitting a fox toy, adding the right details to the face is key to bringing the toy to life. By incorporating specific features and techniques, you can ensure that your fox toy is adorable and realistic.
1. Embroidering the Eyes
To create expressive eyes for your fox toy, you can use embroidery techniques. Firstly, choose a contrasting color of yarn for the eyes, such as black or dark brown. Thread a needle with this yarn and carefully embroider two small circles for the eyes. For added depth and realism, you can also stitch a small white highlight in each eye. Embroidering the eyes not only adds character to the toy but also gives it a charming and endearing look.
2. Shaping the Nose
The nose is an important feature of the fox’s face, and shaping it correctly will enhance the overall appearance of your toy. To achieve a three-dimensional effect, consider using a technique called “duplicate stitching.” This involves embroidering over existing stitches to create additional layers and depth. You can use a brown or black yarn to carefully stitch a triangular-shaped nose, making sure to fill in the area between the eyes. This technique will make the nose stand out and give your fox toy a more realistic appearance.
3. Adding Whiskers
Whiskers are a fun and playful detail that can add personality to your fox toy. You can use strands of yarn or thin pipe cleaners to create the whiskers. Cut several small pieces of yarn or pipe cleaner, and insert them into the face of the fox, on either side of the nose. You can secure them by stitching them in place or by using a small dab of fabric glue. Whiskers not only make your fox toy look more authentic but also add a touch of whimsy to the overall design.
Incorporating these details to the face of your knitted fox toy will make it truly special. Whether you’re creating the toy for yourself or as a gift, attention to detail will ensure a delightful and charming finished product.
Knitting the Fox’s Limbs and Tail
The limbs and tail of the fox toy are an important part of the knitting process. They add character and dimension to the finished toy, making it look more realistic and playful. To achieve the desired result, it is important to follow the instructions carefully and pay attention to the details.
1. Knitting the Limbs: Start by knitting the limbs of the fox toy. This pattern requires knitting four separate limbs – two front legs and two hind legs. Each limb is knitted using double-pointed needles and requires basic knitting techniques such as knitting in the round and decreasing stitches. The pattern will provide you with the necessary instructions and stitch counts for each limb. Take your time when knitting the limbs to ensure they are evenly shaped and consistent in size.
2. Shaping the Tail: The fox’s tail is knitted separately and then sewn onto the body. To create the tail, start with a long tail cast on and knit in stockinette stitch for the desired length. The pattern will provide instructions on shaping the tail, which may involve increasing and decreasing stitches to achieve the desired shape. Once the tail is complete, use a yarn needle to sew it securely onto the back of the toy, making sure it is centered and positioned correctly.
3. Finishing Touches: Once you have knitted all the limbs and attached the tail, take a moment to check for any loose stitches or uneven tension. Use a yarn needle to weave in any loose ends and secure them. If desired, you can also add additional details such as embroidery for the fox’s paws or facial features. This will enhance the toy’s appearance and give it a more personalized touch.
By following the pattern instructions and taking your time with the knitting process, you will be able to create adorable limbs and a tail for your fox toy. These details will bring your toy to life and make it a cherished item for years to come.
Assembling Your Knitted Fox Toy
Once you have completed knitting all the pieces of your fox toy, it’s time to assemble them together to bring your cute creation to life. Follow these simple steps to ensure that your fox toy looks its best:
Gather all the necessary materials: You will need your knitted fox pieces, yarn or thread in a matching color, a yarn needle, stuffing, and any additional embellishments you want to add.
1. Sew the body:
Start by sewing the body of the fox toy. Place the front and back pieces together, making sure that the right sides are facing each other. Use a yarn needle and yarn or thread to sew the two pieces together, leaving an opening for stuffing.
2. Stuff the body:
Once the body is securely sewn, carefully stuff it with the desired amount of stuffing. Make sure to evenly distribute the stuffing to create a well-shaped and firm body for your fox toy.
3. Sew the head and tail:
Next, sew the head and tail pieces separately. Follow the same method as used for the body, by placing the right sides together and sewing along the edges. Leave an opening for stuffing in both the head and tail.
4. Stuff the head and tail:
Once the head and tail are sewn, stuff them with the desired amount of stuffing. Ensure that the head is firm but not overly stuffed, as this will help give your fox toy a more realistic shape. Stuff the tail to your desired fullness.
5. Attach the head, tail, and limbs:
Using the yarn needle and your yarn or thread, carefully attach the head to the body by sewing them together. Do the same for the tail, making sure it is securely attached. Finally, sew the limbs in place on the body, ensuring that they are evenly spaced.
6. Add finishing touches:
Once all the pieces are securely attached, you can add any additional embellishments to your fox toy. This could include embroidering eyes and a nose, attaching buttons or beads for details, or even adding a cute accessory like a scarf or bowtie.
With these assembly steps completed, your knitted fox toy is now complete and ready to be enjoyed or gifted to someone special. Enjoy the process of bringing your creation to life and have fun adding your own personal touches!
Tips and Tricks for Knitting a Perfect Fox Toy
Knitting a fox toy can be a fun and rewarding project. Whether you’re a beginner or an experienced knitter, here are some tips and tricks to help you create the perfect fox toy.
Choose the Right Yarn:
When knitting a fox toy, it’s important to choose the right yarn. Opt for a yarn that is soft and durable. Acrylic or wool blends are great options as they provide both comfort and longevity. Consider using a yarn that has multiple shades of orange, brown, and white to create a realistic fox fur effect.
Select Appropriate Needles:
The size of your knitting needles can affect the outcome of your fox toy. For a denser and more sturdy toy, use smaller size needles. On the other hand, if you prefer a looser and softer toy, opt for larger size needles. It’s a good idea to test different needle sizes with a gauge swatch to ensure you achieve the desired texture and size.
Take Your Time with Stitch Count:
Stitch count is crucial when knitting a fox toy. Make sure to carefully follow the pattern instructions and count your stitches accurately. It can be helpful to use stitch markers to keep track of increases and decreases. Double-check your work at each round or row to avoid any mistakes that could affect the shape and proportions of your toy.
Add Details with Embroidery:
To give your fox toy a more realistic look, consider adding details with embroidery. Use black yarn or embroidery floss to create the eyes, nose, and mouth. You can also add small stitches to define the ears and create the signature fox face. Take your time and use small, precise stitches to achieve the desired effect.
Blocking and Stuffing:
Once you have finished knitting your fox toy, make sure to block it to give it a neat and uniform shape. Blocking involves wetting the toy and stretching it to the desired size and shape. After blocking, stuff the toy firmly with polyester fiberfill or your preferred stuffing material. Use small amounts of stuffing at a time to avoid overfilling and distorting the shape of the toy.
By following these tips and tricks, you’ll be able to create a beautiful and realistic fox toy through your knitting skills. Enjoy the process and don’t be afraid to get creative with colors and details!
Alternative Ideas and Variations for Your Knitted Fox Toy
If you have already made a knitted fox toy using the free pattern, you might be interested in exploring some alternative ideas and variations to make your toy unique. Here are a few suggestions to consider:
1. Different Colors
Instead of the traditional orange color, you can experiment with different shades of red, brown, or even gray to create a fox toy with a unique and personalized look. You could also add stripes or spots to mimic different fox species.
2. Embroidered Details
Enhance the features of your knitted fox toy by adding embroidered details such as a cute button nose, whiskers, or expressive eyes. This will give your toy a more lifelike appearance and make it even more charming.
3. Clothing and Accessories
You can add a touch of personality to your knitted fox toy by dressing it up in different outfits or accessories. Consider knitting tiny scarves, hats, or even mini backpacks to give your fox toy a fun and playful look.
4. Changing the Body Shape
If you want to create a more unique and whimsical fox toy, consider changing the body shape. You could make your toy taller, wider, or even give it a more slender or elongated body. Get creative and have fun experimenting with different proportions.
5. Mixing Different Knitting Techniques
Instead of sticking to the traditional knitting technique used in the free pattern, you can mix it up by incorporating different knitting stitches and techniques. Try combining garter stitch, ribbing, and cable knitting to add texture and depth to your fox toy.
Remember, these are just a few ideas to get you started. Feel free to use your imagination and explore different options to make your knitted fox toy truly one-of-a-kind!
Showcasing Your Finished Fox Toy
Now that you have completed your fox toy, it’s time to display it proudly! Here are some ideas for showcasing your finished creation:
- Photographs: Take high-quality pictures of your fox toy in different settings and angles. You can capture its cute expression and show off the intricate details of your knitting work. Share these photos on social media or display them in a photo frame.
- Gift or Decor: Your fox toy can make a wonderful gift for a child or a fox lover. Wrap it in a ribbon and present it creatively to the recipient. You can also use it as a decorative item in your own home or office.
- Display Shelf: Create a dedicated display shelf for your fox toy and other knitted creations. Arrange them neatly using different props or backdrops to enhance their appeal.
- Personal Collection: If you enjoy knitting toys, consider creating a collection of different animal toys. Display them together to create a charming display that will impress your guests.
- Online Portfolio: If you are proud of your knitting skills and want to showcase your work to a wider audience, consider creating an online portfolio or blog. Share the process of making the fox toy and the final result to inspire and connect with other knitting enthusiasts.
Remember, your finished fox toy is a testament to your creativity and skills. Whether you choose to keep it for yourself, gift it to someone special, or share it with the online community, it’s an accomplishment worth celebrating. Enjoy the process of knitting and take pride in the beautiful results!