
Knitting is a popular craft that allows you to create unique and personalized accessories and garments. For those who are fans of cozy and warm scarves, the Freya Harper Scarf Knitting Pattern is a must-try. This pattern combines classic knitting techniques with a touch of modern style to create a beautiful and versatile scarf.
Designed by Freya Harper, a talented knitting enthusiast, this scarf pattern features a combination of textured stitches that add depth and visual interest to the finished product. With its intricate design and delicate detailing, this scarf is sure to become a staple in your winter wardrobe.
The Freya Harper Scarf Knitting Pattern is suitable for knitters of all skill levels. Whether you’re a beginner looking to take on a new project or an experienced knitter seeking a challenge, this pattern offers something for everyone. The pattern includes detailed instructions, stitch diagrams, and helpful tips to guide you through the knitting process.
Freya Harper Scarf Knitting Pattern: How to Create a Stylish Winter Accessory

Stay warm and stylish this winter with the Freya Harper Scarf knitting pattern. This pattern is perfect for both beginners and experienced knitters looking to create a fashionable accessory that will keep them cozy during the colder months.
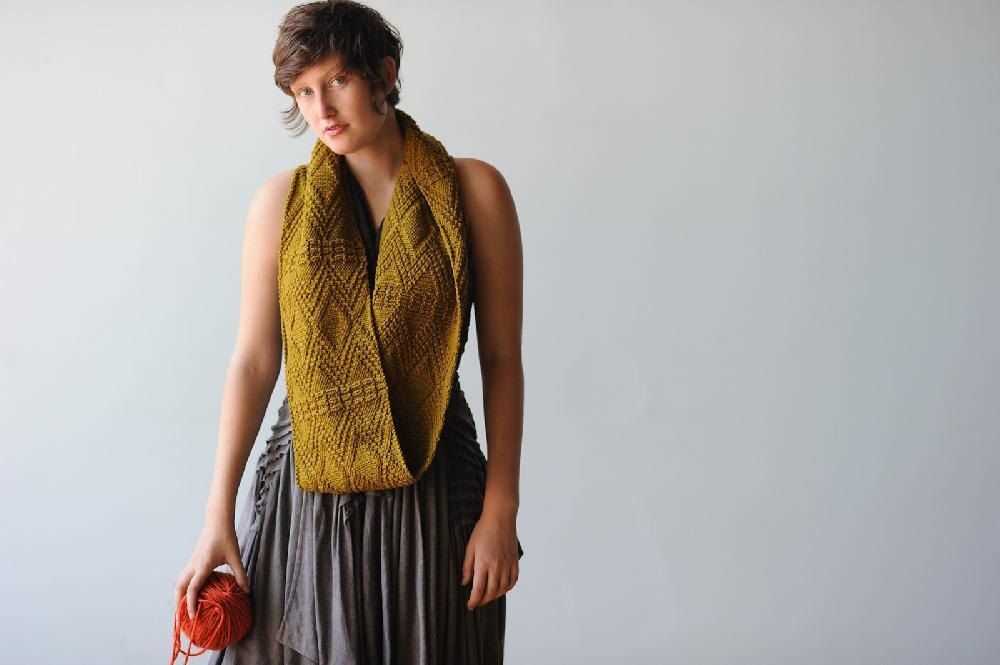
The Freya Harper Scarf knitting pattern features a unique design that combines different stitches to create a textured and eye-catching look. With its intricate lace patterns and delicate cables, this scarf is sure to turn heads wherever you go.
To create the Freya Harper Scarf, you will need basic knitting skills and a few materials. The pattern calls for a medium-weight yarn and a pair of knitting needles, making it accessible for knitters of all levels. The detailed instructions provide step-by-step guidance, making it easy to follow along and create your own stylish winter accessory.
The finished scarf is not only fashionable but also functional. Its generous length allows you to wrap it around your neck multiple times for added warmth, while the soft yarn ensures a comfortable and cozy feel against your skin.
Materials:
- Medium-weight yarn in your choice of color
- Pair of knitting needles in the appropriate size
- Stitch markers
- Tapestry needle
Instructions:

- Cast on the desired number of stitches
- Begin knitting the lace pattern as instructed
- Continue knitting until the desired length is reached
- Bind off and weave in any loose ends
With the Freya Harper Scarf knitting pattern, you can create a stylish winter accessory that will keep you warm and fashionable all season long. Whether you’re knitting it for yourself or as a gift for a loved one, this scarf is sure to be a hit.
Gather Your Knitting Supplies
Before beginning the Freya Harper scarf knitting pattern, make sure you have all the necessary supplies on hand. Having everything organized and ready to go will help make the knitting process smoother and more enjoyable.
Here is a list of the essential knitting supplies you will need:
- Yarn: Choose a soft and cozy yarn in the color of your choice. Make sure to check the pattern for the recommended yarn weight and yardage.
- Knitting Needles: Select the appropriate needle size based on the recommended gauge in the pattern. Straight or circular needles can be used, depending on your preference.
- Tapestry Needle: This needle is used for weaving in loose ends and sewing seams.
- Scissors: A good pair of scissors is essential for cutting yarn and trimming excess ends.
- Stitch Markers: These small rings are used to mark specific stitches or sections in the pattern.
- Row Counter: Keeping track of your rows is important, especially for larger projects. A row counter can be a physical device or a digital app.
- Measuring Tape: Measuring tape is helpful for checking gauge and measuring the length of your scarf.
- Stitch Holder or Waste Yarn: These tools are used to hold stitches temporarily when needed.
Having all these supplies within easy reach before you start knitting will save you time and prevent any interruptions during the project. Take a few moments to gather everything together, and soon you’ll be ready to cast on and begin creating your own beautiful Freya Harper scarf!
Choose the Perfect Yarn for Your Freya Harper Scarf
The Freya Harper scarf is a stunning knitting pattern that requires the perfect yarn to bring out its beauty. When selecting your yarn, it’s essential to consider the characteristics that will complement the intricate texture and design of the scarf.
Weight: The weight of the yarn you choose will greatly impact the final result of your scarf. For the Freya Harper pattern, it is recommended to use a bulky or super bulky weight yarn. This will help to create a plush and luxurious texture, showcasing the intricate stitches and details. The thickness of the yarn will also make the knitting process quicker, allowing you to enjoy your finished scarf sooner.
Fiber Content:
- Merino Wool: Merino wool is known for its softness and warmth, making it an excellent choice for the Freya Harper scarf. The natural elasticity of merino wool also helps to maintain the shape and drape of the scarf, ensuring it stays cozy and stylish.
- Alpaca: Alpaca yarn is incredibly soft and lightweight, making it an ideal option for a scarf. It provides excellent insulation and is suitable for those with sensitive skin. The drape of alpaca yarn will enhance the movement of the scarf, adding an elegant touch to your overall look.
- Cashmere: If you’re looking for the ultimate luxury, cashmere yarn is an excellent choice for the Freya Harper scarf. Cashmere is incredibly soft, lightweight, and provides exceptional warmth. The delicate fibers of cashmere will enhance the intricate details of the scarf, creating a truly elegant and cozy accessory.
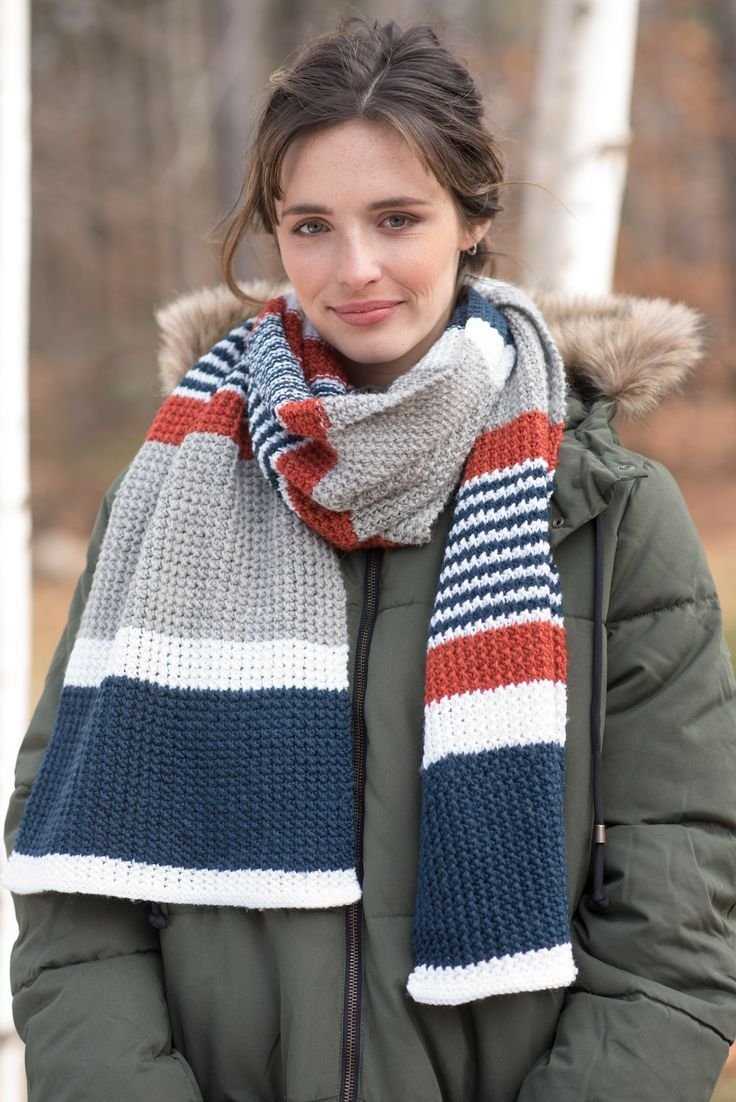
Color: The choice of color is entirely up to your personal preference and style. You can opt for neutral tones like gray, cream, or camel for a timeless and versatile look. Alternatively, you can choose bold and vibrant colors to make a statement and add a pop of color to your outfit. The Freya Harper pattern will look beautiful in any color, so feel free to experiment and find the shade that truly speaks to you.
By selecting the right weight, fiber content, and color, you can ensure that your Freya Harper scarf turns out as beautiful as the original design. The perfect yarn will not only enhance the pattern but also provide comfort and style throughout the chilly seasons.
Understanding the Freya Harper Scarf Knitting Pattern
The Freya Harper Scarf is a beautiful knitting pattern that is perfect for adding a touch of elegance and warmth to your winter wardrobe. This pattern is designed for intermediate knitters who are comfortable with basic knitting techniques such as knit, purl, and yarn overs, as well as more advanced techniques such as cables and lace stitches.
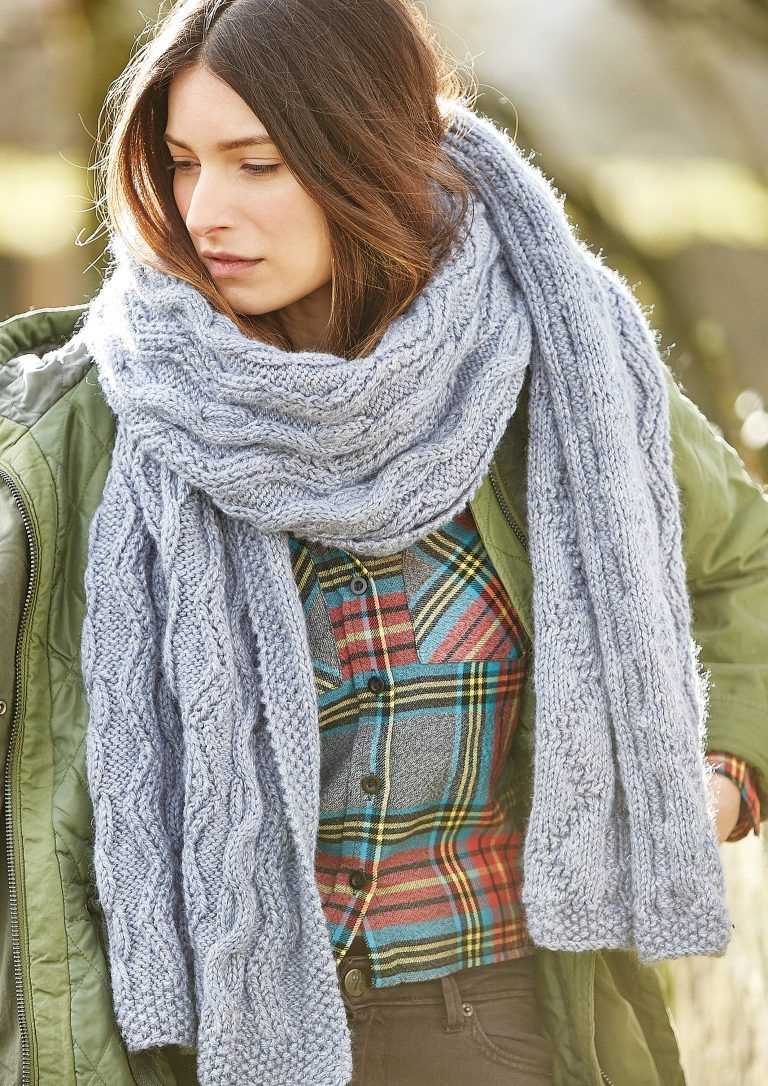
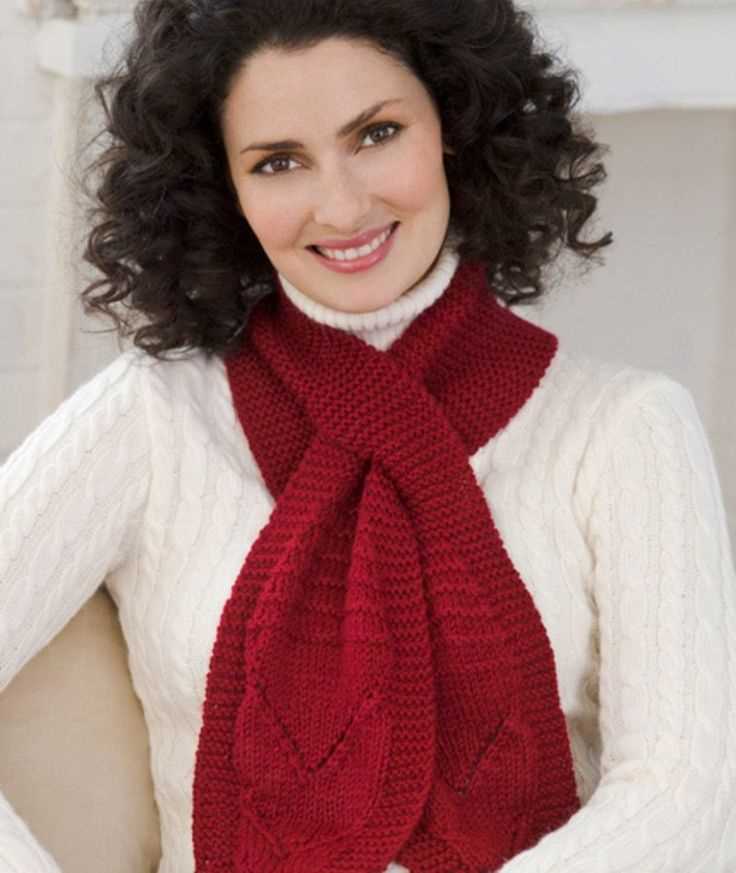
The pattern begins with a section of ribbing that provides a nice stretch and helps to keep the scarf snug around the wearer’s neck. From there, the scarf transitions into a stunning cable and lace combination stitch pattern. The cables add texture and depth to the design, while the lace stitches create an intricate and delicate look. The combination of these two techniques gives the scarf a unique and eye-catching appearance.
To successfully complete the Freya Harper Scarf, it’s important to carefully read through the pattern before starting. The pattern includes detailed instructions, a stitch chart, and a list of abbreviations used. Familiarize yourself with the abbreviations and the different stitches so that you can follow along easily. Make sure you have all the necessary materials, including the recommended yarn and needle size, as specified in the pattern.
As you work through the pattern, it’s helpful to keep track of your progress using a row counter or a pen and paper. This will help you stay organized and ensure that you don’t miss any important steps. Take your time with each section of the pattern, paying close attention to the stitch counts and any special instructions.
With a little patience and practice, you’ll be able to create a stunning Freya Harper Scarf that will be a stylish addition to your winter wardrobe. Whether you choose to knit it for yourself or as a gift for a loved one, this scarf is sure to be treasured for years to come. So grab your knitting needles and get started on this beautiful project today!
Casting On: Start Your Scarf with Confidence
Knitting a scarf is a great way to practice your knitting skills and create a beautiful accessory to keep you warm during the colder months. If you’re new to knitting or just need a refresher, casting on is the first step in starting your scarf project. With a few simple techniques and some practice, you’ll be casting on with confidence in no time.
Choose your yarn and needles: Before you can start casting on, you’ll need to choose the right yarn and needles for your project. The Freya Harper scarf knitting pattern typically recommends using a medium-weight yarn and size 8 or 9 knitting needles. Make sure to check the gauge recommended in the pattern to ensure your stitches will come out the right size.
Once you have your yarn and needles ready, it’s time to begin casting on your stitches. There are several different methods for casting on, but the long-tail cast-on method is often used for scarves. To start, create a slipknot by making a loop with the tail end of the yarn and pulling the working end through the loop. Place this loop on your needle and tighten it gently.
The first row of stitches in your scarf is often the most challenging, but with practice, it will become easier. Remember to keep your tension even and not too tight or loose. The number of stitches you cast on will depend on the width of your scarf, so be sure to follow the pattern instructions. Once you have cast on your stitches, you’re ready to start knitting the first row of your scarf and watch it come to life.
Mastering the Basic Knitting Stitches for the Freya Harper Scarf
When it comes to knitting the Freya Harper scarf, it’s important to have a solid understanding of the basic knitting stitches. These stitches form the foundation of the scarf and knowing how to execute them properly will ensure that your finished product looks beautiful and professional. In this guide, we will walk you through the key stitches you’ll need to master.
1. Cast-on Stitch:
The first step in knitting the Freya Harper scarf is to start with the cast-on stitch. This stitch creates a foundation row of loops that will hold your stitches as you progress further. There are different methods of casting on, but the most common one is the long-tail cast-on. It’s important to practice this stitch until you can get an even tension and have the right number of stitches on your needle.
2. Knit Stitch:
The knit stitch is the most basic stitch in knitting, and it forms the majority of the scarf’s fabric. To knit, you will insert the right needle into the front of the stitch on the left needle, wrap the yarn around the right needle, and pull it through the stitch, creating a new stitch on the right needle. This stitch creates the classic “V” shape and gives the fabric a smooth texture.
3. Purl Stitch:
The purl stitch is the opposite of the knit stitch and creates a different texture on the fabric. To purl, you will insert the right needle into the back of the stitch on the left needle, wrap the yarn around the right needle, and pull it through the stitch, creating a new stitch on the right needle. This stitch creates a bumpy texture and is often used in combination with the knit stitch to create various patterns and designs.
4. Stockinette Stitch:
The stockinette stitch is a basic knitting pattern that alternates between rows of knit stitches and rows of purl stitches. This stitch creates a smooth, flat fabric with one side showing the knit stitches and the other side showing the purl stitches. It is commonly used in scarves, sweaters, and other knitting projects.
5. Binding off:
Once you have completed the desired length of your Freya Harper scarf, it’s time to bind off. Binding off is the process of closing off your stitches and creating a finished edge. To bind off, knit the first two stitches, then use the left needle to lift the first stitch over the second stitch and off the right needle. Continue knitting and lifting the previous stitch over until you have one stitch remaining. Cut the yarn, leaving a tail, and thread it through the final stitch to secure it.
By mastering these basic knitting stitches, you’ll be well-equipped to tackle the Freya Harper scarf pattern and create a beautiful accessory to keep you warm and stylish. Remember to practice these stitches until you feel confident in your technique, and don’t be afraid to experiment with different stitch combinations to add your own personal touch to the scarf.
Following the Pattern: Rows and Repeats
When knitting the Freya Harper scarf, it is important to carefully follow the pattern to achieve the desired result. Understanding the instructions for the rows and repeats is crucial in creating a beautiful and well-executed scarf.
The pattern will typically provide details on the number of stitches to cast on and the recommended needle size. It may also include information on gauge, which is important for ensuring the correct size and fit of the finished scarf. Make sure to take the time to check your gauge with a swatch before starting the project.
The pattern will then outline the specific instructions for each row. This may include a combination of knitting stitches, purling stitches, and various stitch patterns, such as cables or lace. Pay attention to any special stitch instructions or abbreviations provided in the pattern.
One of the important aspects of following the pattern is understanding the concept of repeats. Many patterns will include a section that needs to be repeated multiple times to create a specific design or pattern. This may be indicated by a repeat symbol, such as an asterisk (*) or brackets ([]).
For example, the pattern may instruct you to “repeat rows 1-6 three times.” This means that you would knit or purl according to the instructions for rows 1 to 6, and then repeat those same instructions two more times.
It is crucial to carefully count your rows and repeats to ensure accuracy in the pattern. This will help you maintain the correct stitch count and avoid any mistakes or inconsistencies. Using stitch markers can also be helpful in keeping track of your progress.
By following the pattern’s instructions for rows and repeats, you will be able to confidently create the Freya Harper scarf and achieve a beautiful finished product.
Adding Variety: Incorporating Different Knitting Techniques
When knitting a Freya Harper scarf, there are many ways to add variety and make the pattern more interesting. By incorporating different knitting techniques, you can create unique textures and designs that will make your scarf stand out.
One technique you can use is cable knitting. This involves crossing stitches over each other to create a twisted, braided effect. You can add cables to your scarf by following a specific cable pattern or by creating your own. Cable knitting adds depth and dimension to your project, and is a great way to add visual interest.
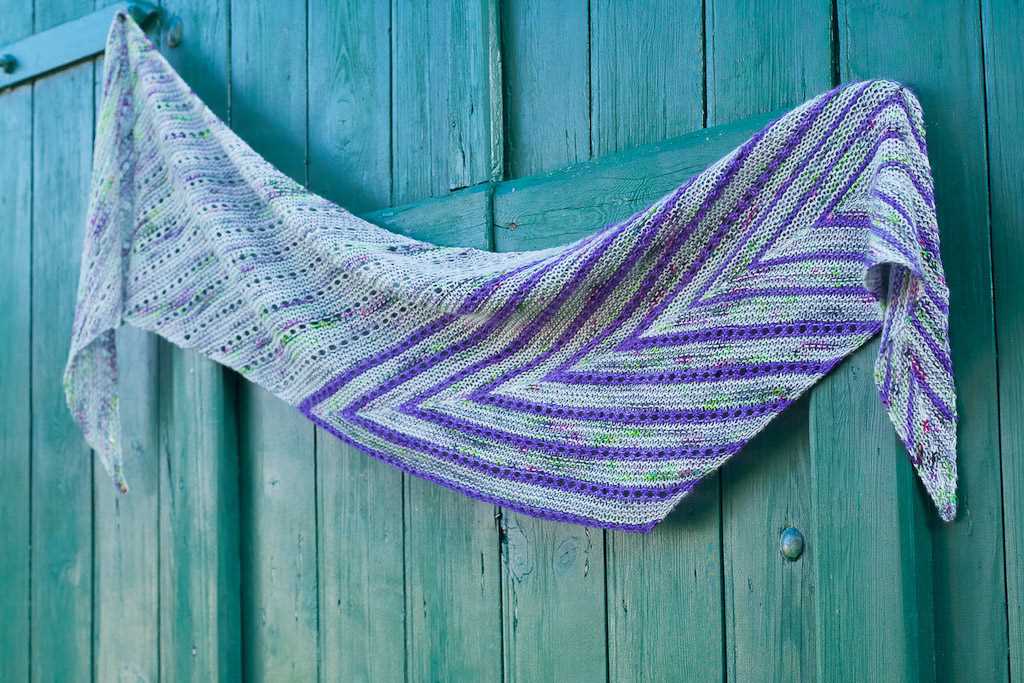
Another technique to consider is lace knitting. Lace patterns involve creating deliberate holes in your knitting to form intricate and delicate designs. You can incorporate lace knitting into your Freya Harper scarf by using lace stitch patterns or by adding lace sections in between other stitch patterns. Lace knitting adds a touch of elegance and femininity to your scarf.
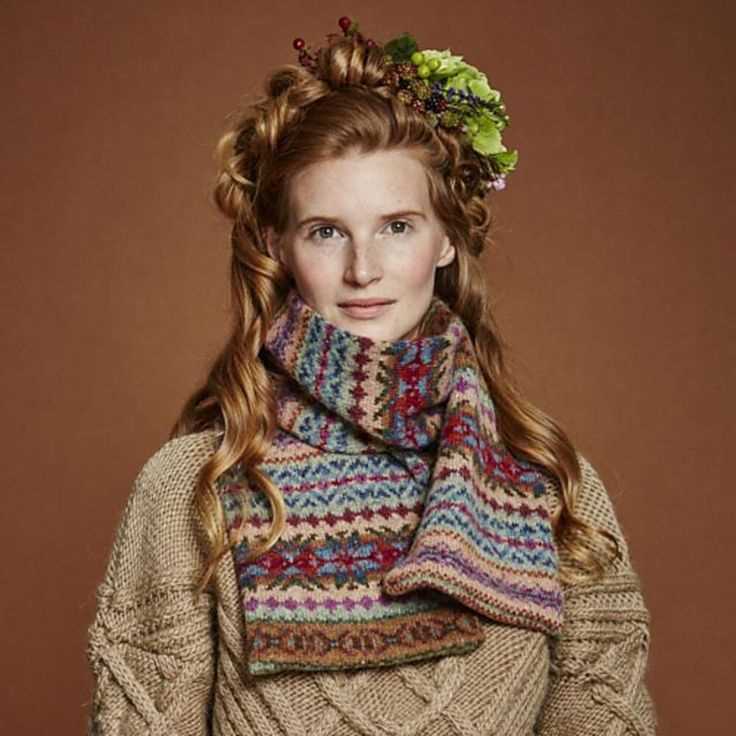
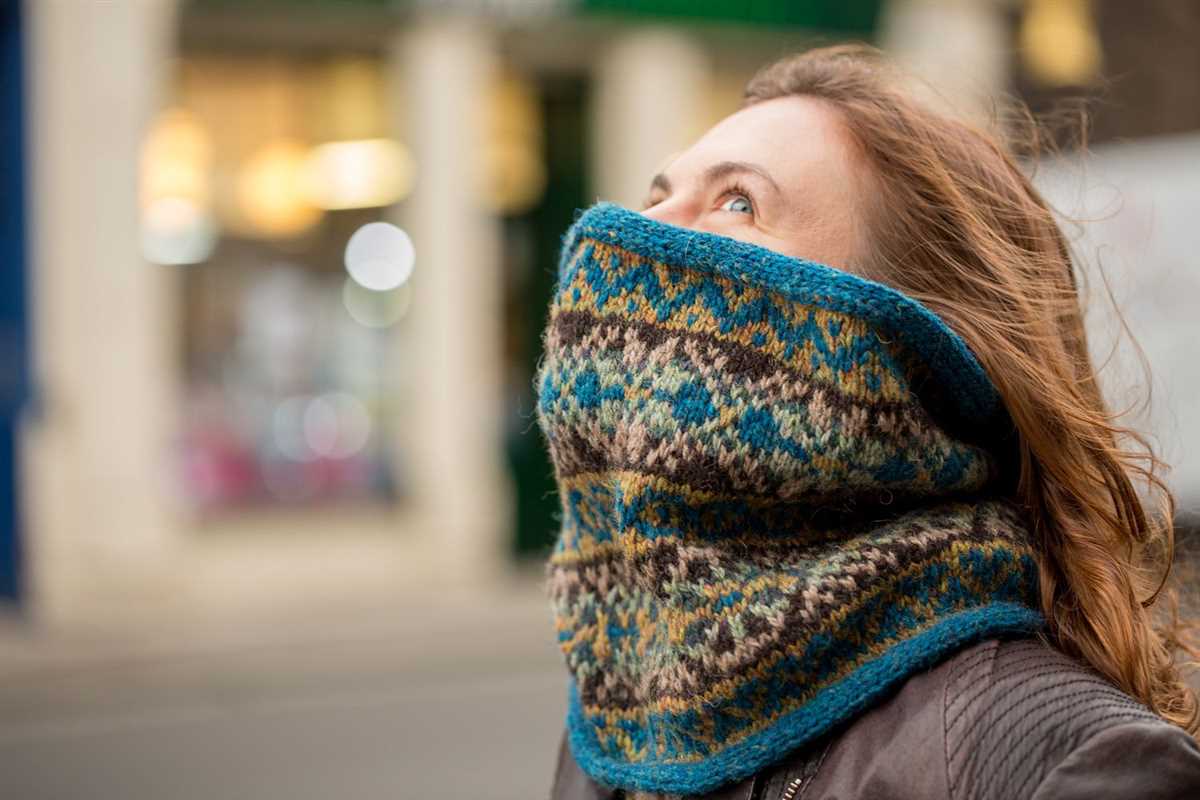
Colorwork is yet another technique that can enhance your scarf. By using multiple colors of yarn, you can create beautiful patterns and motifs. Fair Isle knitting, for example, involves knitting with two different colors in a row, creating geometric patterns. You can also experiment with intarsia knitting, which allows you to create larger pictures or designs within your scarf. Colorwork adds vibrancy and visual interest to your knitting.
- Try incorporating cable knitting to add a twisted, braided effect.
- Experiment with lace knitting for intricate and delicate designs.
- Consider using colorwork to create beautiful patterns and motifs.
By incorporating these different knitting techniques into your Freya Harper scarf, you can create a truly unique and eye-catching piece. Have fun experimenting with different patterns and designs to make your scarf one-of-a-kind!
Creating a Stunning Color Gradient on Your Freya Harper Scarf
The Freya Harper scarf is a beautiful knitting pattern that allows you to create a stunning color gradient. With a few simple techniques, you can achieve a seamless transition from one color to another, resulting in a scarf that is as visually striking as it is cozy.
1. Choose your colors: Start by selecting a range of colors that you would like to use for your gradient. You can choose colors that are close in shade or opt for a more dramatic contrast. Consider using yarns with variegated or self-striping patterns to add depth to your gradient.
2. Plan your transition: Before you begin knitting, it’s helpful to plan out how you want your colors to transition. You can create a gradual fade from one color to the next, or incorporate more abrupt color changes. Sketching out a color chart can be a useful way to visualize your design.
3. Knit with multiple strands: To create a smooth color transition, you can knit with multiple strands of yarn at once. Start by holding both the old and new color yarns together and knitting a few rows. As you continue, gradually decrease the amount of the old color yarn until you are only using the new color.
4. Introduce blending techniques: If you want a more subtle transition between colors, you can try blending techniques such as striping or marling. Stripes involve alternating rows of different-colored yarns, while marling involves holding two different-colored strands together and knitting with them as one.
5. Experiment with different stitch patterns: Don’t be afraid to experiment with different stitch patterns to enhance your color gradient. Some stitch patterns, like the brioche stitch, can create a beautiful interplay between colors. Play around with textures and see how they complement your chosen color scheme.
6. Block your scarf: Once you have completed your scarf, block it to improve its appearance and stretch out any uneven stitches. Blocking will also help to set the colors and blend them together even more seamlessly.
With these tips in mind, you can create a stunning color gradient on your Freya Harper scarf. Whether you choose a subtle or bold transition, the result will be a unique and eye-catching accessory that is sure to turn heads.
Troubleshooting Tips for Common Knitting Mistakes
Knitting can be a rewarding and relaxing hobby, but it’s not without its challenges. Whether you’re a beginner or an experienced knitter, it’s common to encounter a few mistakes along the way. However, with a few troubleshooting tips, you can fix these mistakes and continue enjoying your knitting project.
1. Dropped Stitches
One of the most common mistakes in knitting is dropping a stitch. This can happen when you accidentally slip a stitch off the needle or forget to knit or purl a stitch. To fix a dropped stitch, use a crochet hook or the tip of your knitting needle to catch the dropped stitch and pull it back up through the stitches in that row. Then, carefully place the stitch back on the needle and continue knitting.
2. Uneven Tension
Uneven tension can result in stitches that are too tight or too loose, creating an uneven look in your knitting project. To improve tension, practice knitting with consistent rhythm and pressure on the yarn. If your stitches are too tight, try using larger needles or relaxing your grip. If your stitches are too loose, try using smaller needles or tightening your grip slightly. It may take some trial and error, but finding the right tension will greatly improve the overall appearance of your knitting.
3. Twisted Stitches
Twisted stitches occur when you accidentally twist the loop of the stitch while knitting. This can result in distorted stitches that don’t align properly with the rest of your project. To fix a twisted stitch, carefully insert the tip of your knitting needle through the stitch from the front to the back, and then knit or purl it as usual. This will untwist the stitch and ensure that it sits correctly in your knitting.
4. Holes or Gaps
Holes or gaps in your knitting can be frustrating, especially if you’re working on a delicate pattern. These gaps can occur when you accidentally skip a stitch or create an accidental yarn over. To fix a hole or gap, carefully examine your knitting and identify where the mistake occurred. Then, using a crochet hook or the tip of your knitting needle, pick up the dropped stitch or close the gap by creating a new stitch with the adjacent stitches. Make sure to secure the new stitch by knitting or purling it as required by your pattern.
- Remember, mistakes happen to even the most experienced knitters. Don’t be discouraged if you make a mistake – it’s all part of the learning process.
- Counting and checking your stitches regularly can help you catch and fix mistakes early on before they become more challenging to correct.
- If you’re unsure how to fix a specific mistake, don’t hesitate to seek guidance from knitting resources such as books, online tutorials, or experienced knitters in your community.
Blocking Your Finished Freya Harper Scarf
Blocking is an important final step in the knitting process that helps to shape and enhance the overall appearance of your finished Freya Harper scarf. It involves shaping and stretching the scarf to its desired measurements and allowing it to dry in this position. Blocking can help smooth out any uneven stitches, open up lace patterns, and give your scarf a finished, polished look.
To start the blocking process, you will need to gather a few supplies. You will need blocking mats or towels, rustproof pins, and a spray bottle filled with water. Lay out the blocking mats or towels on a flat surface, making sure they are larger than the dimensions of your scarf. Pin the scarf to the mats, using rustproof pins to hold it in place.
Next, use the spray bottle to lightly mist the scarf with water. Make sure to evenly distribute the water so that the entire scarf is moist, but not soaking wet. Gently reshape and stretch the scarf to its desired measurements, using your fingers. Pay special attention to any lace patterns, making sure to open up the stitches as much as possible.
Once the scarf is shaped and stretched to your liking, leave it to dry completely. This can take anywhere from a few hours to overnight, depending on the climate and the thickness of the yarn used. Avoid disturbing the scarf while it is drying, as this can cause the shape to shift or the stitches to lose their definition.
After the scarf is dry, carefully remove the pins and admire your beautifully blocked Freya Harper scarf. The blocking process helps to enhance the stitch definition, drape, and overall appearance of the scarf, making it a lovely accessory to wear or gift to someone special.
Adding Fringe or Tassels for a Personalized Touch
Looking to add a little extra flair to your Freya Harper scarf? Consider adding fringe or tassels to personalize your creation and make it truly unique. Fringe and tassels can add texture, movement, and visual interest to your scarf, making it a statement piece that stands out from the crowd.
How to Add Fringe: Adding fringe to your scarf is a simple and fun way to customize your knitting project. To add fringe, you will need some extra yarn in a coordinating color. Cut the yarn into pieces that are twice the desired length of the fringe. Fold each piece in half and attach to the ends of your scarf by looping the folded end through a stitch and pulling the loose ends through the loop. Continue attaching the fringe along the entire length of your scarf, spacing them evenly for a polished look.
How to Add Tassels: Tassels can give your scarf a bohemian or playful touch. To add tassels, you will need to cut several pieces of yarn, each about four times the desired length of the tassel. Take a few pieces of yarn and fold them in half, creating a loop. Insert the folded end through a stitch at the end of your scarf and pull the loose ends through the loop, creating a knot. Repeat this process along the entire edge of your scarf, spacing the tassels evenly for a balanced look.
Whether you choose to add fringe or tassels, these embellishments can take your Freya Harper scarf to the next level. Have fun experimenting with different colors and lengths to create a look that reflects your personal style. The added texture and movement will make your scarf a truly eye-catching accessory that you’ll love to wear.
Sharing Your Finished Freya Harper Scarf with the Knitting Community
Once you have completed your beautiful Freya Harper scarf, you may want to share it with the knitting community. The knitting community is a wonderful place to connect with other knitters, show off your projects, and get inspiration for future creations. Here are a few ways you can share your finished Freya Harper scarf:
1. Share on Social Media
Take a photo of your finished scarf and share it on your favorite social media platforms. Consider using hashtags like #FreyaHarperScarf or #KnittingCommunity to reach a wider audience. Don’t forget to tag the pattern designer or the yarn brand if they have a social media presence. This way, they will be able to see and appreciate your work.
2. Upload to Knitting Forums or Ravelry
Join online knitting forums or platforms like Ravelry and upload a photo of your finished scarf. These platforms have dedicated sections where you can showcase your completed projects. Not only will you be able to share your work with the knitting community at large, but you may also inspire and motivate other knitters who are considering making the Freya Harper scarf.
3. Donate or Gift Your Scarf
If you have already made multiple Freya Harper scarves or simply have more scarves than you could ever wear, consider donating or gifting your finished scarf to someone in need. Check with local charities, shelters, or organizations that accept handmade items. Your beautiful creation will not only keep someone warm but also bring them joy and comfort.
By sharing your finished Freya Harper scarf, you become a part of the larger knitting community and inspire others with your creativity and skills. So don’t hesitate to show off your masterpiece!