
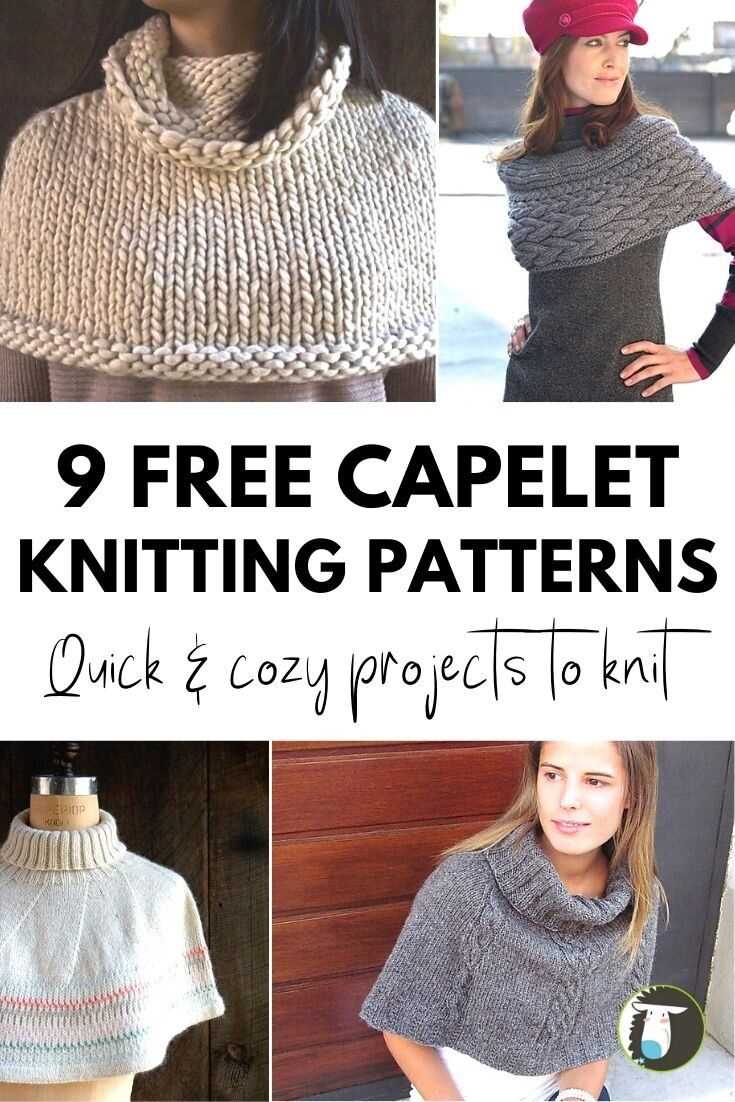
If you’re looking for a fun and fashionable knitting project, look no further than the chunky knit capelet pattern. This versatile and trendy accessory is perfect for keeping warm during chilly weather while adding a touch of style to any outfit. Whether you’re a knitting novice or an experienced crafter, this pattern is suitable for all skill levels.
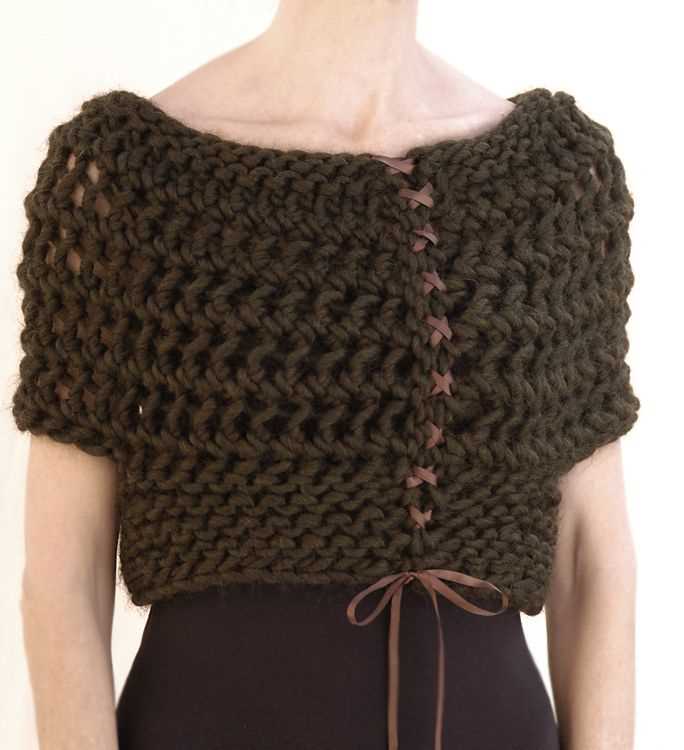
The chunky knit capelet pattern features a unique combination of stitches and textures that create a beautiful and eye-catching design. Using thick yarn and large knitting needles, you’ll be able to quickly create this cozy and stylish accessory. The pattern also allows for customization, so you can make it longer or shorter depending on your preference.
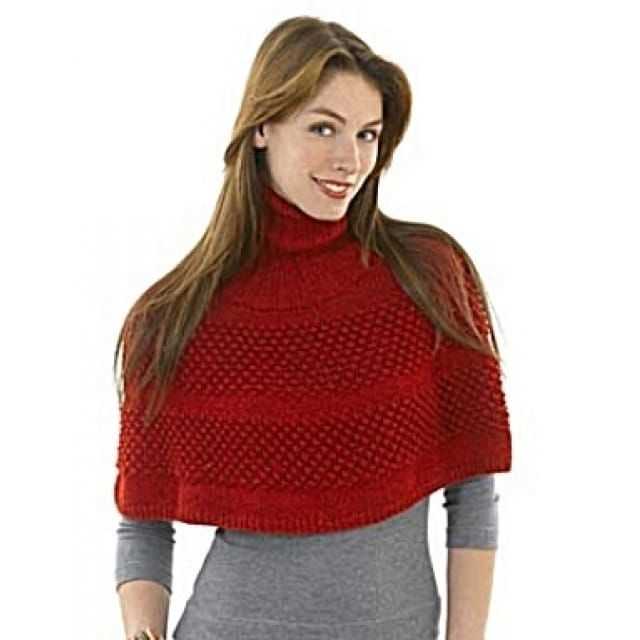
Not only is the chunky knit capelet a practical choice for staying warm, but it also adds a fashionable element to any look. Whether you wear it over a sweater, dress, or even a jacket, this accessory instantly elevates your outfit and helps you stand out from the crowd. With its chunky and cozy design, it’s the perfect addition to your winter wardrobe.
Chunky Knit Capelet Pattern
If you’re looking for a stylish and warm accessory to add to your winter wardrobe, a chunky knit capelet is the perfect choice. This versatile piece can be layered over sweaters, long-sleeved shirts, or even dresses to add an extra layer of coziness and style. Plus, with a chunky knit pattern, it’s sure to keep you warm during those chilly winter months. Whether you’re a beginner or an experienced knitter, this pattern is perfect for you.
Materials Needed:
- Chunky yarn in your preferred color
- Size 10 knitting needles
- Tapestry needle for weaving in ends
- Scissors
Instructions:
- Start by casting on 60 stitches onto your knitting needles.
- Knit two rows in garter stitch (knit every stitch) for the border.
- Continue knitting in stockinette stitch (knit one row, purl one row) until the capelet measures approximately 12 inches in length.
- Next, knit two rows in garter stitch for the border.
- Bind off all stitches and weave in any loose ends.
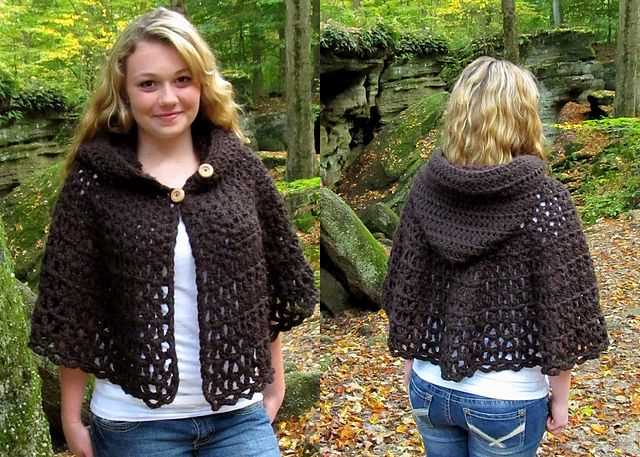
This chunky knit capelet pattern is a great project for beginners to practice their knitting skills. The chunky yarn and large needles make it easy to see your stitches and create a cozy finished product. Plus, with its simple design, you can easily customize the capelet by adding buttons, a cowl neck, or even a hood. So grab your knitting needles and get started on creating your very own chunky knit capelet for the winter season.
Materials
The Chunky knit capelet pattern requires a few key materials to create. Here’s a list of everything you’ll need:
- Yarn: For this project, you’ll need a super chunky yarn that’s approximately 200-250 yards. Look for a yarn that’s soft and cozy, like merino wool, as it will provide extra warmth.
- Knitting needles: You’ll need a pair of 10mm (US 15) knitting needles to create the chunky stitches in the pattern.
- Tapestry needle: A tapestry needle with a large eye will be useful for weaving in the ends of your yarn and sewing any seams together.
- Scissors: A pair of sharp scissors will be needed to cut the yarn when necessary.
- Stitch markers: You may find it helpful to have some stitch markers to keep track of your progress and mark certain sections of your project.
It’s important to choose high-quality materials for this project, as the chunky knit stitches will be on full display and you’ll want your capelet to look and feel luxurious. Take the time to find yarn that matches your desired color and texture, and invest in good knitting needles that will help you achieve the desired stitch gauge.
Gauge and Measurements
Before starting the chunky knit capelet pattern, it is important to understand the importance of gauge and measurements. Gauge refers to the number of stitches and rows needed to create a certain measurement in a knitting pattern. It is crucial to obtain the correct gauge in order to achieve the desired size and fit of the finished garment.
In the case of the chunky knit capelet pattern, the gauge specified is usually based on a 4-inch square swatch knitted with the recommended yarn and needle size. This means that you will need to knit a swatch and measure the number of stitches and rows within a 4-inch area to ensure that your gauge matches the pattern’s requirements.
Gauge: To achieve the gauge specified in the pattern, you may need to adjust the needle size or the tension of your knitting. If your stitches are too loose and the swatch measures larger than the required gauge, try switching to a smaller needle size. Conversely, if your stitches are too tight and the swatch measures smaller than the required gauge, use a larger needle size instead. It is important to keep in mind that changes in the needle size may also affect the drape and appearance of the finished capelet.
Measurements: In addition to gauge, it is also essential to take accurate body measurements before starting the chunky knit capelet pattern. This includes measurements such as the circumference of the neck, the length from the shoulders to the desired finished length, and any other relevant measurements specified in the pattern. Taking these measurements will help ensure that the capelet fits properly and flatters your body shape. It is recommended to measure yourself or the intended recipient accurately with a flexible measuring tape to obtain the correct measurements.
Pattern adjustments: If your gauge and measurements do not match the pattern requirements, you may need to make adjustments to the pattern. This can involve modifying the number of stitches or rows, or even using a different size pattern altogether. Keep in mind that making adjustments to the pattern may require some experience and understanding of knitting techniques, so it is always helpful to consult with a knitting expert or reference resources before making any modifications.
Stitch Instructions
The chunky knit capelet pattern incorporates a few different stitches to create a textured and beautiful finished product. Here are the stitch instructions you will need to follow:
Garter Stitch
The garter stitch is a simple and beginner-friendly stitch that is created by knitting every row. To knit in garter stitch, simply knit every stitch on every row. This stitch creates a bumpy and squishy texture.
Stockinette Stitch
The stockinette stitch is another basic stitch that is commonly used in knitting. It is created by alternating rows of knit stitches and purl stitches. To knit in stockinette stitch, knit one row, then purl one row, repeating these two rows. This stitch creates a smooth and flat texture on one side, and a bumpy texture on the other side.
Ribbing Stitch
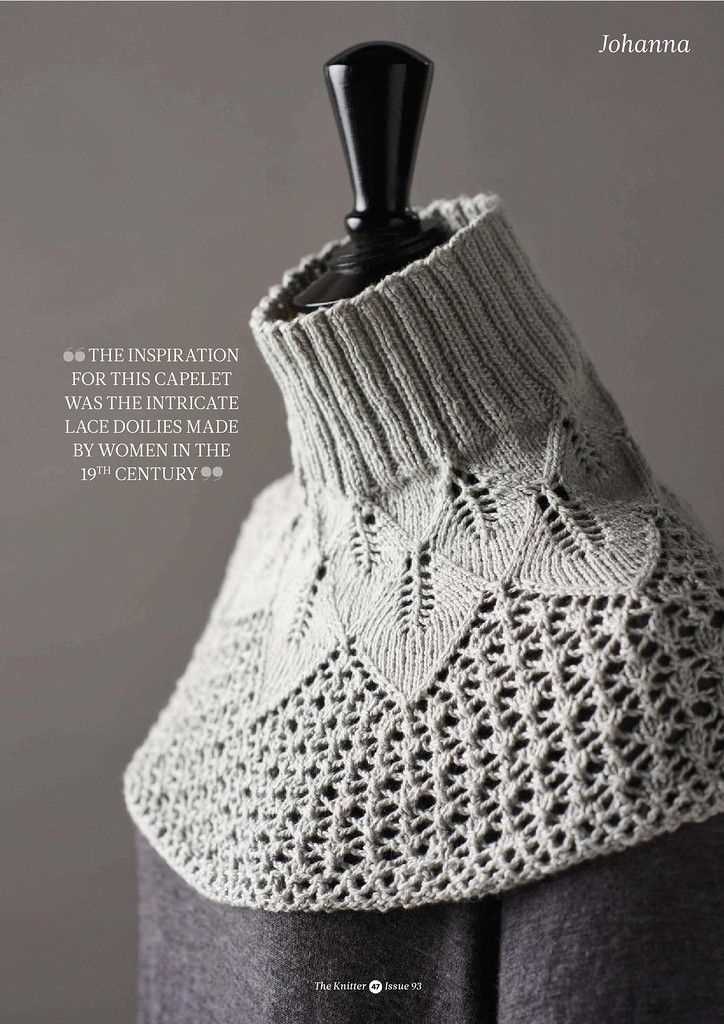
The ribbing stitch is often used for cuffs, hems, and other areas that need to stretch. It is created by alternating knit stitches and purl stitches in the same row. The most common ribbing stitch is the 1×1 rib, which is created by knitting one stitch, then purling one stitch, repeating this pattern across the row. Other variations include 2×2 rib, 3×3 rib, and so on.
Seed Stitch
The seed stitch is a textured stitch that creates a pattern of alternating knit and purl stitches. It is created by knitting one stitch, then purling one stitch, repeating this pattern across the row, and then repeating the same pattern on subsequent rows. This stitch creates a bumpy and textured pattern that looks like seeds.
By combining these different stitches in the chunky knit capelet pattern, you will be able to create a unique and eye-catching piece. Whether you are a beginner or an experienced knitter, these stitch instructions will guide you through the process of creating a beautiful chunky knit capelet.
Pattern Instructions
In this pattern, you will learn how to create a beautiful chunky knit capelet. The capelet is designed to be warm and cozy, perfect for cold winter days. It features a chunky knit design, which creates a unique texture and adds visual interest to the piece.
Materials Needed
- Chunky yarn (approx. 400g)
- Knitting needles (size 10mm)
- Tapestry needle
- Stitch markers
Instructions
Step 1: Cast on 60 stitches using the long-tail cast-on method. Place a stitch marker to mark the beginning of the round.
Step 2: Knit in a round for 10 rows to create the ribbed edge of the capelet.
Step 3: Switch to the chunky knitting pattern. Knit one stitch, then yarn over, knit two stitches together. Repeat this pattern until the end of the round.
Step 4: Continue knitting in this pattern until the capelet measures approximately 20 inches in length.
Step 5: Bind off all stitches and weave in any loose ends using a tapestry needle.
Step 6: Block the capelet by wetting it gently, shaping it to the desired dimensions, and allowing it to dry flat.
This chunky knit capelet pattern is a great project for knitters of all skill levels. It can be customized by using different colors of yarn or adding embellishments such as buttons or pom-poms. Once completed, the capelet can be worn over a coat or sweater for added warmth and style. Happy knitting!
Understanding Cast On for Chunky Knit Capelet
When starting a new knitting project, one of the first steps is to cast on. Casting on creates the foundation row of stitches that will form the base of your knitting project. In the case of a chunky knit capelet, the cast on is especially important as it sets the tone for the entire garment.
In order to cast on for a chunky knit capelet, you will need to gather your materials including your yarn and knitting needles. It is important to choose a yarn that is suitable for the project, such as a chunky or bulky weight yarn that will give the capelet its cozy and warm feel. The knitting needles should also be appropriate for the yarn weight, ensuring that the stitches are not too tight or too loose.
Next, you will need to decide on the cast on method that you will use for your chunky knit capelet. There are several different methods to choose from, including the long-tail cast on, the cable cast on, and the knitted cast on. Each method has its own unique characteristics and may create a different edge for your capelet. It is important to choose the method that you are most comfortable with and that will give you the desired result.
Once you have chosen your cast on method, you can begin the process of casting on. This typically involves creating a slipknot to secure the yarn to the needle, followed by a series of loops or stitches that are formed by wrapping the yarn around the needle. The number of stitches you cast on will depend on the size of your capelet and the desired fit. It is important to follow the pattern instructions carefully to ensure that you cast on the correct number of stitches.
After you have completed the cast on, you will be ready to move on to the next steps of your chunky knit capelet pattern. This may involve knitting the first row or working a specific stitch pattern. The cast on is an important foundation for your project, and taking the time to cast on correctly will ensure that your chunky knit capelet turns out beautifully.
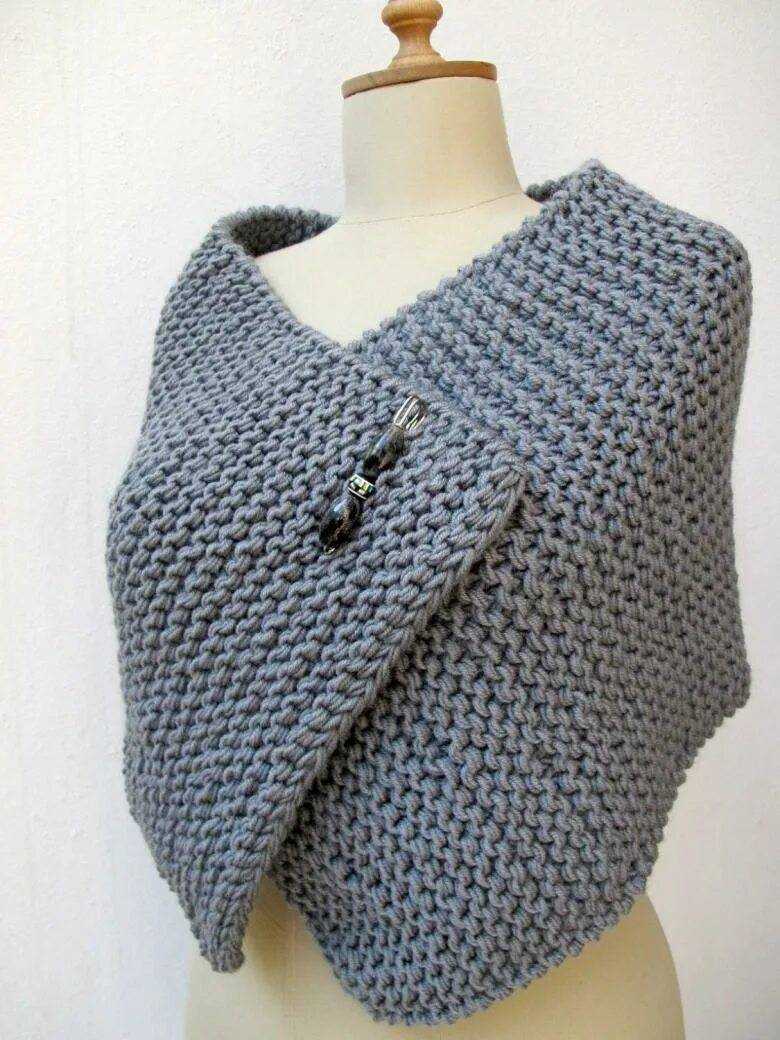
Knit Body
The knit body is the main component of the chunky knit capelet. It is the part that will be draped over the shoulders, providing warmth and style. To create the knit body, you will need a set of chunky knitting needles and a ball of chunky yarn. The size of the knitting needles will depend on your gauge and the desired final size of the capelet.
Start by casting on the desired number of stitches. This will determine the width of the knit body. You can use a simple knit stitch or experiment with different stitch patterns to add texture and interest to the capelet. As you work, make sure to check your gauge to ensure that the knit body will be the right size and fit comfortably around the shoulders.
Once the knit body is complete, you can add any desired embellishments, such as buttons, ribbons, or fringe. These can be sewn onto the edges of the capelet or used to create a closure at the front. The knit body can also be customized with different colors or stripes, depending on your preference.
To finish the chunky knit capelet, you will need to attach the knit body to the collar. This can be done by sewing or by picking up stitches along the edge of the collar and knitting the two pieces together. Once the knit body is securely attached to the collar, your chunky knit capelet is complete and ready to wear. It is sure to be a cozy and fashionable addition to your winter wardrobe.
Neckline Shaping
When knitting a chunky knit capelet, neckline shaping is an important step in creating a comfortable and well-fitting garment. The neckline is what frames the face and determines how the capelet will sit on the shoulders. It can be shaped in various ways depending on the desired style and fit.
One common method of neckline shaping is to decrease stitches gradually on either side of the center front. This creates a V-shaped neckline that is wider at the shoulders and narrower at the center front. This shaping allows the capelet to sit snugly around the neck and gives it a flattering drape.
To achieve this neckline shaping, you can use techniques such as knitting two stitches together or ssk (slip, slip, knit), which creates a left-leaning decrease. These decreases are usually worked at the beginning and end of rows, and can be spaced evenly or gradually to create the desired shape.
Another option is to create a scoop neckline, which is wider and more rounded. This can be achieved by gradually increasing stitches on either side of the center front. The increases can be done at the beginning and end of rows, or by picking up stitches along the neckline and working short rows to create the rounded shape.
Ultimately, the neckline shaping will depend on your personal preference and the style you want to achieve. It’s important to take accurate measurements and test the shaping as you go to ensure a perfect fit.
Armhole Shaping
The armhole shaping is an important step in creating a well-fitting capelet. This pattern provides instructions for shaping the armholes to ensure a comfortable and flattering fit.
To begin the armhole shaping, the pattern instructs you to decrease a certain number of stitches on each side of the work. This can be done by knitting or purling two stitches together, or by slipping the first stitch and knitting or purling the next stitch, and then passing the slipped stitch over.
After the initial decrease rows, the pattern may instruct you to continue shaping the armholes by decreasing one stitch on each side of the work in every row or every other row. This gradual decrease helps to create a smooth and gentle curve for the armhole opening.
It is important to follow the specific instructions provided in the pattern for the armhole shaping, as the number of stitches to decrease and the frequency of the decreases may vary depending on the size and style of the capelet.
Once the armhole shaping is complete, you can continue working on the remaining sections of the capelet, such as the neckline or the hem. The armhole shaping helps to create a tailored and well-fitting garment, and adds an extra touch of professionalism to your finished capelet.
Finishing
After completing the final row of your chunky knit capelet, it’s time to finish off the edges and add any desired embellishments. Here are some steps to guide you through the finishing process:
1. Cast off
To create a clean, finished edge, begin by casting off your stitches. This involves knitting two stitches, then passing the first stitch over the second stitch and off the needle. Repeat this process until all stitches have been cast off.
2. Seam the edges
Next, you’ll need to seam the edges of your capelet together. Using a tapestry needle and matching yarn, neatly sew the cast-off edge to the initial row of the capelet. This will create a seamless and professional-looking finish.
3. Block the capelet
To give your capelet its final shape and drape, it’s recommended to block it. Wet-blocking or steam-blocking can help relax the stitches and create a more even and polished look. Pin the capelet on a blocking board or towel and shape it to your desired dimensions. Let it dry completely before removing the pins.
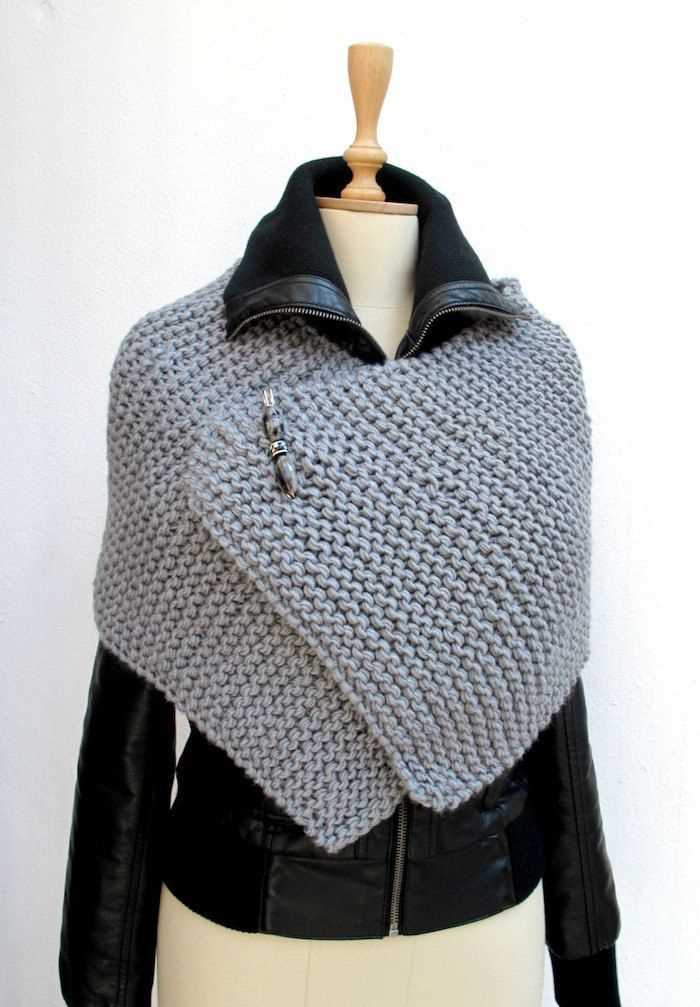
4. Embellishments (optional)
If you’d like to add some decorative touches to your chunky knit capelet, now is the time to do so. You might consider attaching buttons, a brooch, or a fringe to enhance the overall appearance. Be sure to sew on any embellishments securely, using a thread that matches the color and weight of your yarn.
By following these finishing steps, you’ll be able to complete your chunky knit capelet with a professional and polished look. Enjoy wearing your cozy and stylish accessory!
Optional Embellishments
If you want to add some extra flair to your chunky knit capelet, there are a few optional embellishments you can consider. These can help to customize your capelet and make it truly unique.
1. Buttons: Adding buttons to your capelet can be a great way to add some visual interest and also allow for different ways of wearing it. You can choose buttons in a contrasting color or matching color to your yarn, or even opt for decorative buttons with interesting shapes or patterns.
2. Cables or Lace: If you’re looking to elevate the design of your chunky knit capelet, you can incorporate cable or lace patterns into the knitting. These intricate patterns can add a touch of elegance and sophistication to your capelet and make it stand out.
3. Pom-poms or Tassels: For a playful and whimsical touch, you can add pom-poms or tassels to the corners or edges of your capelet. These can be made with matching or contrasting yarn and can add a fun element to your finished piece.
4. Embroidery or Appliqué: If you’re feeling creative, you can consider adding embroidery or appliqué to your capelet. This can be a great way to personalize your capelet with your own unique design or add small decorative motifs to complement the overall look.
5. Faux Fur Trim: For a touch of luxury and warmth, you can add a faux fur trim to the neckline or edges of your capelet. This can give your capelet a stylish and glamorous look, perfect for special occasions or colder weather.
- Buttons
- Cables or Lace
- Pom-poms or Tassels
- Embroidery or Appliqué
- Faux Fur Trim
With these optional embellishments, you can add your own personal touch to your chunky knit capelet and truly make it one-of-a-kind.
Tips and Tricks
The Chunky knit capelet pattern can be a fun and rewarding project to take on. To help ensure success, here are some tips and tricks to keep in mind:
Choose the Right Yarn
When selecting yarn for your capelet, opt for a chunky or bulky weight yarn that will provide the desired thickness and warmth. Consider the fiber content as well, as certain fibers may be softer or more durable than others. Experiment with different yarn options to find the perfect fit for your project.
Take Your Gauge
Before you begin knitting, take the time to create a gauge swatch to ensure that your stitches match the pattern’s recommended gauge. Adjust your needle size if necessary to achieve the desired gauge. An accurate gauge will help ensure that your capelet turns out the right size and fit.
Use Stitch Markers
Stitch markers can be a valuable tool to help you keep track of pattern repeats or specific sections of your capelet. They can also be used to mark the beginning of a round if you are knitting in the round. Use different colored markers for different sections to make it easier to follow the pattern.
Read and Understand the Pattern
Before diving into the project, take the time to read and understand the pattern instructions. Familiarize yourself with any special stitches or techniques that may be used. If you come across a term or abbreviation that you’re unsure of, consult a knitting glossary or online tutorial for clarification.
Block Your Finished Capelet
Once you’ve completed your capelet, consider blocking it to give it a more polished and professional finish. Blocking can help even out your stitches and enhance the drape of the garment. Follow the yarn manufacturer’s instructions for blocking to prevent any damage to the yarn or shape of the capelet.
Personalize Your Capelet
Feel free to add your own personal touch to the capelet pattern. You can experiment with different stitch patterns or incorporate colorwork to make it unique. Consider adding buttons, toggles, or a decorative closure for added style. Let your creativity shine through to make the capelet truly yours.
Practice and Have Fun
Remember that knitting is a skill that takes time and practice to master. Don’t be discouraged if your first capelet doesn’t turn out exactly as planned. Each project is an opportunity to learn and improve your knitting skills. Enjoy the process and have fun creating your very own chunky knit capelet.
Q&A:
What is a chunky knit capelet?
A chunky knit capelet is a type of garment that is made using thick yarn and large knitting needles. It is a small, cape-like piece of clothing that is typically worn over the shoulders to provide warmth and style.
Where can I find a pattern for a chunky knit capelet?
You can find patterns for chunky knit capelets online on various knitting websites, on online marketplaces, or in knitting pattern books. There are also many free patterns available for download.
What are the materials required to make a chunky knit capelet?
To make a chunky knit capelet, you will need thick yarn (preferably chunky or bulky weight), large knitting needles (size US 13 or above), a yarn needle for finishing, and any additional embellishments or buttons you may want to add.
How difficult is it to knit a chunky knit capelet?
The difficulty level of knitting a chunky knit capelet will vary depending on your knitting skills and experience. It is considered a intermediate-level project, as it involves working with larger needles and thicker yarn. However, with some practice and patience, it can be successfully completed by knitters of various skill levels.
Can I customize the size of a chunky knit capelet?
Yes, you can customize the size of a chunky knit capelet by adjusting the number of stitches and rows in the pattern. You can also add or subtract length to make it shorter or longer. It is important to note that making these adjustments may require you to recalculate the amount of yarn needed.
What is a chunky knit capelet?
A chunky knit capelet is a short cape or cloak that is knitted using thick yarn and large knitting needles, resulting in a chunky, cozy, and warm garment.