
If you have a little one on the way or know someone who does, why not try your hand at knitting a newborn romper? This versatile and adorable item of clothing is perfect for keeping a baby cozy and stylish. Plus, knitting it yourself adds a personal touch and allows you to customize the colors and pattern to your liking.
Knitting a newborn romper may seem like a daunting task, but with the right pattern and a little patience, it can be a rewarding project. Whether you’re a seasoned knitter or just starting out, this pattern is suitable for all skill levels. The end result will be a charming romper that will make any baby look even more adorable.
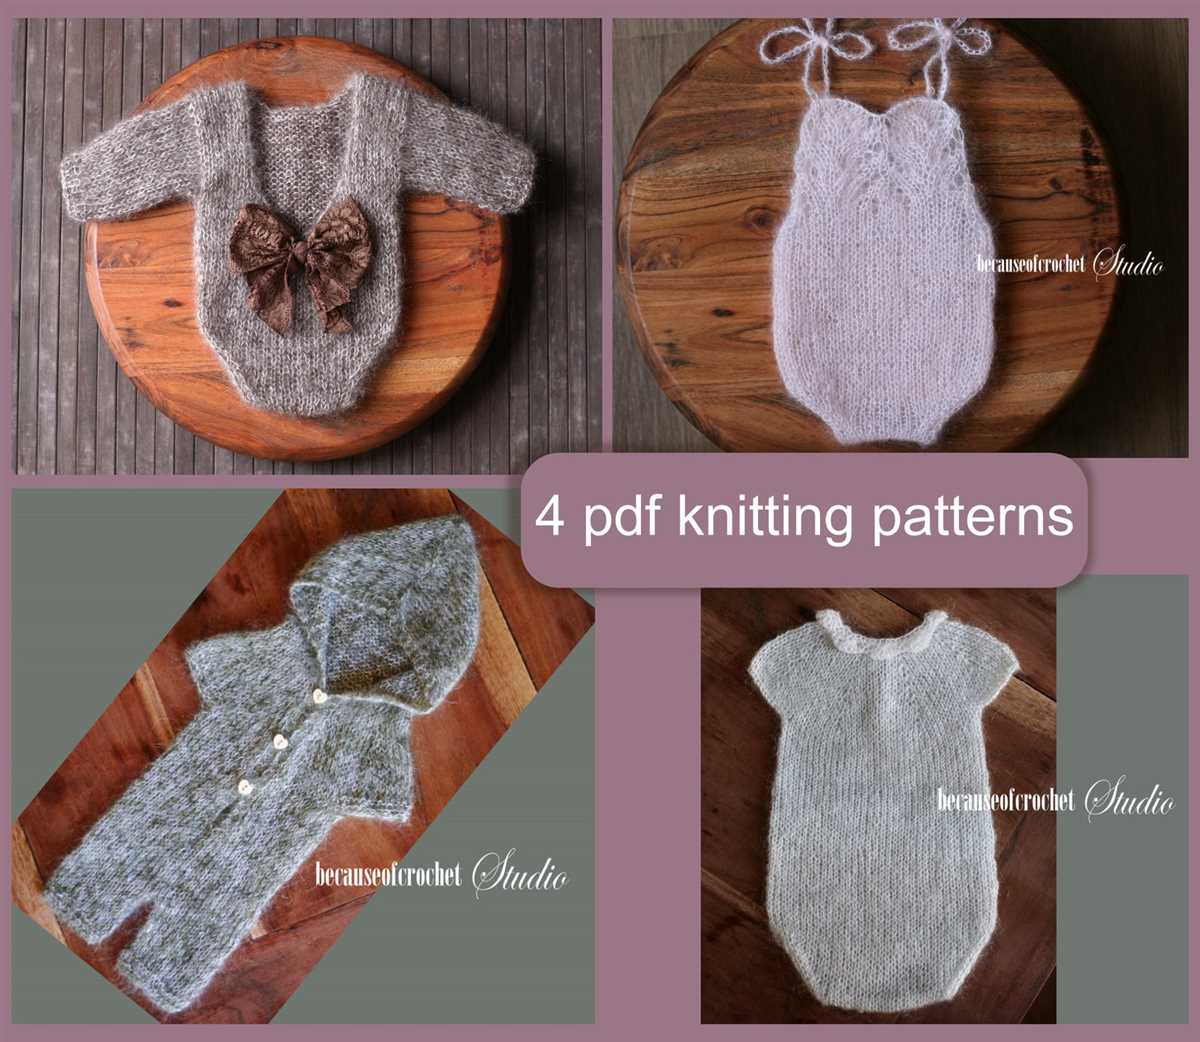
When choosing a knitting pattern for a newborn romper, it’s important to consider the level of difficulty and the materials required. Many patterns are available online and in knitting books, each with its own unique design and style. Look for a pattern that includes clear instructions and diagrams to help guide you through the process.
Newborn Romper Knitting Pattern: Create the Perfect Outfit for Your Baby
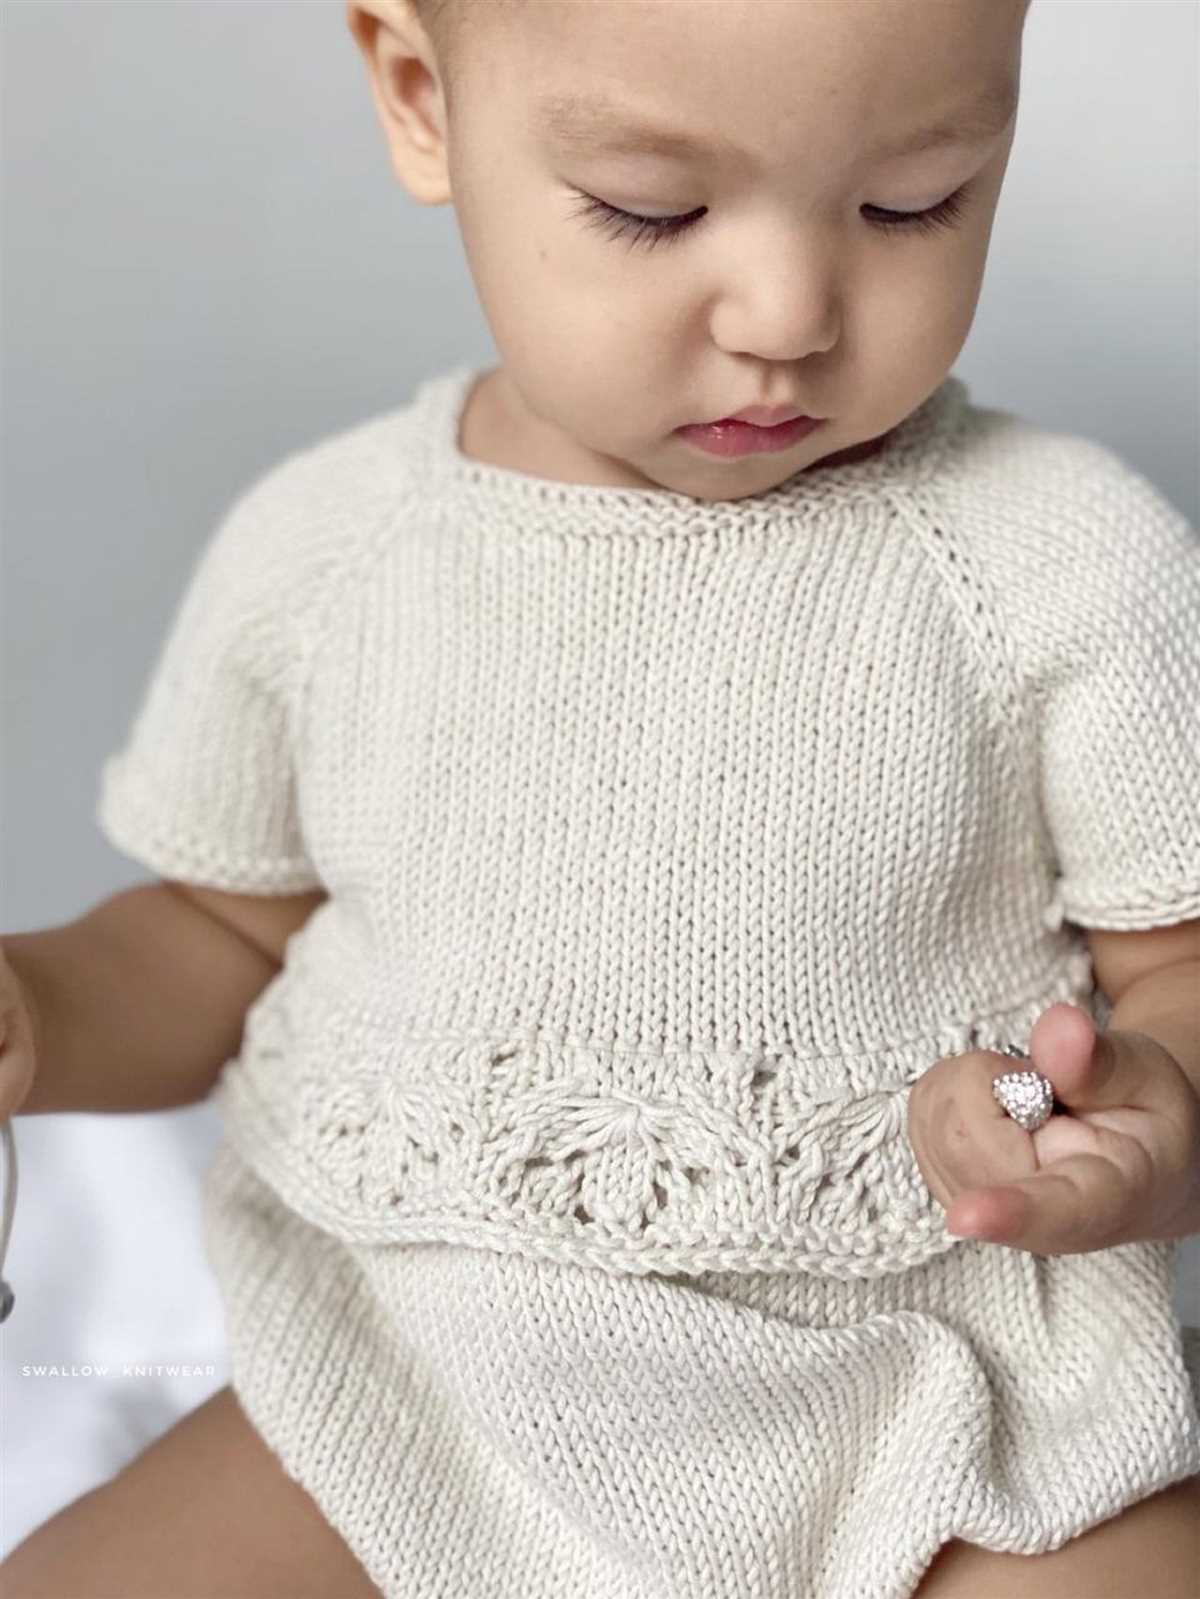
When it comes to dressing up your little one, nothing compares to a handmade outfit that is both cozy and cute. With a newborn romper knitting pattern, you can create the perfect outfit for your baby, ensuring they are comfortable and stylish from day one.
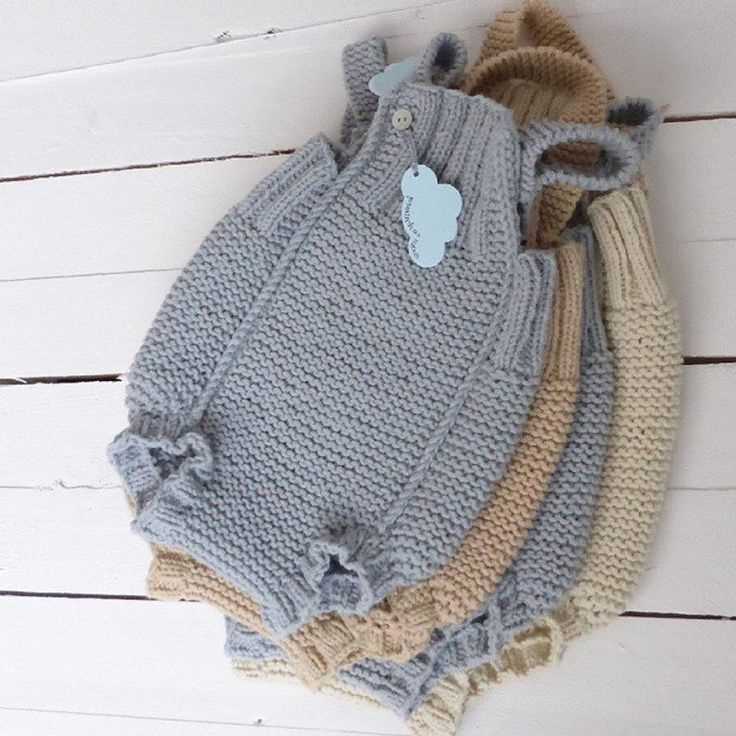
Knitting a romper for your newborn allows you to customize every detail, from the color of the yarn to the type of buttons or embellishments you choose. This not only adds a personal touch to your baby’s wardrobe but also ensures that the romper is made with love and care.
Why choose a romper?
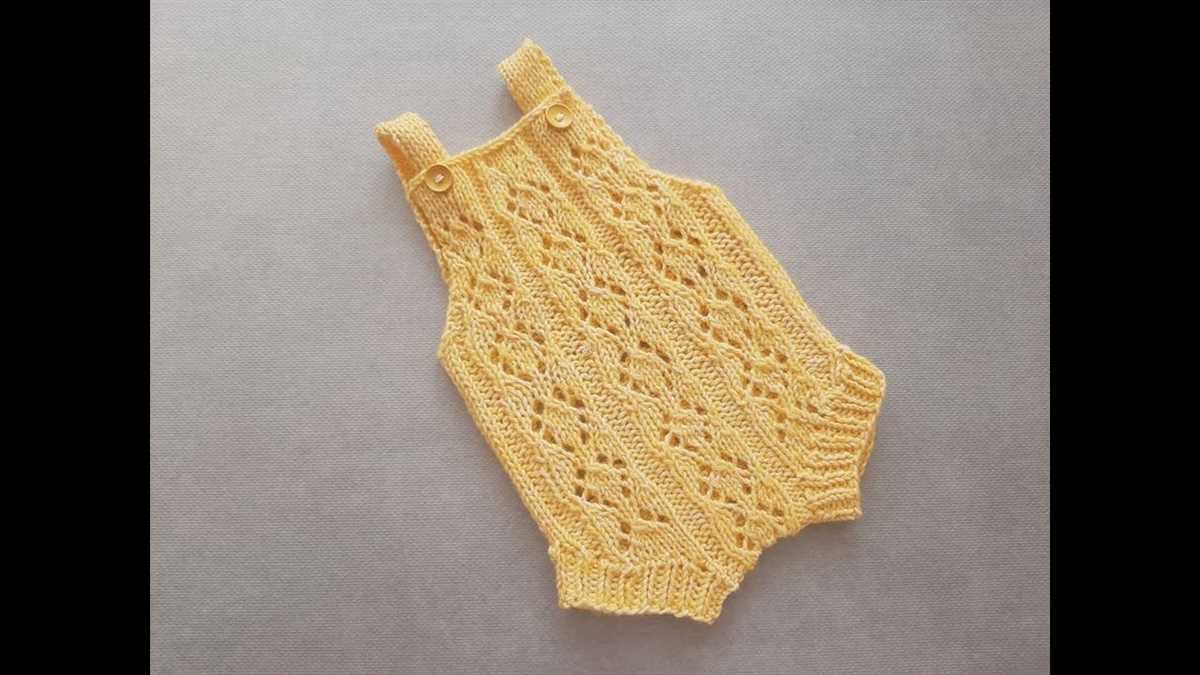
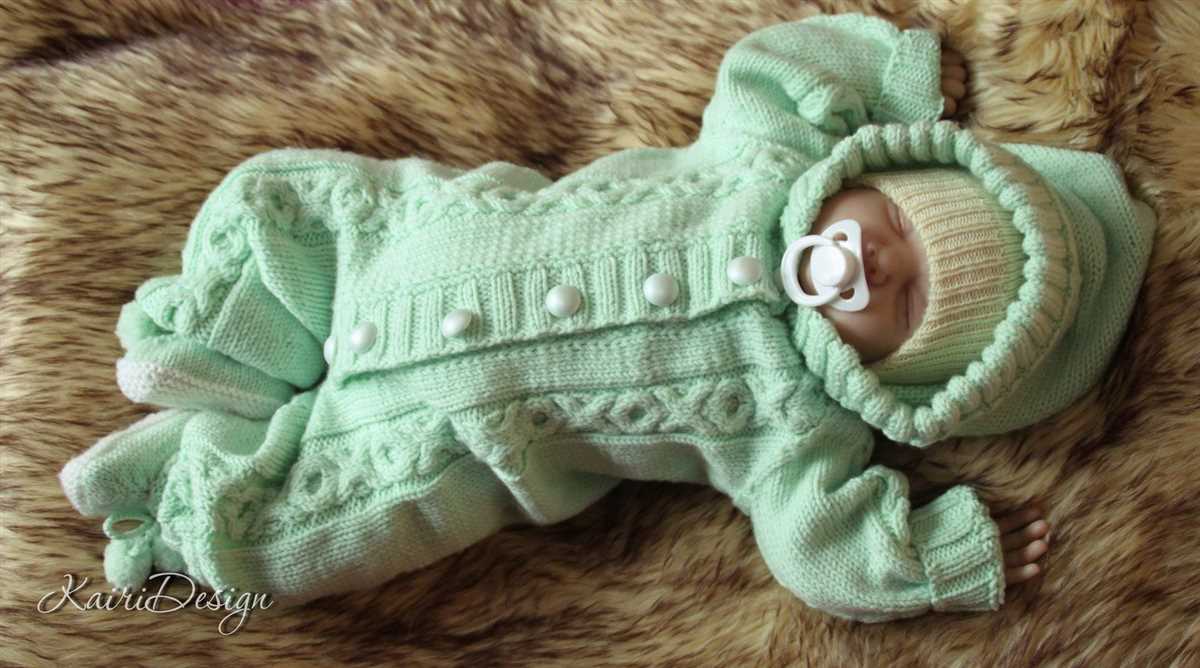
A romper is an excellent choice for newborns as it provides full coverage while allowing easy movement. The one-piece design keeps your baby’s tummy and back protected, and the bottom snaps make diaper changes a breeze. Plus, rompers are incredibly adorable and can be dressed up or down depending on the occasion.
Choosing the right knitting pattern
There are countless knitting patterns available for newborn rompers, ranging from simple designs to more intricate ones. When selecting a pattern, consider your knitting skill level, the type of yarn you want to use, and the style you prefer. Look for patterns that include clear instructions and diagrams to ensure a smooth knitting experience.
The joy of knitting
Knitting a romper for your newborn can be a wonderful way to relax and bond with your baby during pregnancy or the early months. The rhythmic motion of knitting can be soothing and therapeutic, allowing you to unwind while creating something beautiful for your little one.
Conclusion
A newborn romper knitting pattern is the perfect way to create a unique and cozy outfit for your baby. Whether you’re a seasoned knitter or a beginner, there are patterns available to suit every skill level. So grab your knitting needles and get ready to make a beautiful romper that your baby will cherish for years to come.
Why Knitting Your Baby’s Romper Is a Special Experience
Knitting your baby’s romper is not just about creating a cute and functional piece of clothing. It is an opportunity to connect with your little one even before they are born. The moment you start knitting, you are pouring your love, care, and anticipation into every stitch.
One of the reasons knitting your baby’s romper is so special is the sense of accomplishment it brings. As you see the romper taking shape, you know that you have created something unique and beautiful for your baby. It is a tangible expression of your creativity and dedication. Every time your baby wears the romper, you can feel proud knowing that you made it with your own hands.
Knitting a romper also allows you to customize it according to your preferences and your baby’s needs. You can choose the colors, patterns, and materials that resonate with you and create a romper that perfectly reflects your style and personality. You can also adapt the pattern to make it more comfortable and practical for your baby, ensuring a perfect fit and ease of movement.
Knitting your baby’s romper is also a therapeutic and relaxing activity. The repetitive motion of knitting can have a calming effect on your mind and body, helping to reduce stress and anxiety. It can become a form of meditation, allowing you to focus your thoughts on the present moment and creating a sense of mindfulness.
Furthermore, knitting your baby’s romper is a way to pass down a cherished tradition. Knitting has been a beloved craft for generations, and by carrying on the tradition, you are connecting with your family’s history and creating memories that can be shared with future generations. The romper you knit may become an heirloom, treasured and handed down from one generation to the next.
Overall, knitting your baby’s romper is a special experience that goes beyond creating a piece of clothing. It is an expression of love, a way to bond with your little one, and an opportunity to create something meaningful and unique. So grab your knitting needles, choose a pattern, and enjoy the journey of knitting a romper for your precious baby.
Choosing the Right Yarn for Your Newborn Romper
When it comes to knitting a newborn romper, selecting the right yarn is crucial. Not only does the yarn need to be soft and gentle against the baby’s delicate skin, but it should also be durable and easy to care for. Here are some factors to consider when choosing yarn for your newborn romper.
Fiber Content: Opt for yarns that are made from natural fibers, such as cotton or bamboo, as they are hypoallergenic and less likely to irritate the baby’s skin. These fibers are also breathable, which is important for regulating the baby’s body temperature.
Weight: Choose a yarn that is lightweight, such as a fingering or sport weight yarn, so that the romper is not too heavy or bulky for the baby. This will ensure that the baby is comfortable and can move around freely.
Safety: Keep in mind that newborns have a tendency to put everything in their mouths. Avoid yarns that have loose fibers or can easily unravel, as they pose a choking hazard. Opt for yarns that are tightly spun and do not shed.
Washability: Newborns can be messy, so it’s important to choose a yarn that is machine washable and can withstand frequent washing. Look for yarns that are labeled as “easy care” or “machine washable” for added convenience.
By considering these factors, you can choose the perfect yarn for your newborn romper. Not only will it be soft and comfortable for your baby, but it will also be practical and easy to care for.
Essential Knitting Tools for Your Newborn Romper Project
When it comes to knitting a newborn romper, having the right tools can make all the difference in the outcome of your project. Here are some essential knitting tools that you’ll need to ensure a successful and enjoyable knitting experience:
Knitting Needles:
One of the most important tools you’ll need for your newborn romper project is a set of knitting needles. The size of the needles will depend on the gauge and yarn weight you plan to use. It’s a good idea to have a range of needle sizes available in case you need to adjust your gauge or if you’re unsure about the recommended needle size for your pattern.
Tape Measure:
A tape measure is an essential tool for measuring your newborn romper as you progress with your knitting. It will help ensure that you’re achieving the correct dimensions and sizing as indicated in the pattern. Additionally, it can be useful for measuring gauge swatches and checking your tension.
Stitch Markers:
Stitch markers are small, circular or clip-on markers that can be placed on your knitting needles to identify specific points in your pattern. They are especially useful for marking the beginning of a round, separating different stitch patterns, or indicating where to make increases or decreases. Using stitch markers can help you keep track of your progress and ensure accuracy in your knitting.
Yarn Needle:
A yarn needle, also known as a darning needle or tapestry needle, is an essential tool for weaving in loose ends and finishing your newborn romper. It has a large eye and blunt tip, making it easy to thread and maneuver through the stitches. You’ll use the yarn needle to secure any loose stitches or tails, adding a neat and finished look to your project.
Row Counter:
A row counter is a handy tool for keeping track of the number of rows you’ve knitted in your newborn romper. It can be a physical device that you click or rotate after completing each row or a digital counter on your phone or tablet. Using a row counter helps you stay organized and ensures that you don’t lose track of your progress, especially in complex patterns with multiple stitch counts.
These essential knitting tools will set you up for success in your newborn romper project. By having these tools at hand, you’ll be ready to tackle any knitting challenges that come your way and create a beautiful and cozy romper for your little one.
Understanding the Basic Stitches for Knitting a Romper
When it comes to knitting a newborn romper, having a good understanding of the basic stitches is essential. These stitches form the foundation for creating the intricate patterns and designs that make each romper unique. Whether you are a beginner or an experienced knitter, it is important to review and practice these stitches before starting your project.
1. Knit Stitch: The knit stitch is the most fundamental stitch in knitting. It creates a smooth and even fabric with a “v” shape. To knit, simply insert the right needle into the front of the first stitch on the left needle, wrap the yarn around the right needle, and pull it through the stitch, slipping the old stitch off the left needle.
2. Purl Stitch: The purl stitch is the reverse of the knit stitch and creates a bumpy texture on the fabric. To purl, insert the right needle into the front of the first stitch on the left needle, but this time bring the yarn to the front of the work, wrap it around the right needle, and pull it through the stitch, slipping the old stitch off the left needle.
3. Stockinette Stitch: The stockinette stitch is a combination of knit and purl stitches and creates a smooth fabric on one side (knit side) and a bumpy fabric on the other side (purl side). It is achieved by knitting one row and then purling the next row, repeating this pattern throughout the project.
4. Garter Stitch: The garter stitch is created by knitting every row, resulting in a fabric with ridges running horizontally. It is a reversible stitch, meaning both sides of the fabric look the same. The garter stitch is often used for edging or as an all-over design in rompers.
5. Ribbing: Ribbing is a combination of knit and purl stitches and creates a stretchy and elastic fabric. It is commonly used for cuffs, waistbands, and neckbands in rompers. The most common ribbing pattern is the 1×1 rib, which alternates between a knit stitch and a purl stitch.
By mastering these basic stitches, you will be ready to tackle any newborn romper knitting pattern. Remember to practice your tension and gauge to ensure that your finished romper fits perfectly and has a professional finish. Happy knitting!
How to Read Knitting Patterns for Your Newborn Romper

Knitting patterns can sometimes seem daunting, especially for beginners. However, once you understand how to read them, you’ll be able to create beautiful newborn rompers for your little one. Here are a few tips to help you navigate knitting patterns:
1. Start with the materials and gauge
Before you begin knitting, take a look at the materials required for the pattern. Check if you have the correct yarn, knitting needles, and any additional supplies such as buttons or ribbons. Also, pay attention to the gauge mentioned in the pattern. Gauge refers to the number of stitches and rows per inch or centimeter. It’s crucial to match the gauge in order to achieve the correct size and fit for your romper.
2. Understand the abbreviations
Knitting patterns often use abbreviations to save space. It’s important to familiarize yourself with common knitting abbreviations such as K (knit), P (purl), YO (yarn over), and SSK (slip, slip, knit). The pattern should include a key or a list of abbreviations to help you understand and follow the instructions.
3. Follow the stitch-by-stitch instructions
Once you’ve gathered all your materials and understand the abbreviations, it’s time to follow the stitch-by-stitch instructions. The pattern will guide you through each row, specifying the type of stitch and any increases or decreases needed. It’s helpful to use stitch markers to keep track of your progress and count your stitches as you go along.
4. Pay attention to shaping and finishing details
A newborn romper pattern may include shaping details such as decreases for the waist or sleeves, as well as finishing details like ribbing or buttonholes. Make sure to carefully read and follow these instructions to achieve the desired shape and look for your romper. Take your time and double-check your work to ensure accuracy.
By following these tips, you’ll be able to confidently read and understand knitting patterns for your newborn romper. Remember to take it step by step, and don’t be afraid to ask for help or clarification if needed. Happy knitting!
Tips for Correct Gauge and Measurements for Your Newborn Romper
When knitting a newborn romper, obtaining the correct gauge and taking accurate measurements are key to ensure the perfect fit for your little one. Here are some tips to help you achieve the right measurements and achieve a successful finished project.
1. Check your gauge: Before you start knitting, it’s crucial to check your gauge. This means knitting a swatch using the same needles and yarn you plan to use for the romper. Measure the gauge according to the pattern instructions. If your gauge doesn’t match, you may need to go up or down a needle size to achieve the correct tension.
2. Measure your baby: Measure your newborn’s chest circumference, waist circumference, and leg length to determine the size to knit. Use a flexible measuring tape and take the measurements snugly but not too tight. Compare the measurements to the size chart provided in the pattern to select the appropriate size.
3. Make adjustments if needed: Babies come in all shapes and sizes, so it’s important to be flexible with the pattern instructions. If your baby’s measurements fall between sizes, you may need to make adjustments to ensure a proper fit. This could involve adding or subtracting stitches or rows in certain areas to customize the romper to your baby’s proportions.
4. Consider ease: Newborn rompers are typically designed with some ease to allow for movement and growth. The pattern should specify the amount of ease, which is usually a few inches or centimeters. Keep this in mind when selecting the size and making adjustments, as you want the romper to fit comfortably without being too tight or too loose.
5. Measure as you go: As you progress through the knitting, periodically try the romper on your baby or use the measurements to ensure you’re on track. This will help you catch any sizing issues early on and make adjustments if necessary. It’s better to make small corrections as you go rather than having to rip out the entire project later.
By paying attention to gauge and taking accurate measurements, you can ensure a well-fitted and adorable newborn romper for your little one. Happy knitting!
Step-by-Step Instructions for Knitting the Romper Bodice
Knitting a romper bodice for a newborn can be a rewarding and enjoyable project. It is a great way to create a unique and personalized outfit for your little one. Here are step-by-step instructions to help you get started on knitting the romper bodice:
1. Gather Materials: Before you begin, gather all the necessary materials. You will need knitting needles, a tape measure, yarn in the desired color, and a pair of scissors.
2. Determine Gauge:
It is important to determine your gauge before starting the project. Using the chosen yarn and knitting needles, create a sample swatch using the recommended stitch pattern. Measure the swatch to determine how many stitches and rows make up one inch. This will help ensure that your romper bodice will have the correct measurements.
3. Cast On Stitches:
To start knitting the romper bodice, cast on the required number of stitches onto your knitting needles. The number of stitches will depend on the size of the romper and your gauge. Use a cast-on method of your choice, such as the long-tail cast-on, to create a neat and sturdy edge.
4. Knit the Rows:
Continue knitting the rows using the chosen stitch pattern. You can use a basic knit stitch or try a more intricate stitch pattern for added texture. Follow the pattern instructions carefully, making sure to maintain the correct number of stitches and rows.
5. Shape the Neckline:
When you reach the desired length for the bodice, it’s time to shape the neckline. Begin by dividing the stitches into three sections: the center stitches for the neckline and the two sides for the shoulders. You can use stitch markers to help keep track of the sections.
6. Bind Off:
Once you have completed shaping the neckline, it’s time to bind off the stitches. Use a bind-off method of your choice, such as the traditional bind-off or the picot bind-off, to create a neat edge. Make sure to bind off loosely to prevent the neckline from being too tight.
Following these step-by-step instructions will help you successfully knit the romper bodice for your newborn. Remember to take your time and enjoy the process as you create a special garment for your little one.
Adding Beautiful Details to Your Newborn Romper
When it comes to knitting a newborn romper, adding beautiful details can make all the difference. From delicate lace patterns to intricate colorwork, these details can elevate your romper from ordinary to extraordinary. Here are a few ideas to inspire you:
Add Lace Panels
Lace panels are a popular choice for adding a touch of elegance to newborn rompers. You can incorporate lace patterns on the yoke, sleeves, or even the entire body of the romper. Knitting lace requires attention to detail, but the end result is truly stunning. Choose a lace pattern that complements the overall style of the romper and watch as your little one becomes the center of attention.
Use Contrasting Colors
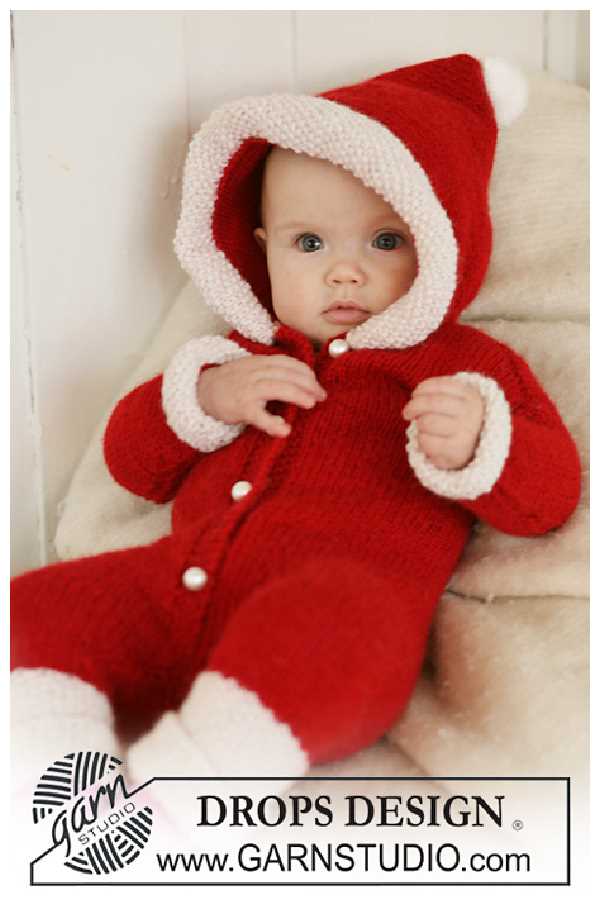
Playing with contrasting colors is another way to add visual interest to your newborn romper. Consider using a different color for the cuffs, collar, or buttons to create a striking contrast. You can also experiment with color block patterns, where different sections of the romper are knitted in contrasting colors. This technique can give your romper a modern and unique look.
Add Embellishments
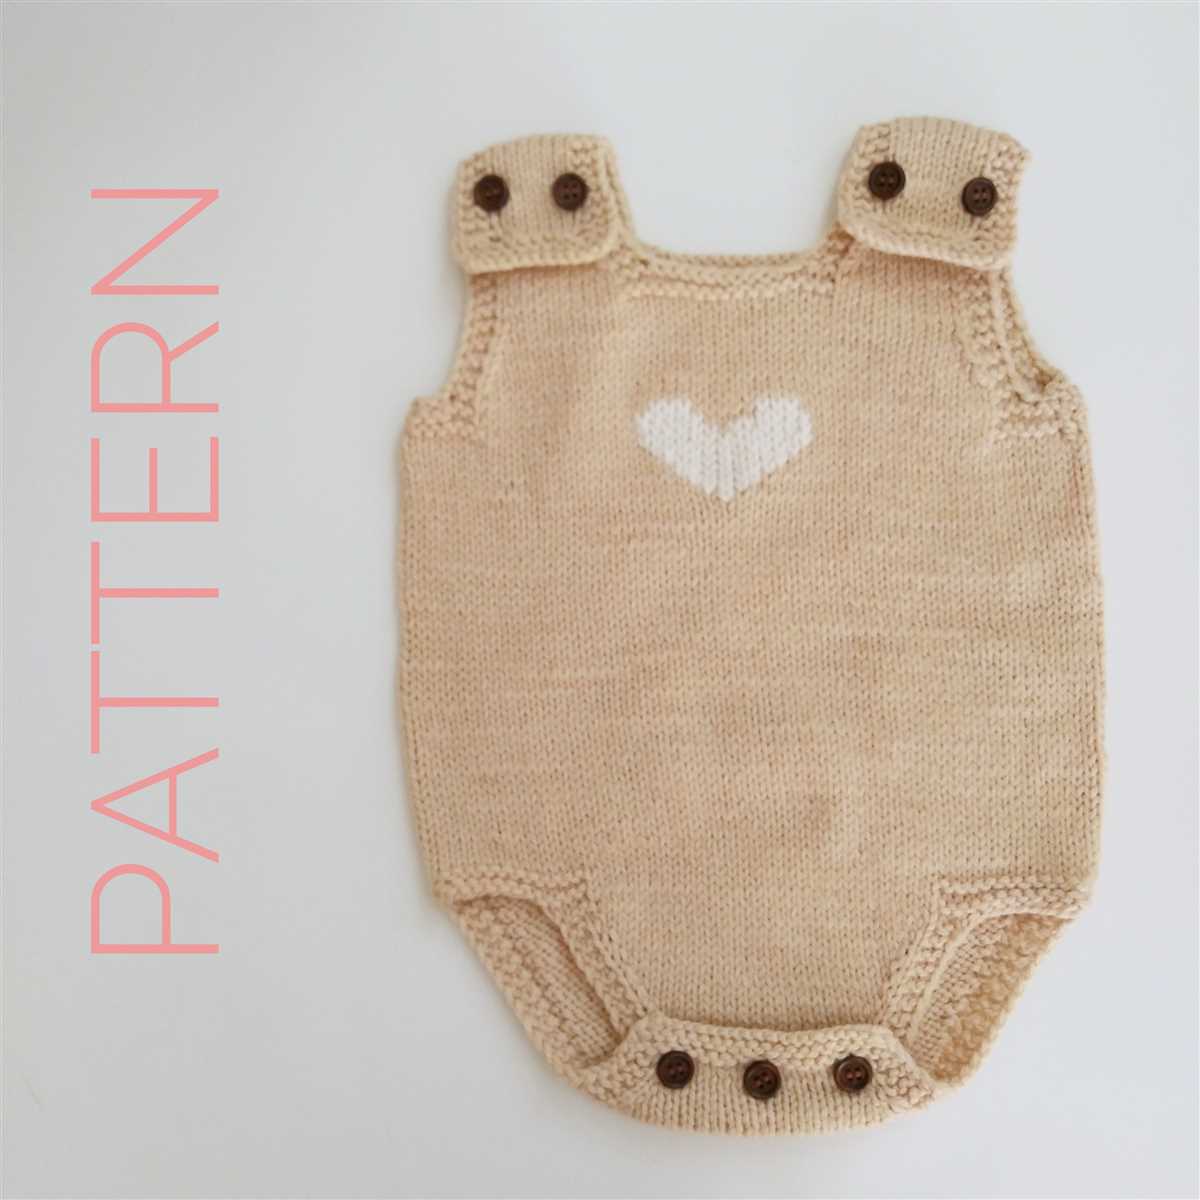
Embellishments are a fun way to add a touch of personality to your newborn romper. You can use small buttons, bows, or even crocheted flowers to create eye-catching details. These embellishments can be strategically placed on the romper to highlight certain areas or create a focal point. Just make sure to securely attach them to avoid any choking hazards for your little one.
Create Textured Patterns
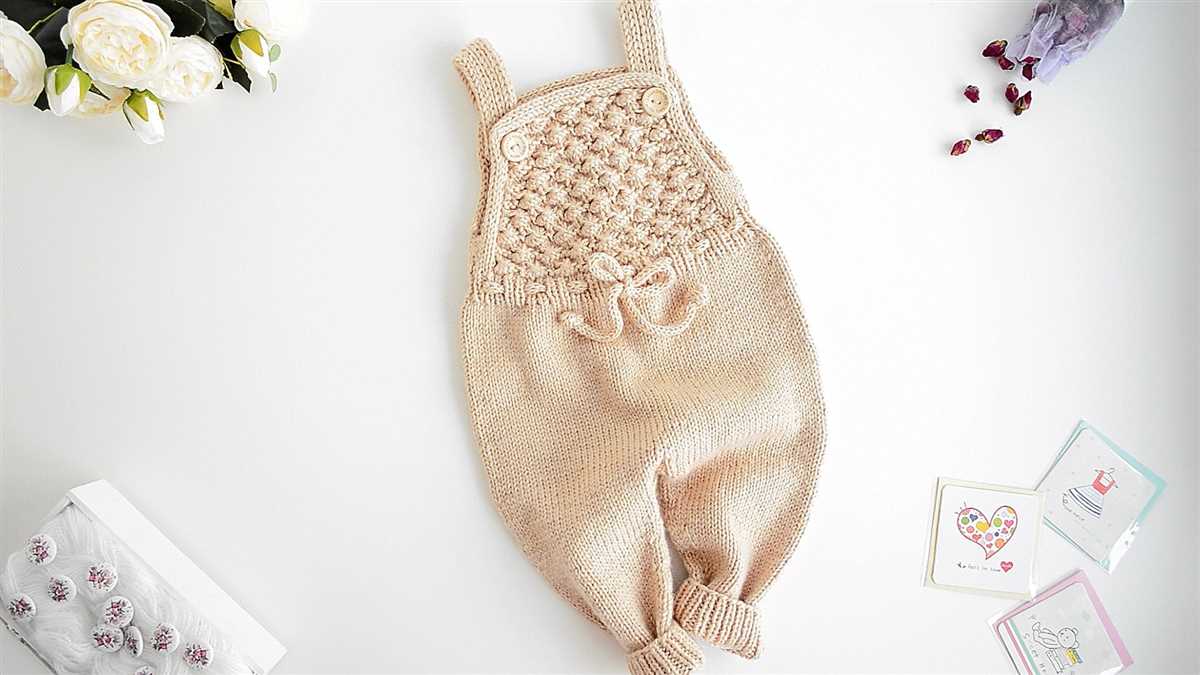
Adding textured patterns to your newborn romper can create a tactile experience for your little one. You can experiment with different stitches like cables, bobbles, or seed stitch to give the romper a unique texture. These patterns not only add visual interest but also provide extra warmth and comfort for your baby. Just be mindful of not making the textured areas too bulky, as newborns need freedom of movement.
In conclusion, adding beautiful details to your newborn romper can make it extra special. Whether you choose to incorporate lace, contrasting colors, embellishments, or textured patterns, these details can transform an ordinary romper into a stunning work of art. Don’t be afraid to get creative and let your imagination run wild as you knit your little one’s new favorite outfit.
Knitting the Leg Openings and Closures for Your Newborn Romper
When knitting a newborn romper, one of the most important aspects to consider is the leg openings and closures. These are the areas where the baby’s legs will go through, so it’s essential to ensure they are comfortable and secure. There are several techniques and options you can use to accomplish this.
1. Ribbing:
Ribbing is a common technique used to create stretchy and flexible leg openings for a newborn romper. By alternating knit and purl stitches, you can create a ribbed texture that stretches to accommodate the baby’s leg. This is particularly useful as it allows for easy dressing and undressing, making it convenient for both the baby and the parents.
2. Buttons or Snaps:
Another option for leg closures is the use of buttons or snaps. You can create buttonholes or attach snaps along the leg opening to secure the romper. This method provides a customizable fit and allows for easy opening and closing when changing the baby’s diaper. Make sure to choose buttons or snaps that are securely attached, avoiding any potential choking hazards.
3. Drawstring:
Using a drawstring is another way to create leg openings for your newborn romper. This method involves knitting a casing or loops along the leg opening and inserting a string or ribbon to tighten and secure the romper around the legs. It provides a snug fit and gives the option to adjust the tightness according to the baby’s needs.
When knitting the leg openings and closures for your newborn romper, it’s important to consider the comfort and safety of the baby. Choose a technique that allows for easy dressing and undressing, provides a secure fit, and avoids any potential hazards. By considering these factors, you can create a beautiful and functional romper that your newborn will love.
Finishing Touches: Weaving in Ends and Blocking Your Newborn Romper
Once you have completed knitting your newborn romper, there are a few important finishing touches to consider before it’s ready for your little one to wear. The first step is to weave in all the loose ends of yarn left from changing colors or adding new skeins. This not only gives the romper a neater appearance, but also ensures that the ends won’t come loose and unravel over time.
To weave in the ends, thread your yarn needle with one of the loose ends and carefully insert it into the nearby stitches on the wrong side of the romper. Continue weaving the yarn in and out of the stitches for a few centimeters, making sure it is secure. Repeat this process with all the remaining loose ends, ensuring that they are all woven in neatly.
Blocking
Once all the ends are woven in, it’s time to block your newborn romper. Blocking is the process of gently shaping and stretching the knitted fabric to give it a more professional and finished look. It also helps even out any uneven tension or stitches in the garment.
First, fill a basin or sink with lukewarm water and add a mild soap or gentle detergent. Submerge the romper in the water, making sure it is completely soaked. Let it sit for about 10-15 minutes to allow the fibers to relax.
Note: Some yarns may require a different blocking method, so be sure to check the yarn label for any specific instructions.
After soaking, gently squeeze out the excess water from the romper, but do not wring or twist it. Lay the romper flat on a clean towel and roll it up, pressing down to remove even more water. Unroll the towel and carefully transfer the romper to a blocking mat or a flat surface covered with a clean dry towel.
Using rustproof pins, start shaping the romper according to the desired size and shape. Pin the edges and any areas that need to be stretched or shaped, such as the cuffs, collar, or button bands. Make sure to align the stitches and edges neatly.
Allow the romper to dry completely in a well-ventilated area, away from direct sunlight or heat sources. This can take anywhere from a few hours to a day or two, depending on the humidity and air circulation. Once dry, remove the pins and admire your beautifully blocked newborn romper, ready to be worn by your precious little one!
Tips for Customizing Your Newborn Romper Pattern
Creating your own customized newborn romper pattern can be a rewarding and creative process. Here are some tips to help you customize your pattern and make it unique:
1. Choose your desired yarn
Select a yarn that suits your preferences and the season in which the romper will be worn. Consider the fiber content, color, and weight of the yarn. Experiment with different yarns to achieve the desired texture and drape for your romper.
2. Adjust the size
If you want to make the romper larger or smaller than the pattern suggests, you can adjust the size by changing the needle size or modifying the number of stitches and rows. Keep in mind that altering the size may affect the overall look and fit of the romper, so make sure to make a gauge swatch to ensure proper sizing.
3. Add stitch patterns or embellishments
To make your romper more unique, consider adding stitch patterns or embellishments. You can incorporate lace, cables, or textured stitches to give your romper a personalized touch. Additionally, you can add decorative buttons, bows, or embroidery to enhance the overall design.
4. Customize the neckline and closures
Experiment with different necklines, such as V-necks or boat necks, to change the overall look of the romper. You can also customize the closures, such as using buttons, snaps, or ties instead of the suggested closure in the pattern. This will add a personal touch and ensure a snug and secure fit.
5. Consider different color variations
Play around with different color combinations to create a unique look. You can use a single color, or experiment with stripes or color blocking. Take into account the gender of the baby and the overall aesthetic you want to achieve.
Overall, personalizing your newborn romper pattern allows you to showcase your creativity and add a personal touch to your knitting project. Don’t be afraid to try new techniques or make modifications to the pattern to achieve your desired result. Enjoy the knitting process and create a romper that is perfect for your little one!