
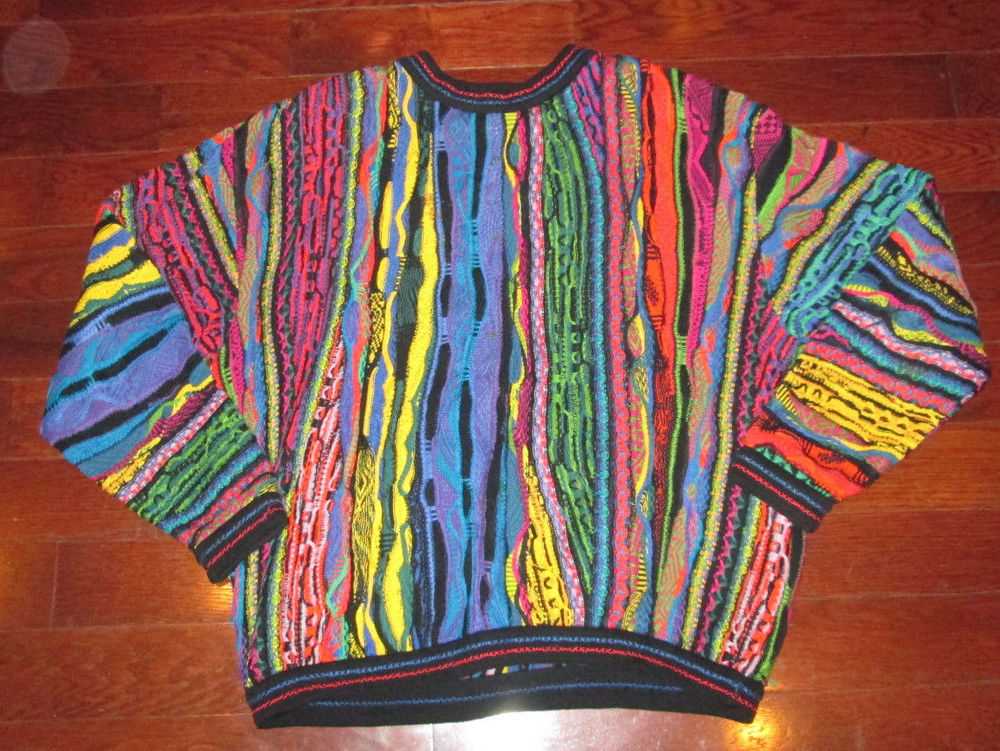
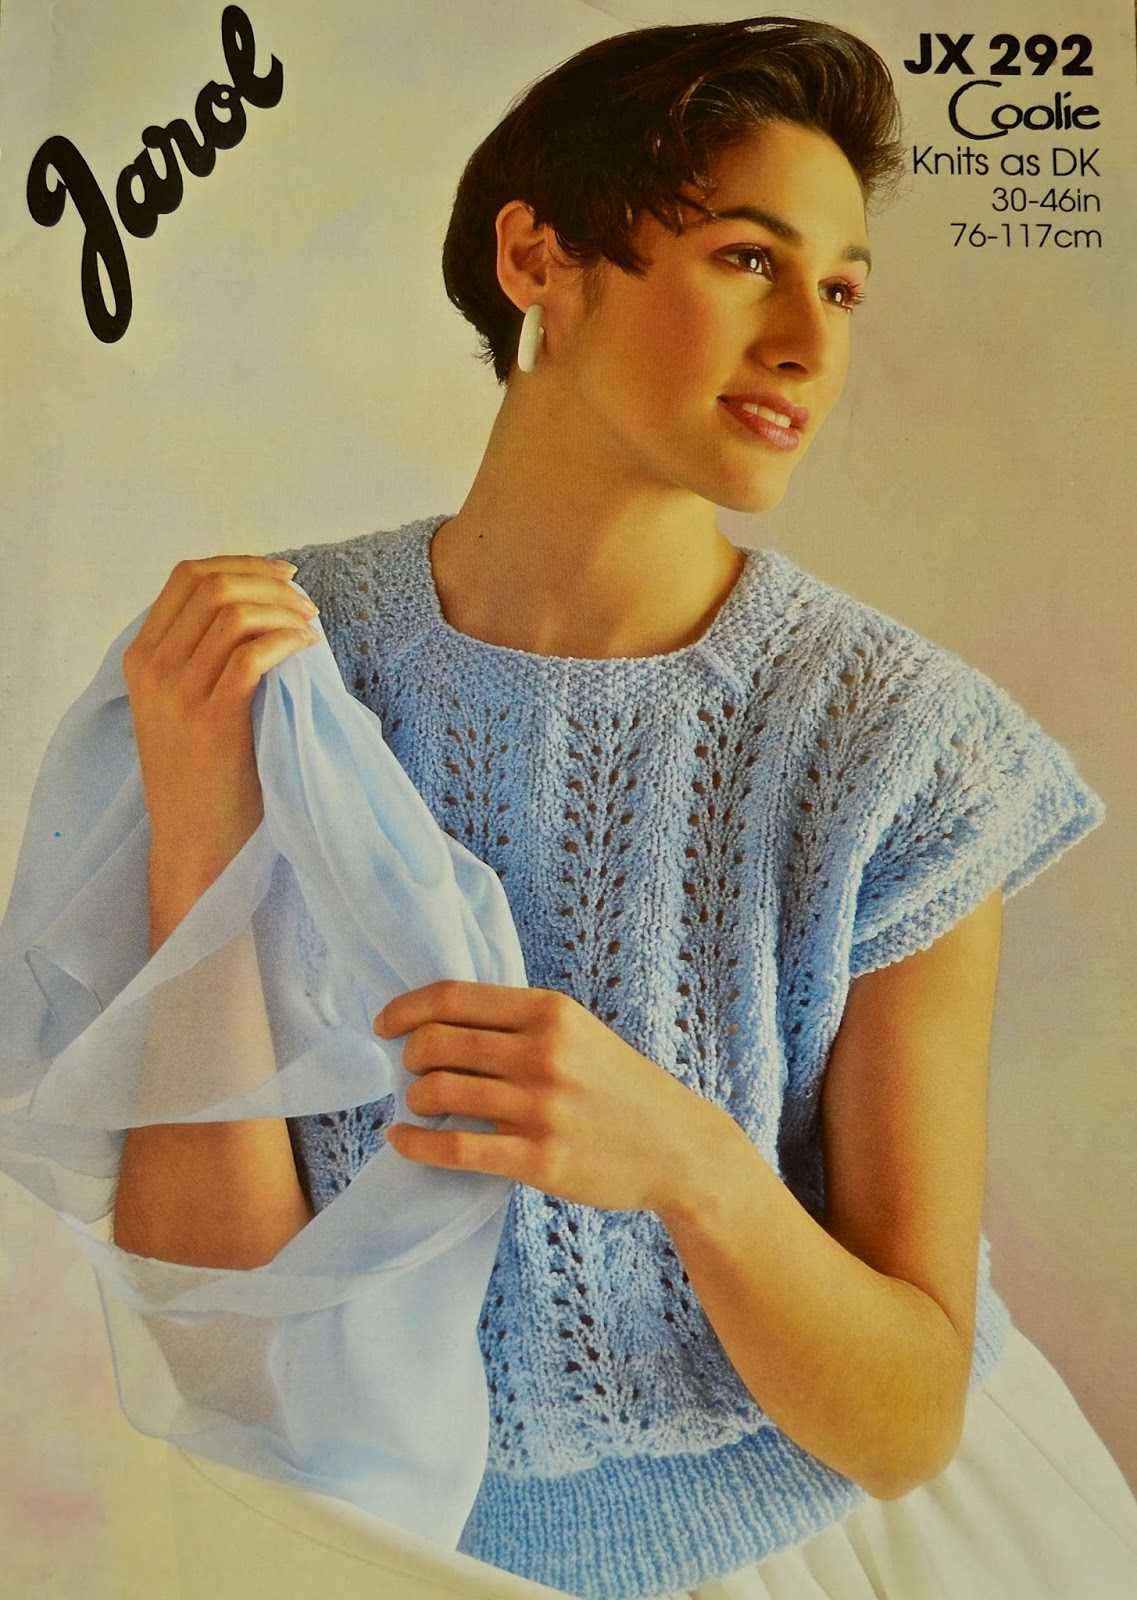
The 1990s were a decade filled with bold and iconic fashion trends, and one of the most memorable pieces from that era is the sweater. Sweaters from the 90s were characterized by their unique designs, vibrant colors, and oversized fit, and they have remained a popular choice among fashion enthusiasts even after all these years.
If you want to recreate the stylish and cozy vibes of the 90s, why not try your hand at knitting your very own 90s-inspired sweater? With the resurgence of homemade and vintage-inspired fashion, knitting has become a popular hobby once again. And what better way to pay homage to the 90s than by knitting a sweater that embodies the spirit of that era?
Thankfully, there are plenty of knitting patterns available that will help you recreate the look and feel of 90s sweaters. Whether you’re a beginner or a seasoned knitter, you can find patterns that cater to all skill levels. From simple color-block designs to more intricate cable patterns, there’s a knitting pattern out there for everyone.
How to Knit a Stylish 90s Sweater
Knitting your own 90s-inspired sweater is a fun and rewarding project that allows you to create a stylish and unique piece of clothing. With its bold patterns and vibrant colors, the 90s sweater is a nostalgic fashion trend that has made a comeback in recent years. Whether you want to channel your inner grunge icon or simply add a touch of vintage flair to your wardrobe, knitting a 90s sweater is a creative and enjoyable way to do so.
Choosing the Right Yarn: The first step in knitting a 90s sweater is selecting the right yarn. Look for a medium-weight yarn in vibrant colors, such as neon or jewel tones. Acrylic or wool blends are commonly used for this type of project, as they provide warmth and durability. Make sure to choose a yarn that matches the gauge specified in the knitting pattern to ensure a proper fit.
Pattern Selection:
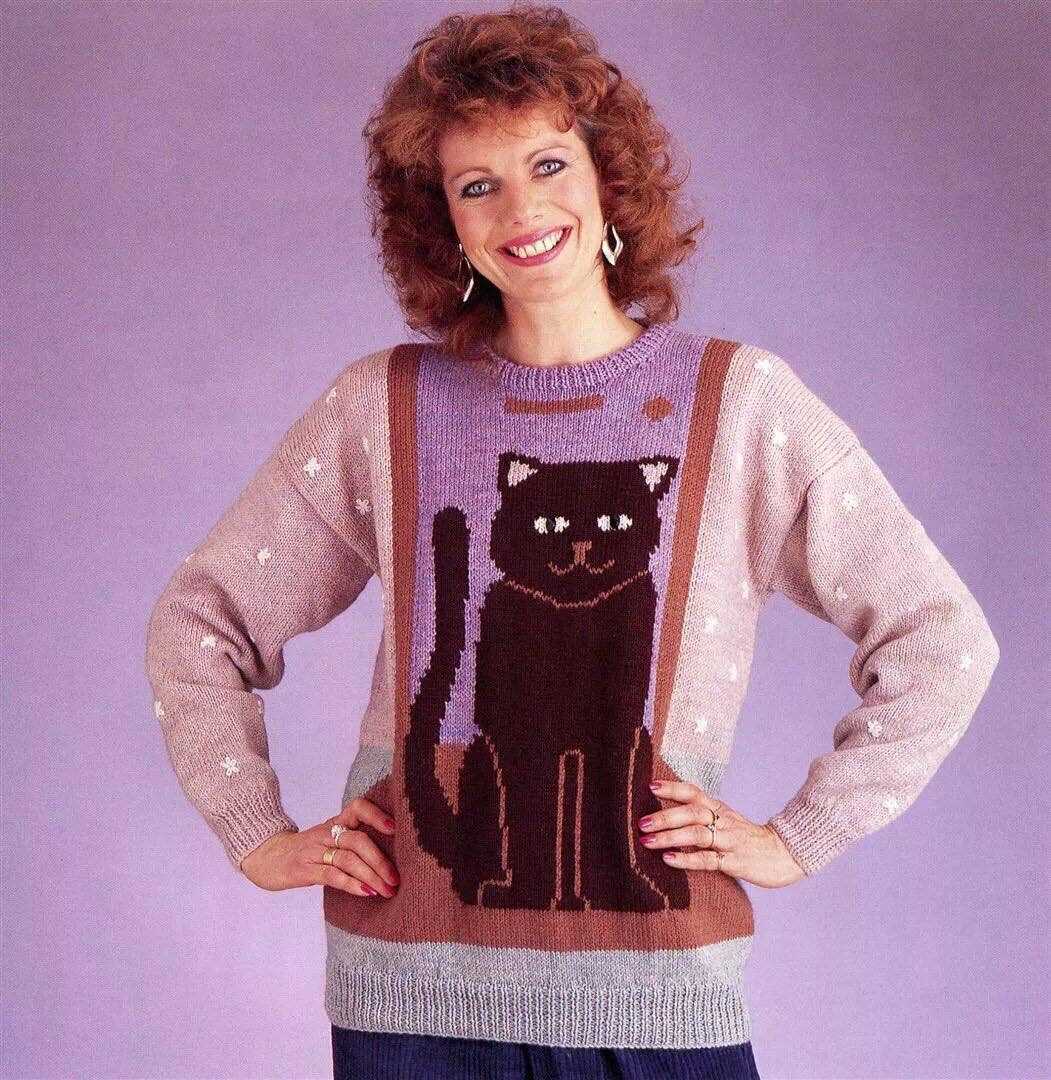
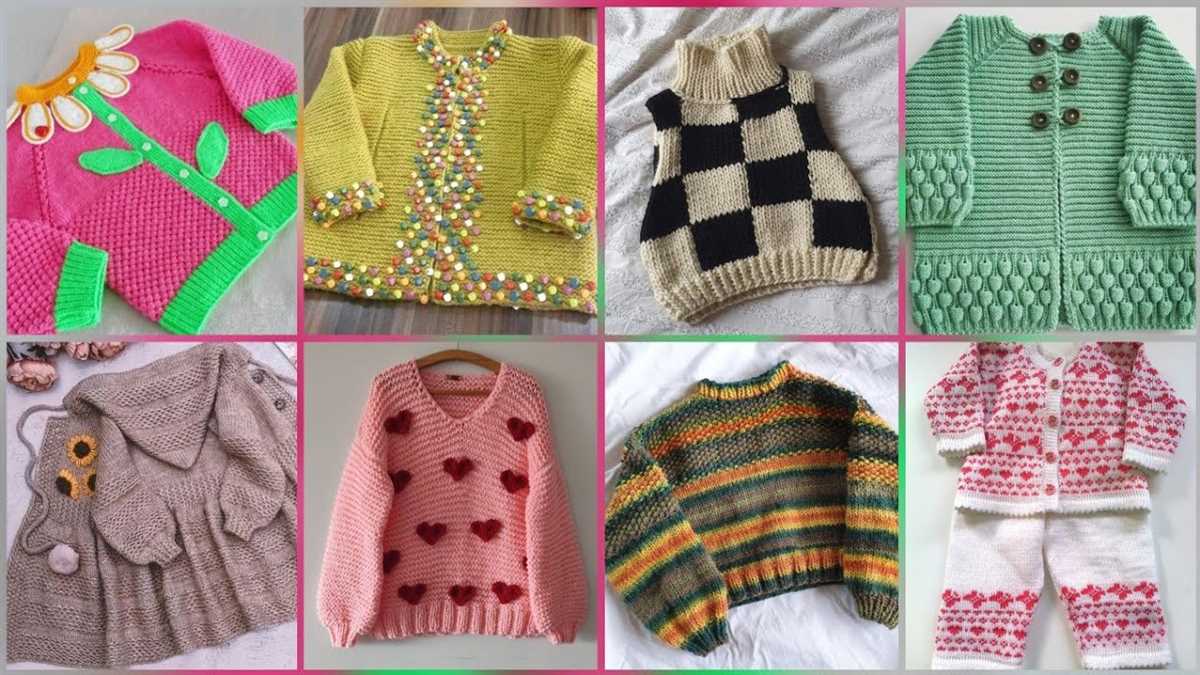
Selecting a pattern that captures the essence of 90s fashion is crucial for creating an authentic-looking sweater. Look for patterns that feature geometric designs, bold stripes, or abstract motifs. Popular sweater styles from the 90s include oversized pullovers, cropped cardigans, and turtlenecks. Consider your skill level and the amount of time you have available when choosing a pattern, as some designs may be more complex and time-consuming than others.
Getting Started: Once you have chosen your yarn and pattern, it’s time to start knitting! Begin by casting on the required number of stitches, following the pattern’s instructions. Pay close attention to any shaping or color changes indicated in the pattern. As you progress, make sure to check your gauge regularly to ensure that your sweater will fit properly.
- Knit the body of the sweater according to the pattern, following any instructions for shaping or stitch patterns.
- Work on the sleeves separately, using the same stitch patterns and shaping as indicated in the pattern.
- Once all pieces are completed, sew them together using mattress stitch or your preferred seaming method.
- Finish off your sweater by adding ribbing to the cuffs, hem, and neckline. This will give your sweater a polished and professional-looking finish.
With its timeless appeal and unique design, a 90s-inspired sweater is sure to become a staple in your wardrobe. Whether you wear it with high-waisted jeans for a retro look or layer it over a floral dress for a modern twist, your handmade sweater will be a fashionable and personal expression of your knitting skills and style.
Choosing the Right Yarn for Your 90s Sweater
When it comes to knitting a 90s sweater, choosing the right yarn is essential to achieve the desired look and feel. The 90s fashion era was known for its bold colors and unique textures, so it’s important to select a yarn that can recreate that nostalgic aesthetic.
Consider the weight: The weight of the yarn will determine the thickness and drape of your 90s sweater. For a classic oversized and cozy sweater, opt for a bulky or super bulky yarn. If you prefer a more fitted and lightweight style, choose a worsted or sport weight yarn.
Look for vibrant colors: The 90s fashion was all about bright and eye-catching hues, so don’t be afraid to experiment with bold color choices for your sweater. Opt for yarns in neon shades, primary colors, or fun variegated colorways to truly capture the essence of the 90s.
Consider texture: Texture played a significant role in 90s fashion, so selecting a yarn with an interesting texture can add an authentic retro touch to your sweater. Look for yarns with a boucle, chenille, or mohair texture to achieve that 90s grunge or cozy aesthetic.
Check for acrylic content: Acrylic yarns were commonly used in the 90s due to their affordability and easy care. Consider choosing a yarn with a high acrylic content if you want your sweater to have that authentic 90s vibe. However, if you prefer natural fibers, there are plenty of wool or cotton blends available that can also provide a retro feel.
Get inspired by vintage patterns: To ensure that your 90s sweater truly captures the essence of the era, look for vintage knitting patterns from the 90s. These patterns often provide specific yarn recommendations, allowing you to recreate the exact look and feel of the time.
By carefully considering the weight, color, texture, and fiber content of your yarn, you’ll be able to create a 90s sweater that is both nostalgic and stylish. Embrace the vibrant and bold aesthetic of the era, and let your knitting skills bring the 90s fashion back to life.
Essential Knitting Supplies for the 90s Sweater Pattern
When it comes to knitting a 90s sweater pattern, having the right supplies is essential to ensure success. Whether you’re a seasoned knitter or just starting out, there are a few key items that you’ll need to have on hand. From yarn choices to needle sizes, here are the essential supplies you’ll need for your 90s sweater knitting project.
1. Yarn: One of the most important decisions you’ll make for your 90s sweater is choosing the right yarn. For an authentic 90s look, consider using a bulky weight yarn in bold and vibrant colors. Acrylic or wool blends are popular choices, as they offer warmth and durability.
- 2. Knitting Needles: To knit the pattern, you’ll need a set of knitting needles. The size of the needles will depend on the gauge of the pattern, so be sure to check the instructions. Circular needles are a great option for 90s sweaters, as they allow you to easily knit in the round.
- 3. Stitch Markers: Stitch markers are helpful tools that can be used to mark specific stitches or sections of your pattern. They can be especially useful when working with intricate cable designs or colorwork patterns.
- 4. Scissors: A pair of sharp scissors is essential for cutting yarn and trimming any loose ends. Look for small, lightweight scissors that are easy to handle.
- 5. Tapestry Needle: Also known as a yarn needle, a tapestry needle is used for weaving in ends and sewing seams. Look for a needle with a large eye and a blunt tip, as this will make it easier to work with bulky yarn.
6. Measuring Tape: Accurate measurements are crucial when knitting a sweater, so having a measuring tape on hand is essential. Use it to check the length, width, and gauge of your work throughout the knitting process.
With these essential knitting supplies in your arsenal, you’ll be well-equipped to tackle any 90s sweater pattern that comes your way. So grab your yarn, needles, and accessories, and get ready to create a nostalgic fashion statement.
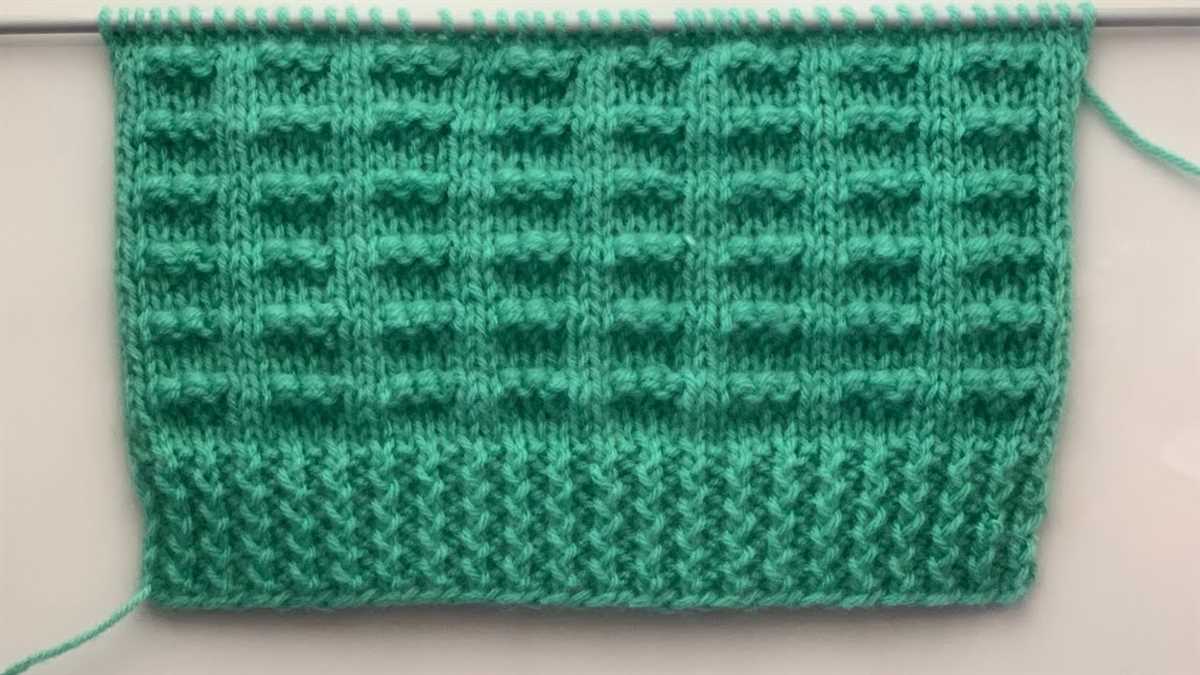
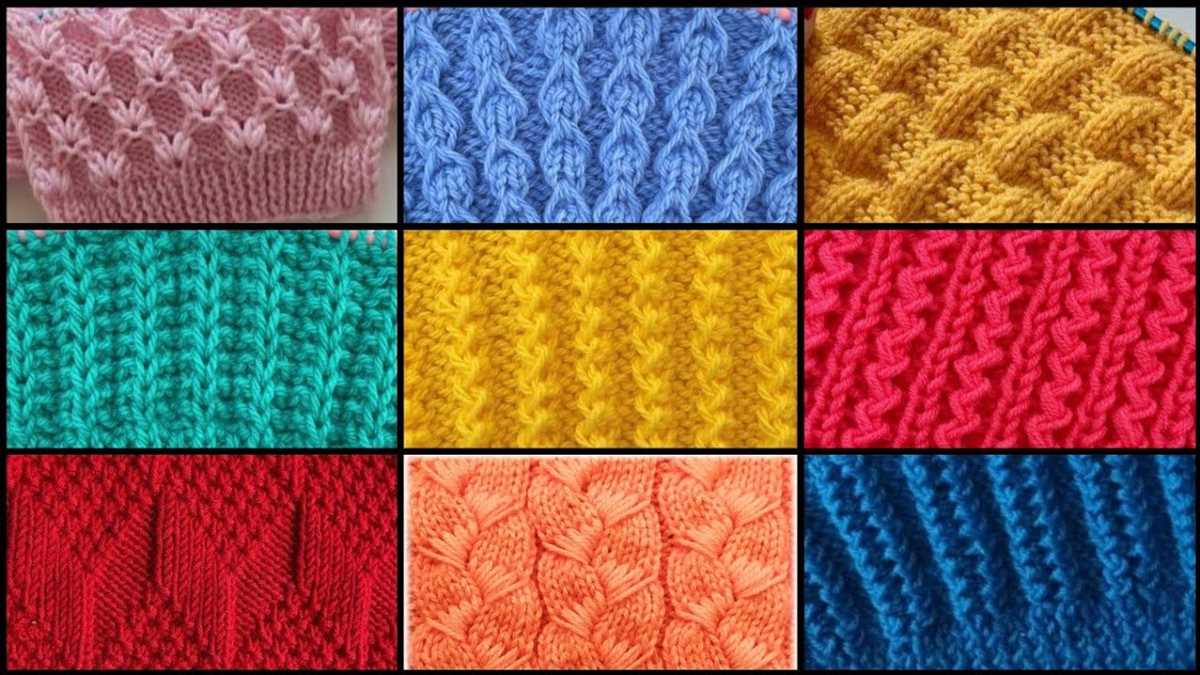
Understanding the Basic Stitches for the 90s Sweater
Knitting a 90s-inspired sweater can be a fun and exciting project for any knitting enthusiast. However, before you begin, it’s important to understand the basic stitches that are commonly used in this type of pattern. By mastering these stitches, you’ll be able to create the intricate designs and textures that were popular during that era.
One of the most essential stitches for knitting a 90s sweater is the stockinette stitch. This stitch creates a smooth and even fabric with a “V” pattern on the right side and a purl pattern on the wrong side. To achieve this stitch, simply alternate between knitting one row and purling the next row. This stitch is often used for the body of the sweater and provides a clean and polished look.
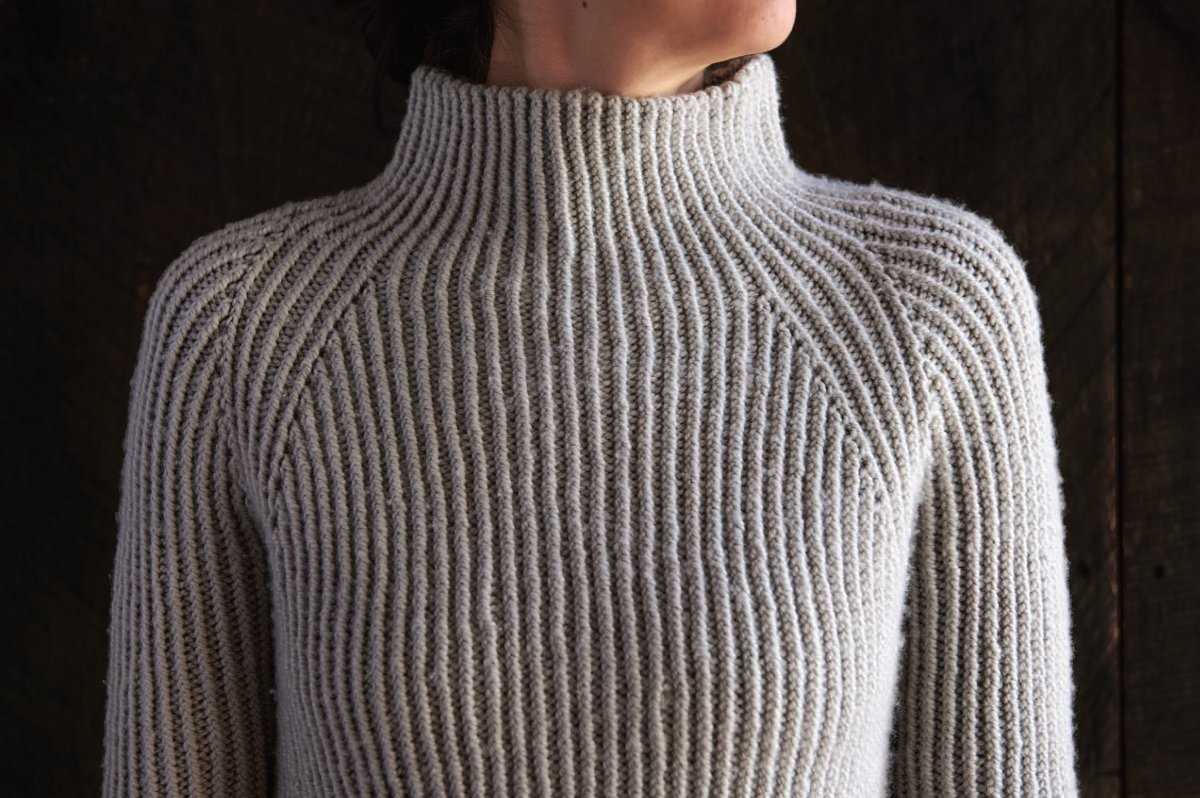
Another important stitch to master is the rib stitch. This stitch is commonly seen on the cuffs, collar, and hem of 90s sweaters. The rib stitch creates a textured fabric that is stretchy and elastic. To create this stitch, alternate between knitting and purling in the same row. A common rib stitch pattern is the 2×2 rib, where you knit two stitches and purl two stitches in a repeated pattern.
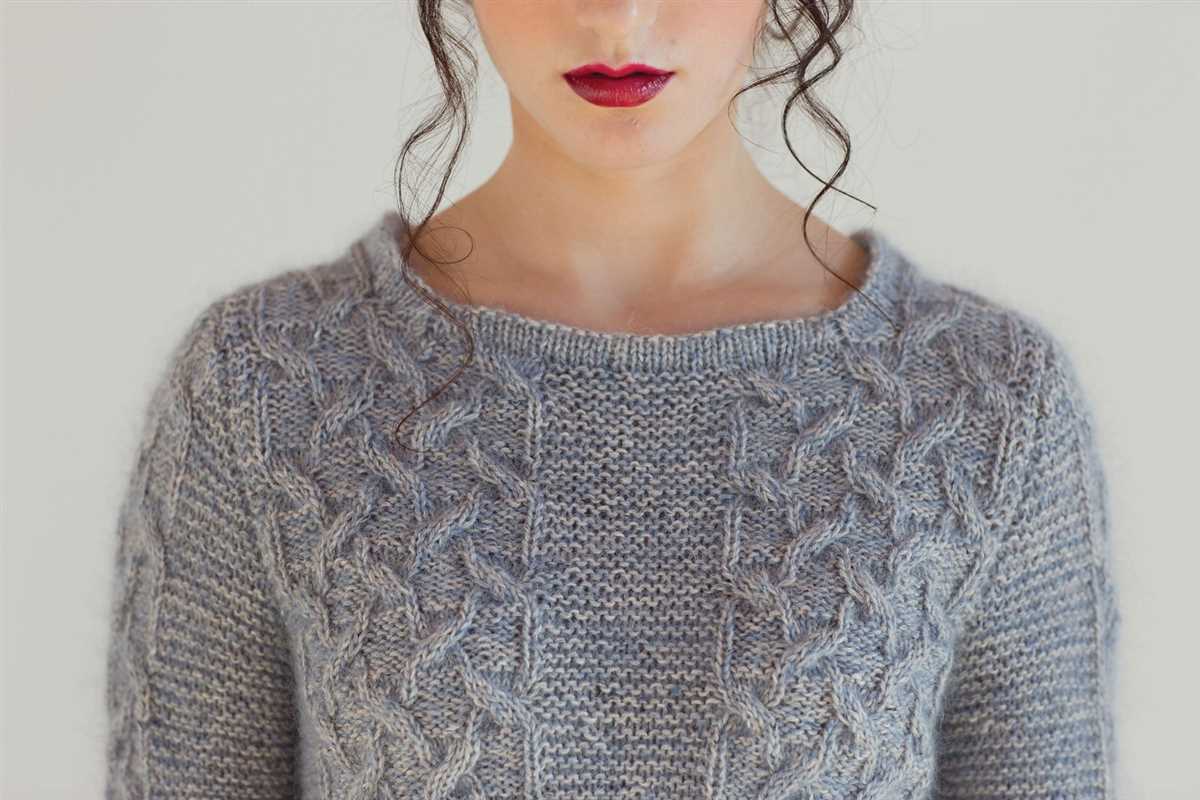
For added visual interest, cables were often incorporated into 90s sweater designs. The cable stitch adds depth and texture to the fabric and creates the illusion of intertwined strands. To create a cable, you’ll need a cable needle or double-pointed needle. By crossing a few stitches over each other and then knitting them, you can create beautiful cable designs that give your sweater a unique and timeless look.
By mastering these basic stitches – the stockinette stitch, rib stitch, and cable stitch – you’ll be well on your way to knitting your own 90s-inspired sweater. These stitches provide the foundation for creating the intricate and stylish designs that were popular during that era. So grab your knitting needles and yarn, and get ready to create a piece of fashion history!
Getting Started: Casting On for the 90s Sweater
Casting on is the first step in any knitting project, and it sets the foundation for the entire sweater. For the 90s sweater, a smooth cast on is important to achieve a clean edge and ensure the stitches are evenly spaced. To get started, gather your materials including your chosen yarn, knitting needles, and a tape measure.
Step 1: Measure the correct amount of yarn needed for your sweater according to the pattern instructions. This will ensure you have enough yarn to complete the project without running out or having excessive leftovers.
Step 2: Choose a suitable cast on method for your sweater. Depending on the desired edge and stretchiness, you can use various techniques such as the long-tail cast on, the cable cast on, or the provisional cast on. Consult the pattern instructions to determine which cast on method is recommended.
Step 3: Hold the knitting needles together in your dominant hand, with the pointy ends facing away from you. Make sure the needle tips are evenly aligned.
Step 4: With the yarn in your other hand, make a slipknot by creating a loop and pulling the working yarn through it. Slide the slipknot onto one of the knitting needles and tighten it snugly.
Step 5: Insert the second knitting needle into the slipknot from left to right, crossing over the first needle. Hold both needles together, forming an “X” shape.
Step 6: Using your other hand, wrap the working yarn around your thumb and index finger, creating a loop that goes over both needles. Make sure the yarn is positioned behind the needles.
Step 7: With the second needle, go under the loop created by the working yarn and pull it through, creating a new stitch. Slip this stitch onto the first needle, and tighten it gently. Repeat this process until you have cast on the required number of stitches for your sweater.
Step 8: Once all the stitches are cast on, check that they are not too tight or too loose. The edge should be even and have a bit of stretch. Adjust the tension if necessary.
Now that you have successfully cast on for your 90s sweater, you are ready to move on to the next steps of the pattern, such as knitting the ribbing or starting the main body. Take your time and enjoy the process of creating a stylish and cozy sweater reminiscent of the 90s fashion era!
Knitting the Ribbing for the 90s Sweater
When knitting a 90s sweater, the ribbing is an important element that adds both style and functionality to the garment. The ribbing is usually placed at the cuffs, hem, and neckline, and it gives the sweater a snug and structured fit. In this article, we will discuss how to knit the ribbing for a 90s sweater.
Materials:
- Worsted weight yarn of your choice
- US size 7 (4.5mm) circular knitting needles
- Stitch marker
- Tapestry needle
Instructions:
- Cast on the desired number of stitches for the ribbing. This number should be a multiple of the ribbing pattern you choose. The most common ribbing pattern for a 90s sweater is the 2×2 rib, which means you knit 2 stitches and purl 2 stitches alternately.
- Place a stitch marker to indicate the beginning of the round if you’re knitting in the round or simply mark the first stitch if you’re knitting flat.
- Continue knitting in rib pattern until the ribbing measures approximately 2 inches. You can adjust the length of the ribbing according to your preference.
- Once the ribbing is complete, you can switch to the main stitch pattern for the body of the sweater. This could be stockinette stitch, a cable pattern, or any other design that you desire.
- Remember to bind off loosely to ensure that the ribbing remains stretchy and comfortable to wear.
- Weave in any loose ends and block the sweater to give it a polished look.
Knitting the ribbing for a 90s sweater may seem like a small step, but it plays a crucial role in the overall design and fit of the garment. Take your time and enjoy the process, and soon you’ll have a stylish and cozy sweater ready to wear.
Creating the Body of the 90s Sweater
Once you have completed the ribbing for the cuffs and the hem, it’s time to move on to the body of the sweater. This is where the real fun begins! The body of the 90s sweater is typically worked in stockinette stitch, but you can get creative and add some texture or colorwork if you like.
To start, you will need to determine the desired length of your sweater. Measure from the bottom of the ribbing to your desired length, and make a note of this measurement. You will also need to measure the width of your sweater across the bust, as this will determine how many stitches to cast on.
Cast on: Using the measurements you took earlier, cast on the required number of stitches. You can use a long-tail cast-on or any other method you prefer. Make sure the cast-on edge is not too tight, as this will affect the fit of the sweater.
Knit in stockinette stitch: Once you have cast on the required number of stitches, you will begin knitting in stockinette stitch. This is done by knitting one row and purling the next. Repeat these two rows until you reach your desired length, making sure to keep the edges neat and even.
If you want to add some texture or colorwork to your sweater, you can do so by incorporating different stitch patterns or by working stripes or color blocks. Just make sure to follow the pattern or chart carefully, and keep track of your stitches and rows to ensure an even and consistent design.
Once you have finished knitting the body of the sweater, you can proceed to the next step, which is usually shaping the armholes or adding any desired details such as pockets or buttons. Stay tuned for the next section where we will discuss these steps in more detail.
Knitting the Sleeves for the 90s Sweater
Once you have completed the body of your 90s sweater, it’s time to move on to the sleeves. Knitting the sleeves is an important step in completing your sweater and will give it the classic 90s look. Here are some steps to guide you through the process.
1. Choosing the Right Yarn: Select a yarn that matches the weight and fiber content of the yarn used for the body of your sweater. This will help ensure that the sleeves are consistent with the rest of the garment.
2. Determining Sleeve Length: Measure the length of your arm from the shoulder to the wrist. Use this measurement to determine the desired length of your sleeves. You can choose to have full-length sleeves or adjust the length according to your preference.
3. Casting On: Using the same size needles used for the body of your sweater, cast on the required number of stitches for the sleeves. The number of stitches may vary depending on your gauge and the size of your sweater. It’s important to refer to the pattern or your own measurements for an accurate number of stitches.
4. Knitting in the Round: Once you have cast on, join the round and begin knitting in the round using a circular knitting needle or double-pointed needles. This will create a seamless sleeve without any side seams.
5. Following the Pattern: Continue knitting in the round, following the pattern for the sleeve. This may include increases or decreases at specific intervals to shape the sleeve and create a comfortable fit. It’s important to carefully read and follow the instructions provided in the pattern.
6. Ribbing and Binding Off: As you approach the end of the sleeve, you may need to switch to a smaller needle size to create ribbing. This will help create a snug fit at the cuff. Once you have completed the ribbing, bind off the stitches to finish the sleeve.
Repeat these steps to knit the second sleeve, ensuring that they match in length and shape. Once both sleeves are completed, you can join them to the body of the sweater and continue with any finishing touches, such as seaming the shoulder seams or adding a collar. With a little patience and attention to detail, you’ll have a finished 90s sweater that’s ready to wear!
Shaping the Neckline for the 90s Sweater
When knitting a 90s sweater, one of the key areas to pay attention to is the neckline. The neckline can greatly influence the overall look and fit of the sweater, so it’s important to shape it properly. There are several techniques and patterns that can be used to achieve different neckline styles.
1. Ribbing: A popular choice for shaping the neckline of a 90s sweater is to use ribbing. Ribbing creates a stretchy and snug fit around the neck, giving the sweater a more fitted and polished look. To create a ribbed neckline, you can use a combination of knit and purl stitches, such as knitting two stitches and purling two stitches in a repeated pattern.
2. Decreases: Another method for shaping the neckline is to use decreases. Decreases are stitches that are knitted or purled together to reduce the number of stitches in a row. By strategically placing decreases along the neckline, you can create a more rounded or V-shaped neckline. Decreases can be made by knitting or purling two stitches together or by slipping stitches.
3. Short rows: For a more unique and modern look, short rows can be used to shape the neckline of a 90s sweater. Short rows involve knitting or purling only a portion of the stitches in a row, creating a curve or angle in the fabric. This technique can be used to create a deeper or asymmetric neckline, adding an interesting detail to the sweater.
When shaping the neckline of a 90s sweater, it’s important to consider the overall style and design of the garment. Whether you choose to use ribbing, decreases, or short rows, the shaping technique should complement the rest of the sweater and enhance its overall aesthetic. Experimenting with different techniques and patterns can help create a unique and stylish sweater that captures the essence of the 90s fashion era.
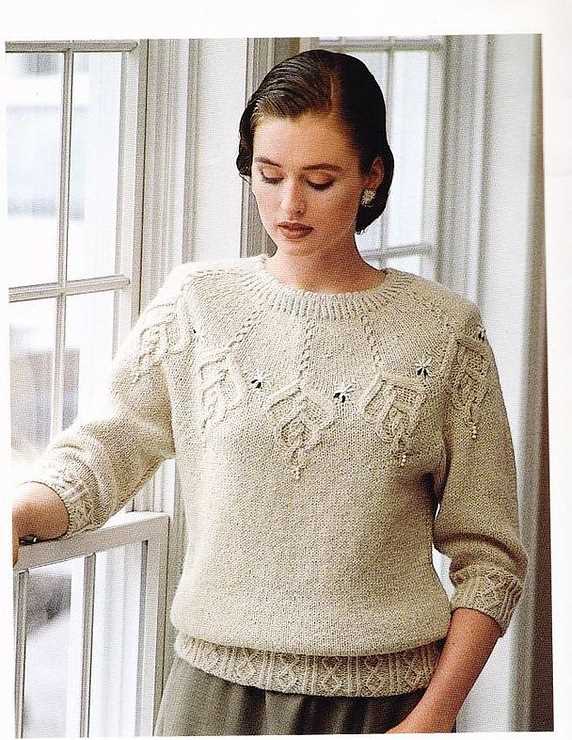
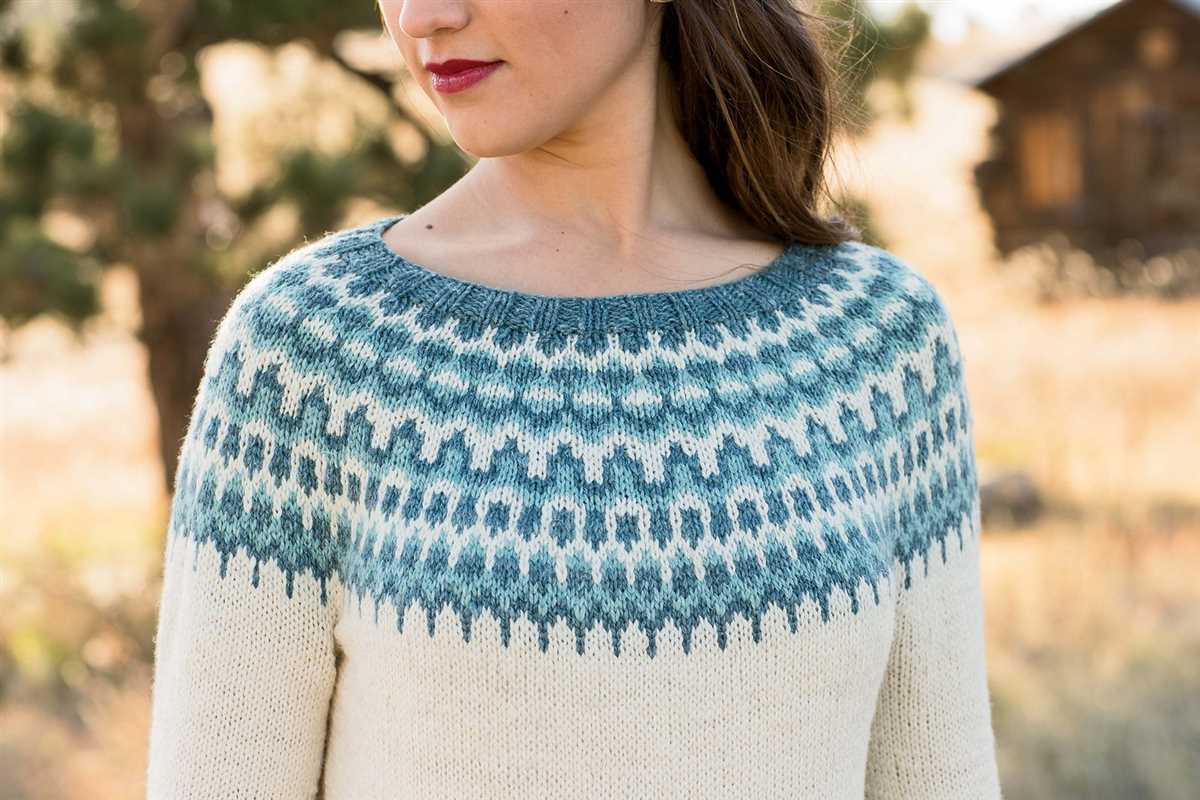
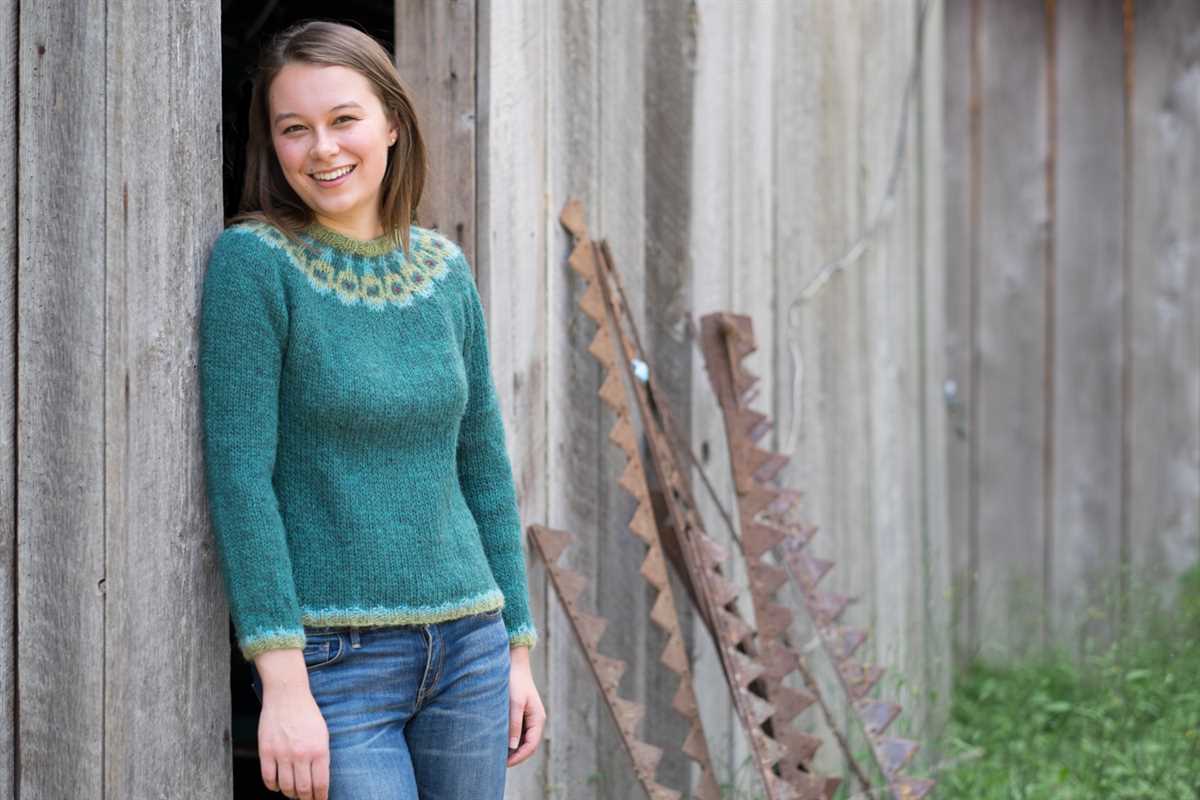
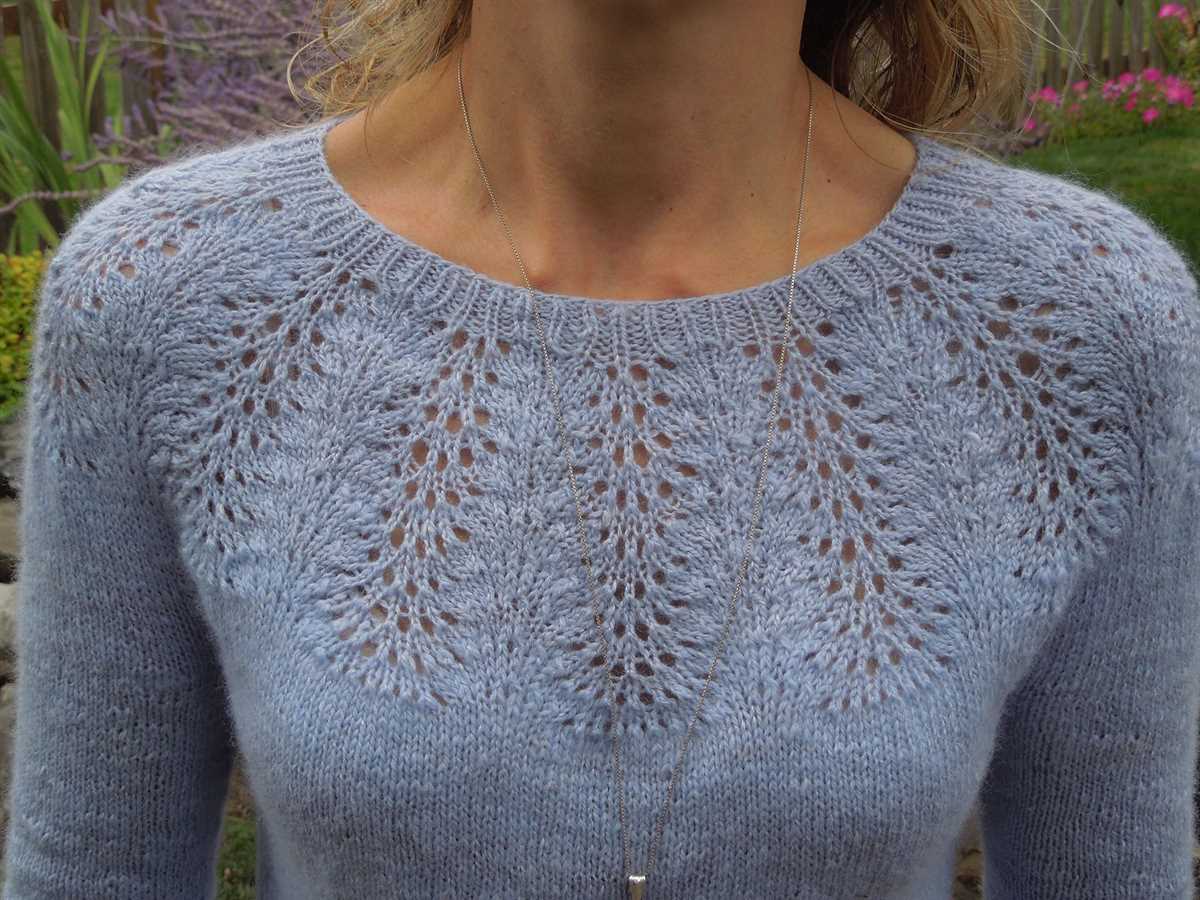
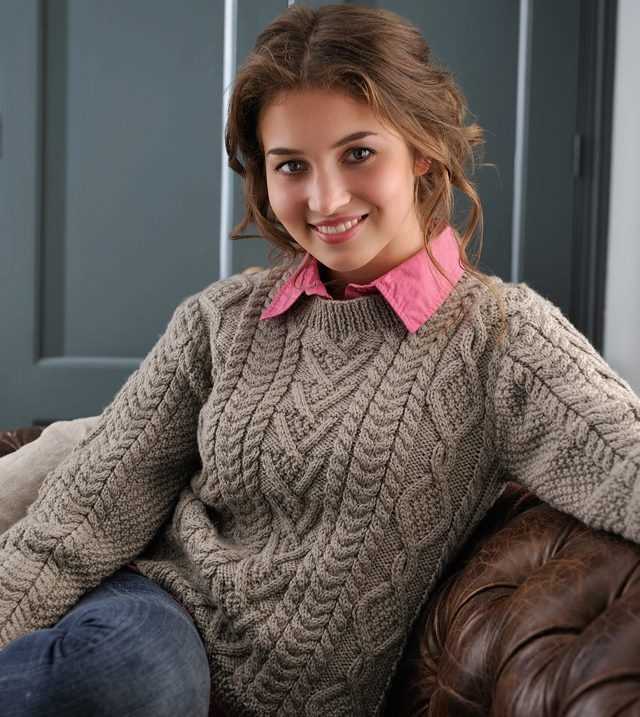
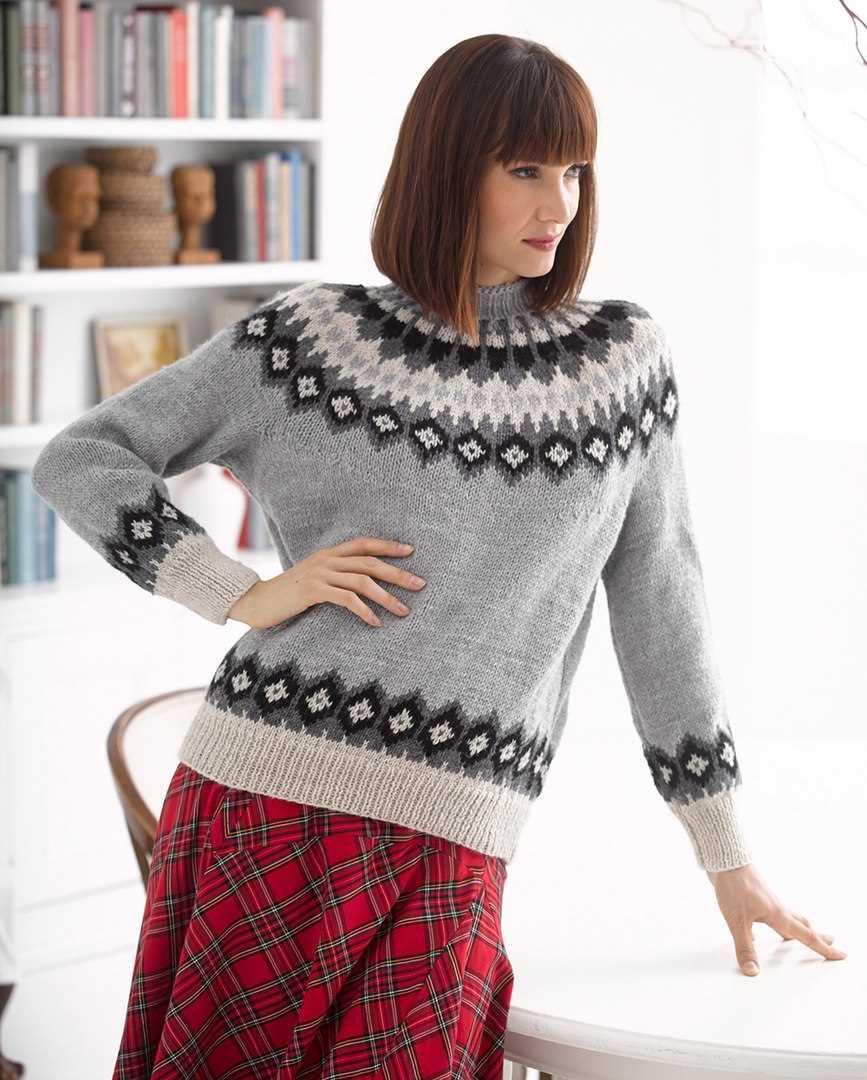
Adding Detail: Cables and Colorwork for the 90s Sweater
When it comes to knitting a classic 90s sweater, adding detail can take your project to the next level. Two popular techniques for adding interest and texture to your sweater are cables and colorwork.
Cables are a timeless knitting technique that can add visual interest and depth to your sweater. They are created by crossing stitches over each other to create a twisted effect. The result is a beautiful, braided pattern that adds texture and dimension to your garment. Whether you choose a simple cable pattern or a more intricate design, cables are sure to make your 90s sweater stand out.
Colorwork is another fantastic way to add detail to your 90s sweater. Colorwork involves knitting with multiple colors to create patterns and designs. The most common colorwork technique is stranded knitting, where two or more colors are carried along the back of the work and knitted into the pattern as needed. This creates a beautiful, multicolored design that can range from subtle to bold. Whether you choose to incorporate a Fair Isle pattern or create your own unique colorwork design, adding color to your 90s sweater will make it a showstopper.
If you’re feeling adventurous, you can even combine cables and colorwork in your 90s sweater. This can create a truly stunning effect, with the cables adding texture and the colorwork adding visual interest. Consider using a cable pattern as a border or accent on your colorwork design, or vice versa. The possibilities are endless, and the result will be a one-of-a-kind sweater that showcases your knitting skills and creativity.
Remember to choose a pattern that matches your skill level and takes into account the specific techniques you want to incorporate. With some practice and patience, you’ll be able to add detail to your 90s sweater that will make it a true standout piece in your wardrobe.
Finishing Touches: Binding Off and Weaving in Ends for the 90s Sweater
As you near the completion of your 90s sweater knitting project, it’s time to focus on the finishing touches. One essential step in finishing any knitwear is binding off. Binding off creates a neat edge that prevents your stitches from unraveling and adds a professional finish to your garment.
To bind off, simply knit two stitches, then use the left-hand needle to lift the first stitch over the second stitch. Continue this process until you have one stitch left on the right-hand needle. Cut the yarn, leaving a tail that is long enough to weave in later. Pull the tail through the last stitch to secure it.
Weaving in the ends is another crucial step in completing your 90s sweater. After binding off, you’ll be left with several loose ends from different color changes or joining new yarn. These ends can be unsightly if left unattended, so it’s important to weave them in securely.
Take a tapestry needle and thread one end through the eye. Insert the needle into the wrong side of the fabric, going under the stitches to avoid creating any visible loops on the front. Weave the needle in different directions, following the path of the stitches for at least an inch or two. Repeat this process for all the loose ends, ensuring they are securely woven in and won’t come undone with wear or washing.
Blocking and Sewing Your 90s Sweater
Once you have finished knitting your 90s sweater, the next step is to block and sew it together. Blocking is an essential process that helps to shape and size your garment. It involves wetting and shaping your knitted pieces so that they lay flat and evenly. This step is particularly important if you want your sweater to fit properly and have a professional finish.
To block your sweater, start by filling a basin or sink with lukewarm water and adding a small amount of wool wash or gentle detergent. Gently submerge your knitted pieces in the water and let them soak for around 15-20 minutes. Avoid agitating or wringing the material as this can cause damage. After soaking, carefully remove the pieces from the water and squeeze out any excess moisture. Lay them flat on a clean towel and shape them to the desired dimensions. Use rust-proof pins to secure the edges and corners in place.
Once your sweater is blocked and dry, it’s time to sew the pieces together. Start with the shoulder seams by placing the front and back pieces together with the right sides facing each other. Use a tapestry needle and matching yarn to sew the seams using a mattress stitch or your preferred method. Make sure to sew the seams tightly and securely to ensure the durability of your sweater.
Next, sew the sleeves to the body of the sweater. Match up the shoulder seams and align the armholes with the sleeves. Again, use a tapestry needle and yarn to sew the seams, making sure to sew them neatly and evenly. Take your time and double-check that the seams are aligned before sewing.
Finally, sew the side seams of the sweater. Lay the front and back pieces flat with the wrong sides facing each other and line up the edges. Use the same technique as before to sew the seams, ensuring that they are straight and secure. Once all the seams are sewn, weave in any loose ends of yarn and trim them neatly.
Blocking and sewing your 90s sweater may take some time and patience, but the end result will be a beautifully finished garment that you can be proud of. Don’t rush through these steps as they are crucial in achieving the desired fit and look of your sweater. Take care to follow the instructions carefully and enjoy the process of transforming your knitted pieces into a cozy and stylish sweater.
Tips for Styling Your 90s Sweater
Now that you have your fabulous 90s sweater, it’s time to show it off! Here are some styling tips to help you rock your vintage knit in a modern way:
- Pair it with high-waisted jeans: The 90s were all about relaxed, grunge-inspired fashion, so opt for a pair of high-waisted jeans to complement your sweater. This will give you a cool, effortless look that’s perfect for casual days.
- Layer it with a slip dress: For a more dressed-up take on the 90s trend, try layering your sweater over a slip dress. This juxtaposition of cozy knitwear with a feminine dress will create an interesting and unexpected outfit.
- Add some accessories: Accessories can elevate any outfit, so don’t be afraid to experiment. Try pairing your sweater with a chunky belt to define your waist, or add some statement earrings for an extra dose of 90s flair.
- Opt for a monochrome look: If you want to keep things simple and stylish, try pairing your sweater with bottoms in the same color family. This monochrome look is a chic way to wear your 90s sweater without overwhelming the rest of your outfit.
- Play with textures: Mix and match different textures to add depth and interest to your outfit. Pair your sweater with leather pants or a velvet skirt for a luxurious touch, or wear it with ripped denim for a more edgy look.
- Experiment with different shoes: Shoes can make or break an outfit, so choose wisely. For a casual vibe, opt for chunky sneakers or ankle boots. If you’re going for a dressier look, try wearing your sweater with heeled sandals or ankle strap pumps.
With these styling tips in mind, you’re ready to embrace the 90s sweater trend and make it your own. Remember to have fun with your outfit choices and let your personal style shine through!